Connectrix: How to Collect a Switch Log File Using PuTTY
Summary: This article gives step-by-step instructions on how to collect switch support logs using PuTTY.
This article applies to
This article does not apply to
This article is not tied to any specific product.
Not all product versions are identified in this article.
Instructions
Follow these steps to collect switch logs:
- Double-click the PuTTY icon to launch the application.
Figure 1: The PuTTY icon
- Click Logging. The logging settings are listed on the right.
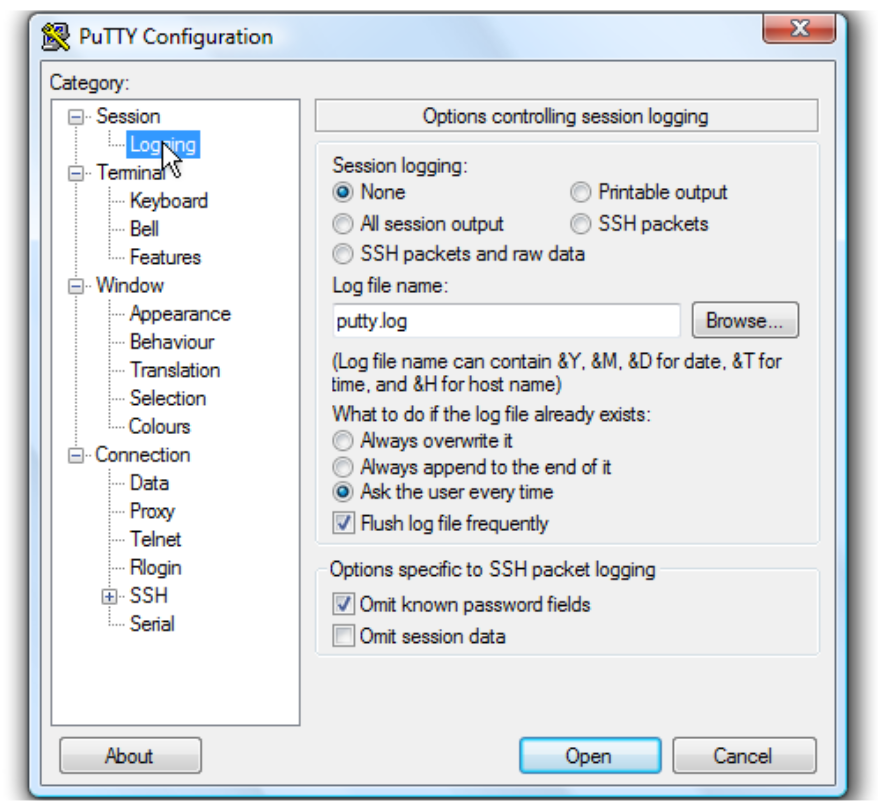
Figure 2: Logging settings
- Click All session output.
- Leave Putty.log as the file name.
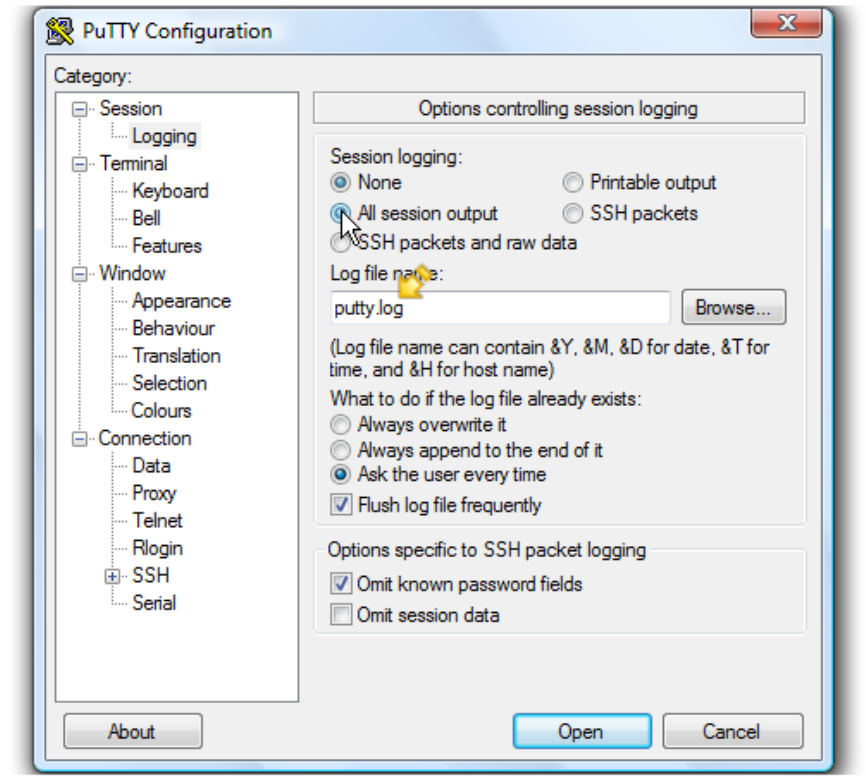
Figure 3: Logging options and file name
- Click Browse to choose the save location.
- Ensure that Desktop is selected here.
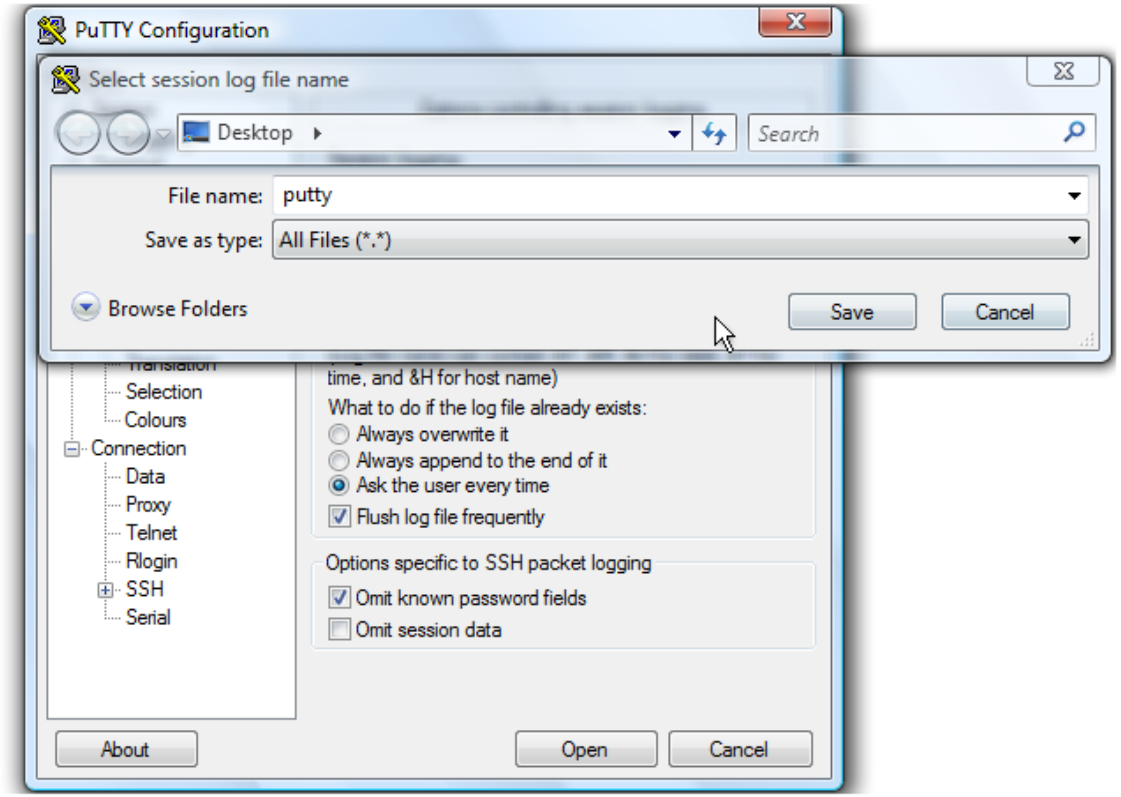
Figure 4: Save the file to the desktop.
- Click Save.
- Ensure Ask the user every time is selected, then click Open to begin the session.

Figure 5: Ensure that Ask the user every time is selected.
- Type the username and press <Enter>.
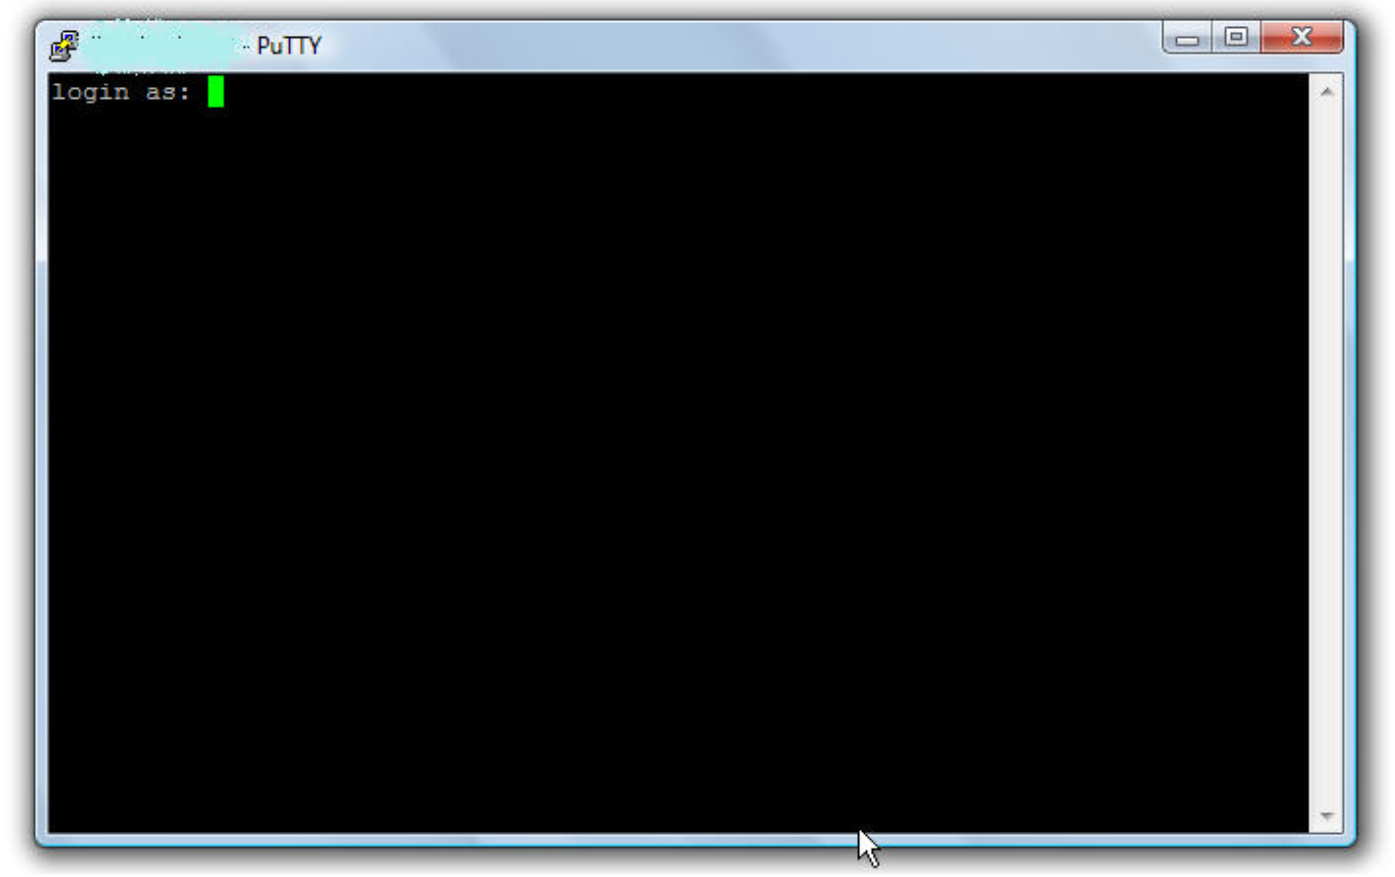
Figure 6: Enter the username.
- Type the password and press <Enter>.

Figure 7: Enter the password.
- On a Brocade switch, run
supportshowto collect the switch log. - On a Cisco switch, run
show tech-support details | no-morecommand to collect the switch log.
- Type exit to close PuTTY.
A log file is now saved to the desktop.
Additional Information
Affected Products
Connectrix MDS-SeriesArticle Properties
Article Number: 000018926
Article Type: How To
Last Modified: 16 Feb 2026
Version: 7
Find answers to your questions from other Dell users
Support Services
Check if your device is covered by Support Services.