Dell Networking OS10 TACACS+ Configuration on ClearPass
Summary: The netoperator default role is given instead of the privileged user sysadmin when attempting to authenticate with TACACS+ using ClearPass.
This article applies to
This article does not apply to
This article is not tied to any specific product.
Not all product versions are identified in this article.
Instructions
Possible Error Logs
Dec 23 22:04:38 TKMXA01-NSA1 .clish[30182]: LOG PREFIX: Dell EMC (OS10)
Dec 23 22:04:39 TKMXA01-NSA1 .clish[30182]: [MGMT:CLISH], privilege level is not config'ed
Dec 23 22:04:39 TKMXA01-NSA1 .clish[30182]: [MGMT:CLISH], ptree exception: No such node (rpc-reply.data.system.user.privilege-level)
Dec 23 22:04:39 TKMXA01-NSA1 .clish[30182]: [MGMT:CLISH], User privilege is not in CMS db,assigning default value(1)
Dec 23 22:04:39 TKMXA01-NSA1 .clish[30182]: [MGMT:CLISH], Error: Failed to get mode for view hidden-view
Dec 23 22:04:40 TKMXA01-NSA1 .clish[30182]: Node.1-Unit.1:PRI [audit], CLI session started for user pnielsen with role netoperator on /dev/pts/1
Dec 23 22:04:40 TKMXA01-NSA1 .clish[30182]: [MGMT:CLISH], No mgmt-clish accounting profiles to retrive at clish startup
Follow These Steps to Change the Role
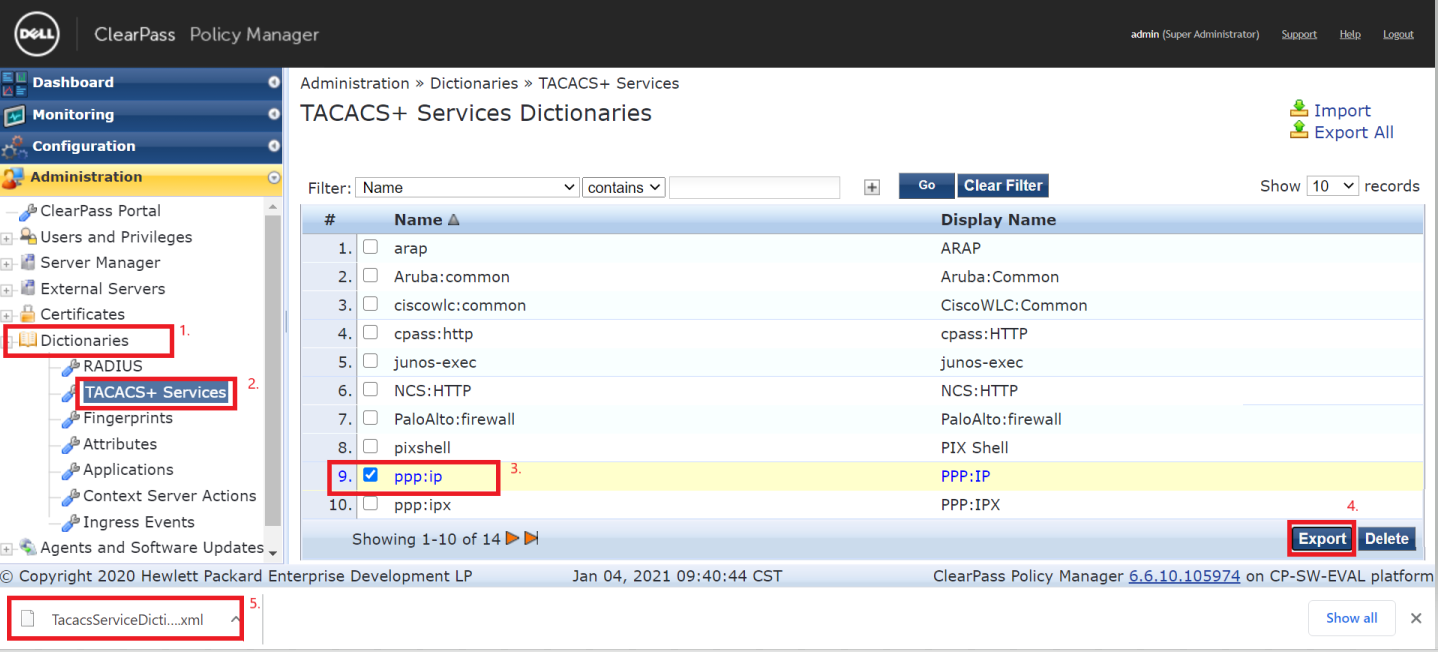
For the sysadmin role to be granted, shell:roles must be defined in the tacacs+ services dictionary.- In the ClearPass Policy Manager under Administration, go to Dictionaries > TACACS+ Services > selectPPP:IP and then click Export.
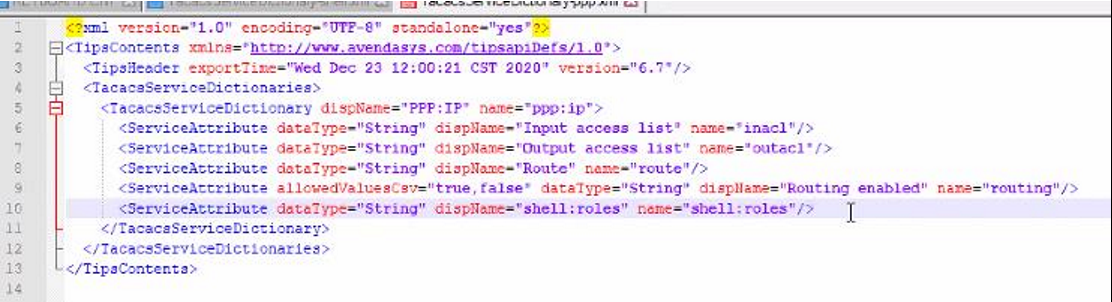
- Open the XML file in a text editor and Add the following line (see example below), and Save the file with the change.
<ServiceAttribute dataType="String" dispName="shell:roles" name="shell:roles"/>
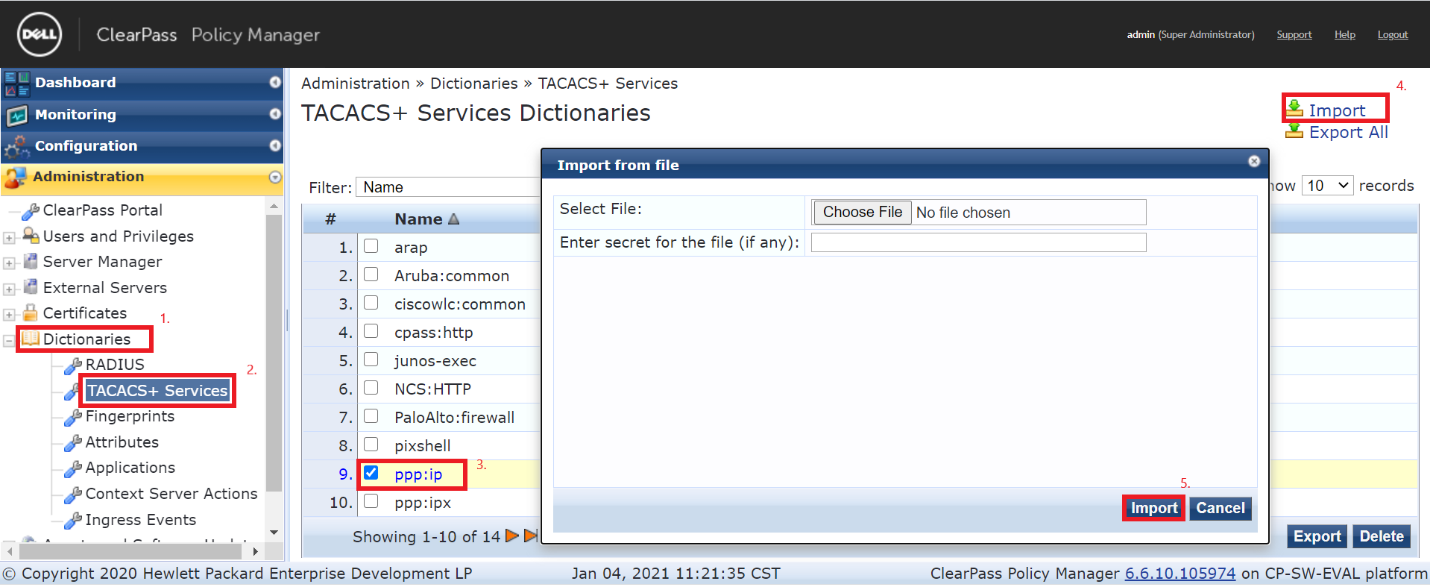
- Import the changes to ClearPass by returning to ClearPass Policy Manager, under Administration go to Dictionaries > TACACS+ Services > select ppp:ip > click Import.
- Attach the XML file and specify the secret, then click Import.
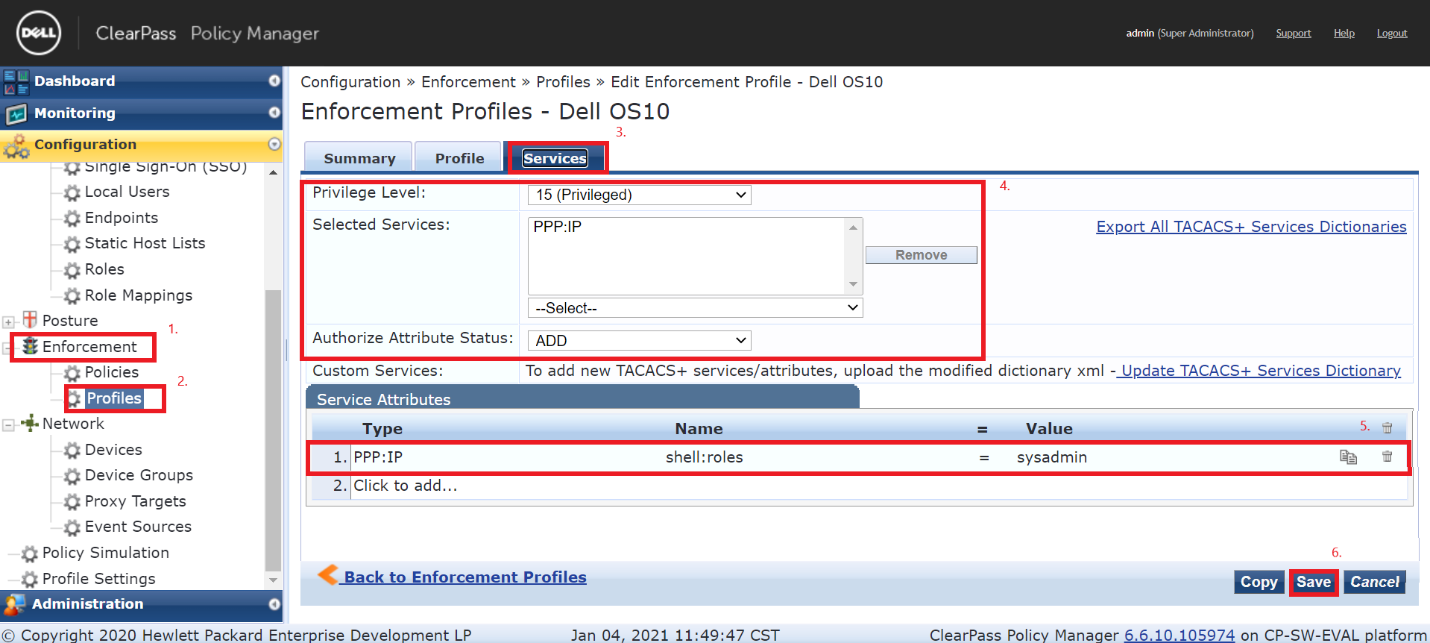
- Apply the Service to your Enforcement Profile. To learn about how to create an Enforcement profile, go to Aruba Networks article Switch Management Using TACACS+
Under Configuration, go to Enforcement > Profiles > Select or Add a new Enforcement Profile > click Services.
- Set the Privilege Level to 15
- Add PPP:IP by choosing it from the Authorize Attribute Status
- Under Server Attributes, select the Click to add… icon
- Select PPP:IP as type, shell:roles for Name and sysadmin for value.
Note: If the TACACS+ Services Dictionary was not imported with the changes, the shell:roles option is not present. The XML file can also be imported here. Be sure that the secret is set here and is the same as you are using on the OS10 switch.
Add or Verify the TACACS+ configuration as necessary.


Affected Products
W-ClearPass Hardware Appliances, W-ClearPass Virtual AppliancesArticle Properties
Article Number: 000181974
Article Type: How To
Last Modified: 19 Oct 2024
Version: 4
Find answers to your questions from other Dell users
Support Services
Check if your device is covered by Support Services.