PowerEdge: How to Upgrade vCenter Server Appliance 7.0 U1a to 7.0 U2b From the vCenter Server Appliance Management Interface
Summary: This article shows the process to upgrade vCenter Server Appliance (vCSA) from version 7.0 U1a to 7.0 U2b from the vCenter Server Appliance Management Interface (VAMI).
This article applies to
This article does not apply to
This article is not tied to any specific product.
Not all product versions are identified in this article.
Instructions
Goal:
Upgrade vCenter Server Appliance (vCSA) from version 7.0 U1a to 7.0 U2b from the vCenter Server Appliance Management Interface (VAMI).
Facts:
vCenter Server Appliance (vCSA)
vCenter Server Appliance Management Interface (VAMI)
Procedure:
- Perform the vCenter Server Upgrade in a maintenance window.
- Validate the vCenter Server Appliance does not have any alert and it is healthy.
Steps:
- Download the ISO for the target version from the Download Center.
- Upload the ISO image to a Datastore that is visible for the vCenter Server Appliance.
- Attached the ISO image to the vCenter Server Appliance by following the next steps:
- Connect to the ESXi host that is hosting the vCenter Server Appliance.
http://ESXi_FQDN_or_ESXi_IP_Address - Log In using the root account and password.
- Go to the Virtual Machines and search for the vCenter Server Appliance to upgrade.
- Right-click the vCenter Server Appliance VM and select Edit Settings
- Go to the CD/DVD Drive and in the VD/DVD Media select Browse for the Datastore where the ISO image is and select it.
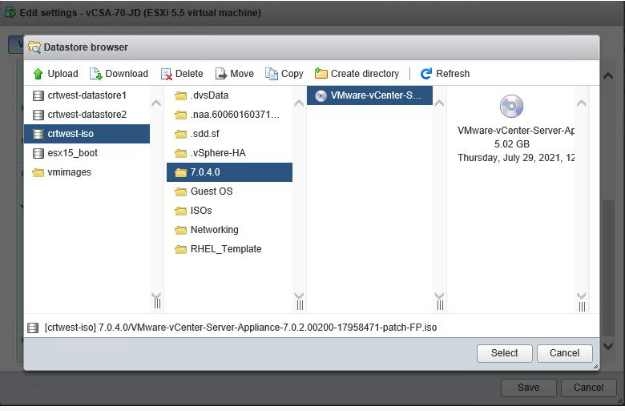
Figure 1: Datastore with ISO Image - Select the option Connect at the right of the Datastore ISO file and click Save.
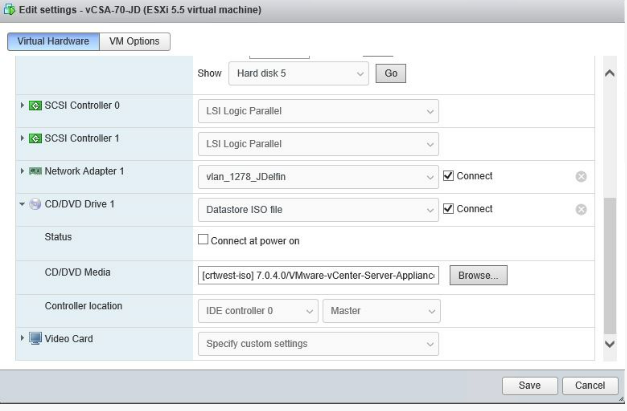
Figure 2: Connect to Datastore ISO and Save.
- Connect to the ESXi host that is hosting the vCenter Server Appliance.
- Log in to the VAMI:
https://vCSA_FQDN_or_vCSA_IP_Address: 5480- Use the root account and password.
- Go to the Summary tab on the left and check the Health Status of the components on the right.
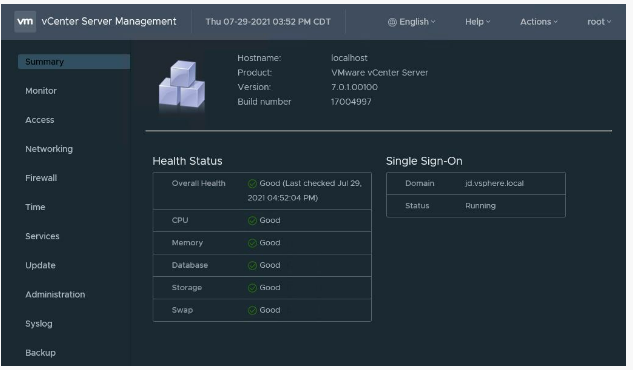
Figure 3: Summary Health Status - Go to the Services tab on the left to validate all Services are running before the update.

Figure 4: Services Validate - Go to the Update tab to load the ISO image and the Check Updates option select Check CD ROM.
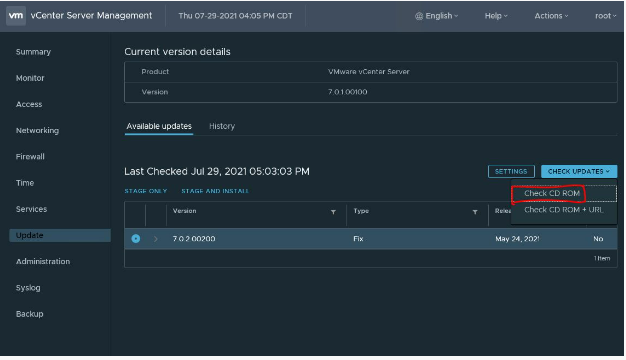
Figure 5 Update Check CD ROM. - Once the ISO image is recognized, click the RUN PRE-UPDATE CHECKS to validate nothing prevents the update on the vCenter Server Appliance or resolve any issues that are found before the update.
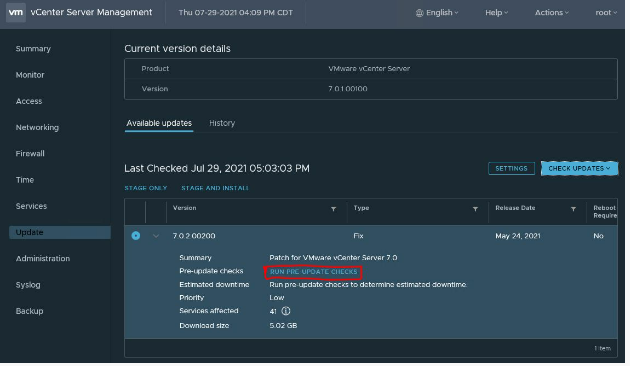
Figure 6: RUN PRE-UPDATE CHECKS - Once completed, check the Pre-update Check status.
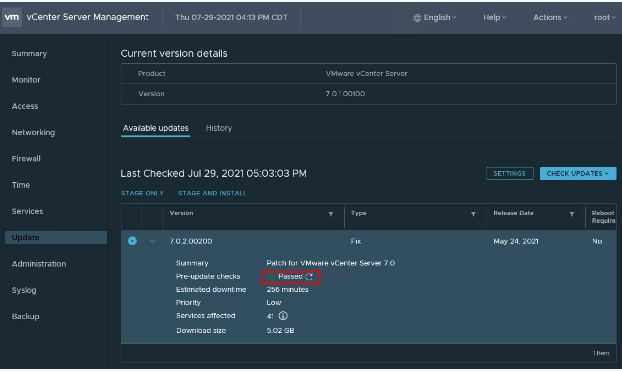
Figure 7: Pre-update Check status. - Check the current vCenter Server Appliance version before to initiating the update.
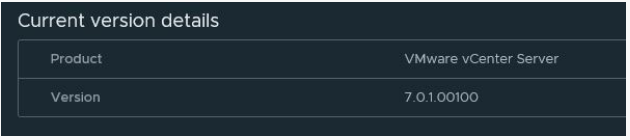
Figure 8: Current Version - Initiate the update by selecting Stage and Install option.

Figure 9: Stage and Install - The Stage and Install Wizard appears. Accept the End-user license agreement and click Next.

Figure 10: End-user license agreement - The Pre-update checks is running.

Figure 11: Running Pre-update Checks - Provide the Single Sign On Administrator password and click Next.
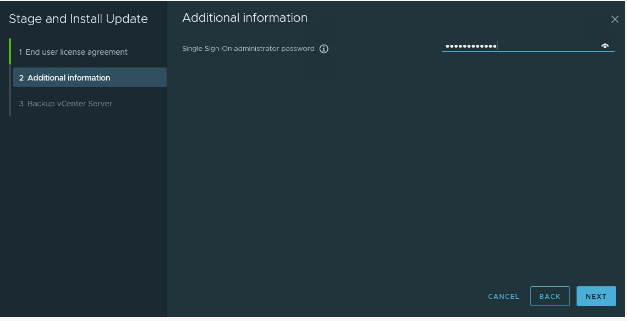
Figure 12: Single Sign On password. - Back up the vCenter Server Appliance if not previously done.
- If the vCenter Appliance is backed up, then select the option I have Backed up the vCenter Server and its associated databases and click Finish.
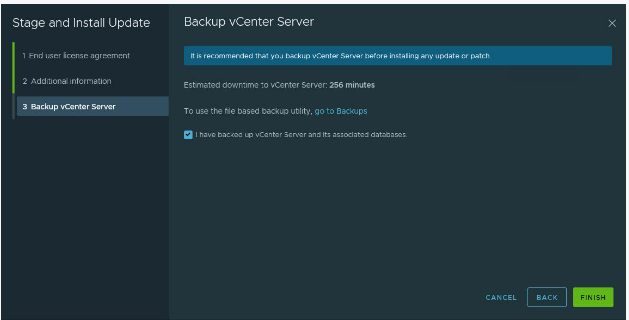
Figure 13: Finish - The installation process is in progress.
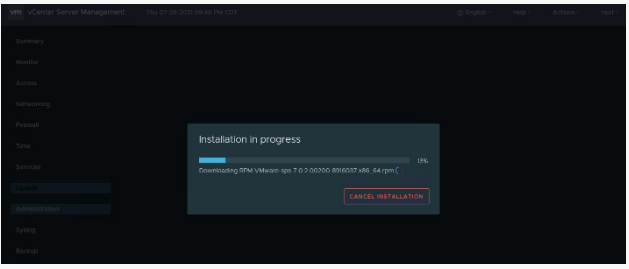
Figure 14: Installation Progress - Monitor the update progress.
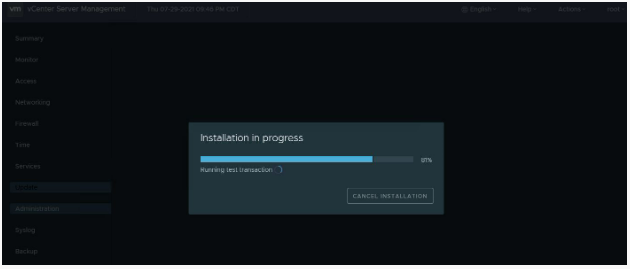
Figure 15: Monitor Progress. - Click Close in the Installation complete window.
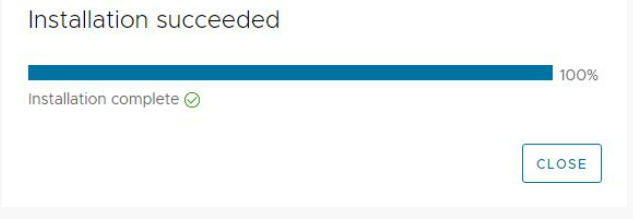
Figure 16: Installation complete - Validate the current vCenter Server Appliance version is the target version vCSA 7.0 U2b.
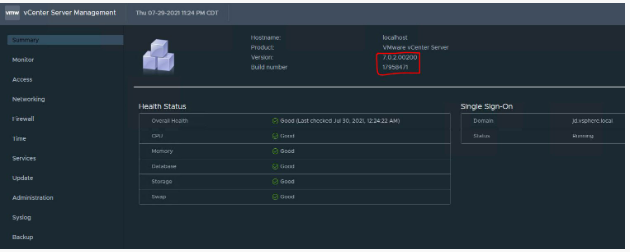
Figure 17: Validate New Version - Go to Services Tab in the left pane and validate the services have all started after the update.
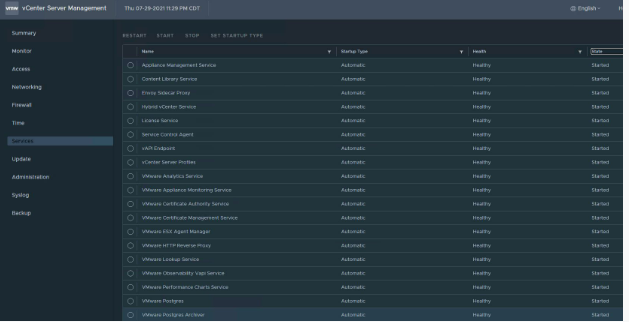
Figure 18: Validate Services are Started. - Open a session into the vSphere UI by using the Single Sign On Administrator Account and validate the vCenter Server version.
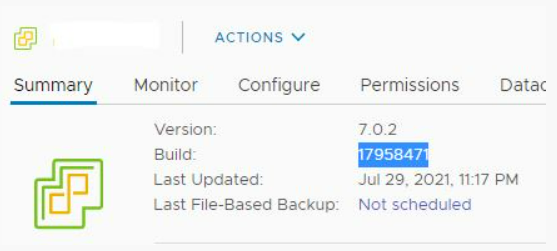
Figure 19: Single Sign On Server Version.
vCenter Server Appliance update to version 7.0 U2b is complete.
Affected Products
VxBlock and Vblock Systems, PowerFlex rack, ScaleIO, PowerEdge XR2, PowerEdge R440, PowerEdge R470, PowerEdge R540, PowerEdge R550, PowerEdge R640, PowerEdge R6415, PowerEdge R650, PowerEdge R650xs, PowerEdge R6515, PowerEdge R6525, PowerEdge R660
, PowerEdge R660xs, PowerEdge R6615, PowerEdge R6625, PowerEdge R670, PowerEdge R740, PowerEdge R740XD, PowerEdge R740XD2, PowerEdge R7415, PowerEdge R7425, PowerEdge R750, PowerEdge R750XA, PowerEdge R750xs, PowerEdge R7515, PowerEdge R7525, PowerEdge R760, PowerEdge R760XA, PowerEdge R760xd2, PowerEdge R760xs, PowerEdge R7615, PowerEdge R7625, PowerEdge R770, PowerEdge R7715, PowerEdge R7725, PowerEdge R840, PowerEdge R860, PowerEdge R940, PowerEdge R940xa, PowerEdge R960, PowerEdge T350, PowerEdge T360, PowerEdge T430, PowerEdge T440, PowerEdge T550, PowerEdge T560, PowerEdge T630, PowerEdge T640, PowerEdge XR11, PowerEdge XR12, PowerEdge XR4000r, PowerEdge XR4000w, PowerEdge XR4000z, PowerEdge XR4510c, PowerEdge XR4520c, PowerEdge XR5610, PowerEdge XR7620, PowerEdge XR8000r, PowerEdge XR8610t, PowerEdge XR8620t
...
Article Properties
Article Number: 000206373
Article Type: How To
Last Modified: 21 Mar 2025
Version: 4
Find answers to your questions from other Dell users
Support Services
Check if your device is covered by Support Services.