Dell EMC Unity: NDMP를 활성화하고 구성하는 방법[사용자 수정 가능]
Resumen: 어레이에서 NDMP를 구성하는 방법
Este artículo se aplica a
Este artículo no se aplica a
Este artículo no está vinculado a ningún producto específico.
No se identifican todas las versiones del producto en este artículo.
Instrucciones
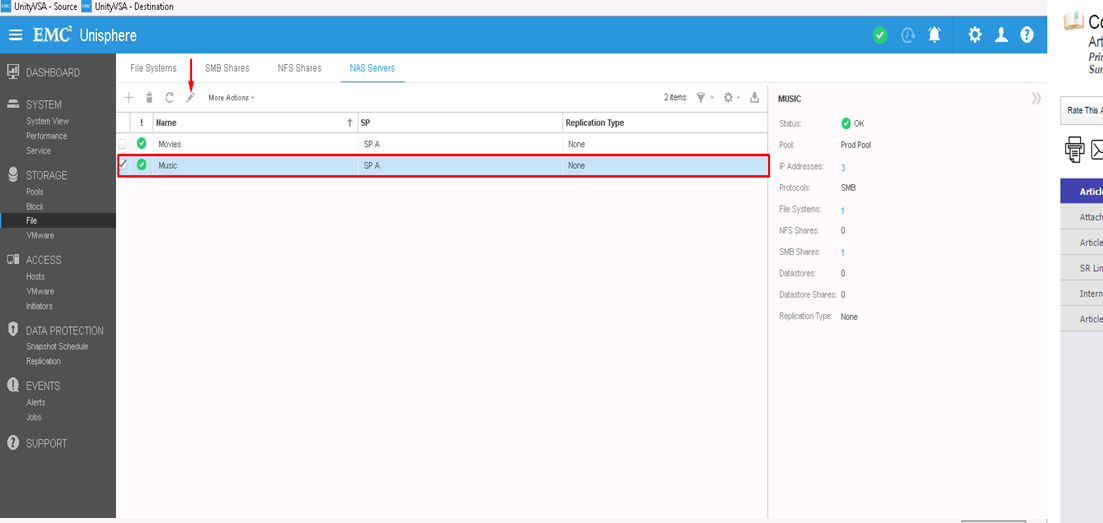
Unisphere GUI에서 다음을 수행합니다.
- 먼저 NDMP를 구성할 NAS 서버를 선택한 다음 편집 아이콘을 클릭하여 수정합니다
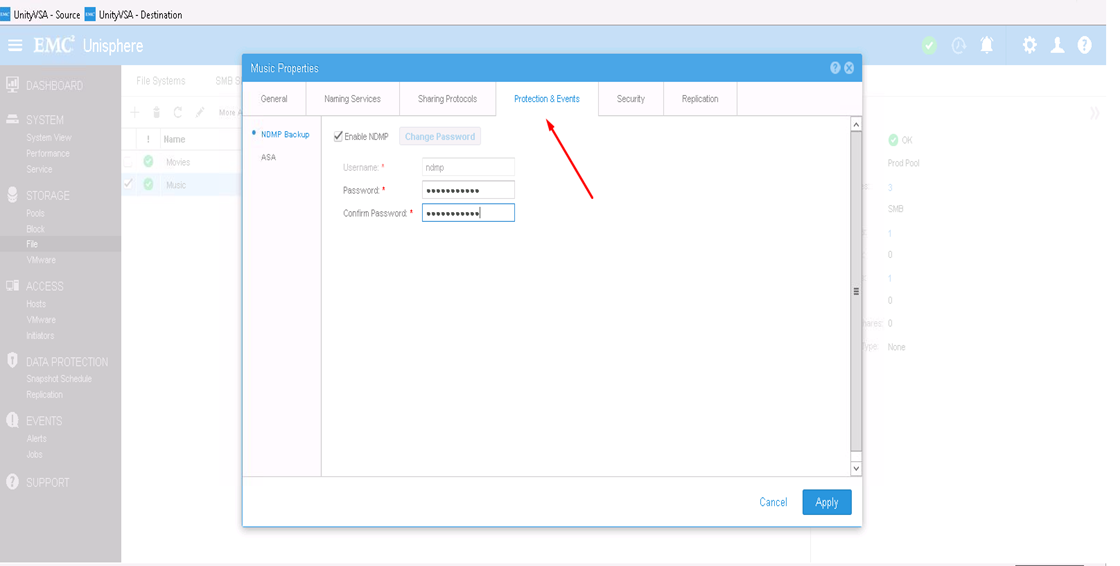
- Protection & events 탭에서 사용자 이름과 비밀번호를 입력하여 NDMP 확인란을 활성화할 수 있습니다
CLI에서 다음을 수행합니다.
1) uemcli -d <array_ip> -u admin -p <admin_pwd> /net/nas/server show
로 NAS 서버 리소스 ID를 확인합니다. 2) 다음 방법으로 NDMP 암호를 활성화하고 설정합니다. uemcli -d <array_ip> -u admin -p <admin_pwd> /net/nas/ndmp -server <nas_x> set enabled yes passwd ndmp_pwd
위 사용자 이름 "ndmp"를 사용하여 Unity에서 NDMP를 활성화합니다.
백업 클라이언트에서 NAS 서버 IP 주소 "ndmp"를 로그인 사용자로 사용하고 NDMP 백업에 구성된 비밀번호를 사용할 수 있습니다.
Productos afectados
Dell EMC Unity FamilyProductos
Dell EMC Unity Family, VNXe1 Series, VNXe2 SeriesPropiedades del artículo
Número del artículo: 000022637
Tipo de artículo: How To
Última modificación: 16 oct 2025
Versión: 3
Encuentre respuestas a sus preguntas de otros usuarios de Dell
Servicios de soporte
Compruebe si el dispositivo está cubierto por los servicios de soporte.