VMware: How to Export VMware ESXi Host Logs for Review
Résumé: This article describes how to export VMware ESXi host diagnostic log bundles for review
Cet article concerne
Cet article ne concerne pas
Cet article n’est associé à aucun produit spécifique.
Toutes les versions du produit ne sont pas identifiées dans cet article.
Instructions
Before You Begin
- Confirm you have administrative credentials for the ESXi host or vCenter Server.
- Identify which method is available based on your environment:
- vSphere Client — Use when the ESXi host is managed by a vCenter Server.
- ESXi Host Client — Use when connecting directly to a standalone ESXi host via a web browser.
- Command Line (SSH) — Use when you have SSH or direct console access to the ESXi host.
Method 1: Export Logs Using vSphere Client (vCenter Managed)
- Open the vSphere Client and connect to your vCenter Server.
- In the inventory, select the ESXi host you want to collect logs from.
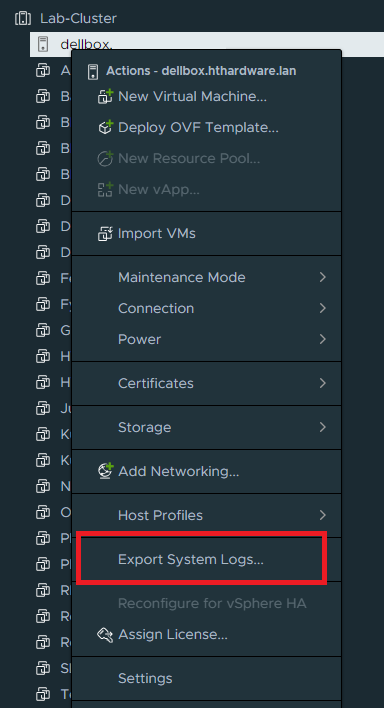
- Right-click the ESXi host and select Export System Logs.
- If required, select Gather performance data and specify a duration and interval.
- Select the specific logs to export. The default selection is typically sufficient for most troubleshooting.
- Optionally, set a password for encrypted core dumps. If you provide this bundle to support, share this password with the support engineer.
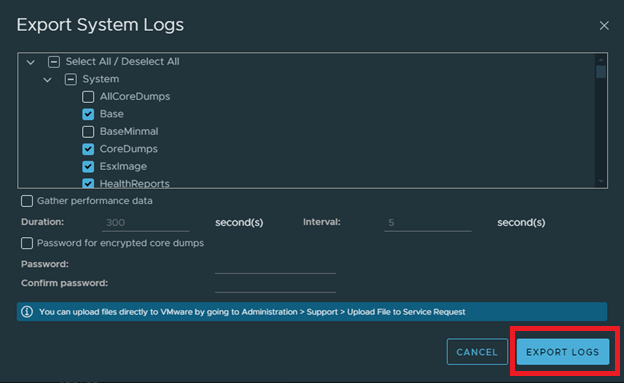
- Select Export Logs to save the
.zipbundle to your local computer.
Note: The Generate diagnostic bundles task appears in the Recent Tasks panel while the bundle is being created.
Method 2: Export Logs Using the ESXi Host Client (Direct Host Access)
- Open a web browser and navigate to
https://<ESXi-host-IP-or-FQDN>/ui. - Log in with administrative credentials (for example, root).
- From the Host tab, select Actions, then select Generate support bundle.
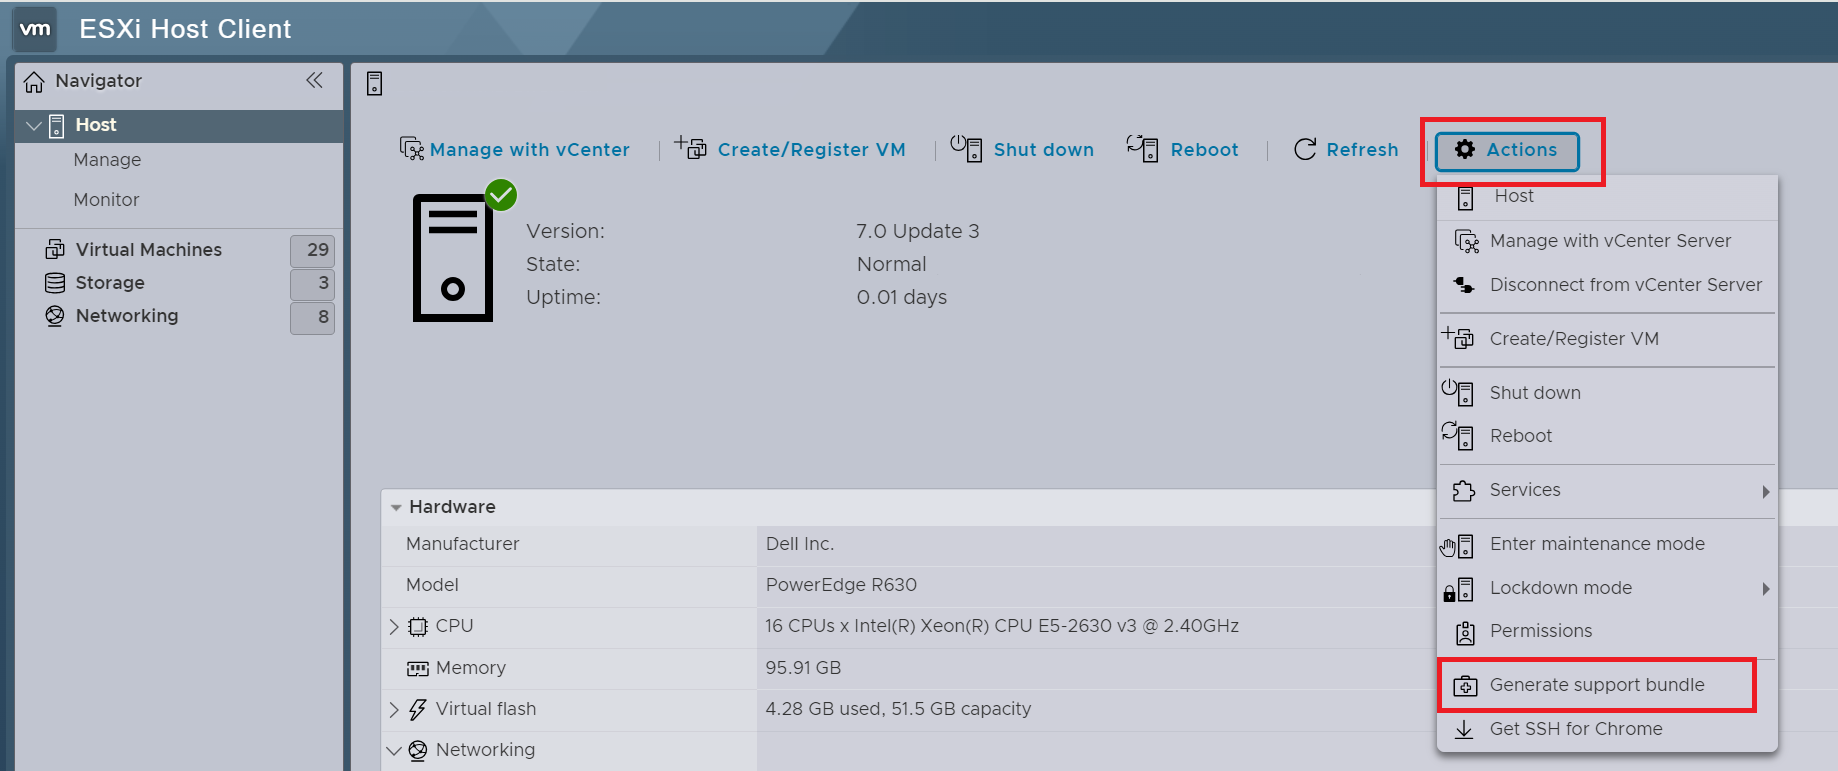
- When prompted, enter administrative credentials again to begin generating and downloading the log bundle.
- Save the
.tgzfile to your local computer.
Method 3: Export Logs Using the Command Line via SSH (vm-support)
- Enable SSH on the ESXi host if it is not already enabled.
- Connect to the ESXi host using an SSH client.
- Run the following command to generate the support bundle and save it to a specified VMFS Datastore:
vm-support -w /vmfs/volumes/DATASTORE_NAME

- After the bundle is generated, transfer the resulting file from the ESXi host to your local computer using SCP or another secure file transfer method.
Note: The
vm-support utility is present on all versions of VMware ESXi, though available options may differ between versions. Run vm-support --help to see version-specific options.
Alternative Browser-Based Method
You can also generate the bundle by entering the following URL in a web browser:
https://<ESXi-host-IP>/cgi-bin/vm-support.cgi
You will be prompted for administrative credentials. The browser will download the log bundle.
Caution: The browser-based method may expose credentials in browser history or proxy logs. Use this method only on a secure, trusted network.
Verify the Export
Informations supplémentaires
Produits concernés
VMware ESXi 7.x, VMware ESXi 8.x, VMware ESXi 9.xPropriétés de l’article
Numéro d’article: 000505337
Type d’article: How To
Dernière modification: 16 Sept 2026
Version: 1
Trouvez des réponses à vos questions auprès d’autres utilisateurs Dell
Services de support
Vérifiez si votre appareil est couvert par les services de support.