How to Back Up and Restore Dell Security Management Server Virtual
요약: Learn how to back up and restore Dell Security Management Server Virtual and Dell Data Protection Virtual Edition by using these instructions.
이 문서는 다음에 적용됩니다.
이 문서는 다음에 적용되지 않습니다.
이 문서는 특정 제품과 관련이 없습니다.
모든 제품 버전이 이 문서에 나와 있는 것은 아닙니다.
지침
This guide shows you how to back up and restore Dell Security Management Server Virtual (formerly Dell Data Protection Virtual Edition).
Affected Products:
- Dell Security Management Server Virtual
- Dell Data Protection Virtual Edition
Affected Operating Systems:
- Linux
The backup and restore function for Dell Security Management Server Virtual varies between versions. Click either 9.11.0 and Later or 8.2.0 to 9.10.1 for more information. For versioning information, reference How to Identify the Dell Data Security Server Version.
Note: If Dell Endpoint Security Suite Enterprise (formerly Dell Data Protection Endpoint Security Suite Enterprise) is in use, the Advanced Threat Prevention certificate must be backed up and restored separately. For more information, reference How to Back Up and Restore the Advanced Threat Prevention Certificate for Dell Data Security Servers.
9.11.0 and Later
For more information, click either Create Backup, Offload Backup, Load Backup, or Restore Backup.
Create Backup
- Log in to the Dell Security Management Server Virtual administration console.
 Note:
Note:- The default credentials for Dell Security Management Server Virtual are:
- Username:
delluser - Password:
delluser
- Username:
- An administrator can change the default password within the product’s virtual appliance menu.
- The default credentials for Dell Security Management Server Virtual are:
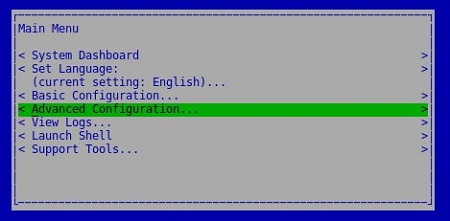
- From the Main Menu, select Advanced Configuration and then press Enter.
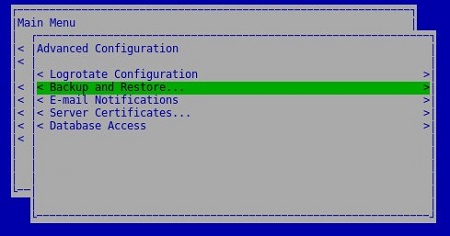
- Select Backup and Restore and then press Enter.
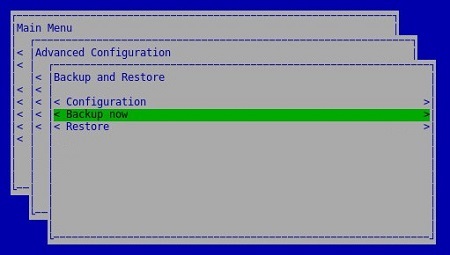
- Select Backup Now and then press Enter.
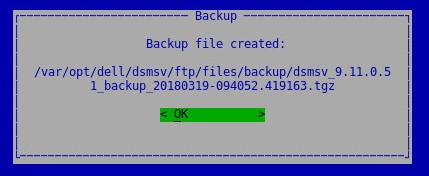
- Press Enter on OK to confirm backup completion of
dsmsv_<VERSION>_backup_<TIMESTAMP>.tgz.
 Note:
Note:<VERSION>= Version of Dell Security Management Server Virtual<TIMESTAMP>= The time that the backup was performed
Offload Backup
To successfully offload a backup, Dell Security Management Server Virtual requires:
- A completed backup
- A third-party FTP (file transfer protocol) client
- Examples of an FTP client include (but are not limited to):
- Filezilla
- WinSCP
- CuteFTP
- Examples of an FTP client include (but are not limited to):
- A storage device (outside of the Dell Security Management Server Virtual)
Note:
- Dell does not endorse nor support any listed third-party product. The listed clients are meant to be an example of potential products a customer can use. Contact the product’s manufacturer for information about setup, configuration, and management.
- Your FTP client UI may differ from the screenshot examples below.
- Launch the FTP client.
- In the FTP client, log in with an FTP user to the Dell Security Management Server Virtual.
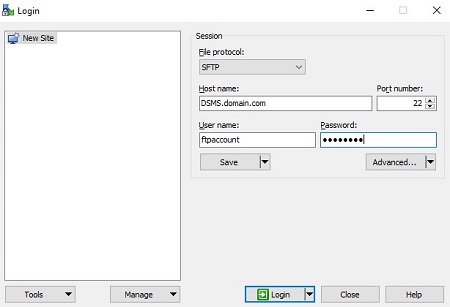 Note: An FTP user must be created within Dell Security Management Server Virtual. Reference How to Create an FTP User in Dell Security Management Server Virtual or more information.
 - Go to
/backup/.
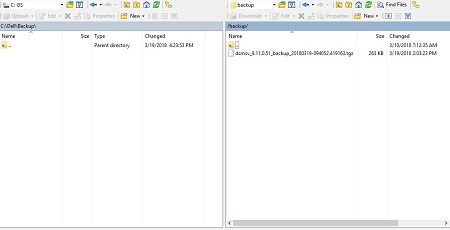
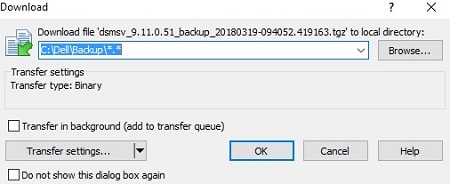
- Select and then transfer the appropriate
dsmsv_<VERSION>_backup_<TIMESTAMP>.tgzfile to your secondary storage device.
 Note:
Note:<VERSION>= Version of Dell Security Management Server Virtual<TIMESTAMP>= The time that the backup was performed
- Close the FTP client.
Load Backup
To successfully load a backup, Dell Security Management Server Virtual requires:
- An offloaded backup of Dell Security Management Server Virtual
- A third-party FTP (file transfer protocol) client
- Examples of an FTP client include (but are not limited to):
- Filezilla
- WinSCP
- CuteFTP
- Examples of an FTP client include (but are not limited to):
- A storage device (outside of the Dell Security Management Server Virtual)
Note:
- Dell does not endorse nor support any listed third-party product. The listed clients are meant to be an example of potential products a customer can use. Contact the product’s manufacturer for information about setup, configuration, and management.
- Your FTP client UI may differ from the screenshot examples below.
- Launch the FTP client.
- In the FTP client, log in with an FTP user to the Dell Security Management Server Virtual.
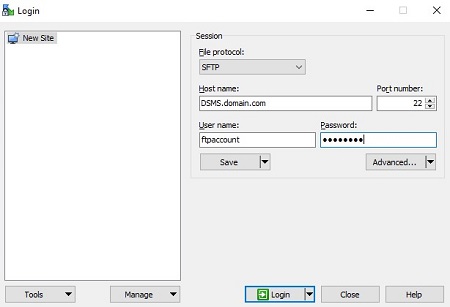 Note: An FTP user must be created within Dell Security Management Server Virtual. Reference How to Create an FTP User in Dell Security Management Server Virtual for more information.
 - Go to
/backup/.
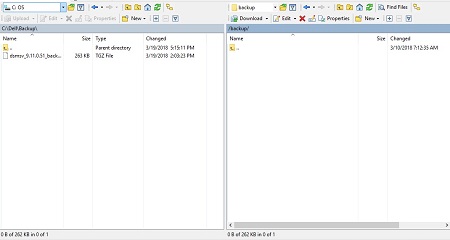
- Move
dsmsv_<VERSION>_backup_<TIMESTAMP>.tgzfrom the storage device to/backup/.
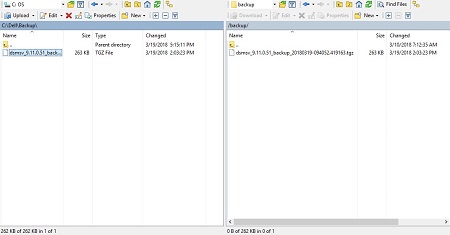 Note:
Note:<VERSION>= Version of Dell Security Management Server Virtual<TIMESTAMP>= The time that the backup was performed
- Close the FTP client.
Restore Backup
- Log in to the Dell Enterprise Server Virtual administration console.
 Note:
Note:- The default credentials for Dell Security Management Server Virtual are:
- Username:
delluser - Password:
delluser
- Username:
- An administrator can change the default password within the product’s virtual appliance menu.
- The default credentials for Dell Security Management Server Virtual are:
- From the Main Menu, select Advanced Configuration and then press Enter.
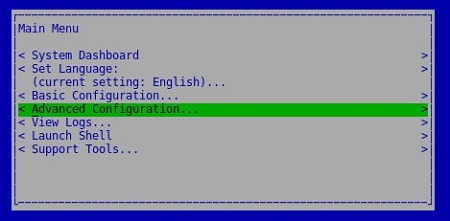
- Select Backup and Restore and then press Enter.
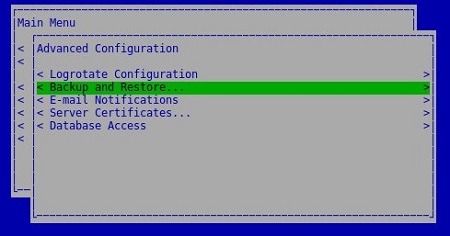
- Select Restore and then press Enter.
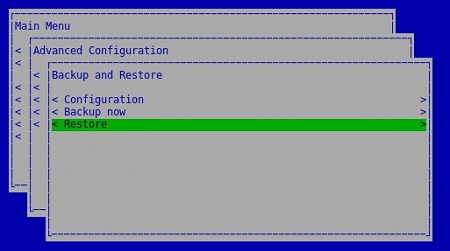
- Select Yes to confirm that the instance used to create the backup is shut down, and then press Enter.

- Select the appropriate
dsmsv_<VERSION>_backup_<TIMESTAMP>.tgzand then press Enter.
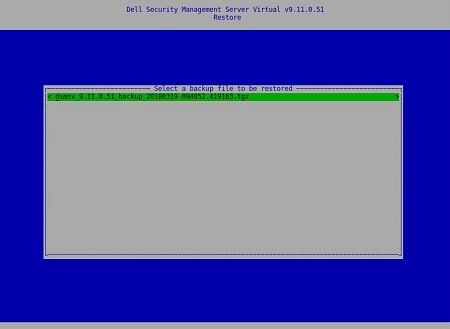 Note:
Note:<VERSION>= Version of Dell Security Management Server Virtual<TIMESTAMP>= The time that the backup was performed
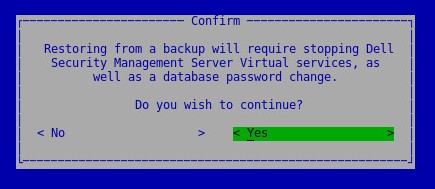
- Select Yes to confirm that services will be shut down and a database password must be changed, and then press Enter.
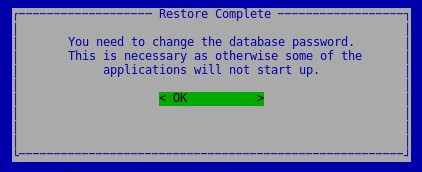
- Press Enter on OK.
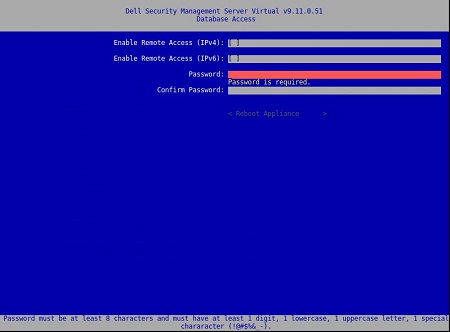
- In the Database Access menu:
- Optionally check Enable Remote Access (IPv4) or Enable Remote Access (IPv6) from external sources (for example, pgAdmin).
- Enter and then confirm the new database Password.
- Select Reboot Appliance and then press Enter.
 Note: For more information, reference Dell Security Management Server Virtual Accessing the Postgres Database Using pgAdmin.
8.2.0 to 9.10.1
For more information, click either Create Backup, Offload Backup, Load Backup, or Restore Backup.
Create Backup
- Log in to the Dell Enterprise Server Virtual administration console.
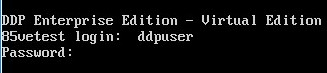 Note:
Note:- The default credentials for Dell Security Management Server Virtual are:
- Username:
ddpuser - Password:
ddpuser
- Username:
- An administrator can change the default password within the product’s virtual appliance menu.
- The default credentials for Dell Security Management Server Virtual are:
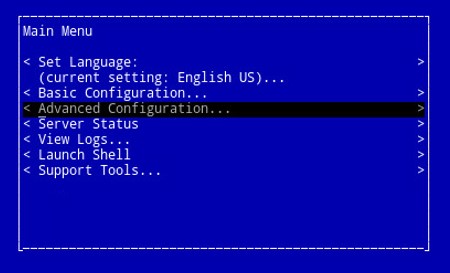
- From the Main Menu, select Advanced Configuration and then press Enter.
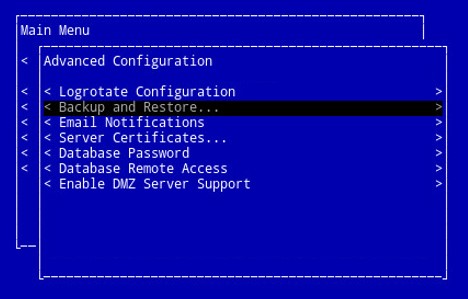
- Select Backup and Restore and then press Enter.
- Select Backup now and then press Enter.
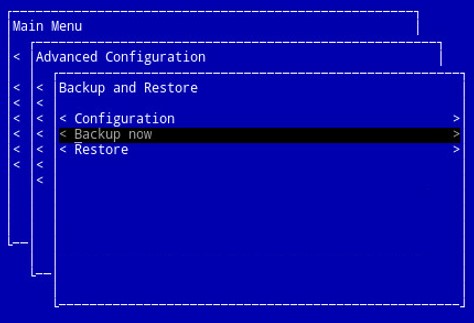
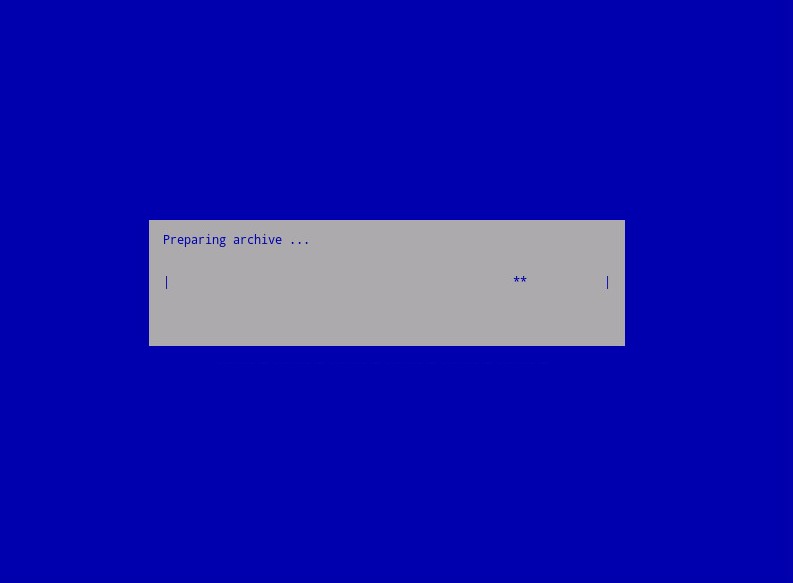
- The backup runs. Go to Step 6.
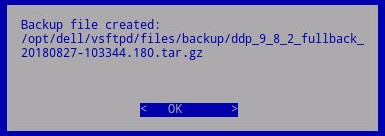
- Press Enter on OK to confirm backup completion of
ddp_<VERSION>_fullback_<TIMESTAMP>.tar.gz.
 Note:
Note:<VERSION>= Version of Dell Data Protection Virtual Edition<TIMESTAMP>= The time that the backup was performed
Offload Backup
To successfully offload a backup, Dell Security Management Server Virtual requires:
- A completed backup
- A third-party FTP (file transfer protocol) client
- Examples of an FTP client include (but are not limited to):
- Filezilla
- WinSCP
- CuteFTP
- Examples of an FTP client include (but are not limited to):
- A storage device (outside of the Dell Security Management Server Virtual)
Note:
- Dell does not endorse nor support any listed third-party product. The listed clients are meant to be an example of potential products a customer can use. Contact the product’s manufacturer for information about setup, configuration, and management.
- Your FTP client UI may differ from the screenshot examples below.
- Launch the FTP client.
- In the FTP client, log in with an FTP user to the Dell Security Management Server Virtual.
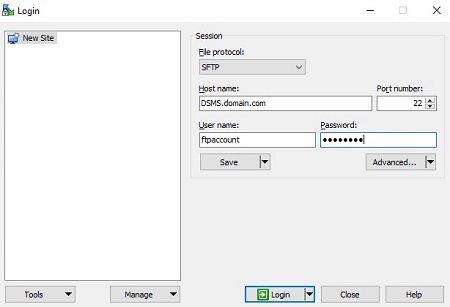 Note: An FTP user must be created within the Dell Security Management Server. Reference How to Create an FTP User in Dell Security Management Server Virtual for more information.
 - Go to
/backup/.
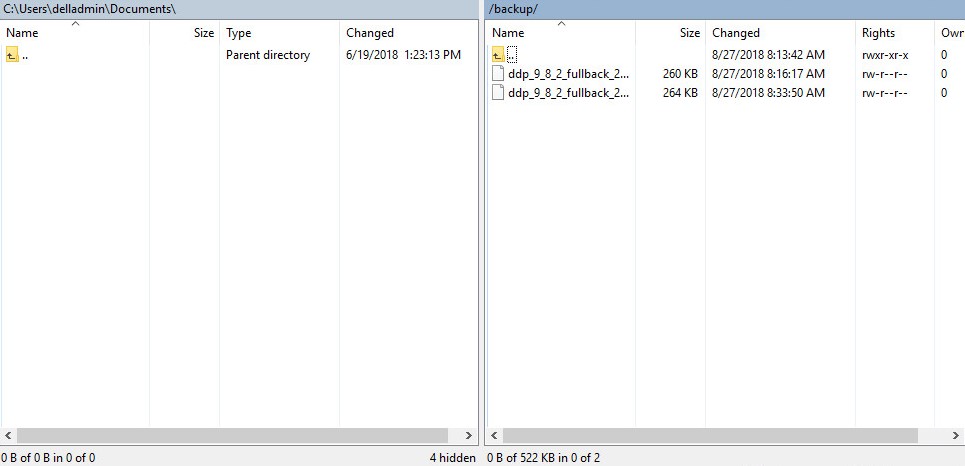
- Select and then transfer the appropriate
ddp_<VERSION>_fullback_<TIMESTAMP>.tar.gzfile to your secondary storage device.
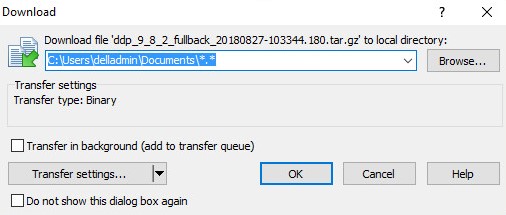 Note:
Note:<VERSION>= Version of Dell Data Protection Virtual Edition<TIMESTAMP>= The time that the backup was performed
- Close the FTP client.
Load Backup
To successfully load a backup, Dell Security Management Server Virtual requires:
- An offloaded backup of Dell Security Management Server Virtual
- A third-party FTP (file transfer protocol) client
- Examples of an FTP client include (but are not limited to):
- Filezilla
- WinSCP
- CuteFTP
- Examples of an FTP client include (but are not limited to):
- A storage device (outside of the Dell Security Management Server Virtual)
Note:
- Dell does not endorse nor support any listed third-party product. The listed clients are meant to be an example of potential products a customer can use. Contact the product’s manufacturer for information about setup, configuration, and management.
- Your FTP client UI may differ from the screenshot examples below.
- Launch the FTP client.
- In the FTP client, log in with an FTP user to the Dell Security Management Server Virtual.
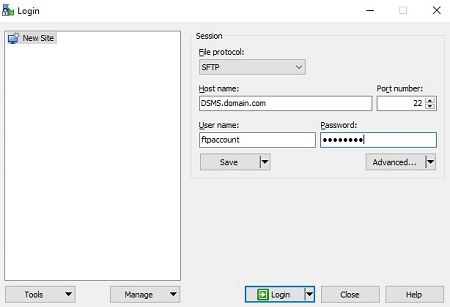 Note: An FTP user must be created within the Dell Security Management Server. Reference How to Create an FTP User in Dell Security Management Server Virtual for more information.
 - Go to
/backup/.
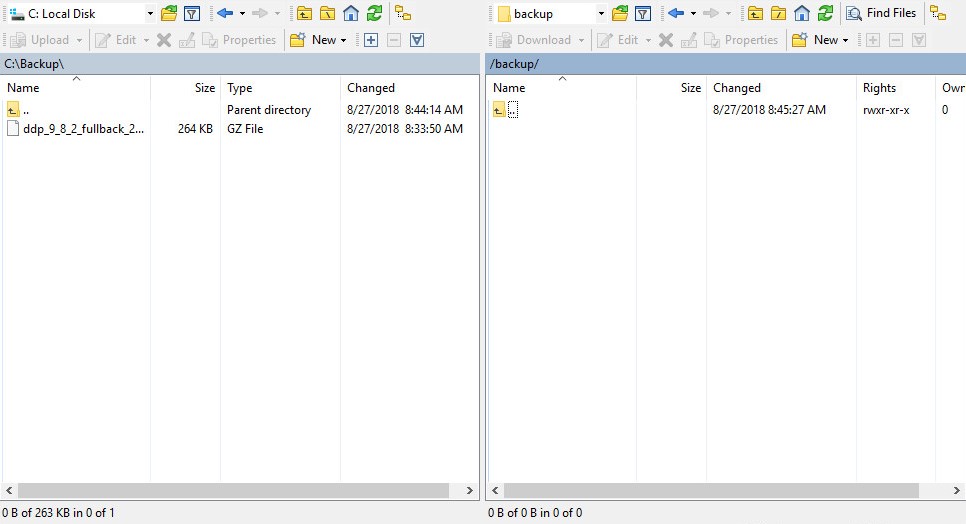
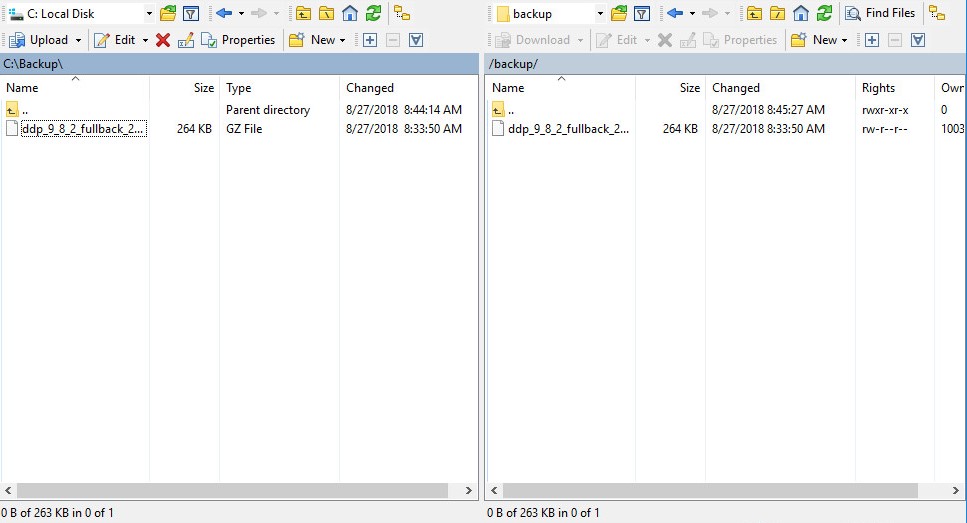
- Move
ddp_<VERSION>_fullback_<TIMESTAMP>.tar.gzfrom the storage device to/backup/.
 Note:
Note:<VERSION>= Version of Dell Data Protection Virtual Edition<TIMESTAMP>= The time that the backup was performed
- Close the FTP client.
Restore Backup
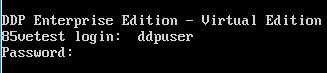
- Log in to the Dell Enterprise Server Virtual administration console.
 Note:
Note:- The default credentials for Dell Security Management Server Virtual are:
- Username:
ddpuser - Password:
ddpuser
- Username:
- An administrator can change the default password within the product’s virtual appliance menu.
- The default credentials for Dell Security Management Server Virtual are:
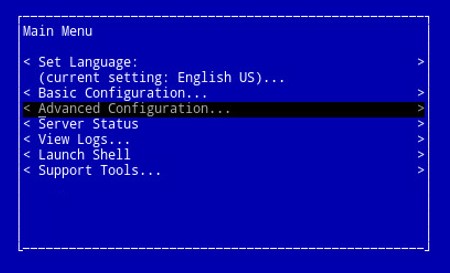
- From the Main Menu, select Advanced Configuration and then press Enter.
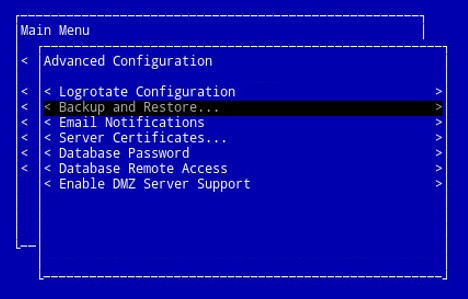
- Select Backup and Restore and then press Enter.
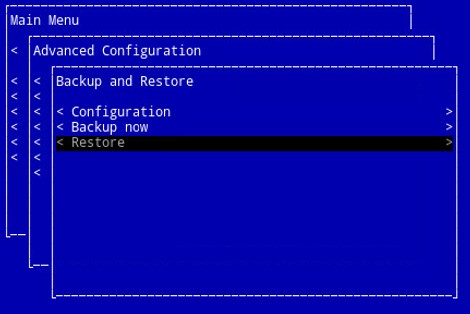
- Select Restore and then press Enter.
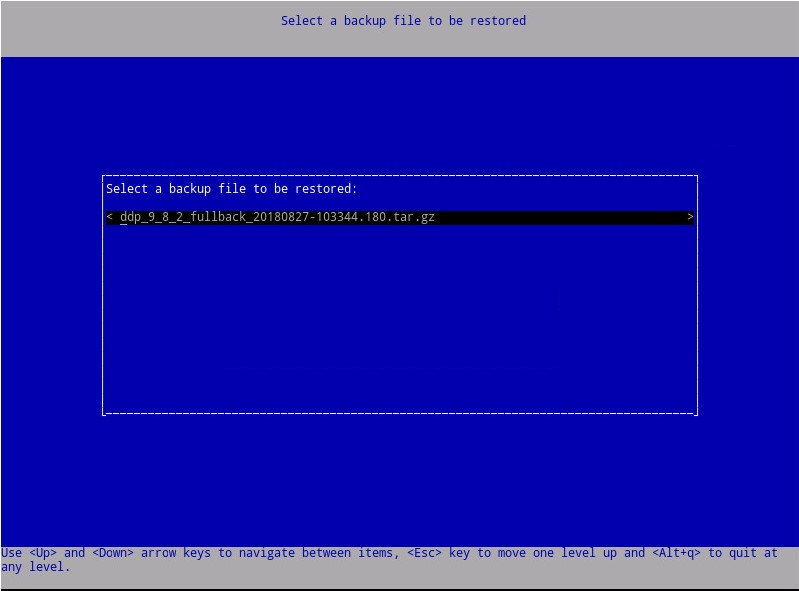
- Select the appropriate
ddp_<VERSION>_fullback_<TIMESTAMP>.tar.gzand then press Enter.
 Note:
Note:<VERSION>= Version of Dell Data Protection Virtual Edition<TIMESTAMP>= The time that the backup was performed
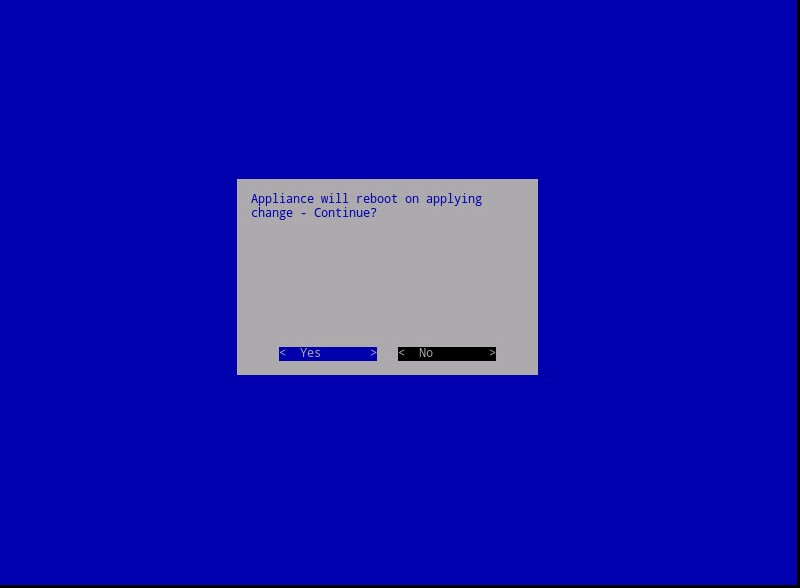
- Select Yes to reboot the virtual appliance on restoration completion and then press Enter.
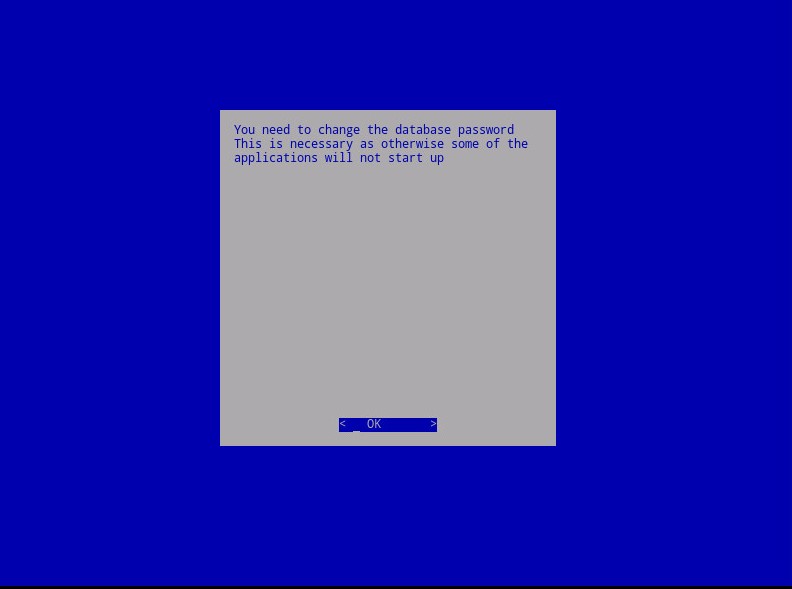
- Press Enter on OK.
- The backup restores. Go to Step 9.
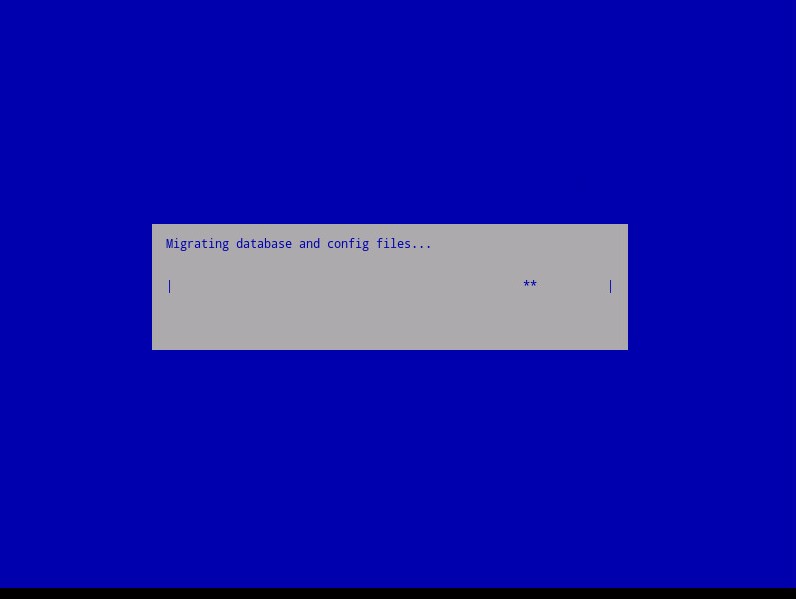
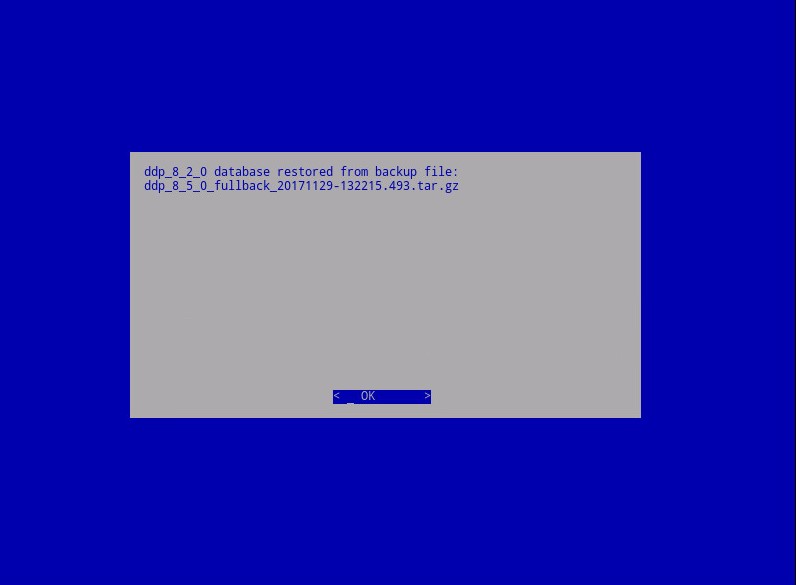
- On restoration, press Enter on OK.
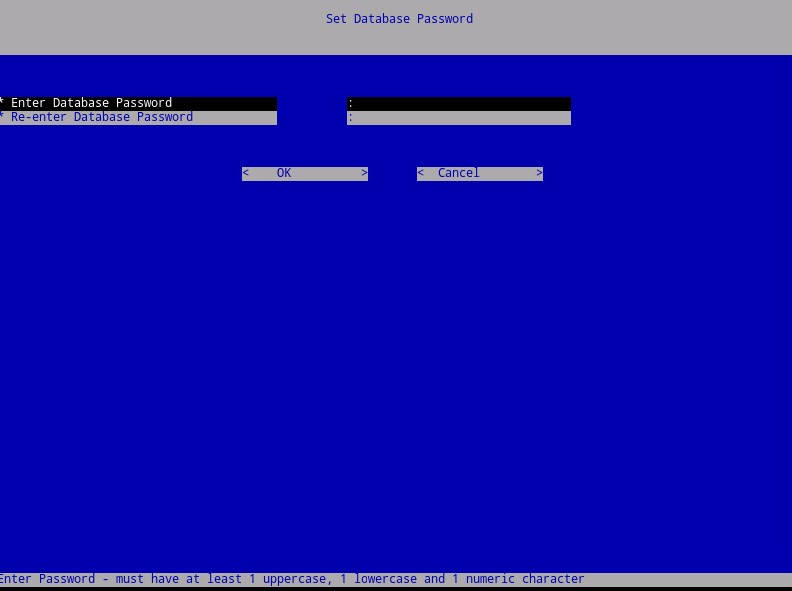
- Enter and then reenter the new database password. Once completed, press Enter on OK to reboot the virtual appliance.
해당 제품
Dell Encryption문서 속성
문서 번호: 000124658
문서 유형: How To
마지막 수정 시간: 14 7월 2026
버전: 15
다른 Dell 사용자에게 질문에 대한 답변 찾기
지원 서비스
디바이스에 지원 서비스가 적용되는지 확인하십시오.