How to Manually Back Up Encryption Keys in Dell Encryption Personal
요약: Learn how to back up encryption keys for Dell Encryption Personal and Dell Data Protection Personal Edition by following these instructions.
이 문서는 다음에 적용됩니다.
이 문서는 다음에 적용되지 않습니다.
이 문서는 특정 제품과 관련이 없습니다.
모든 제품 버전이 이 문서에 나와 있는 것은 아닙니다.
지침
This article provides information about how to manually back up encryption keys (also known as escrowing the keys) in Dell Encryption Personal (formerly Dell Data Protection Personal Edition).
Affected Products:
- Dell Encryption Personal
- Dell Data Protection Personal Edition
Affected Operating Systems:
- Windows
The method to manually back up the encryption keys differs between version 8.15.0 and Later, 8.11.0 to 8.13.X, and 8.0.0 to 8.10.1. Click the appropriate client version for specific steps to back up the encryption keys. For more information about versioning, reference How to Identify the Dell Encryption Enterprise or Dell Encryption Personal Version.
Note:
- To successfully backup keys, Dell Encryption Personal requires a storage device (outside of the endpoint with Dell Encryption Personal installed).
- The Encryption Administrator Password is required to back up the keys.
8.15.0 and Later
- Log in to the Windows computer.
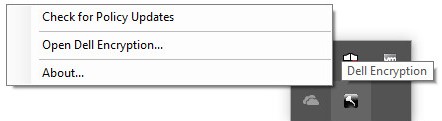
- In the Windows System Tray, right-click the Dell Encryption icon and then select Open Dell Encryption.
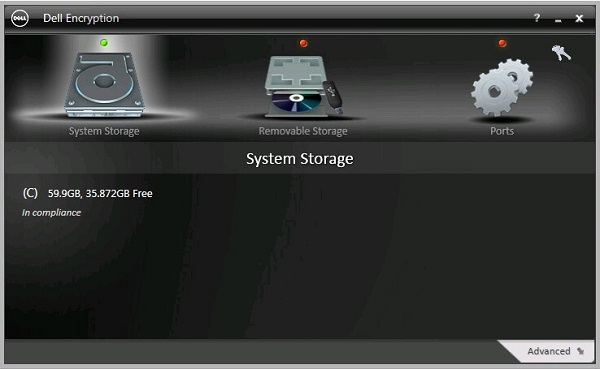
- Click the key icon in the upper-right.
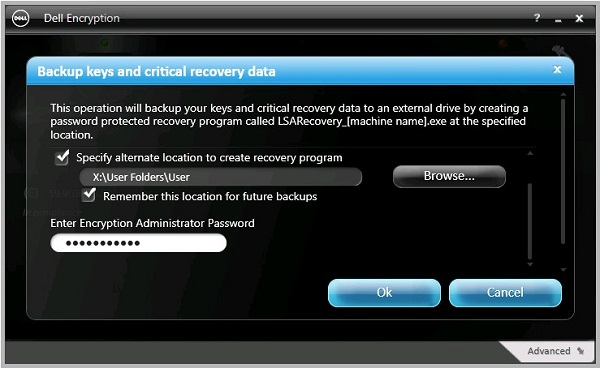
- From the Backup keys and critical recovery data menu:
- Check Specify alternate location to create recovery program.
- Click to Browse to a secondary storage device.
- Optionally, check Remember this location for future backups.
- Populate the Encryption Administrator Password.
- Click OK.
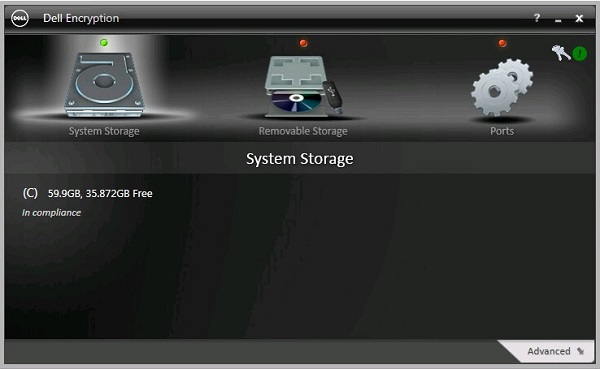
- The key icon (Step 2) displays a green exclamation mark (!) icon beside it upon completion of the backup.
- LSARecovery_<NAME> appears in the location chosen (Step 4).
 Note: <NAME> = Name of the endpoint
8.11.0 to 8.13.X
- Log in to the Windows computer.
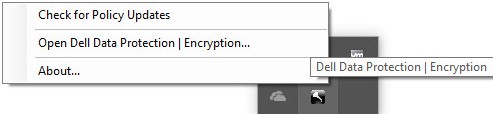
- In the Windows System Tray, right-click the Dell Data Protection | Encryption icon and then select Open Dell Data Protection | Encryption.
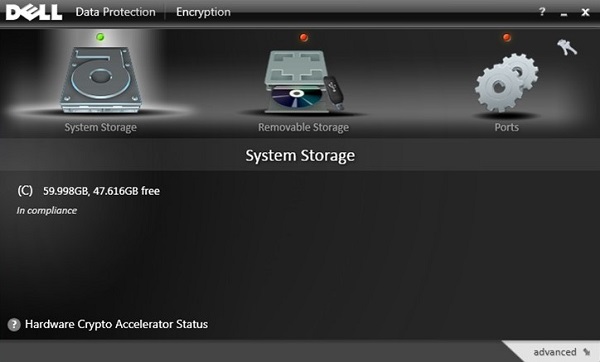
- Click the key icon in the upper right.
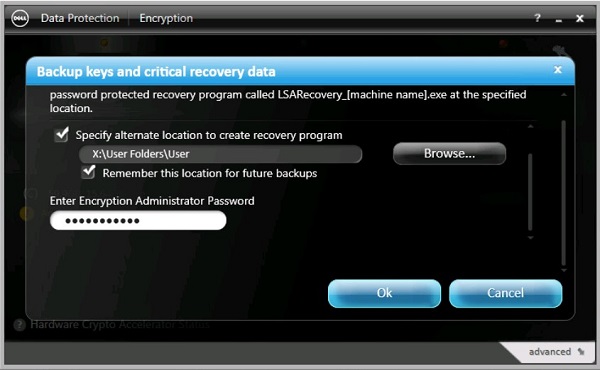
- From the Backup keys and critical recovery data menu:
- Check Specify alternate location to create recovery program.
- Click to Browse to a secondary storage device.
- Optionally, check Remember this location for future backups.
- Populate the Encryption Administrator Password.
- Click OK.
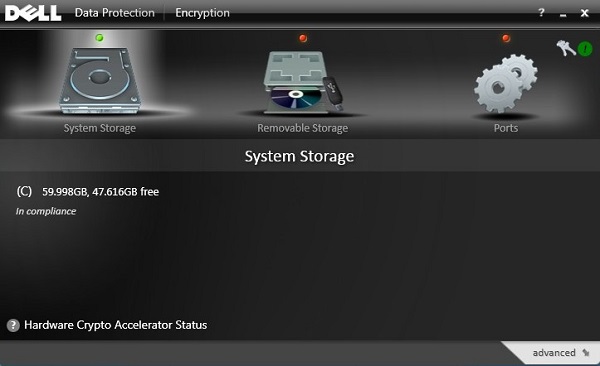
- The key icon (Step 2) displays a green exclamation mark (!) icon beside it upon completion of the backup.
- The LSARecovery_<NAME> appears in the location chosen (Step 4).
 Note: <NAME> = Name of the endpoint
8.0.0 to 8.10.1
- Log in to the Windows computer.
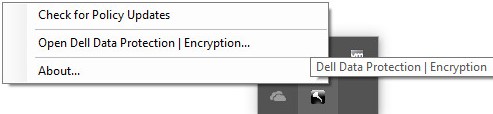
- In the Windows System Tray, right-click the Dell Data Protection | Encryption icon and then select Open Dell Data Protection | Encryption.
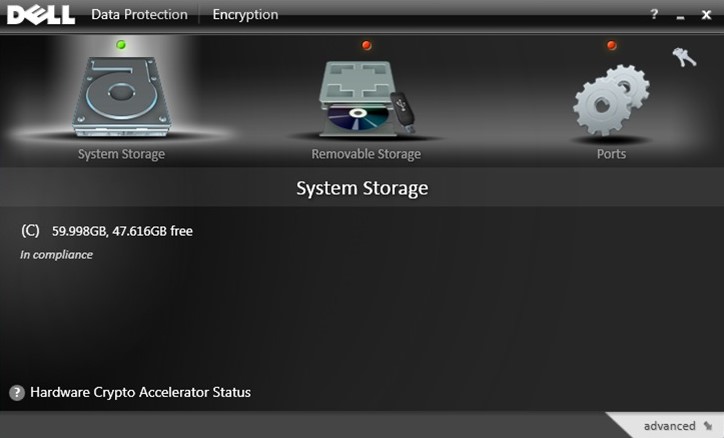
- Click the key icon in the upper-right.
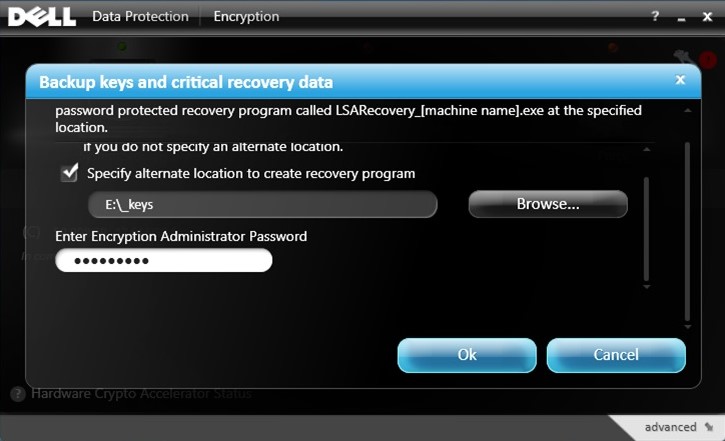
- From the Backup keys and critical recovery data menu:
- Check Specify alternate location to create recovery program.
- Click to Browse to a secondary storage device.
- Populate the Encryption Administrator Password.
- Click OK.
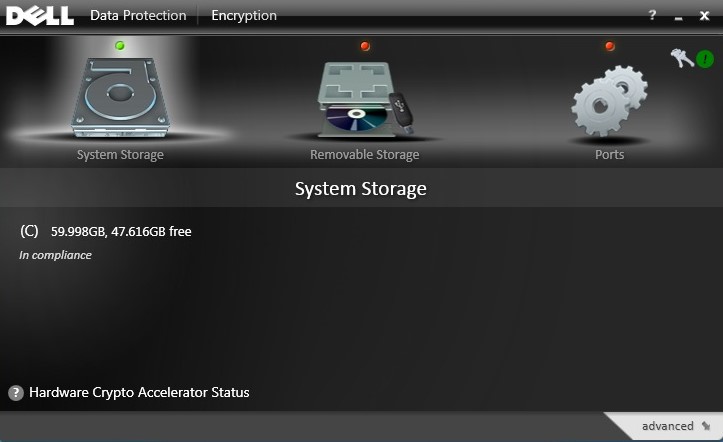
- The key icon (Step 2) displays a green exclamation mark (!) icon beside it upon completion of the backup.
- The LSARecovery_<NAME> appears in the location chosen (Step 4).
 Note: <NAME> = Name of the endpoint
해당 제품
Dell Encryption문서 속성
문서 번호: 000126842
문서 유형: How To
마지막 수정 시간: 02 7월 2026
버전: 10
다른 Dell 사용자에게 질문에 대한 답변 찾기
지원 서비스
디바이스에 지원 서비스가 적용되는지 확인하십시오.