Номер статьи: 000124658
如何备份和恢复 Dell Security Management Server Virtual
Сводка: 可以使用这些说明备份和恢复 Dell Security Management Server Virtual 和 Dell Data Protection Virtual Edition。
Содержание статьи
Симптомы
本指南介绍如何备份和还原 Dell Security Management Server Virtual(以前称为 Dell Data Protection | Virtual Edition)。
受影响的产品:
- Dell Security Management Server Virtual
- Dell Data Protection | Virtual Edition
受影响的操作系统:
- Linux
Причина
不适用
Разрешение
Dell Security Management Server Virtual 的备份和还原功能因版本而异。单击 v9.11.0 和更高版本 或 v8.2.0 至 9.10.1 了解更多信息。有关版本信息,请参阅如何确定 Dell Data Security/Dell Data Protection Server 版本。
提醒:如果正在使用 Dell Endpoint Security Suite Enterprise(以前称为 Dell Data Protection | Endpoint Security Suite Enterprise),则必须单独备份和还原 Advanced Threat Prevention 证书。有关更多信息,请参阅 如何备份和还原 Dell Data Security Server 的高级威胁防护证书 。
v9.11.0 及更高版本
有关更多信息,请单击创建备份、卸载备份、加载备份或还原备份。
- 登录到 Dell Security Management Server Virtual 管理控制台。

提醒:
- Dell Security Management Server Virtual 的默认凭据为:
- 用户名:
delluser - 密码:
delluser
- 用户名:
- 管理员可以更改产品的虚拟设备菜单中的默认密码。
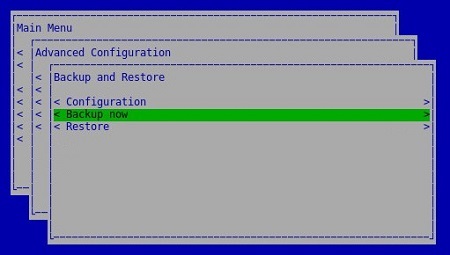
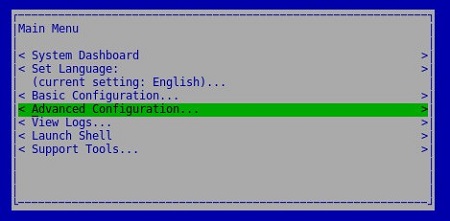
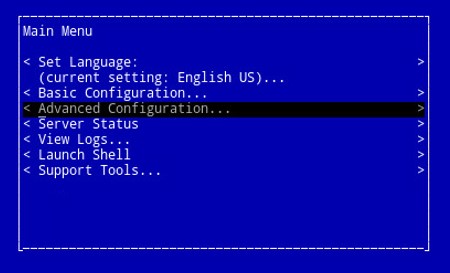
- 从主菜单中,选择 Advanced Configuration,然后按 Enter 键。

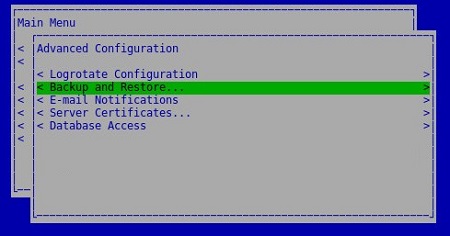
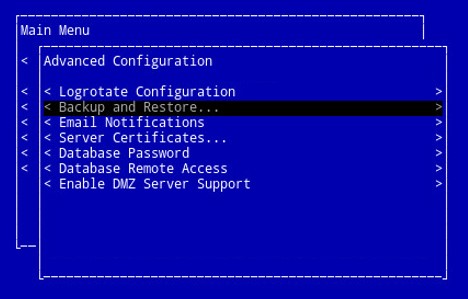
- 选择 Backup and Restore,然后按 Enter 键。

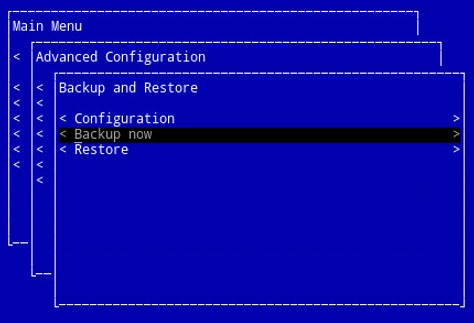
- 选择 Backup Now,然后按 Enter 键。
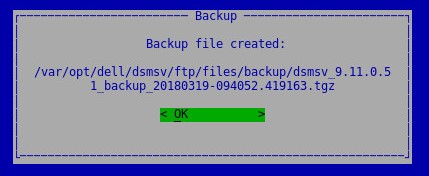
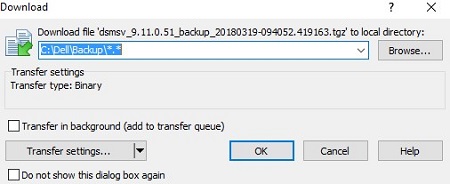
- 在出现 OK 时按 Enter 键,确认
dsmsv_[VERSION]_backup_[TIMESTAMP].tgz的备份完成。
提醒:
[VERSION]= Dell Security Management Server Virtual 的版本[TIMESTAMP]= 执行备份的时间
要成功卸载备份,Dell Security Management Server Virtual 需要:
- 已完成的备份
- 第三方 FTP(文件传输协议)客户端
- FTP 客户端的示例包括(但不限于):
- Filezilla
- WinSCP
- CuteFTP
- FTP 客户端的示例包括(但不限于):
- 存储设备(除 Dell Security Management Server Virtual 之外)
提醒:
- 戴尔既不认可也不支持任何列出的第三方产品。列出的客户端是客户可以使用的潜在产品的示例。有关设置、配置和管理的信息,请与产品的制造商联系。
- 您的 FTP 客户端 UI 可能与以下屏幕截图示例不同。
- 启动 FTP 客户端。
- 在 FTP 客户端中,使用 FTP 用户登录 Dell Security Management Server Virtual。
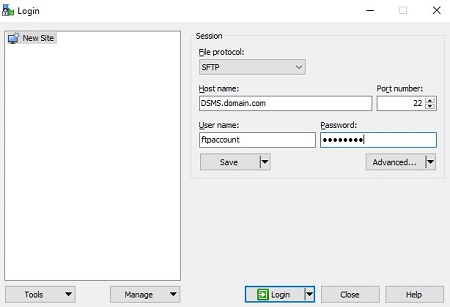
提醒:必须在 Dell Security Management Server Virtual 中创建 FTP 用户。有关详细信息,请参阅如何在 Dell Security Management Server Virtual/Dell Data Protection Virtual Edition 中创建 FTP 用户。
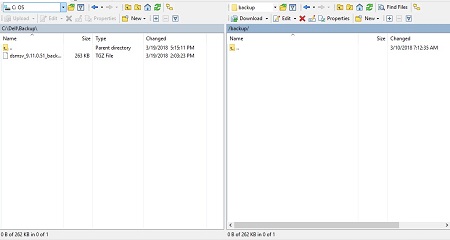
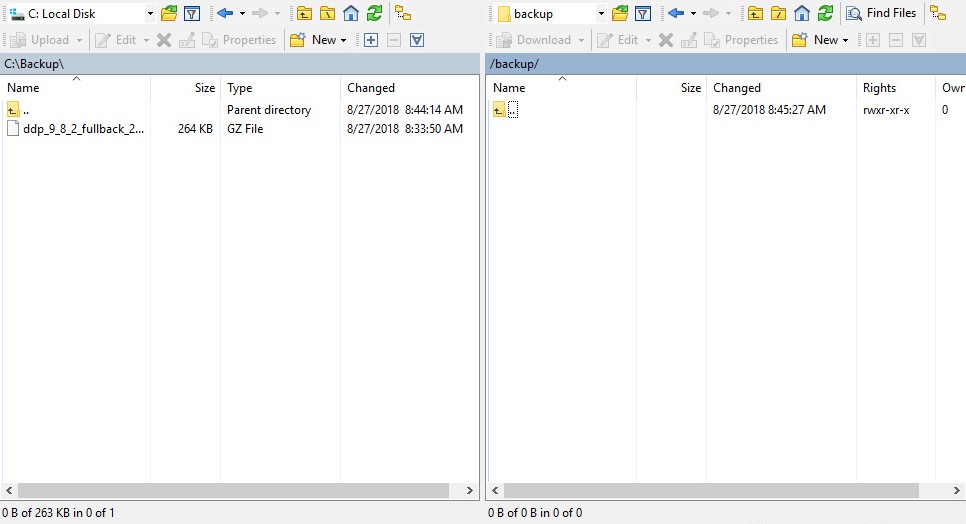
- 转至
/backup/。
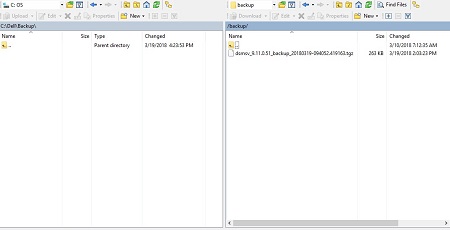
- 选择相应文件,然后将相应
dsmsv_[VERSION]_backup_[TIMESTAMP].tgz文件传输到辅助存储设备。
提醒:
[VERSION]= Dell Security Management Server Virtual 的版本[TIMESTAMP]= 执行备份的时间
- 关闭 FTP 客户端。
要成功加载备份,Dell Security Management Server Virtual 需要:
- 已卸载的 Dell Security Management Server Virtual 备份
- 第三方 FTP(文件传输协议)客户端
- FTP 客户端的示例包括(但不限于):
- Filezilla
- WinSCP
- CuteFTP
- FTP 客户端的示例包括(但不限于):
- 存储设备(除 Dell Security Management Server Virtual 之外)
提醒:
- 戴尔既不认可也不支持任何列出的第三方产品。列出的客户端是客户可以使用的潜在产品的示例。有关设置、配置和管理的信息,请与产品的制造商联系。
- 您的 FTP 客户端 UI 可能与以下屏幕截图示例不同。
- 启动 FTP 客户端。
- 在 FTP 客户端中,使用 FTP 用户登录 Dell Security Management Server Virtual。

提醒:必须在 Dell Security Management Server Virtual 中创建 FTP 用户。有关详细信息,请参阅如何在 Dell Security Management Server Virtual/Dell Data Protection Virtual Edition 中创建 FTP 用户。
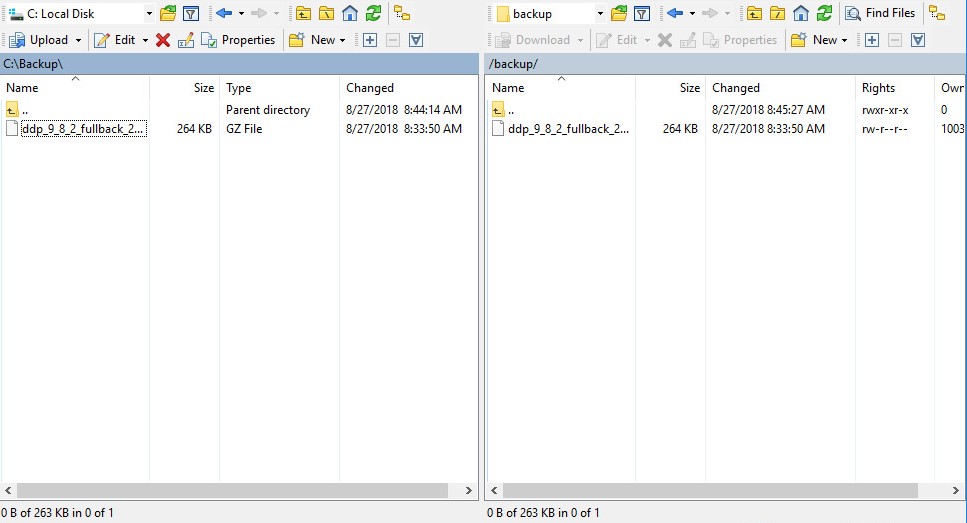
- 转至
/backup/。
- 将
dsmsv_[VERSION]_backup_[TIMESTAMP].tgz从存储设备移动到/backup/。

提醒:
[VERSION]= Dell Security Management Server Virtual 的版本[TIMESTAMP]= 执行备份的时间
- 关闭 FTP 客户端。
- 登录到 Dell Enterprise Server Virtual 管理控制台。

提醒:
- Dell Security Management Server Virtual 的默认凭据为:
- 用户名:
delluser - 密码:
delluser
- 用户名:
- 管理员可以更改产品的虚拟设备菜单中的默认密码。
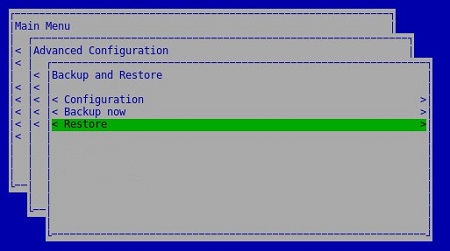
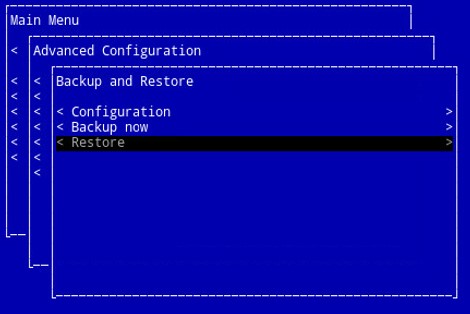
- 从主菜单中,选择 Advanced Configuration,然后按 Enter 键。
- 选择 Backup and Restore,然后按 Enter 键。
- 选择 Restore,然后按 Enter 键。
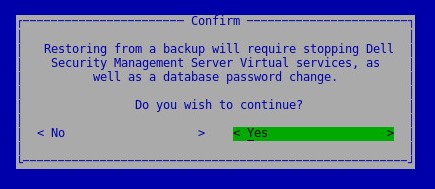
- 选择 Yes 以确认用于创建备份的实例已关闭,然后按 Enter 键。

- 选择相应的
dsmsv_[VERSION]_backup_[TIMESTAMP].tgz,然后按 Enter 键。
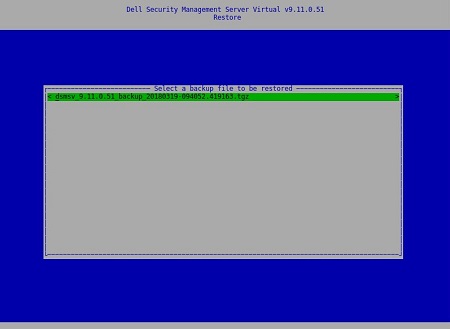
提醒:
[VERSION]= Dell Security Management Server Virtual 的版本[TIMESTAMP]= 执行备份的时间
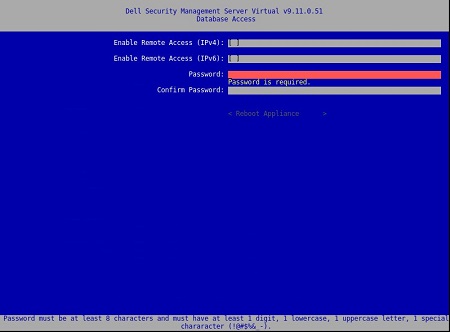
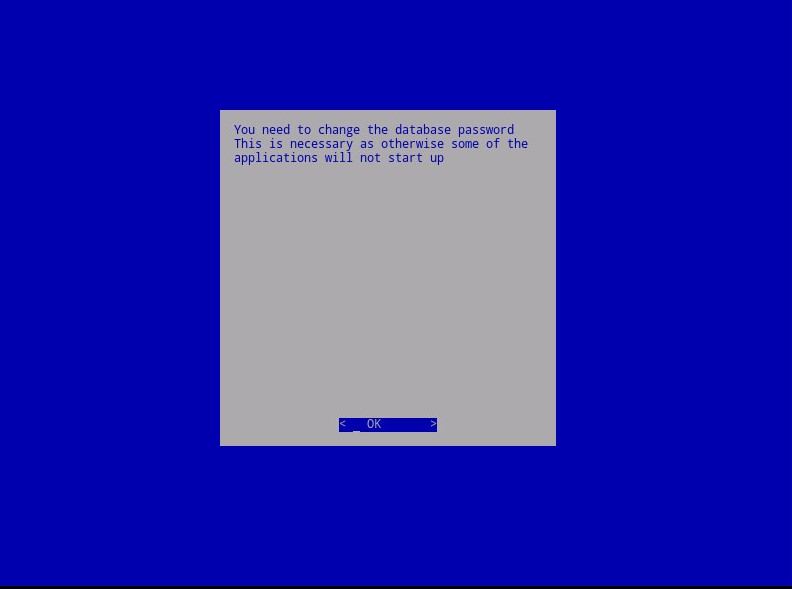
- 选择 Yes 以确认将关闭服务且必须更改数据库密码,然后按 Enter 键。
- 在出现 OK 时按 Enter 键。
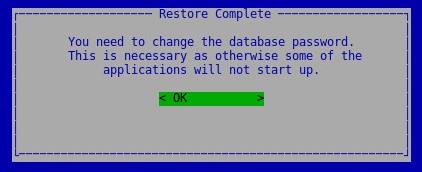
- 在“Database Access”菜单中:
- (可选)选 中 Enable Remote Access (IPv4) 或 Enable Remote Access (IPv6) from external sources (例如,pgAdmin)。
- 输入然后确认新数据库密码。
- 选择 Reboot Appliance,然后按 Enter 键。
提醒:有关详细信息,请参阅 使用 pgAdmin 虚拟访问 Postgres 数据库的 Dell Security Management Server 。
v8.2.0 至 v9.10.1
有关更多信息,请单击创建备份、卸载备份、加载备份或还原备份。
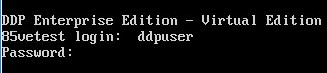
- 登录到 Dell Enterprise Server Virtual 管理控制台。

提醒:
- Dell Security Management Server Virtual 的默认凭据为:
- 用户名:
ddpuser - 密码:
ddpuser
- 用户名:
- 管理员可以更改产品的虚拟设备菜单中的默认密码。
- 从主菜单中,选择 Advanced Configuration,然后按 Enter 键。
- 选择 Backup and Restore,然后按 Enter 键。
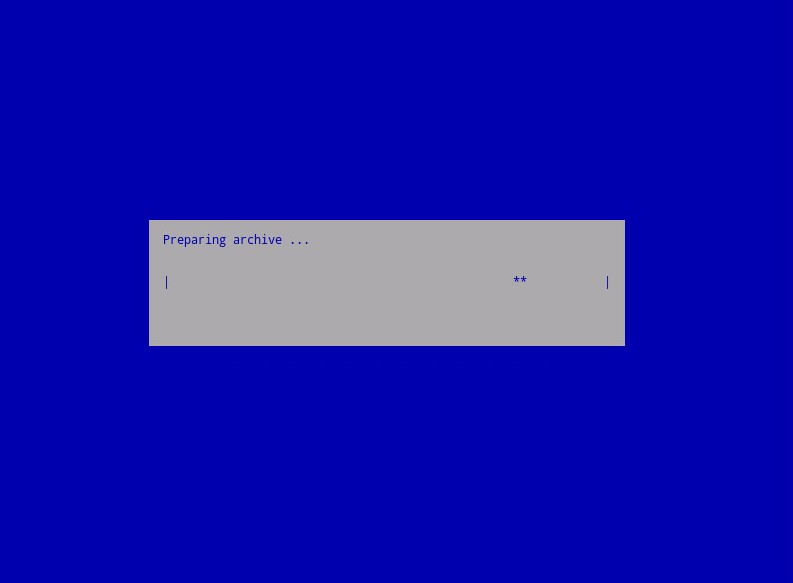
- 选择 Backup now,然后按 Enter 键。
- 备份将运行。转至步骤 6。
- 在出现 OK 时按 Enter 键,确认
ddp_[VERSION]_fullback_[TIMESTAMP].tar.gz的备份完成。
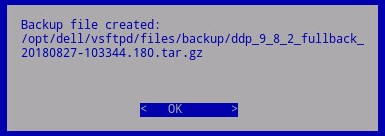
提醒:
[VERSION]= Dell Data Protection | Virtual Edition 的版本[TIMESTAMP]= 执行备份的时间
要成功卸载备份,Dell Security Management Server Virtual 需要:
- 已完成的备份
- 第三方 FTP(文件传输协议)客户端
- FTP 客户端的示例包括(但不限于):
- Filezilla
- WinSCP
- CuteFTP
- FTP 客户端的示例包括(但不限于):
- 存储设备(除 Dell Security Management Server Virtual 之外)
提醒:
- 戴尔既不认可也不支持任何列出的第三方产品。列出的客户端是客户可以使用的潜在产品的示例。有关设置、配置和管理的信息,请与产品的制造商联系。
- 您的 FTP 客户端 UI 可能与以下屏幕截图示例不同。
- 启动 FTP 客户端。
- 在 FTP 客户端中,使用 FTP 用户登录 Dell Security Management Server Virtual。

提醒:必须在 Dell Security Management Server 中创建 FTP 用户。有关详细信息,请参阅如何在 Dell Security Management Server Virtual/Dell Data Protection Virtual Edition 中创建 FTP 用户。
- 转至
/backup/。
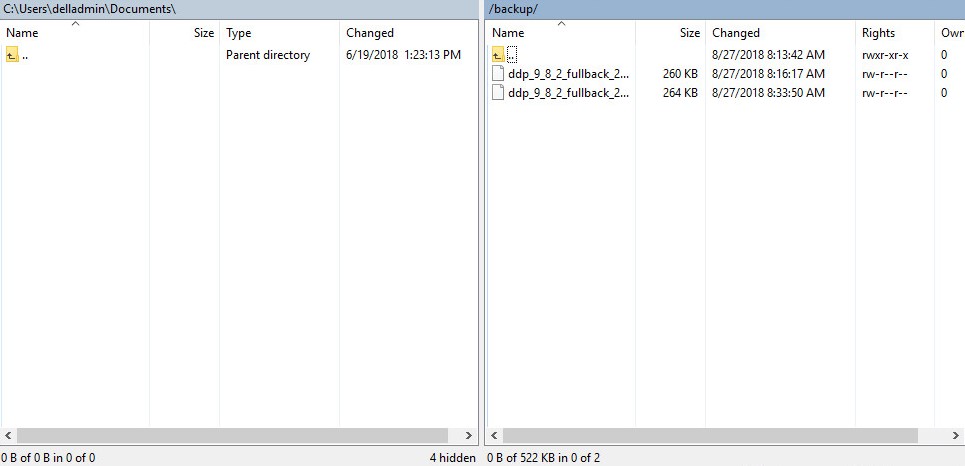
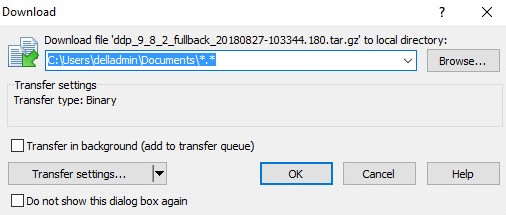
- 选择相应文件,然后将相应
ddp_[VERSION]_fullback_[TIMESTAMP].tar.gz文件传输到辅助存储设备。
提醒:
[VERSION]= Dell Data Protection | Virtual Edition 的版本[TIMESTAMP]= 执行备份的时间
- 关闭 FTP 客户端。
要成功加载备份,Dell Security Management Server Virtual 需要:
- 已卸载的 Dell Security Management Server Virtual 备份
- 第三方 FTP(文件传输协议)客户端
- FTP 客户端的示例包括(但不限于):
- Filezilla
- WinSCP
- CuteFTP
- FTP 客户端的示例包括(但不限于):
- 存储设备(除 Dell Security Management Server Virtual 之外)
提醒:
- 戴尔既不认可也不支持任何列出的第三方产品。列出的客户端是客户可以使用的潜在产品的示例。有关设置、配置和管理的信息,请与产品的制造商联系。
- 您的 FTP 客户端 UI 可能与以下屏幕截图示例不同。
- 启动 FTP 客户端。
- 在 FTP 客户端中,使用 FTP 用户登录 Dell Security Management Server Virtual。

提醒:必须在 Dell Security Management Server 中创建 FTP 用户。有关详细信息,请参阅如何在 Dell Security Management Server Virtual/Dell Data Protection Virtual Edition 中创建 FTP 用户。
- 转至
/backup/。
- 将
ddp_[VERSION]_fullback_[TIMESTAMP].tar.gz从存储设备移动到/backup/。
提醒:
[VERSION]= Dell Data Protection | Virtual Edition 的版本[TIMESTAMP]= 执行备份的时间
- 关闭 FTP 客户端。
- 登录到 Dell Enterprise Server Virtual 管理控制台。
提醒:
- Dell Security Management Server Virtual 的默认凭据为:
- 用户名:
ddpuser - 密码:
ddpuser
- 用户名:
- 管理员可以更改产品的虚拟设备菜单中的默认密码。
- 从主菜单中,选择 Advanced Configuration,然后按 Enter 键。

- 选择 Backup and Restore,然后按 Enter 键。

- 选择 Restore,然后按 Enter 键。
- 选择相应的
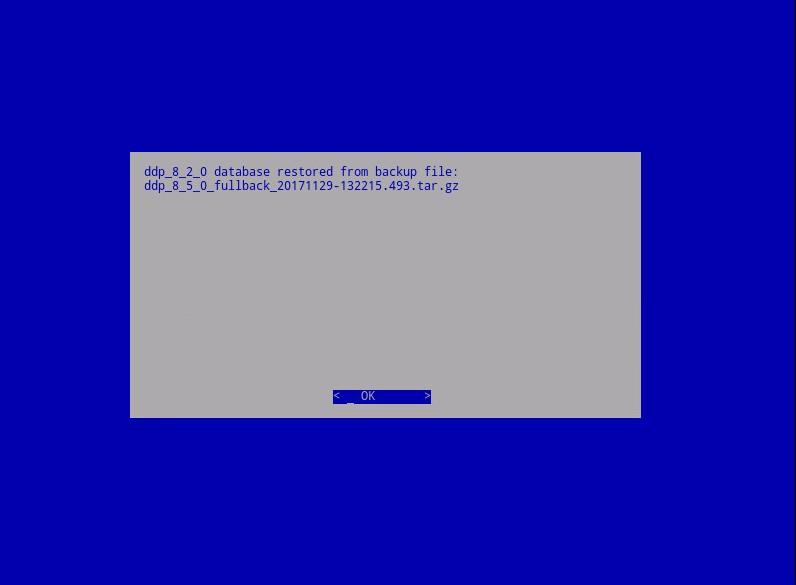
ddp_[VERSION]_fullback_[TIMESTAMP].tar.gz,然后按 Enter 键。
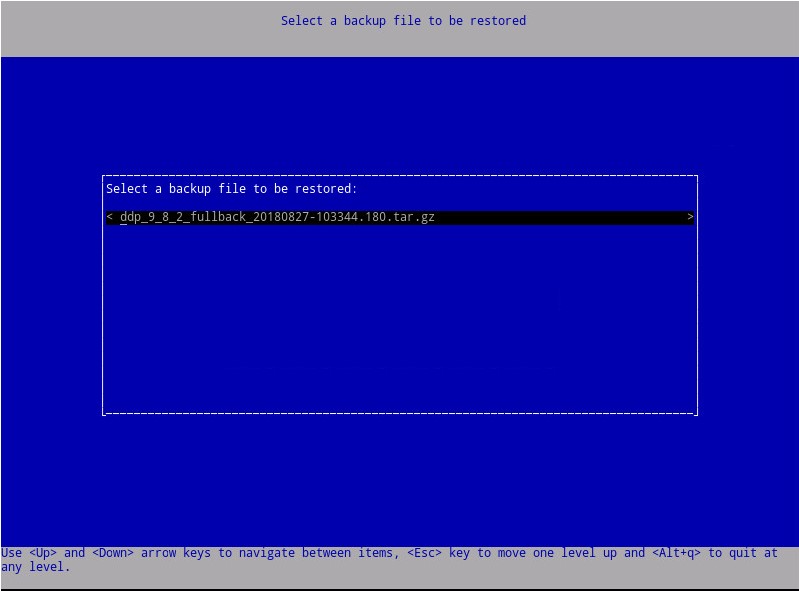
提醒:
[VERSION]= Dell Data Protection | Virtual Edition 的版本[TIMESTAMP]= 执行备份的时间
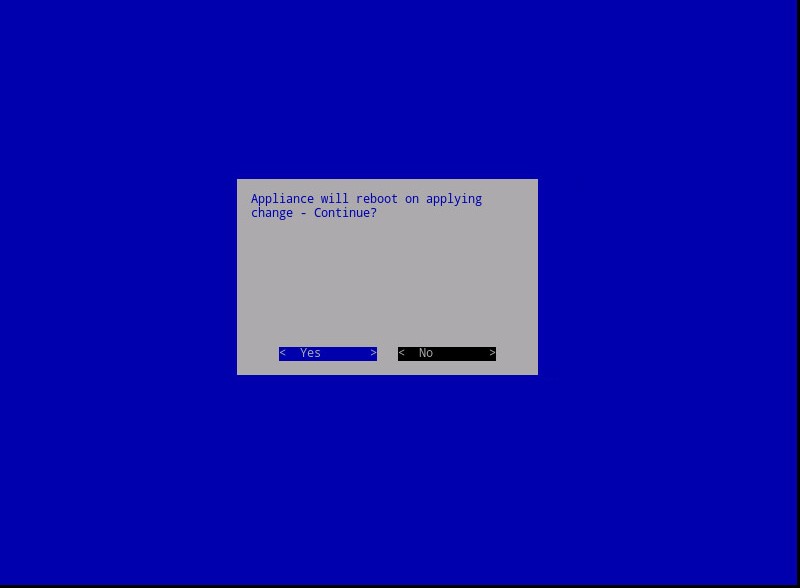
- 选择 Yes 以在还原完成时重新启动虚拟设备,然后按 Enter 键。
- 在出现 OK 时按 Enter 键。
- 备份还原。转至步骤 9。
- 还原时,在出现 OK 时按 Enter 键。
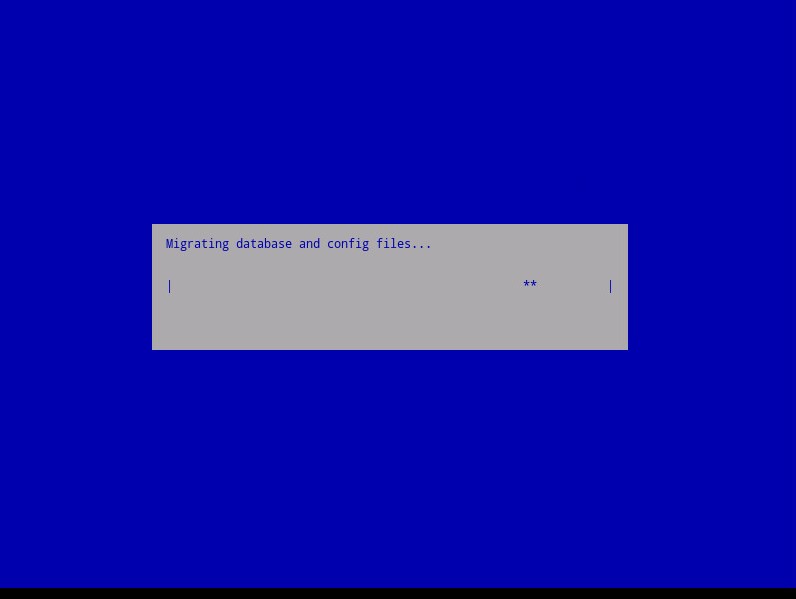
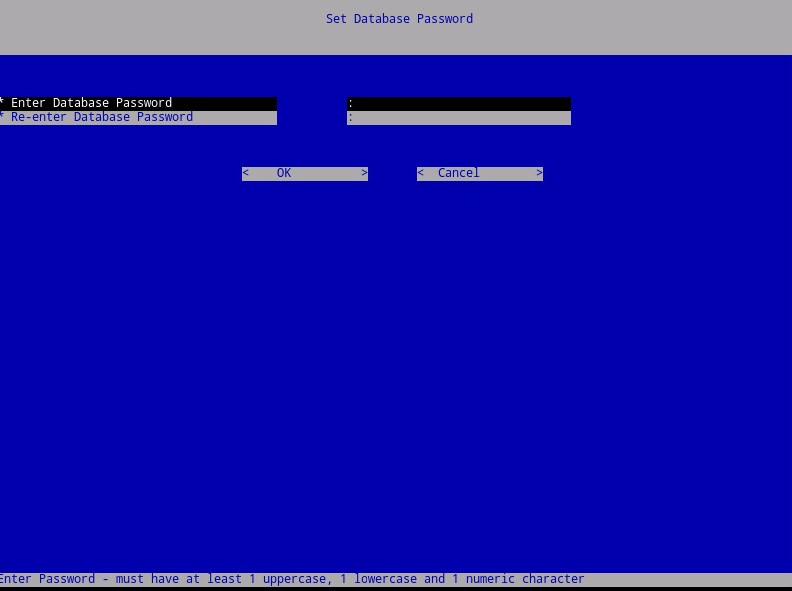
- 输入并重新输入新数据库密码。完成后,在出现 OK 时按 Enter 键,以重新启动虚拟设备。
要联系支持部门,请参阅 Dell Data Security 国际支持电话号码。
转至 TechDirect,在线生成技术支持请求。
要获得更多见解和资源,请加入戴尔安全社区论坛。
Дополнительная информация
Видео
Свойства статьи
Затронутый продукт
Dell Encryption
Дата последней публикации
26 Oct 2023
Версия
14
Тип статьи
Solution