Added Windows Server 2019 Hyper-V roles
摘要: This section describes how to add roles for Hyper-V.
本文适用于
本文不适用于
本文并非针对某种特定的产品。
本文并非包含所有产品版本。
说明
-
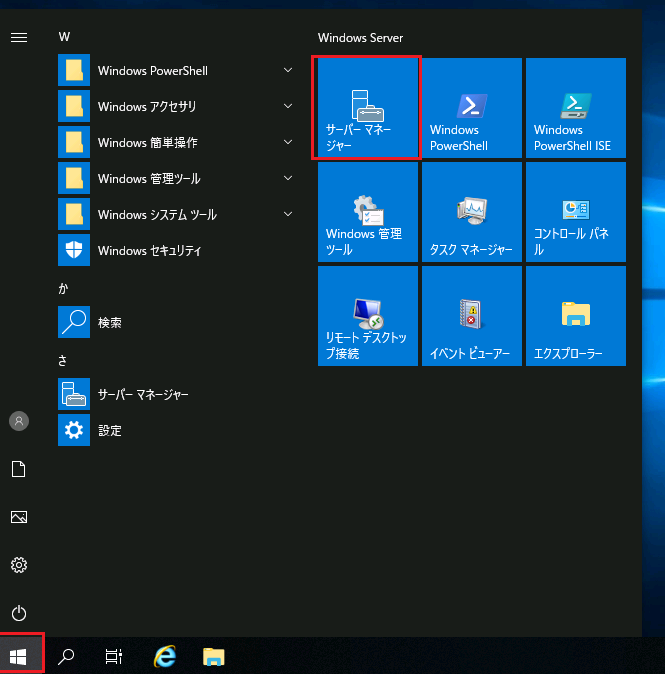
Log on with an account with administrative rights and start Server Manager.
-
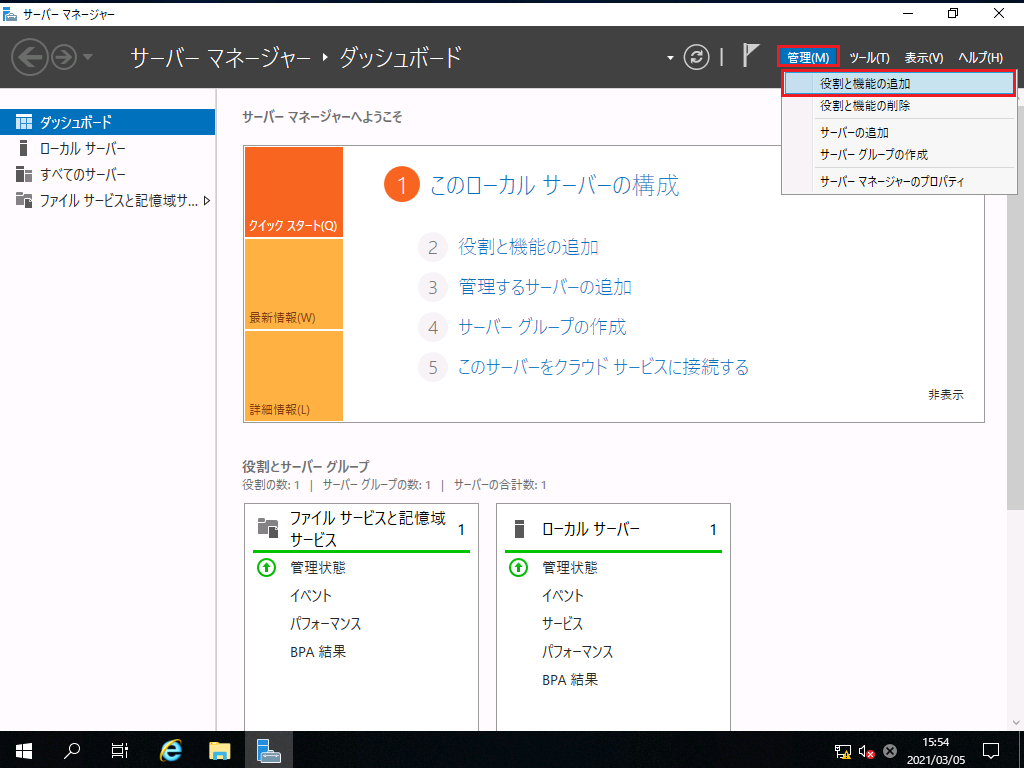
Click Add Roles and Features from the Manage menu at the top right of the screen.
-
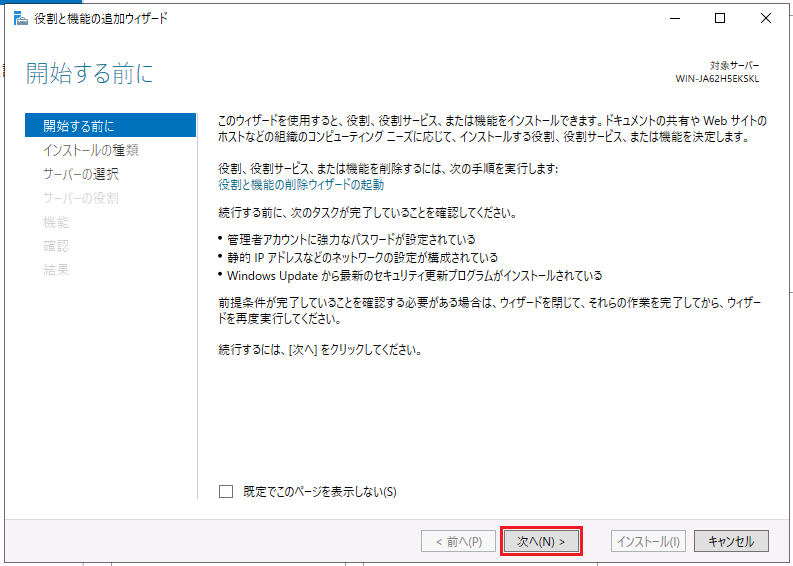
On the Before You Start page, verify that the prerequisites for the roles and features you want to install are in place, and then click Next.
-
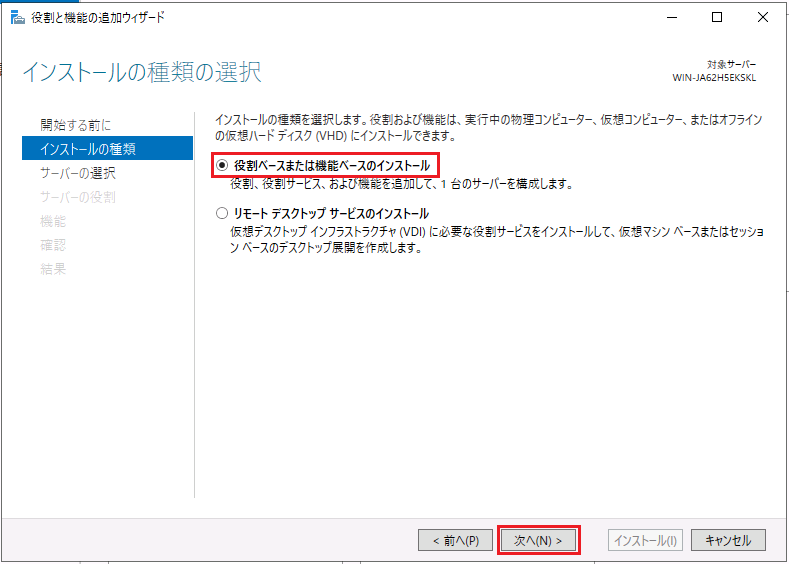
On the Select Installation Type page, select Role-based or Feature-based Installation, and then click Next.
-
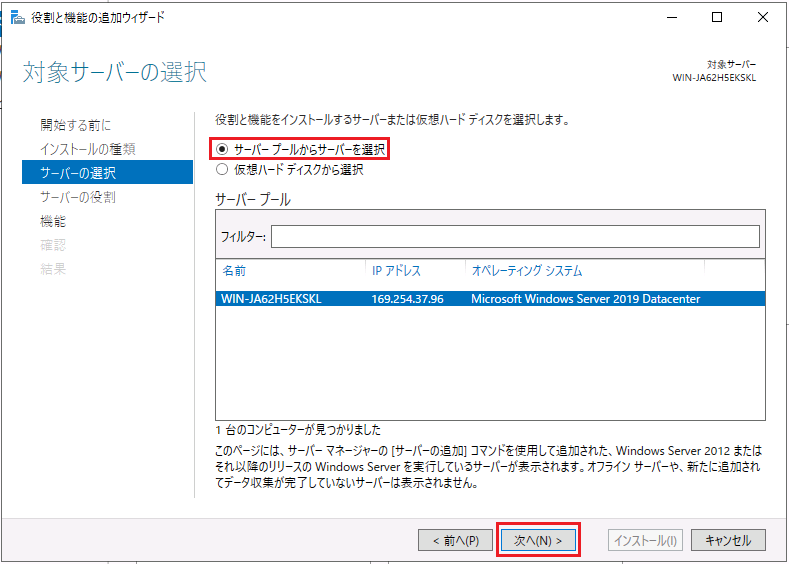
On the Select Target Server page, select Select Server from Server Pool, select the server where you want to install Hyper-V in the Server Pool field, and then click Next.
-
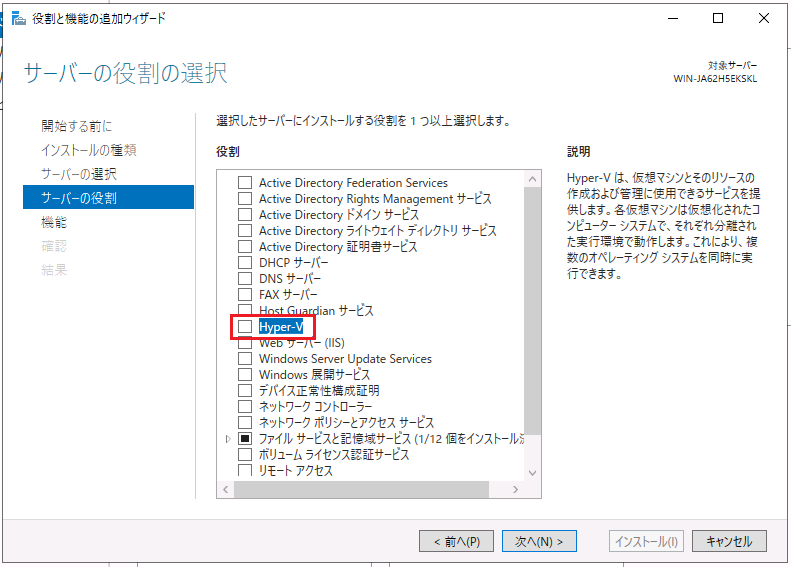
On the Select Server Role page, select Hyper-V.
-
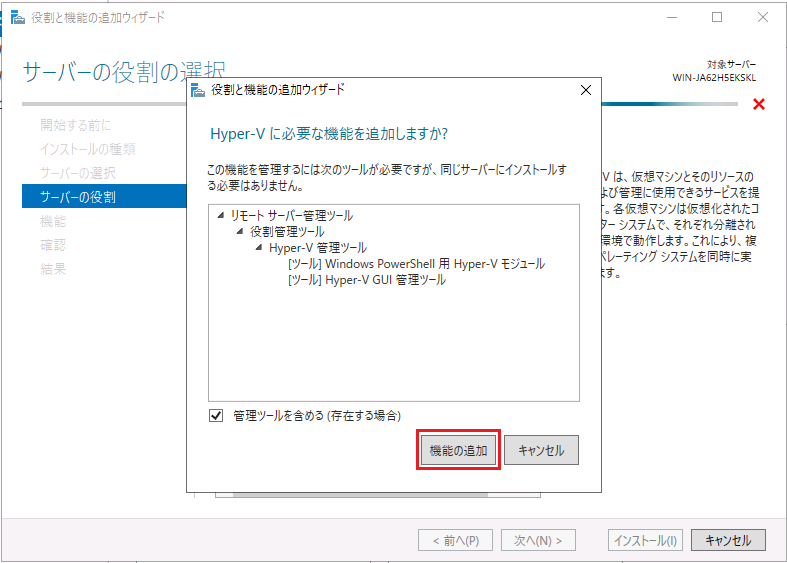
On the Add Required Features page, click Add Features.
-
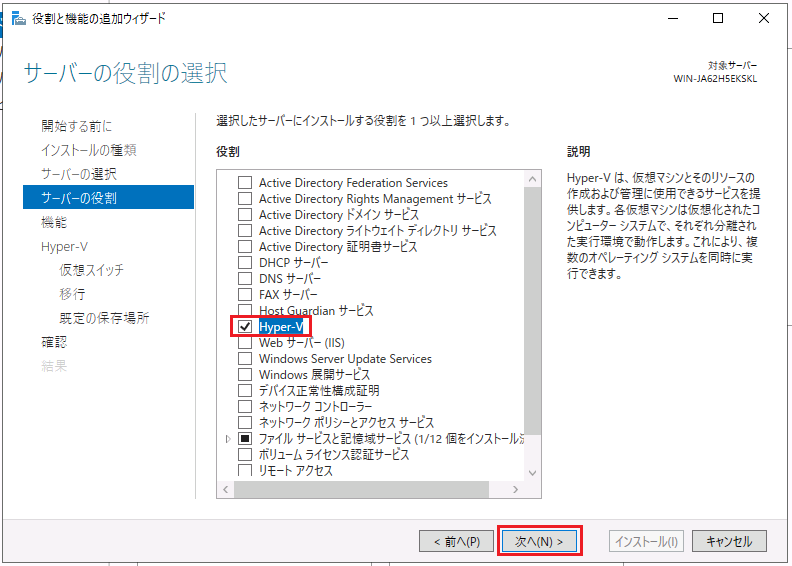
When you return to the Select Server Roles page, click Next.
-
On the Select Features page, click Next as is.
-
On the Hyper-V page, click Next as is.
-
On the Create Virtual Switch page, click Next as is.
*Since virtual switches can be created in hyper-V manager after HYPER-V installation, hyper-V is installed without creating a virtual switch.
-
On the Migrate Virtual Machines page, select the appropriate option if necessary.
Here, select nothing and click Next as it is.
*After hyper-V installation, you can change the settings in hyper-V manager.
-
On the Default Location page, set the appropriate location as needed.
Here, click [Next] without setting anything.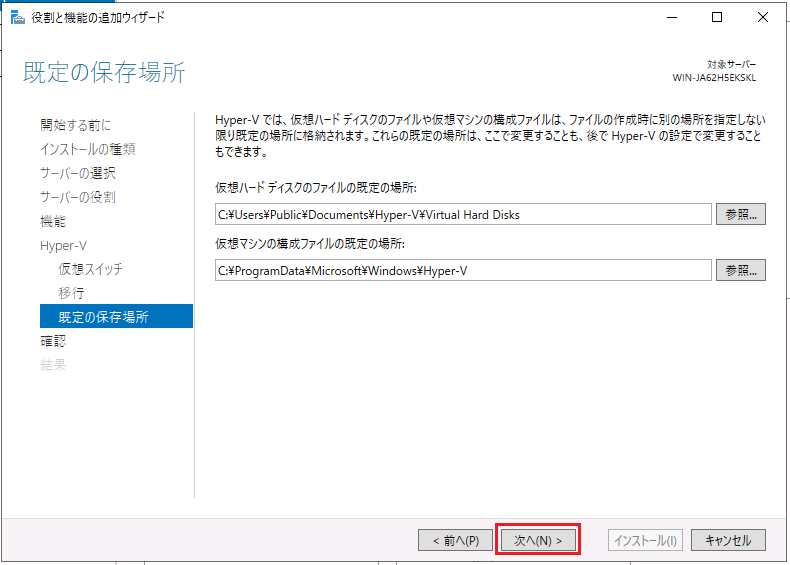
*After hyper-V installation, you can change the settings in hyper-V manager.
-
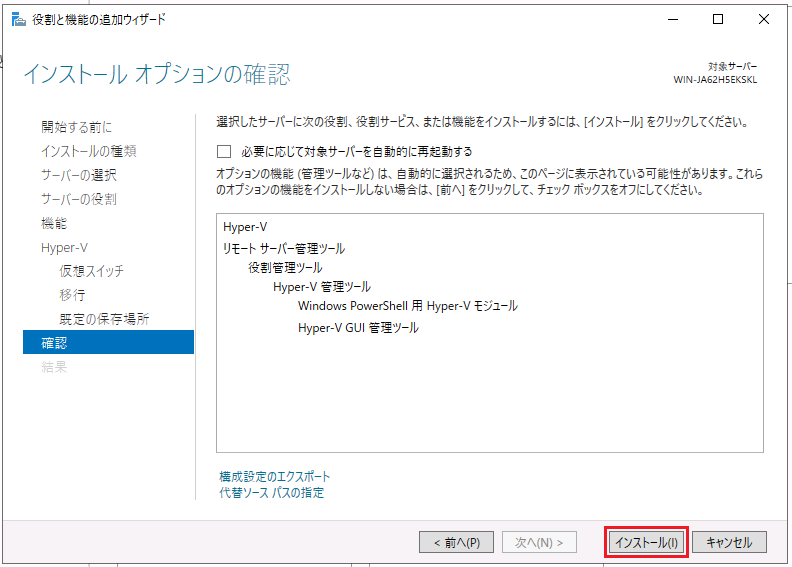
On the [Confirm installation options] page, click [Install].
-
When you see "You need to restart the target server and complete the installation", click Close to restart the server.
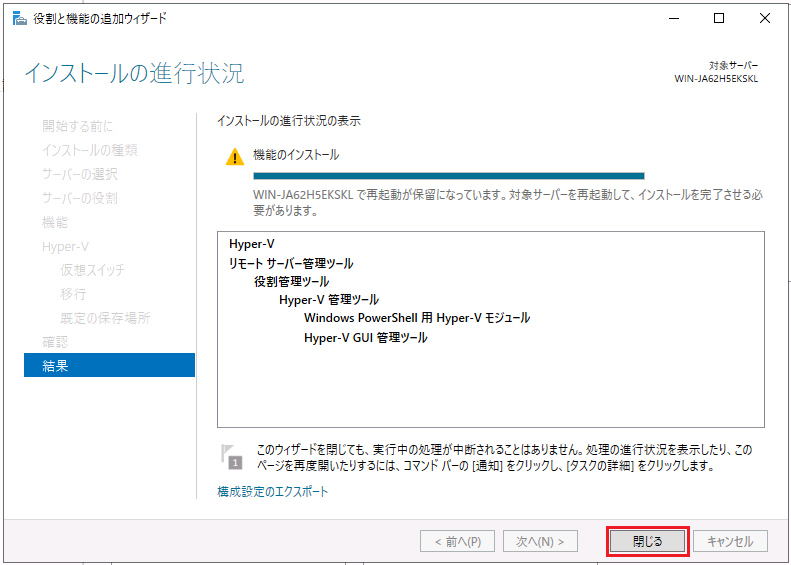
That's it.
受影响的产品
PowerEdge, Microsoft Windows Server 2019文章属性
文章编号: 000184405
文章类型: How To
上次修改时间: 26 3月 2025
版本: 5
从其他戴尔用户那里查找问题的答案
支持服务
检查您的设备是否在支持服务涵盖的范围内。