Avamar:如何在有多個 AD 伺服器時設定 LDAP
摘要: 本文提供在具有多個 Active Directory 伺服器的 Avamar 環境中配置輕量型目錄存取通訊協定 (LDAP) 設定的步驟,其中一些伺服器可能受到防火牆限制。
本文章適用於
本文章不適用於
本文無關於任何特定產品。
本文未識別所有產品版本。
說明
以下是在具有多個 Active Directory (AD) 伺服器的 Avamar 環境中設定 LDAP 所需的步驟,其中一些伺服器可能受到防火牆限制。
當 ldap.properties 或 krb5.conf 檔案會填入具有標準 LDAP 和 Kerberos (KRB) 連接埠 88、389 和 464 的 AD 伺服器,環境中的防火牆會封鎖這些連接埠。
這需要選擇性地搜尋環境中未封鎖這些連接埠的 AD 伺服器。
下列步驟說明如何在客戶環境中搜尋 AD 伺服器,並識別已開啟必要連接埠的伺服器。可使用 ldap.properties 和 krb5.conf 必須使用適當的 AD 伺服器資訊手動更新檔。
- 登入 Avamar 工具節點並執行
nslookup客戶網域上的命令:
nslookup <customerdomain.com> |grep Address
範例輸出
Address: 10.10.10.240#53
Address: 10.10.10.240
Address: 10.10.10.242
Address: 10.10.10.244
Address: 10.10.10.246
Address: 10.10.10.248
Address: 1234:5:678:aaaa:fff:cccc:dddd:eeee
- 重新執行命令,並將 IPv4 位址的輸出傳送到檔案:
nslookup |grep Address | cut -d " " -f2 |grep -v ":" > /tmp/ldaplookup
- 確認
/tmp/ldaplookup只包含 IP 位址:
cat /tmp/ldaplookup
範例輸出
10.10.10.240
10.10.10.242
10.10.10.244
10.10.10.246
10.10.10.248
- 執行
for i使用/tmp/ldaplookup檔案 (建立於上述),直到連線至 LDAP 連接埠 389:
(視可用內容而定,使用 telnet 或 curl)
for i in $(cat /tmp/ldaplookup) ; do timeout 30 telnet $i 389;done
或
for i in $(cat /tmp/ldaplookup); do curl -kv --max-time 30 $i:389;done
通常,如果可以到達埠 389,也可以訪問其他 KRB 埠。
建立連接后, CTRL-C 多次退出迴圈。或者繼續清單以確定哪個是LDAP的最佳域控制器使用。
(寫下可以連線的 AD 伺服器)
範例輸出 - telnet:
Trying 10.10.10.240...
Trying 10.10.10.242...
Trying 10.10.10.244...
Connected to 10.10.10.244
Escape character is '^]'
Trying 10.10.10.246...
Trying 10.10.10.248...
或
Trying 10.10.10.240...
telnet: connect to address 10.10.10.240: Connection refused
Trying 10.10.10.242...
telnet: connect to address 10.10.10.242: Connection refused
Trying 10.10.10.244...
Connected to 10.10.10.244
Escape character is '^]'
Trying 10.10.10.246...
telnet: connect to address 10.10.10.246: Connection refused
Trying 10.10.10.248...
telnet: connect to address 10.10.10.248: Connection refused
範例輸出 - curl:
* Rebuilt URL to: 10.10.10.240:389/
*   Trying 10.10.10.240...
* TCP_NODELAY set
* Connection timed out after 30001 milliseconds
* stopped the pause stream!
* Closing connection 0
curl: (28) Connection timed out after 30001 milliseconds
* Rebuilt URL to: 10.10.10.242:389/
*   Trying 10.10.10.242...
* TCP_NODELAY set
* connect to 10.10.10.242 port 389 failed: Connection refused
* Failed to connect to 10.10.10.242 port 389: Connection refused
* Closing connection 0
curl: (7) Failed to connect to 10.10.10.242 port 389: Connection refused
* Rebuilt URL to: 10.10.10.244:389/
*   Trying 10.10.10.244...
* TCP_NODELAY set
Connected to 10.10.10.244 (10.10.10.244) port 389 (#0)
> GET / HTTP/1.1
> Host: 10.10.10.244:389
> User-Agent: curl/7.60.0
> Accept: */*
* Rebuilt URL to: 10.10.10.246:389/
*   Trying 10.10.10.246...
* TCP_NODELAY set
* connect to 10.10.10.246 port 389 failed: Connection refused
* Failed to connect to 10.10.10.246 port 389: Connection refused
* Closing connection 0
curl: (7) Failed to connect to 10.10.10.246 port 389: Connection refused
- 使用
nslookup命令,以確定 AD 伺服器的完整網域名稱 (FQDN):
nslookup
範例命令與輸出
nslookup 10.10.10.244
Server:    1.2.3.4
Address: 1.2.3.4:53

Non-authorative answer:
244.10.10.10.in-addr.apra    name=my-ad-server.customername.com
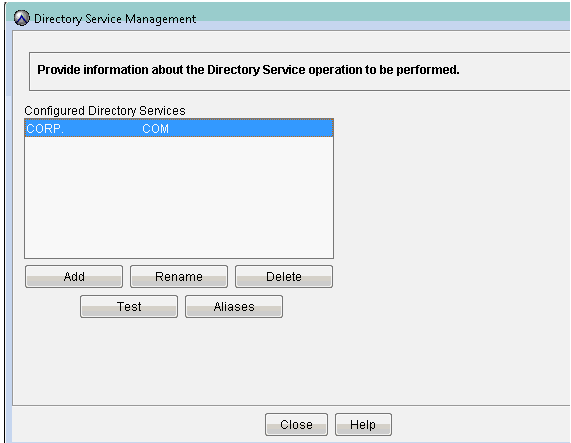
- 使用管理主控台伺服器 (MCS) UI,請執行步驟 7-15:
- 登入 Avamar MCS UI。
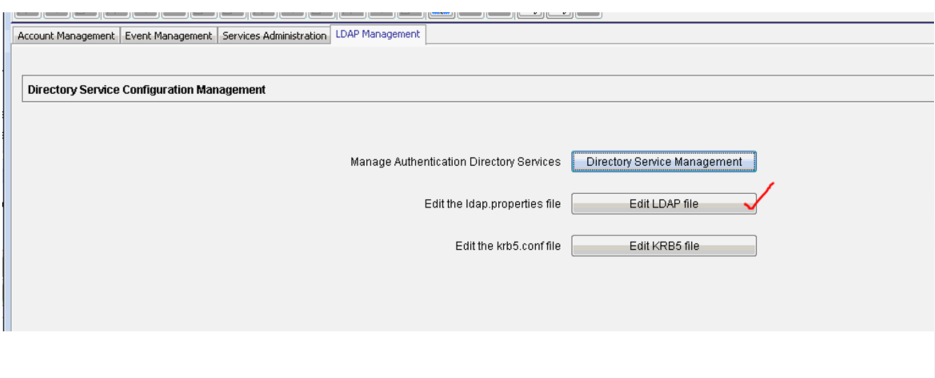
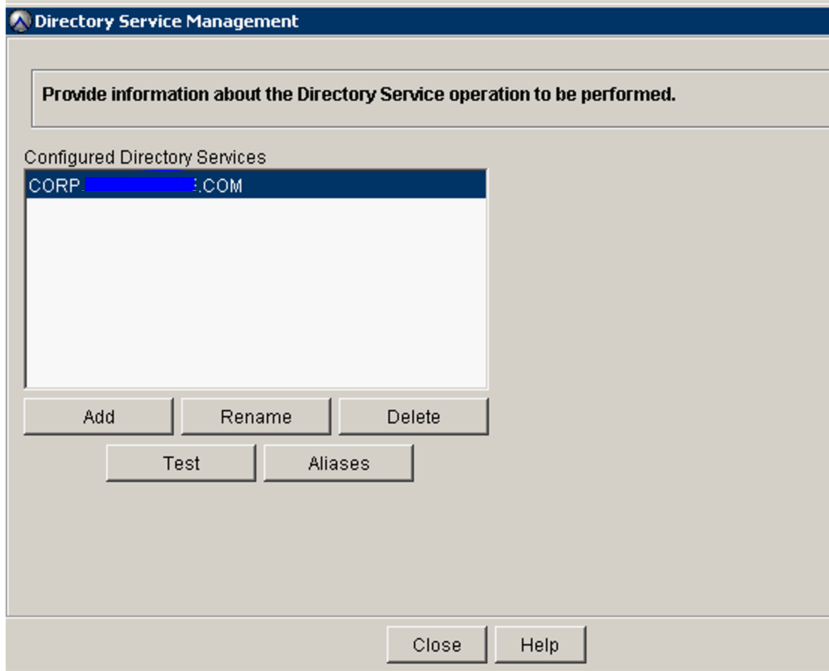
- 前往 LDAP 管理 (系統管理、LDAP 管理)
- 確認 目錄服務管理畫面 已輸入客戶網域資訊。
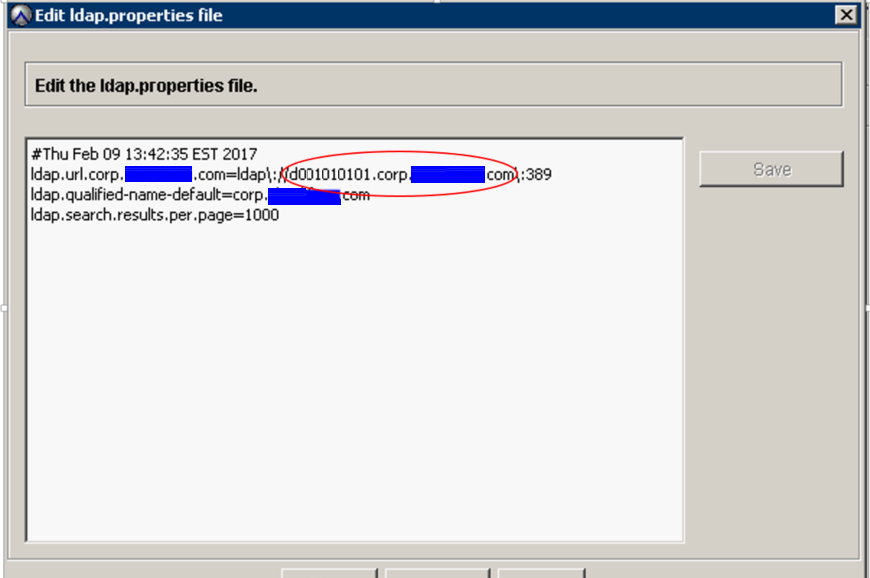
- 按一下 編輯 LDAP 檔案:
- 裝回
ldap.url.corp.userdomain.com使用上述搜索步驟中的新主機名。
範例:
ldap.url.corp.xxxxx.com=ldap\://d001010101.corp.xxx.com\:389
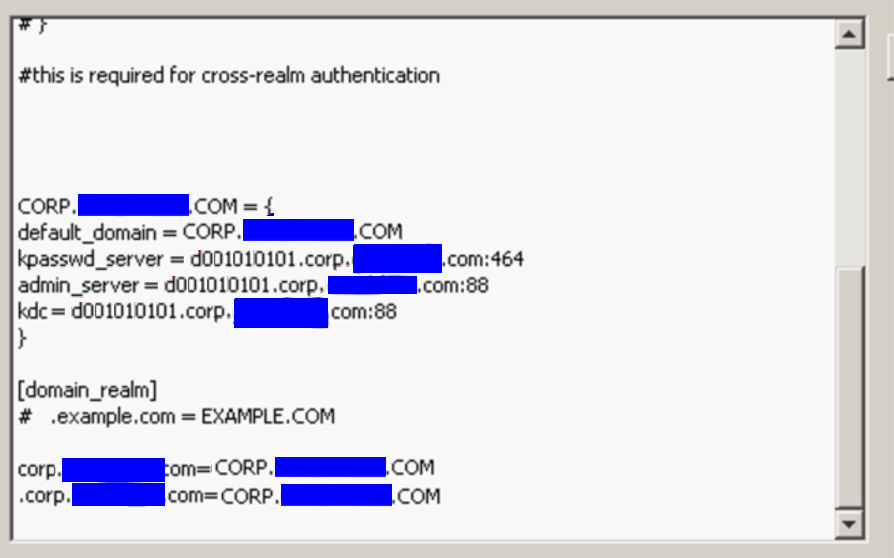
- 在
krb5.conf檔案中所定義。要更改的資訊位於底部附近。
- 前往「目錄服務管理」畫面,使用有效的客戶認證執行測試。
- 新增 LDAP 對應 (系統管理、帳戶管理、新 LDAP 對應),並新增必要的 LDAP 群組。下面的範例是
Avamar-admins隊。
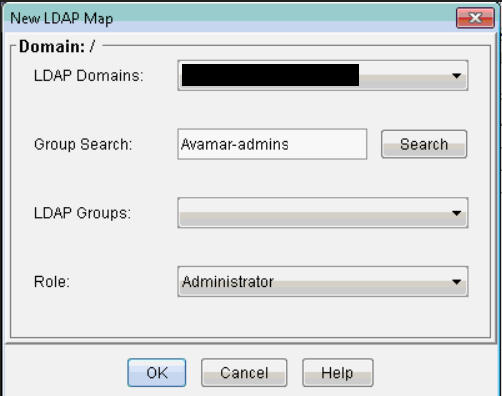
- 成功新增 LDAP (AD) 群組後,請使用屬於該 LDAP 群組成員的 AD 帳戶登入 Avamar UI,以進行測試。
受影響的產品
Avamar, Avamar Server文章屬性
文章編號: 000014466
文章類型: How To
上次修改時間: 21 10月 2025
版本: 13
向其他 Dell 使用者尋求您問題的答案
支援服務
檢查您的裝置是否在支援服務的涵蓋範圍內。