Article Number: 000122457
How to Import a Foreign Configuration in the RAID Controller Using the System Setup Menu
Summary: This article provides information about how to import a foreign configuration RAID array on the system setup (F2) menu.
Article Content
Instructions
When a RAID controller detects that the RAID configuration is inconsistent or not synchronized with the rest of the array, it is marked with a foreign configuration. This could often happen when the drive is moved to another machine, but it could also happen if the drive went offline. The drive could go offline when a failure occurs, while a failure is happening right now, or when an unexpected situation occurs in the firmware.
Note: Since the PowerEdge R/T x30, x40 series system is mainly running in the UEFI mode, RAID BIOS may not be displayed. In this case, reference the steps in this article.
Warning: The steps in this article may cause a loss of data due to the situation. Since the status must be confirmed before running the steps, Dell Technologies recommends contacting Dell support and following their instructions.
An administrator must first Check the Virtual and Physical Disk Status, then Import Foreign Configurations. Click the appropriate process for more information.
Check the Virtual and Physical Disk Status
- Turn on the system.
- Press the F2 key when prompted.
- Select Device Settings on the System Setup Main Menu.
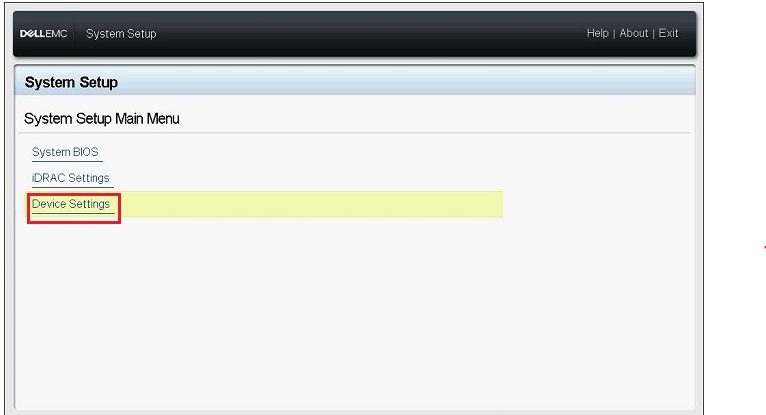
Figure 1: System Setup Device Settings
- Click the appropriate RAID controller on the Device Settings menu.
Note: If the system is a PowerEdge R/T x40 series, select Main Menu on the Dashboard View menu that is displayed after selecting the RAID controller.
- Click Virtual Disk Management on the Main Menu.
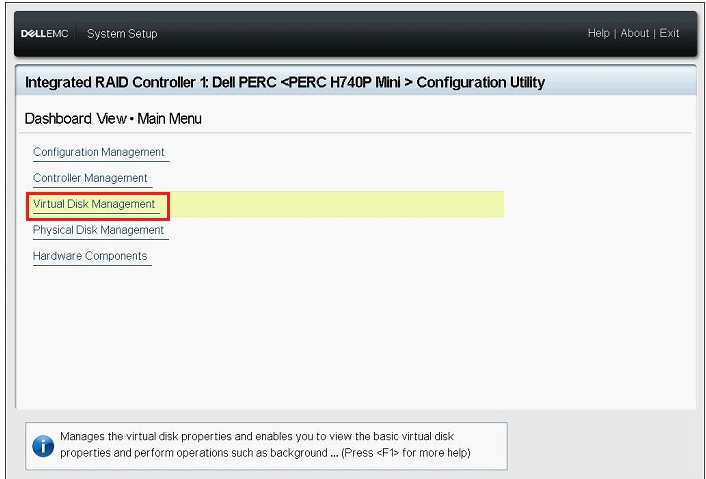
Figure 2: Virtual Disk Management
- Check the status of the appropriate virtual disk that is displayed and then click the virtual disk link.
Note: If the virtual disk information is not displayed, click Back to go back to the previous screen and go to Step 8 to check the physical disk.
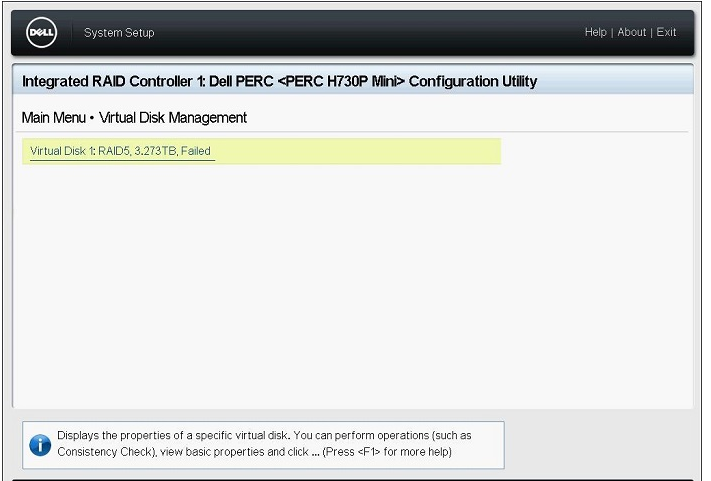
Figure 3: Selecting the virtual disk
- Check the information about the RAID Level, Status and Size, and then click View Associated Physical Disks.
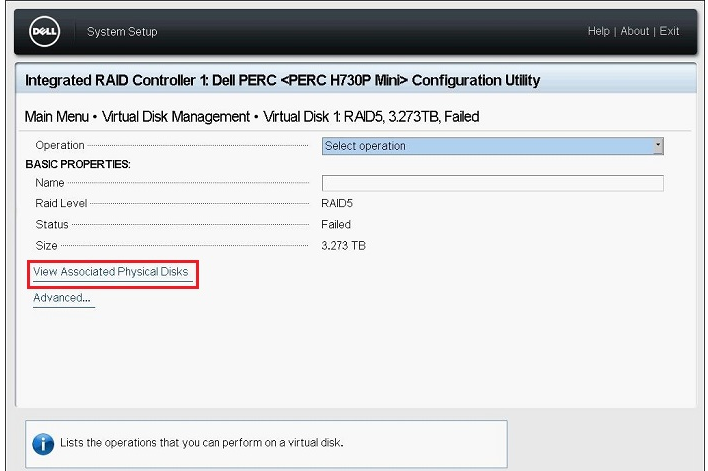
Figure 4: View Associated Physical Disks
- Check physical disks that are part of the virtual disk from the ASSOCIATED PHYSICAL DISKS field and then click Back until the screen returns to the Main Menu.
- Click Physical Disk Management from the Main Menu.
- Check the status of all displayed physical disks and click each disk to check the details.
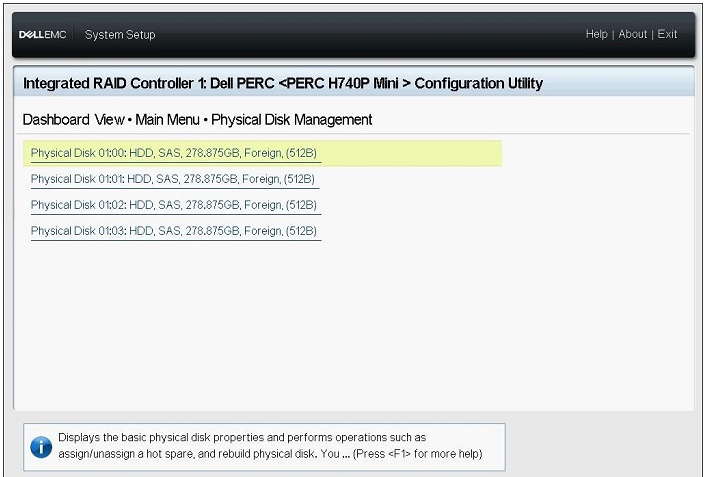
Figure 5: Physical disk details
- Check the following items on the disk details screen:
- PowerEdge R/T x30/x35 series: Physical Disk ID, Status, Size
- PowerEdge R/T x40/x45 series: Device ID, Backplane ID, Slot Number, Status, Size
- Check the status of all remaining physical disks in the same way and then return to the Main Menu.
Import Foreign Configurations
- Click Configuration Management on the Main Menu screen.
- Click Manage Foreign Configuration.
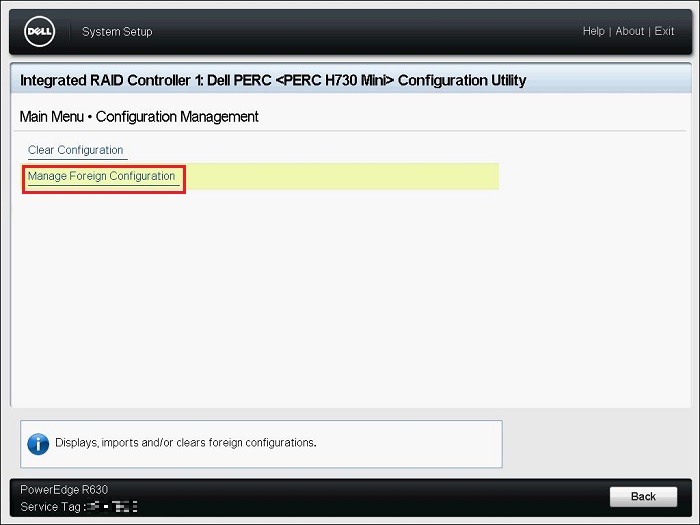
Figure 6: Manage Foreign Configuration
- Click Preview Foreign Configuration.
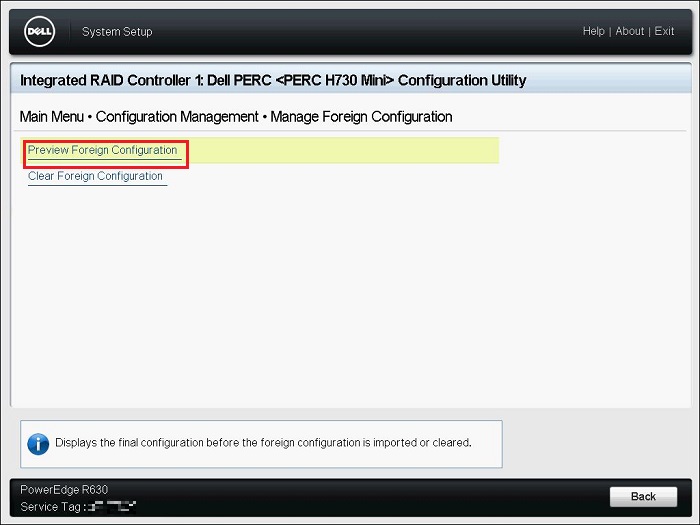
Figure 7: Preview Foreign Configuration
- Check if the status of the virtual disk displayed on the "VIRTUAL DISKS INCLUDED AFTER FOREIGN CONFIGURATION IMPORT" is Ready or Degraded and then click Import Foreign Configuration.
- PHYSICAL DISKS INCLUDED AFTER FOREIGN CONFIGURATION IMPORT: Displays only disks in Foreign configuration
- VIRTUAL DISKS INCLUDED AFTER FOREIGN CONFIGURATION IMPORT: Displays virtual disk after the import operation
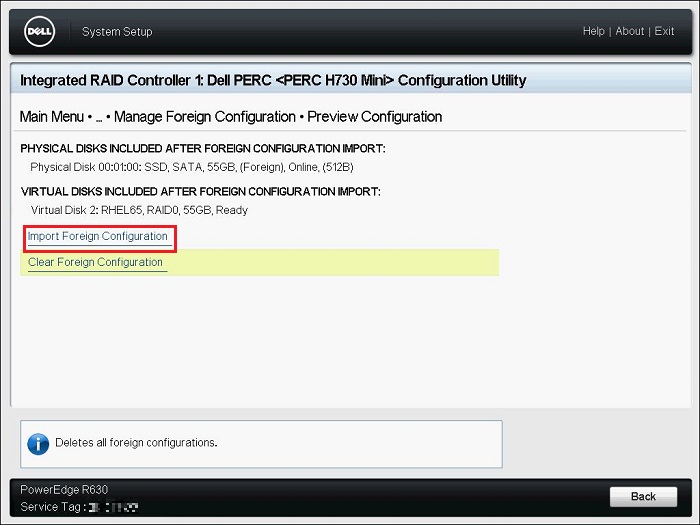
Figure 8: Manage Foreign Configuration
- Read the displayed warning, select Confirm, and then click Yes.
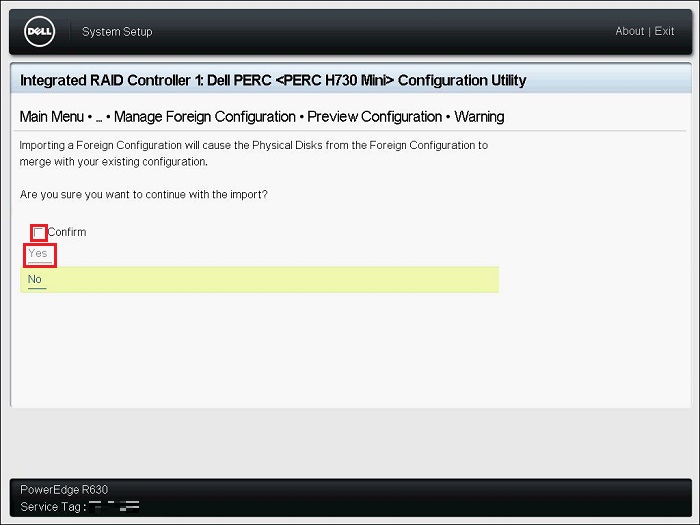
Figure 9: Confirming the warning
- Once the message "The operation has been performed successfully" is displayed, click OK.
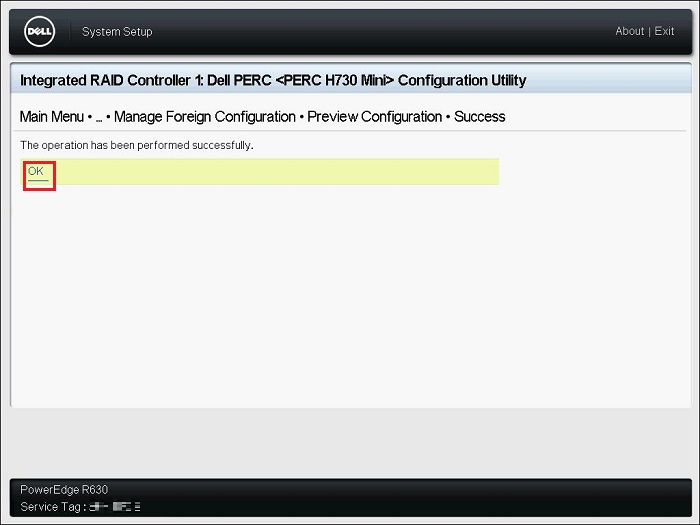
Figure 10: Foreign import success
- Click Back on the Configuration Management screen.
Note: The "Manage Foreign Configuration" menu is still displayed.
- Click Virtual Disk Management on the Main Menu screen, Check that the status of the virtual disk is Ready or Degraded.
If the status is Ready, go to Step 9.
If the status is anything other than Ready, follow the steps below to check the status.- Click the appropriate virtual disk and check the Status.
- Click View Associated Physical Disk and check the physical disks that are part of the virtual disk.
Contact Dell technical support if the disk status is anything other than Online status.
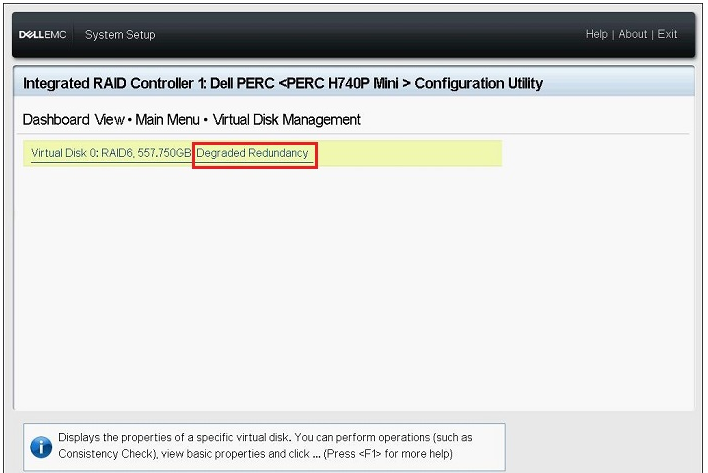
Figure 11: Example Degraded Redundancy Status
- Click Back, Finish, Finish, and then Finish. Once the warning, "Are you sure you want to exit?" is displayed, click Yes.
- The operating system boots.
Note: Right after the import Foreign configuration operation, a recovered virtual disk may not be recognized correctly and the operating system may not launch. If this occurs, press CTRL+ALT+DEL to restart the system, and then check if the system starts up correctly.
Article Properties
Affected Product
PowerEdge RAID Controller H345, PowerEdge RAID Controller H350 Adapter SAS, PowerEdge RAID Controller H355 Front SAS, PowerEdge RAID Controller H355 Adapter SAS, PowerEdge RAID Controller H310, PowerEdge RAID Controller H330
, PowerEdge RAID Controller H700, PowerEdge RAID Controller H710, PowerEdge RAID Controller H710P, PowerEdge RAID Controller H730
...
Product
PowerEdge RAID Controller H730P MX, PowerEdge RAID Controller H745, PowerEdge RAID Controller H745P MX, PowerEdge RAID Controller H750 Adapter SAS, PowerEdge RAID Controller H755 Adapter, PowerEdge RAID Controller H755 MX Adapter
, PowerEdge RAID Controller H755N Front NVMe, PowerEdge RAID Controller H755 Front SAS, PowerEdge RAID Controller H965i Adapter, PowerEdge RAID Controller H965i Front, PowerEdge RAID Controller H965i MX, PowerEdge RAID Controller H730P, PowerEdge RAID Controller H740P, PowerEdge RAID Controller H800, PowerEdge RAID Controller H810, PowerEdge RAID Controller H830, PowerEdge RAID Controller H840, PowerEdge RAID Controller H965e Adapter
...
Last Published Date
28 Sep 2023
Version
7
Article Type
How To