Microphone Not Working: Laptop, Headset, and Wireless Mic Issues
Common Symptoms of Microphone Issues
- Mic Not Working: When you speak into the microphone, it is not picking up any sound. This means others can’t hear you at all, even though you are talking.
- Distorted Sound: Your voice sounds muffled or has a static background noise.
- Low Volume: Your voice sounds very quiet to others, even if you are speaking loudly. The mic is not loud enough even at full settings.
- Lag or Delay: Audio from the microphone lags, creating an uncomfortable delay in communication.
- Intermittent Sound: Your voice cuts in and out, meaning sometimes people can hear you and sometimes they can’t.
- Echo: You hear your own voice repeating back to you after you speak.
- Feedback: There’s a loud, high-pitched noise when you speak.
Causes of Microphone Not Working
There are several causes why your microphone might not be working. Here are some common reasons:
- Loose connections or broken cables.
- Mute settings enabled accidentally.
- Incorrect permissions preventing microphone access.
- Outdated drivers or software conflicts.
- Hardware issues with the microphone or port.
Now, let’s learn how to troubleshoot on both Windows and Ubuntu.
Checking Basic Connections and Settings
Before changing settings, let’s do some basic checks to fix simple problems.
Check Physical Connections
Make sure your microphone is connected to your computer. For USB mics, try different USB ports. For Bluetooth mics or headsets, make sure to pair them using Bluetooth. For laptops, turn on the mic in the BIOS or UEFI settings.
Inspect Mute and Volume Controls
Check if your microphone is muted. This may happen from within the system or even on the mic itself if it has a mute button. Adjust the volume to an audible level to make sure it’s not too low.
- In Windows, go to Start > Settings > System > Sound. Under Input settings, make sure the mic isn’t muted and set the mic volume.
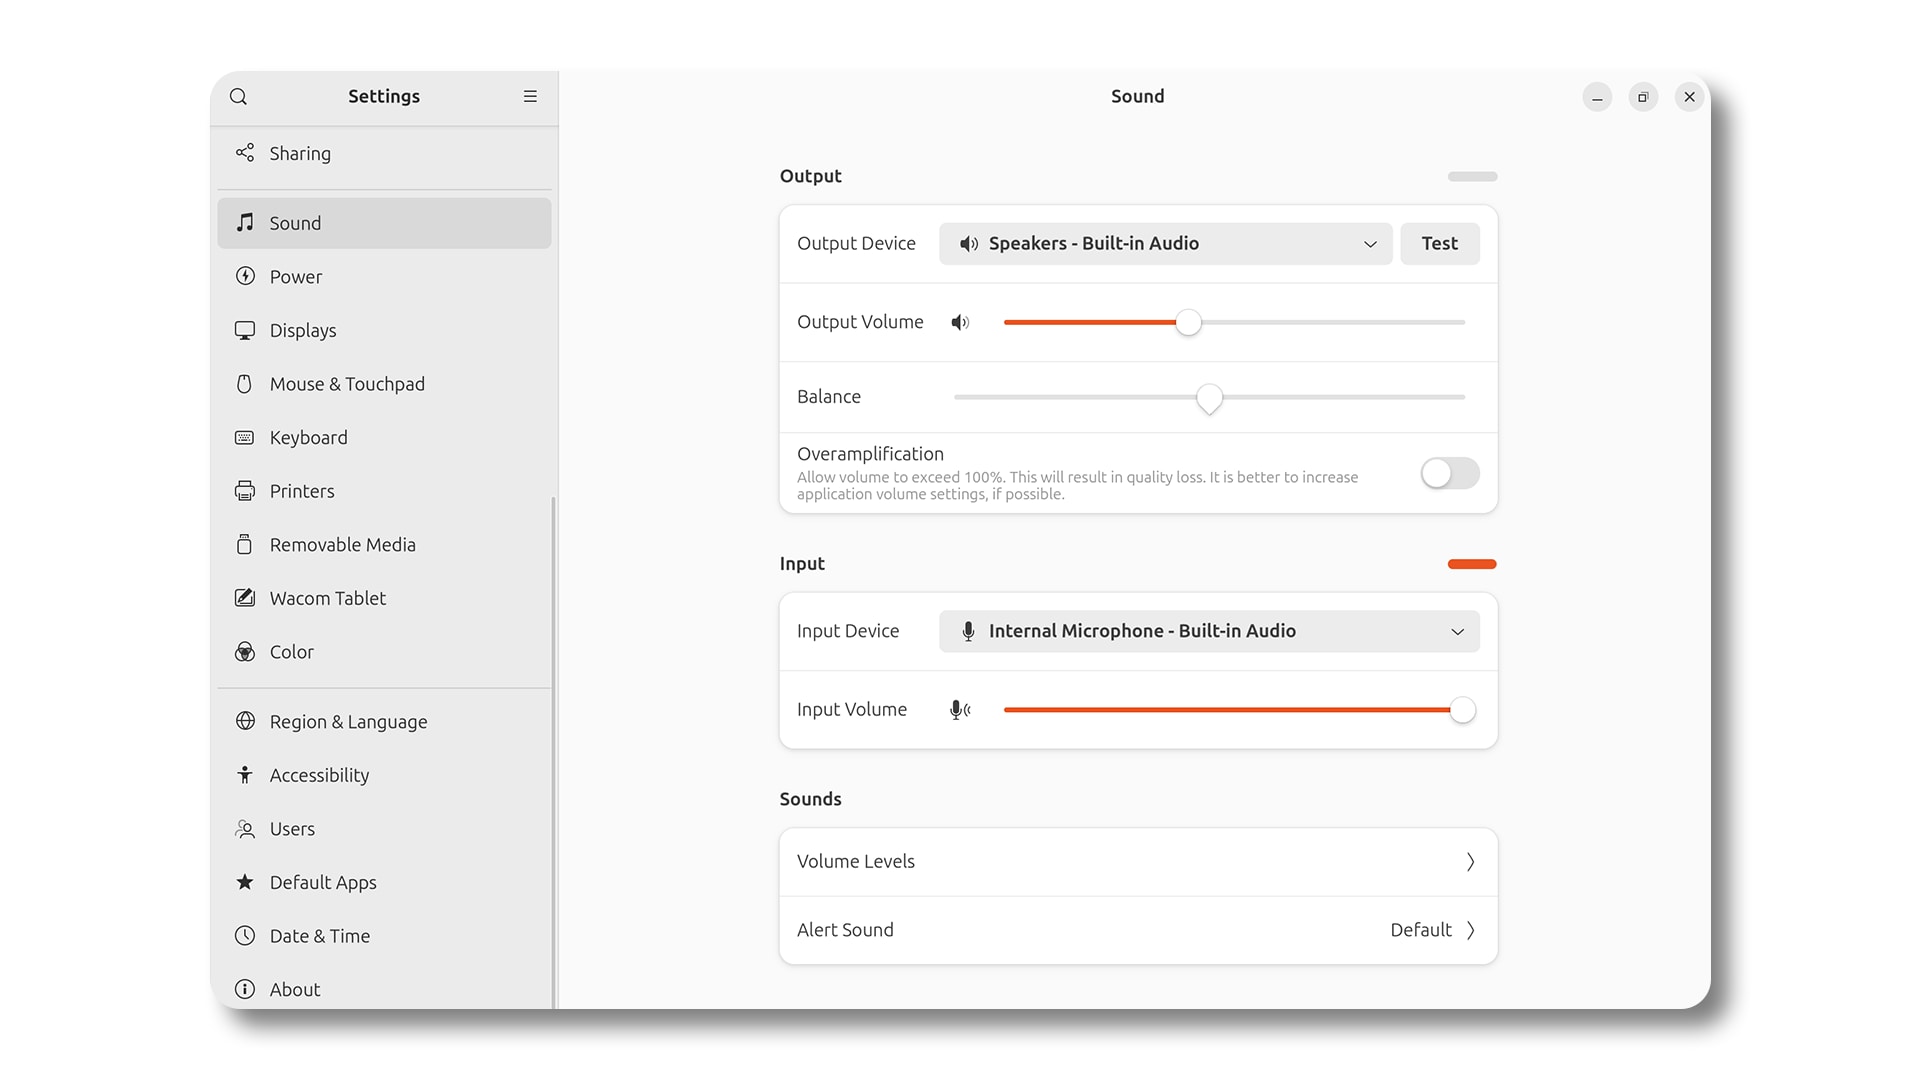
- In Ubuntu, go to Settings > Sound. Under Input, make sure the mic isn’t muted and set the mic volume.
Tip: To prevent your voice from sounding distorted, turn up the volume in small increments and check how it sounds.
Fixing Microphone Not Working on Windows
If the microphone isn’t picking up any sound on your Windows PC, follow these steps.
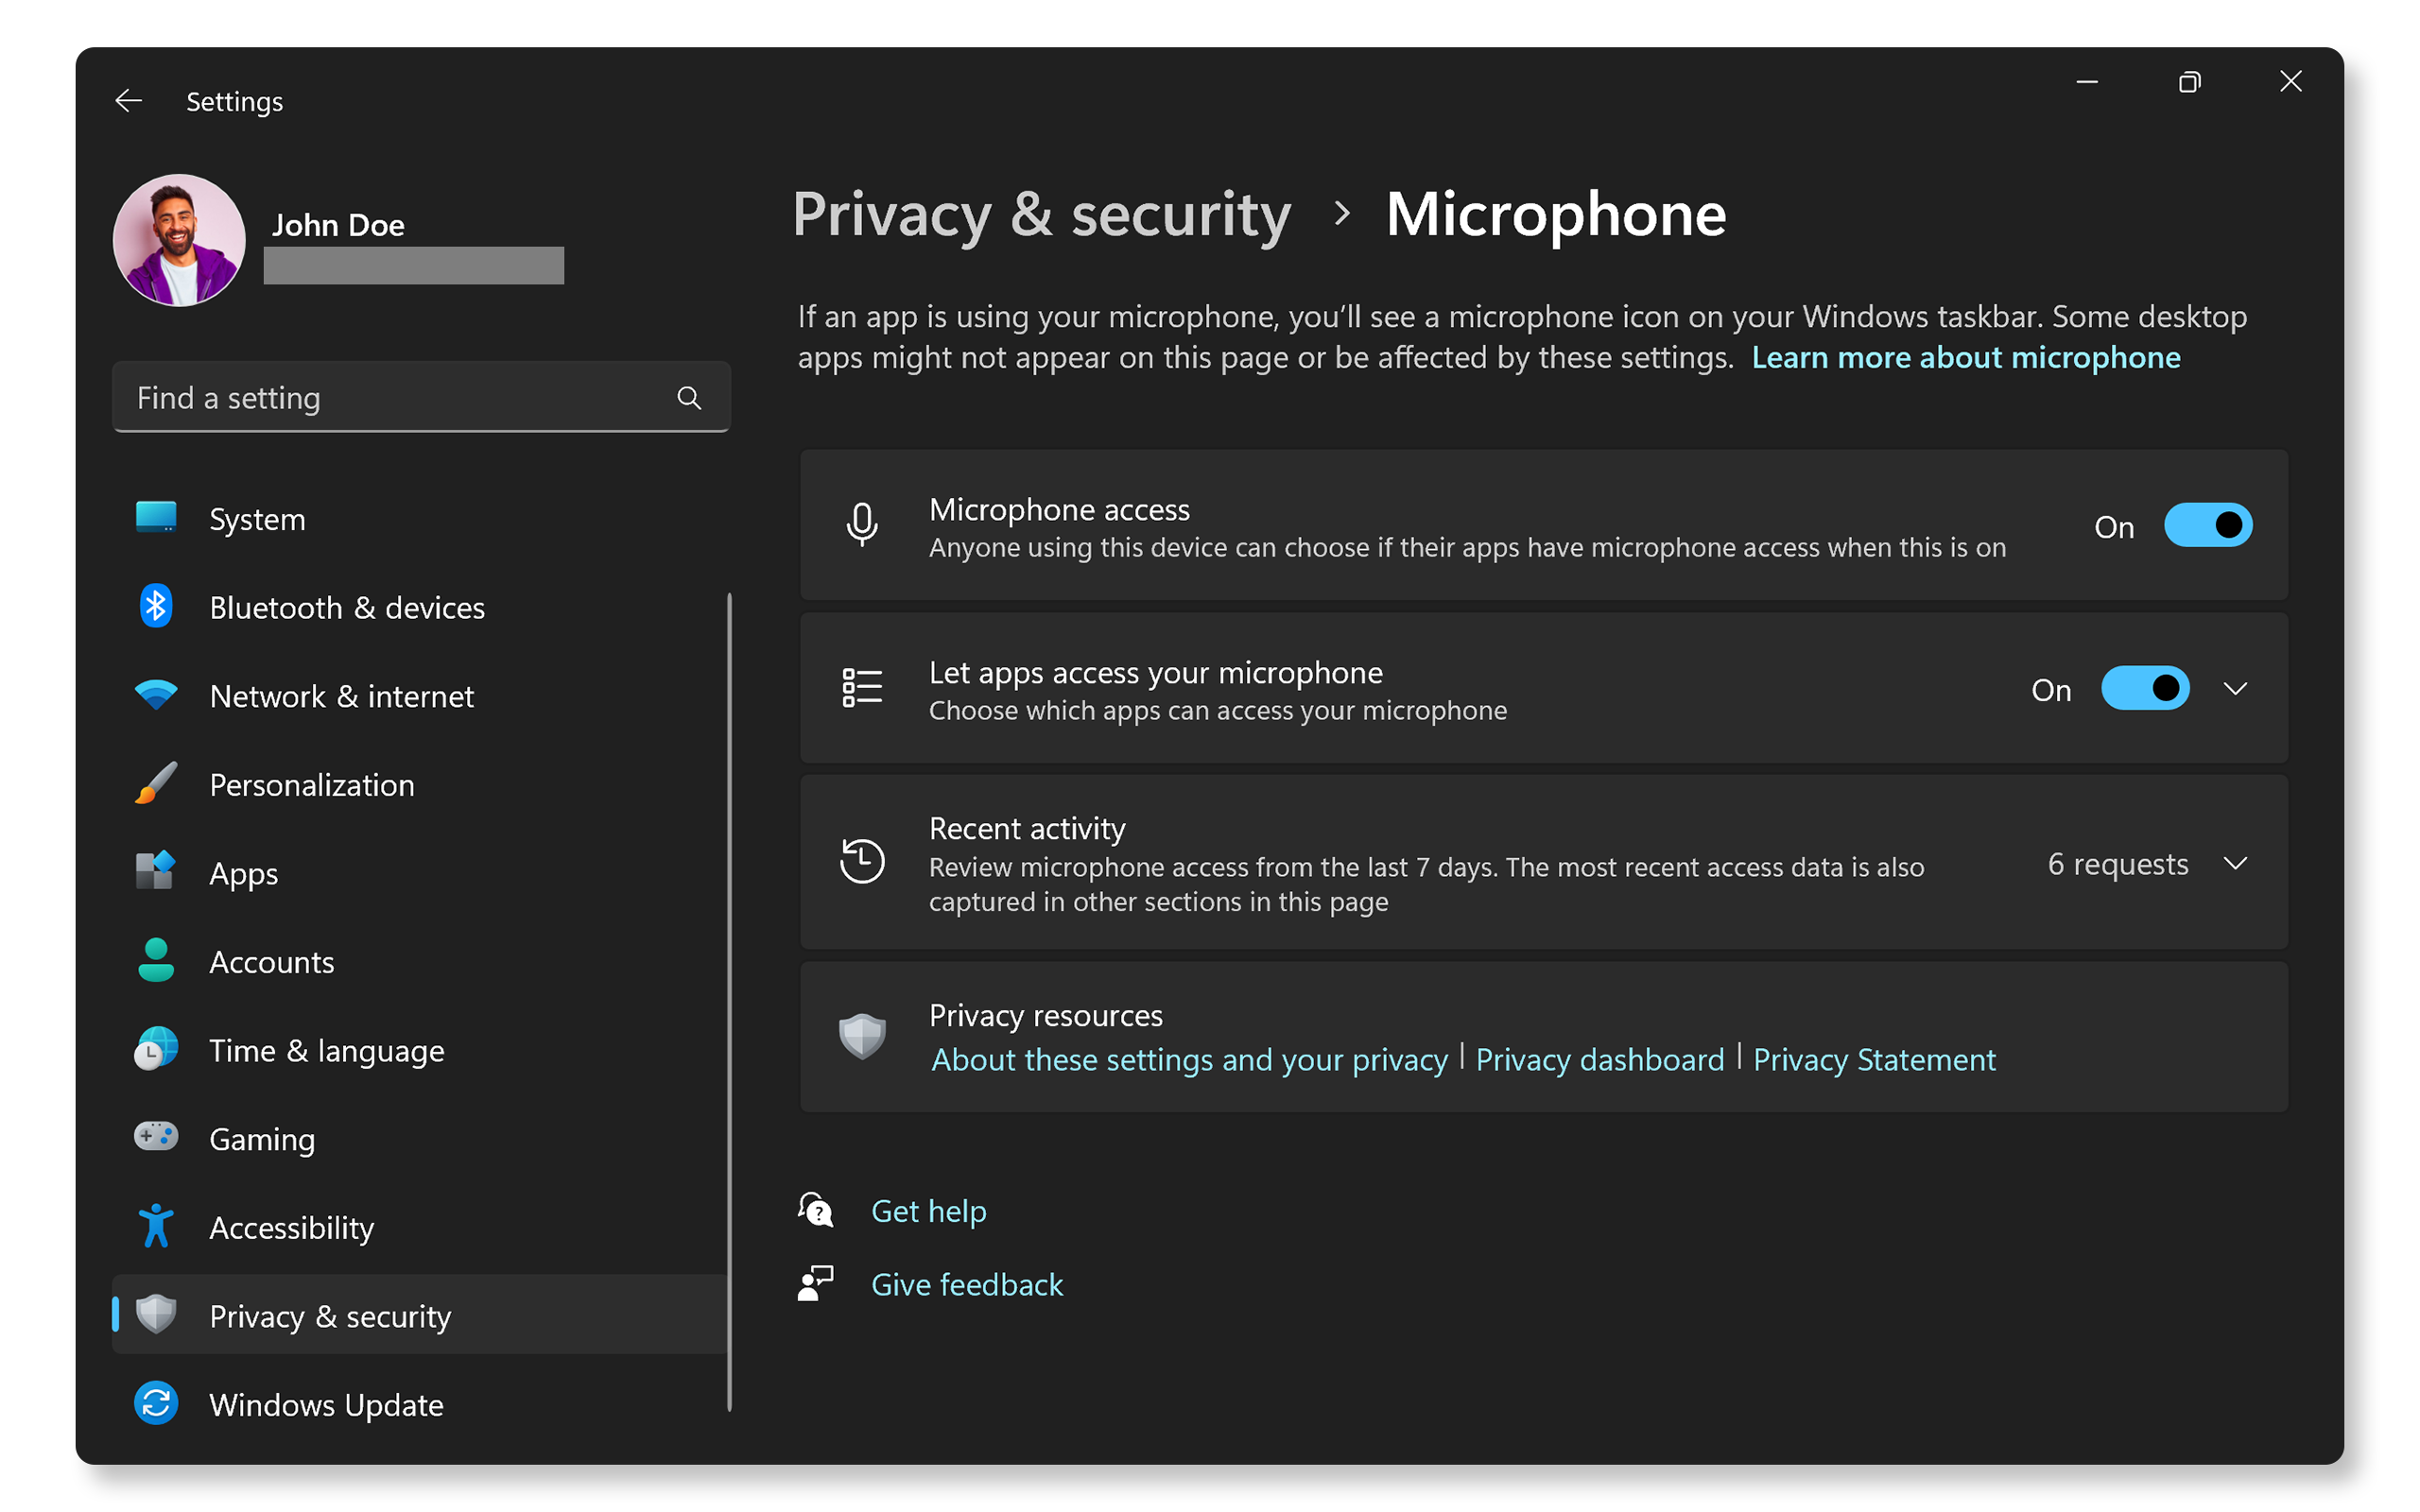
Step 1: Check Privacy Settings for Microphone Access
If your mic isn’t working, you might need to give permission to let your apps use it.
- Go to Start > Settings > Privacy & security > Microphone and make sure Let apps access your microphone is turned on, then choose which apps can use it. Open microphone privacy settings.
Tip: Desktop apps won’t appear in this list. To let desktop apps use your microphone, make sure Let desktop apps access your microphone is turned on. You can’t turn off microphone access for individual desktop apps.
Step 2: Check Default Recording Device
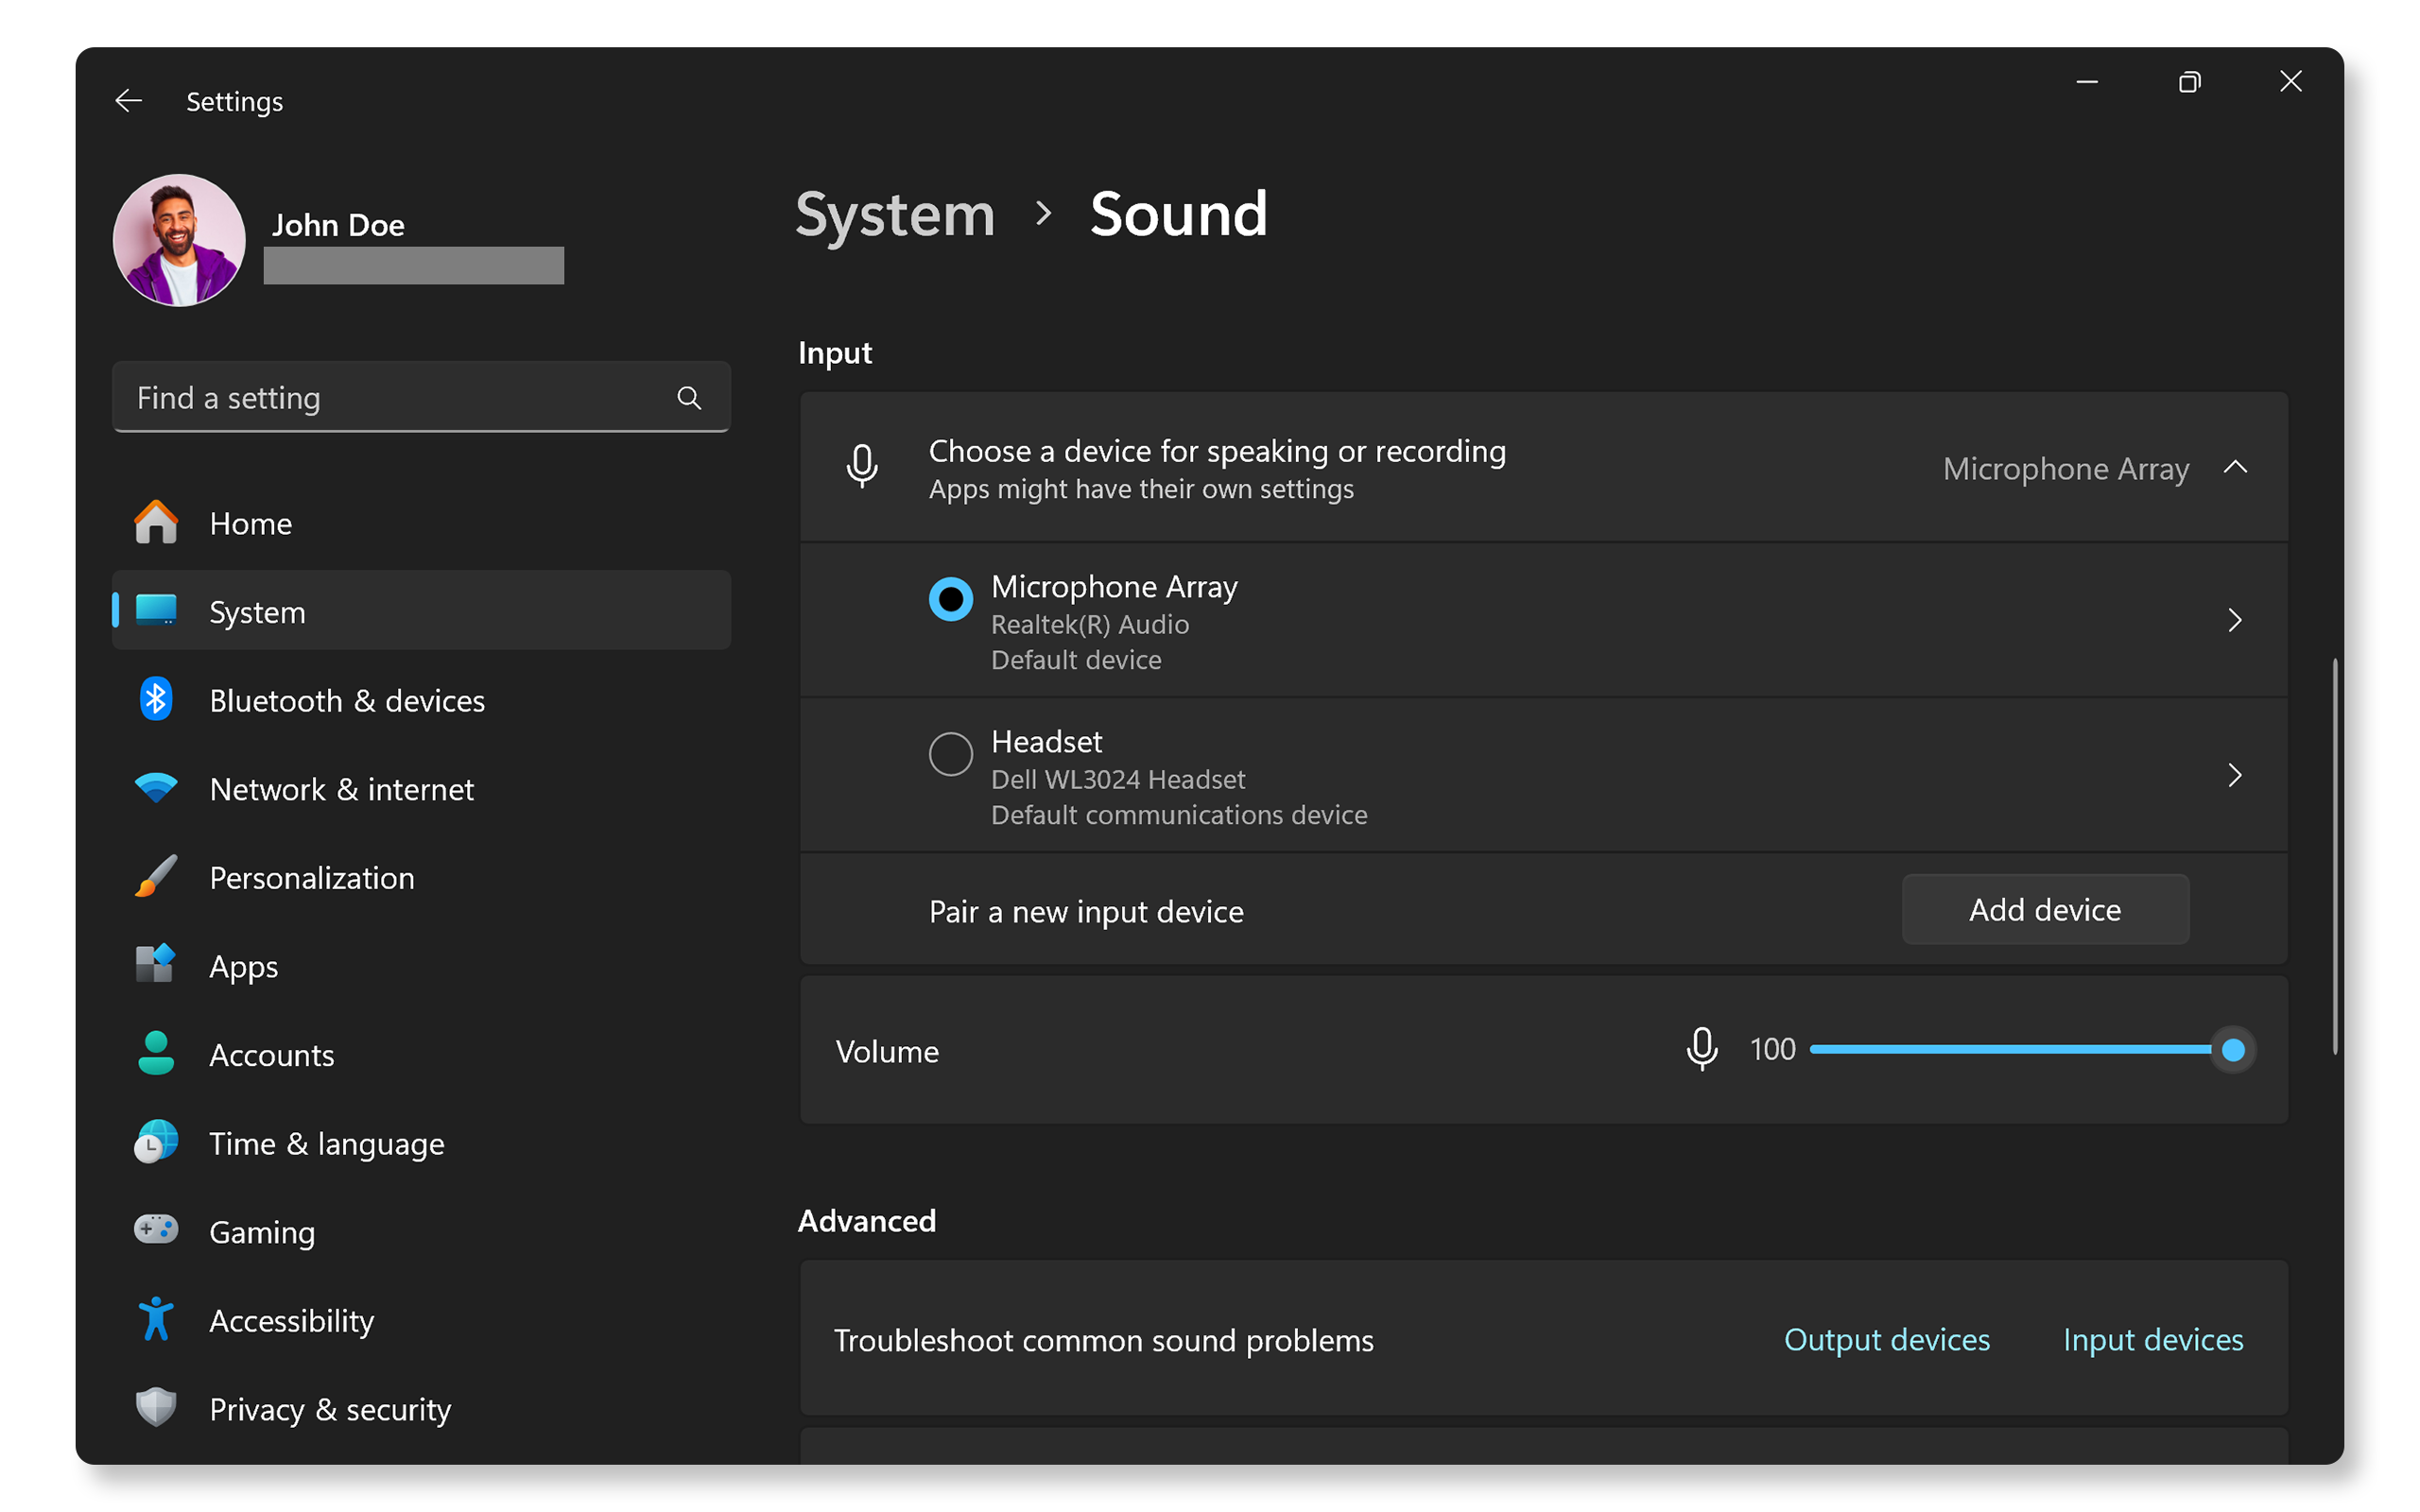
If you have more than one microphone, like a laptop microphone, headset mic, or wireless microphone, choose the right one to use as your default input device.
- Go to Start > Settings > System > Sound. Under Input settings, select the audio device you want to use. This will also make it the default device.
Step 3: Update Audio Drivers
Updating audio drivers or rolling back drivers can often fix microphone issues caused by outdated or corrupt audio drivers.
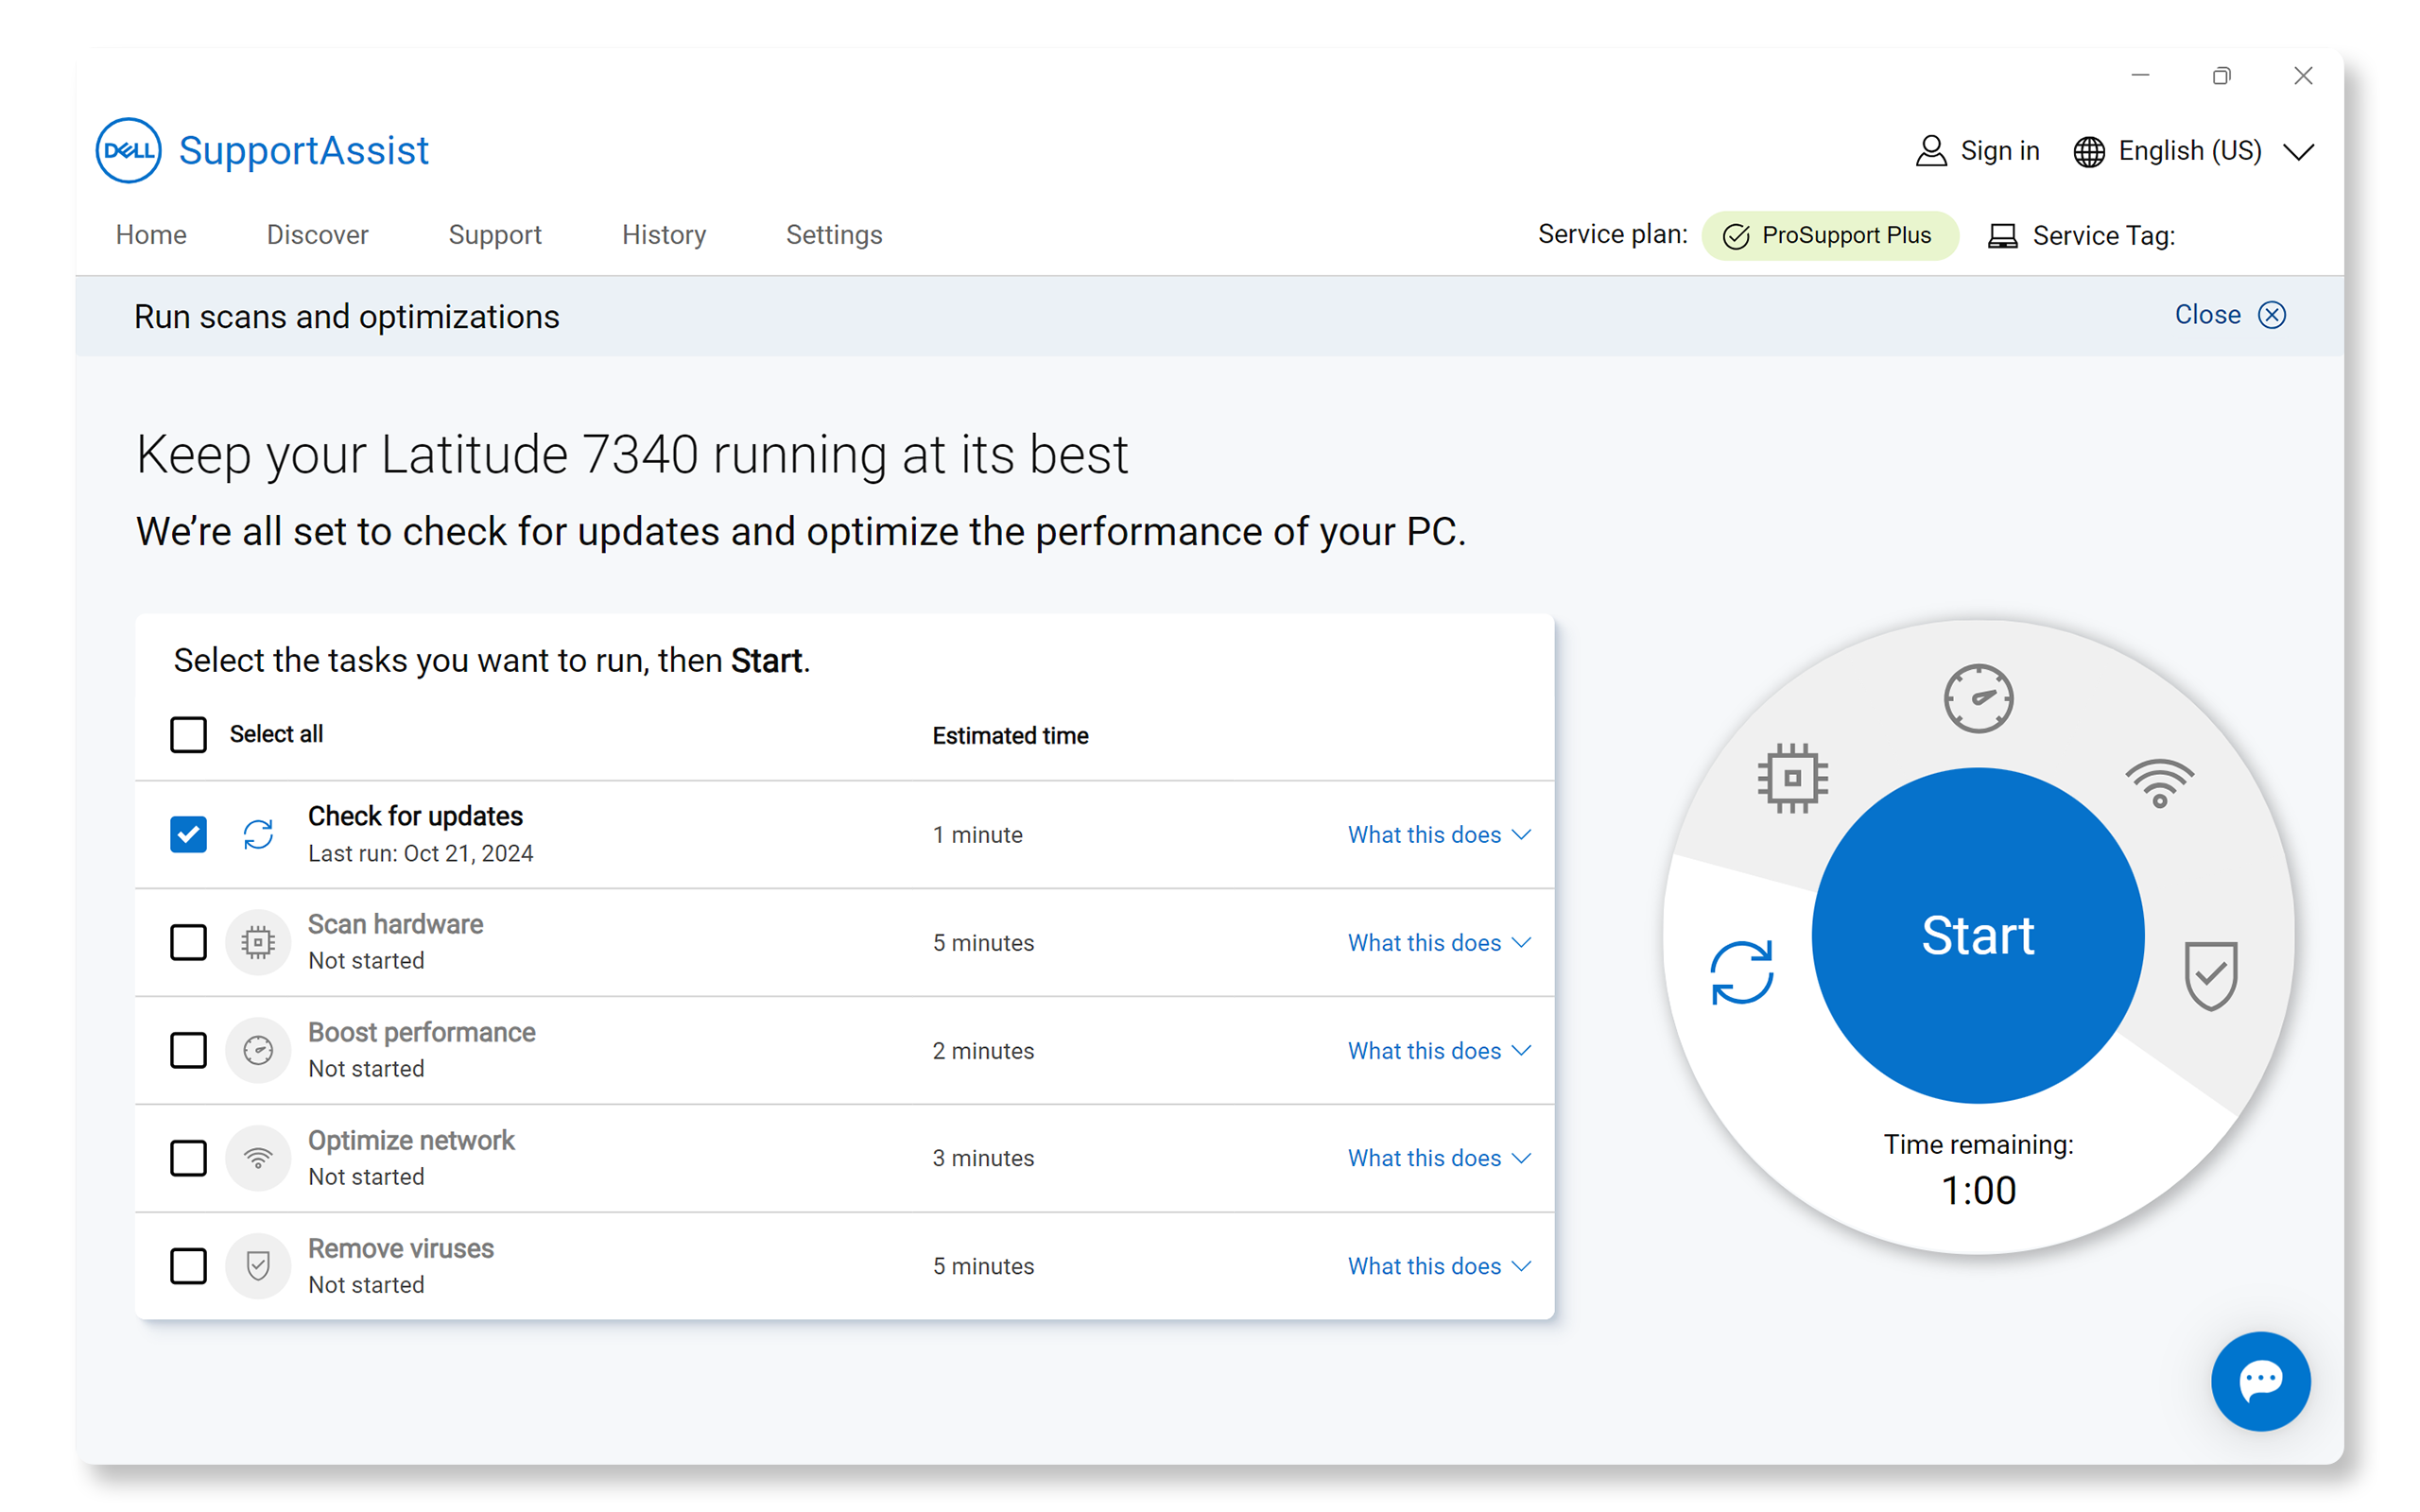
Update Audio Drivers using SupportAssist
Dell's SupportAssist tool automatically scans your Dell computer, looks for driver and BIOS updates, and installs them:
- Search for and open SupportAssist.
- In the SupportAssist app, on the Home tab, select Update software.
- Select Start to check for driver updates.
- Follow the on-screen instructions to update the drivers.
Alternatively, go to Dell Drivers & Downloads to manually download and install Dell drivers. Learn more about updating drivers on your Dell.
Rolling Back Drivers
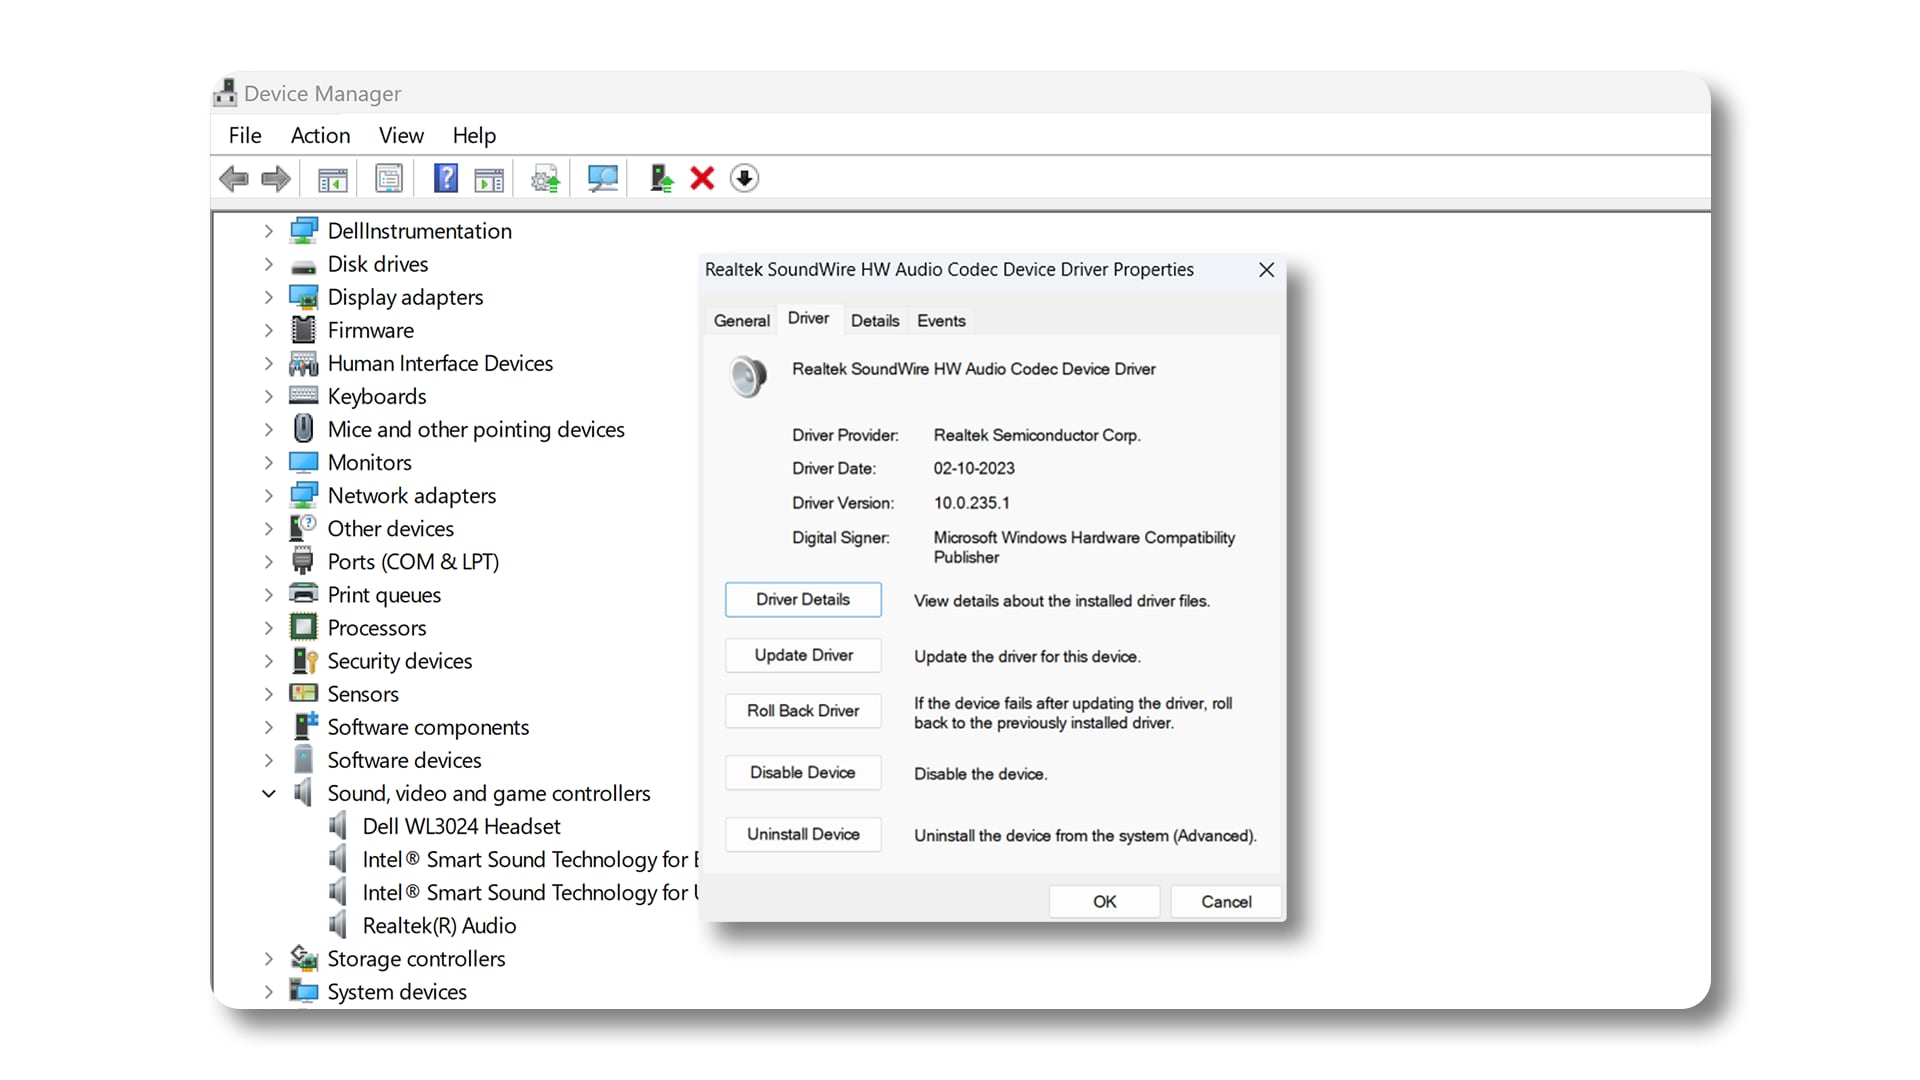
If you have microphone issues after installing Windows Updates, try rolling back your audio driver to a previous version.
- In Device Manager, right-click the audio device.
- Select Properties > Driver tab and then select Roll Back Driver (if available).
Step 4: Run the Microphone Troubleshooter
Windows microphone troubleshooter might be able to fix microphone issues automatically.
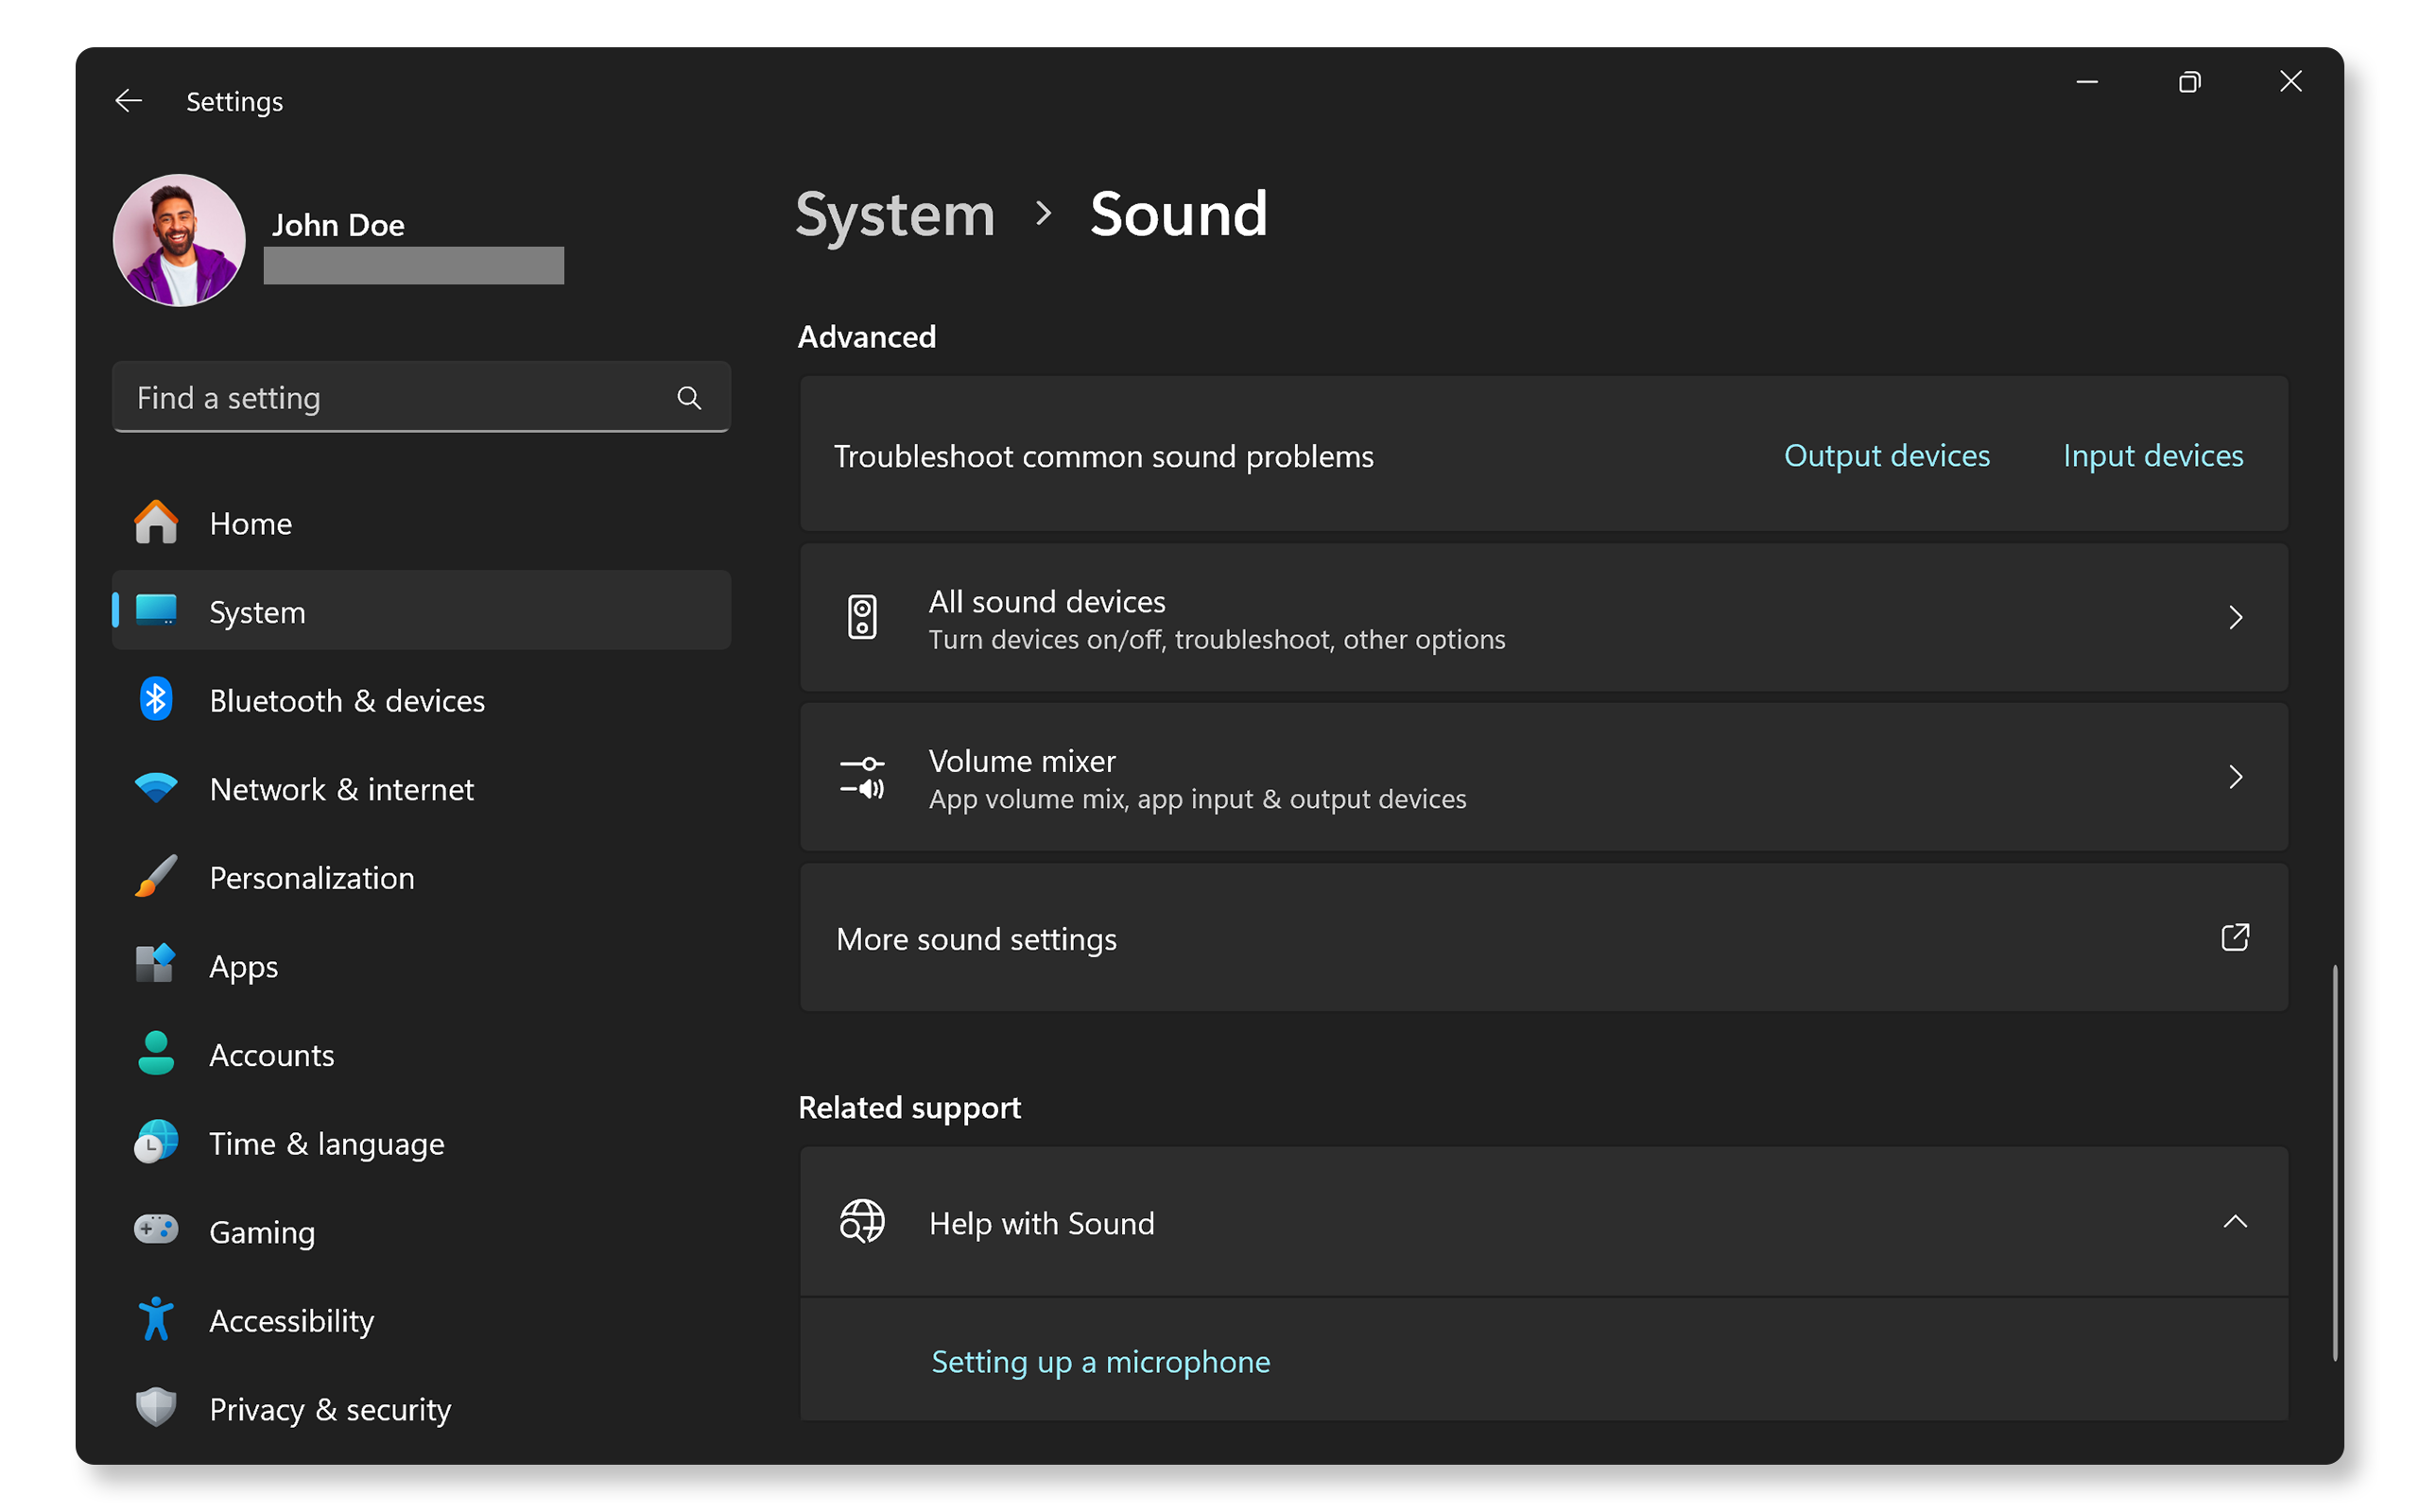
- Go to Start > Settings > System > Sound. Under Advanced, select Input devices and follow the on-screen prompts to let Windows diagnose microphone issues.
Fixing Microphone Not Working on Ubuntu
If the microphone isn’t capturing the sound on your Ubuntu PC, follow these steps.
Step 1: Check Default Recording Device
If you have more than one microphone, like a laptop microphone, headset mic, or wireless microphone, choose the right one to use as your default input device.
- Go to Settings > Sound. Under Input, ensure the correct microphone device is set as default input device.
Step 2: Reinstall Sound Drivers
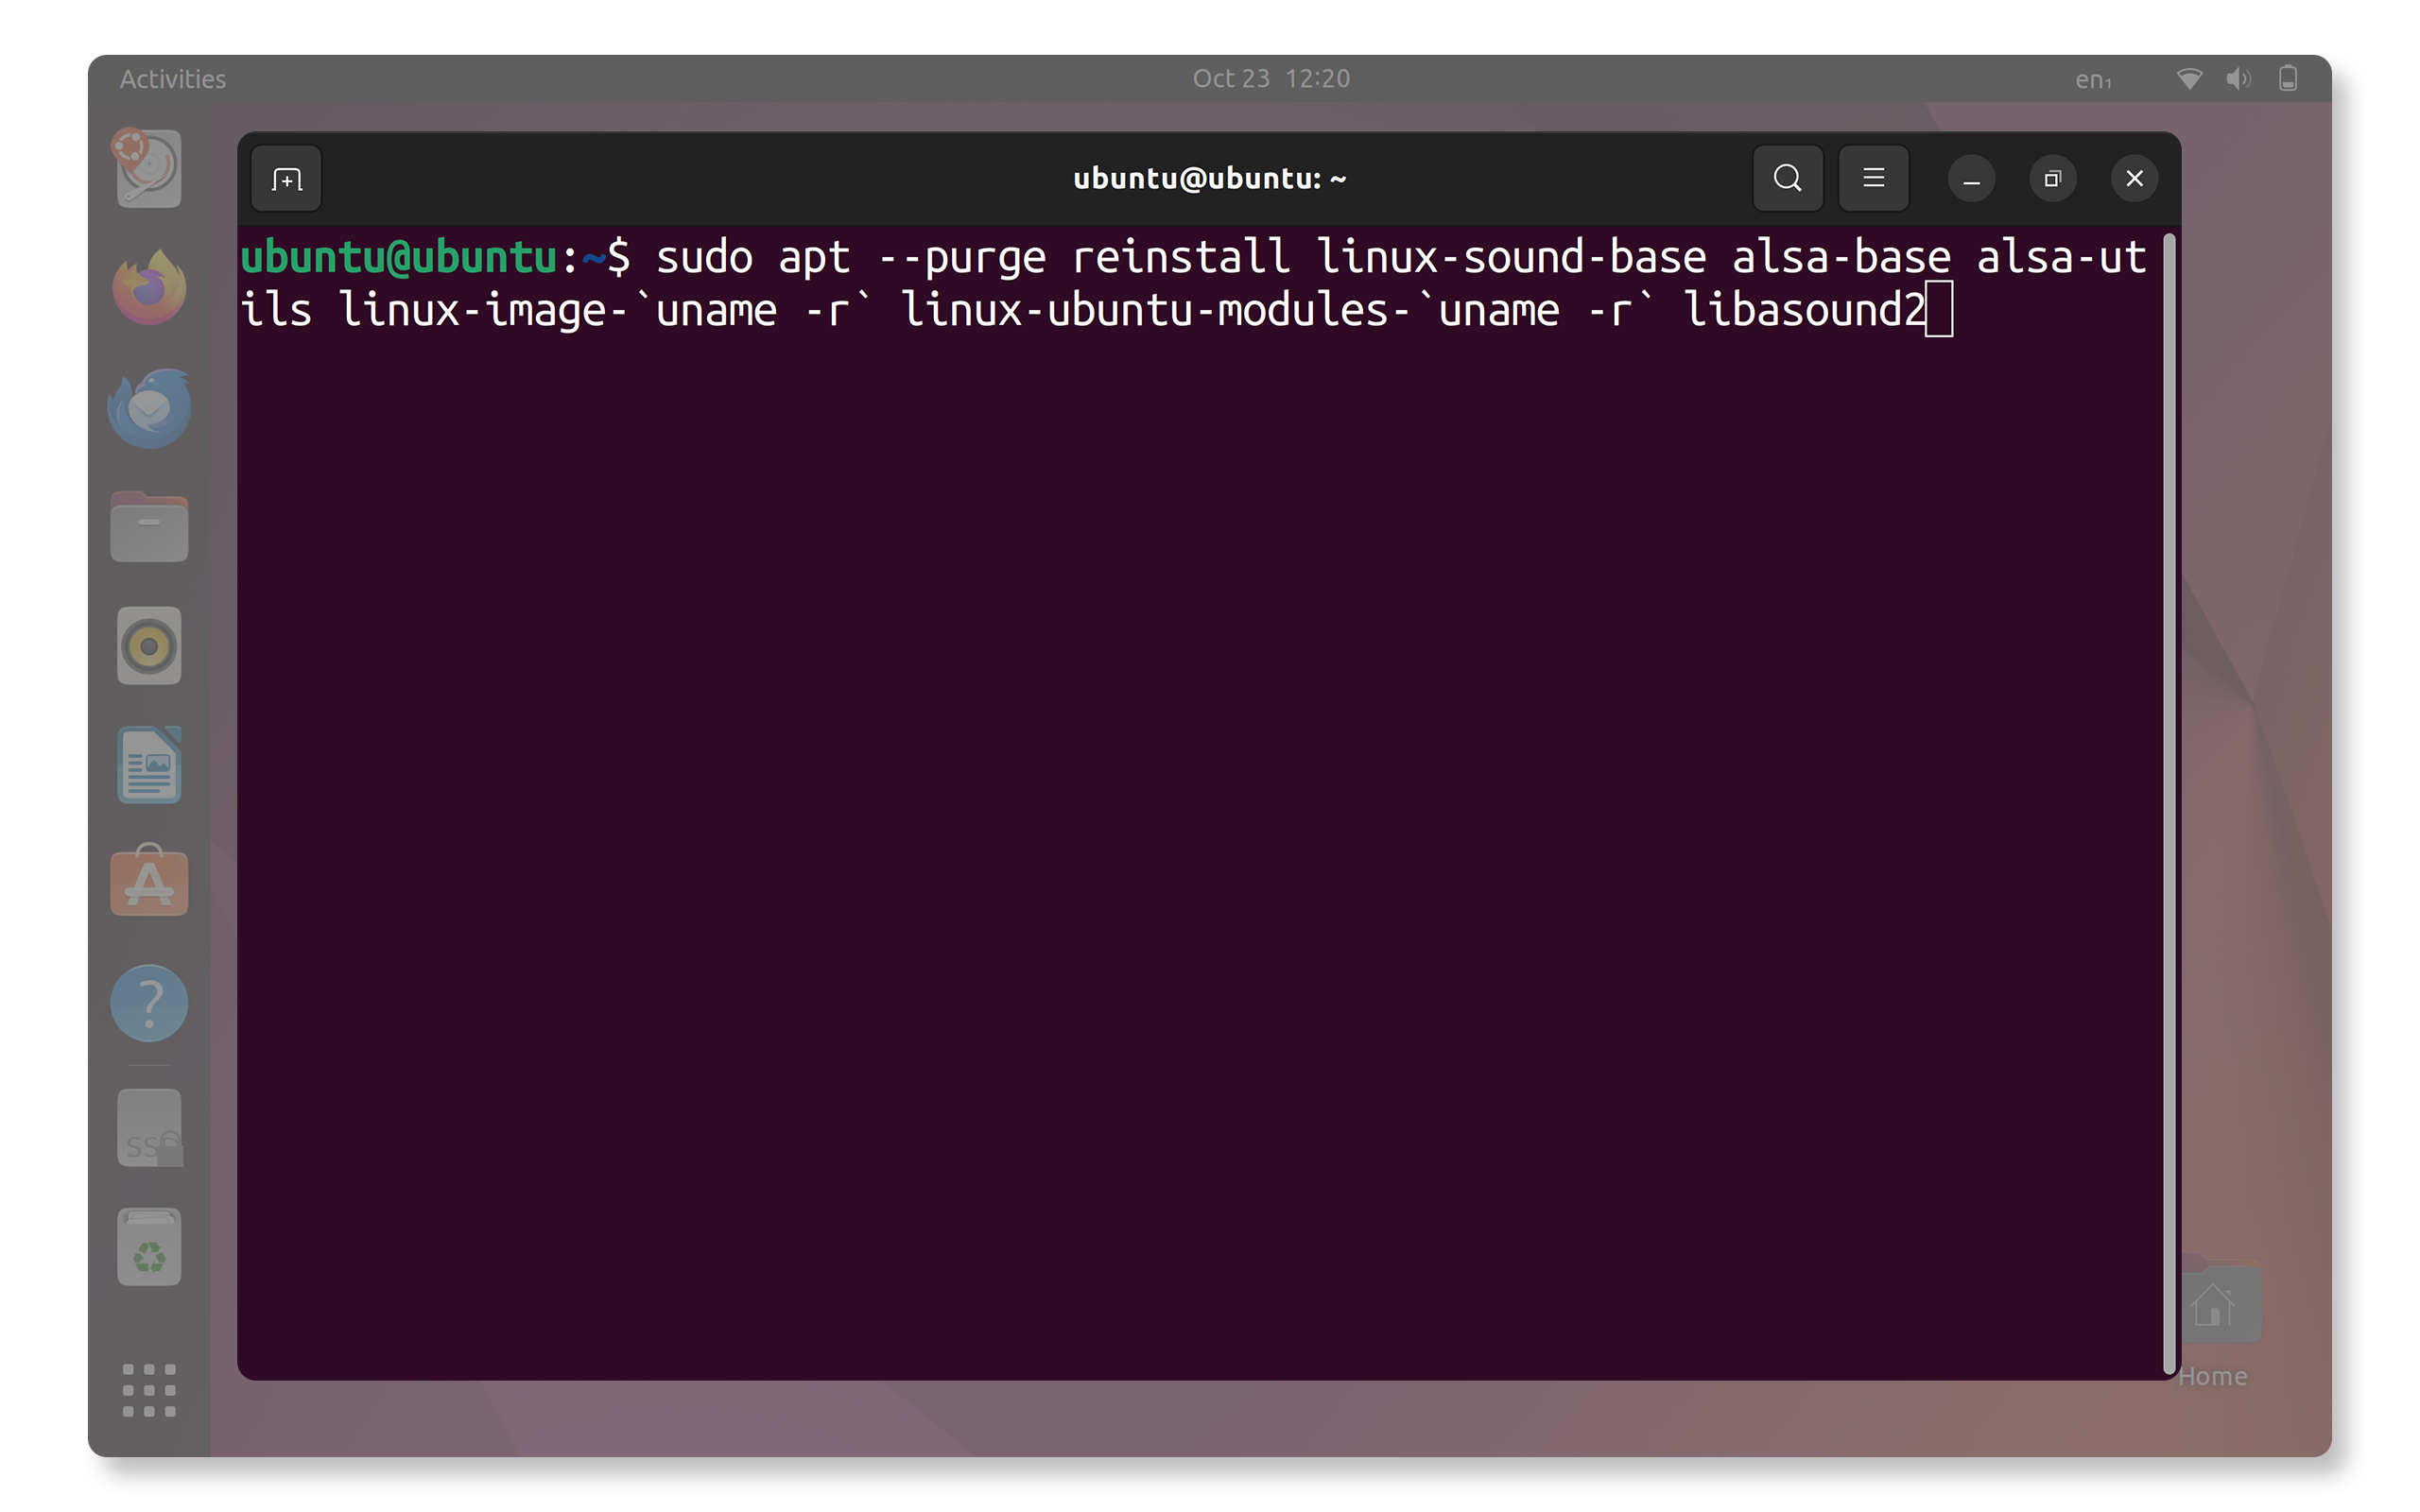
Reinstalling ALSA sound drivers might resolve some software-related issues.
Note: Administrator rights are required to change system settings or update software.
- Open Terminal: Press Ctrl + Alt + T to open Terminal.
- Update Drivers: Type sudo aptitude --purge reinstall linux-sound-base alsa-base alsa-utils linux-image-`uname -r` linux-ubuntu-modules-`uname -r` libasound2 and press Enter.
Step 3: ALSA Audio Driver Compilation
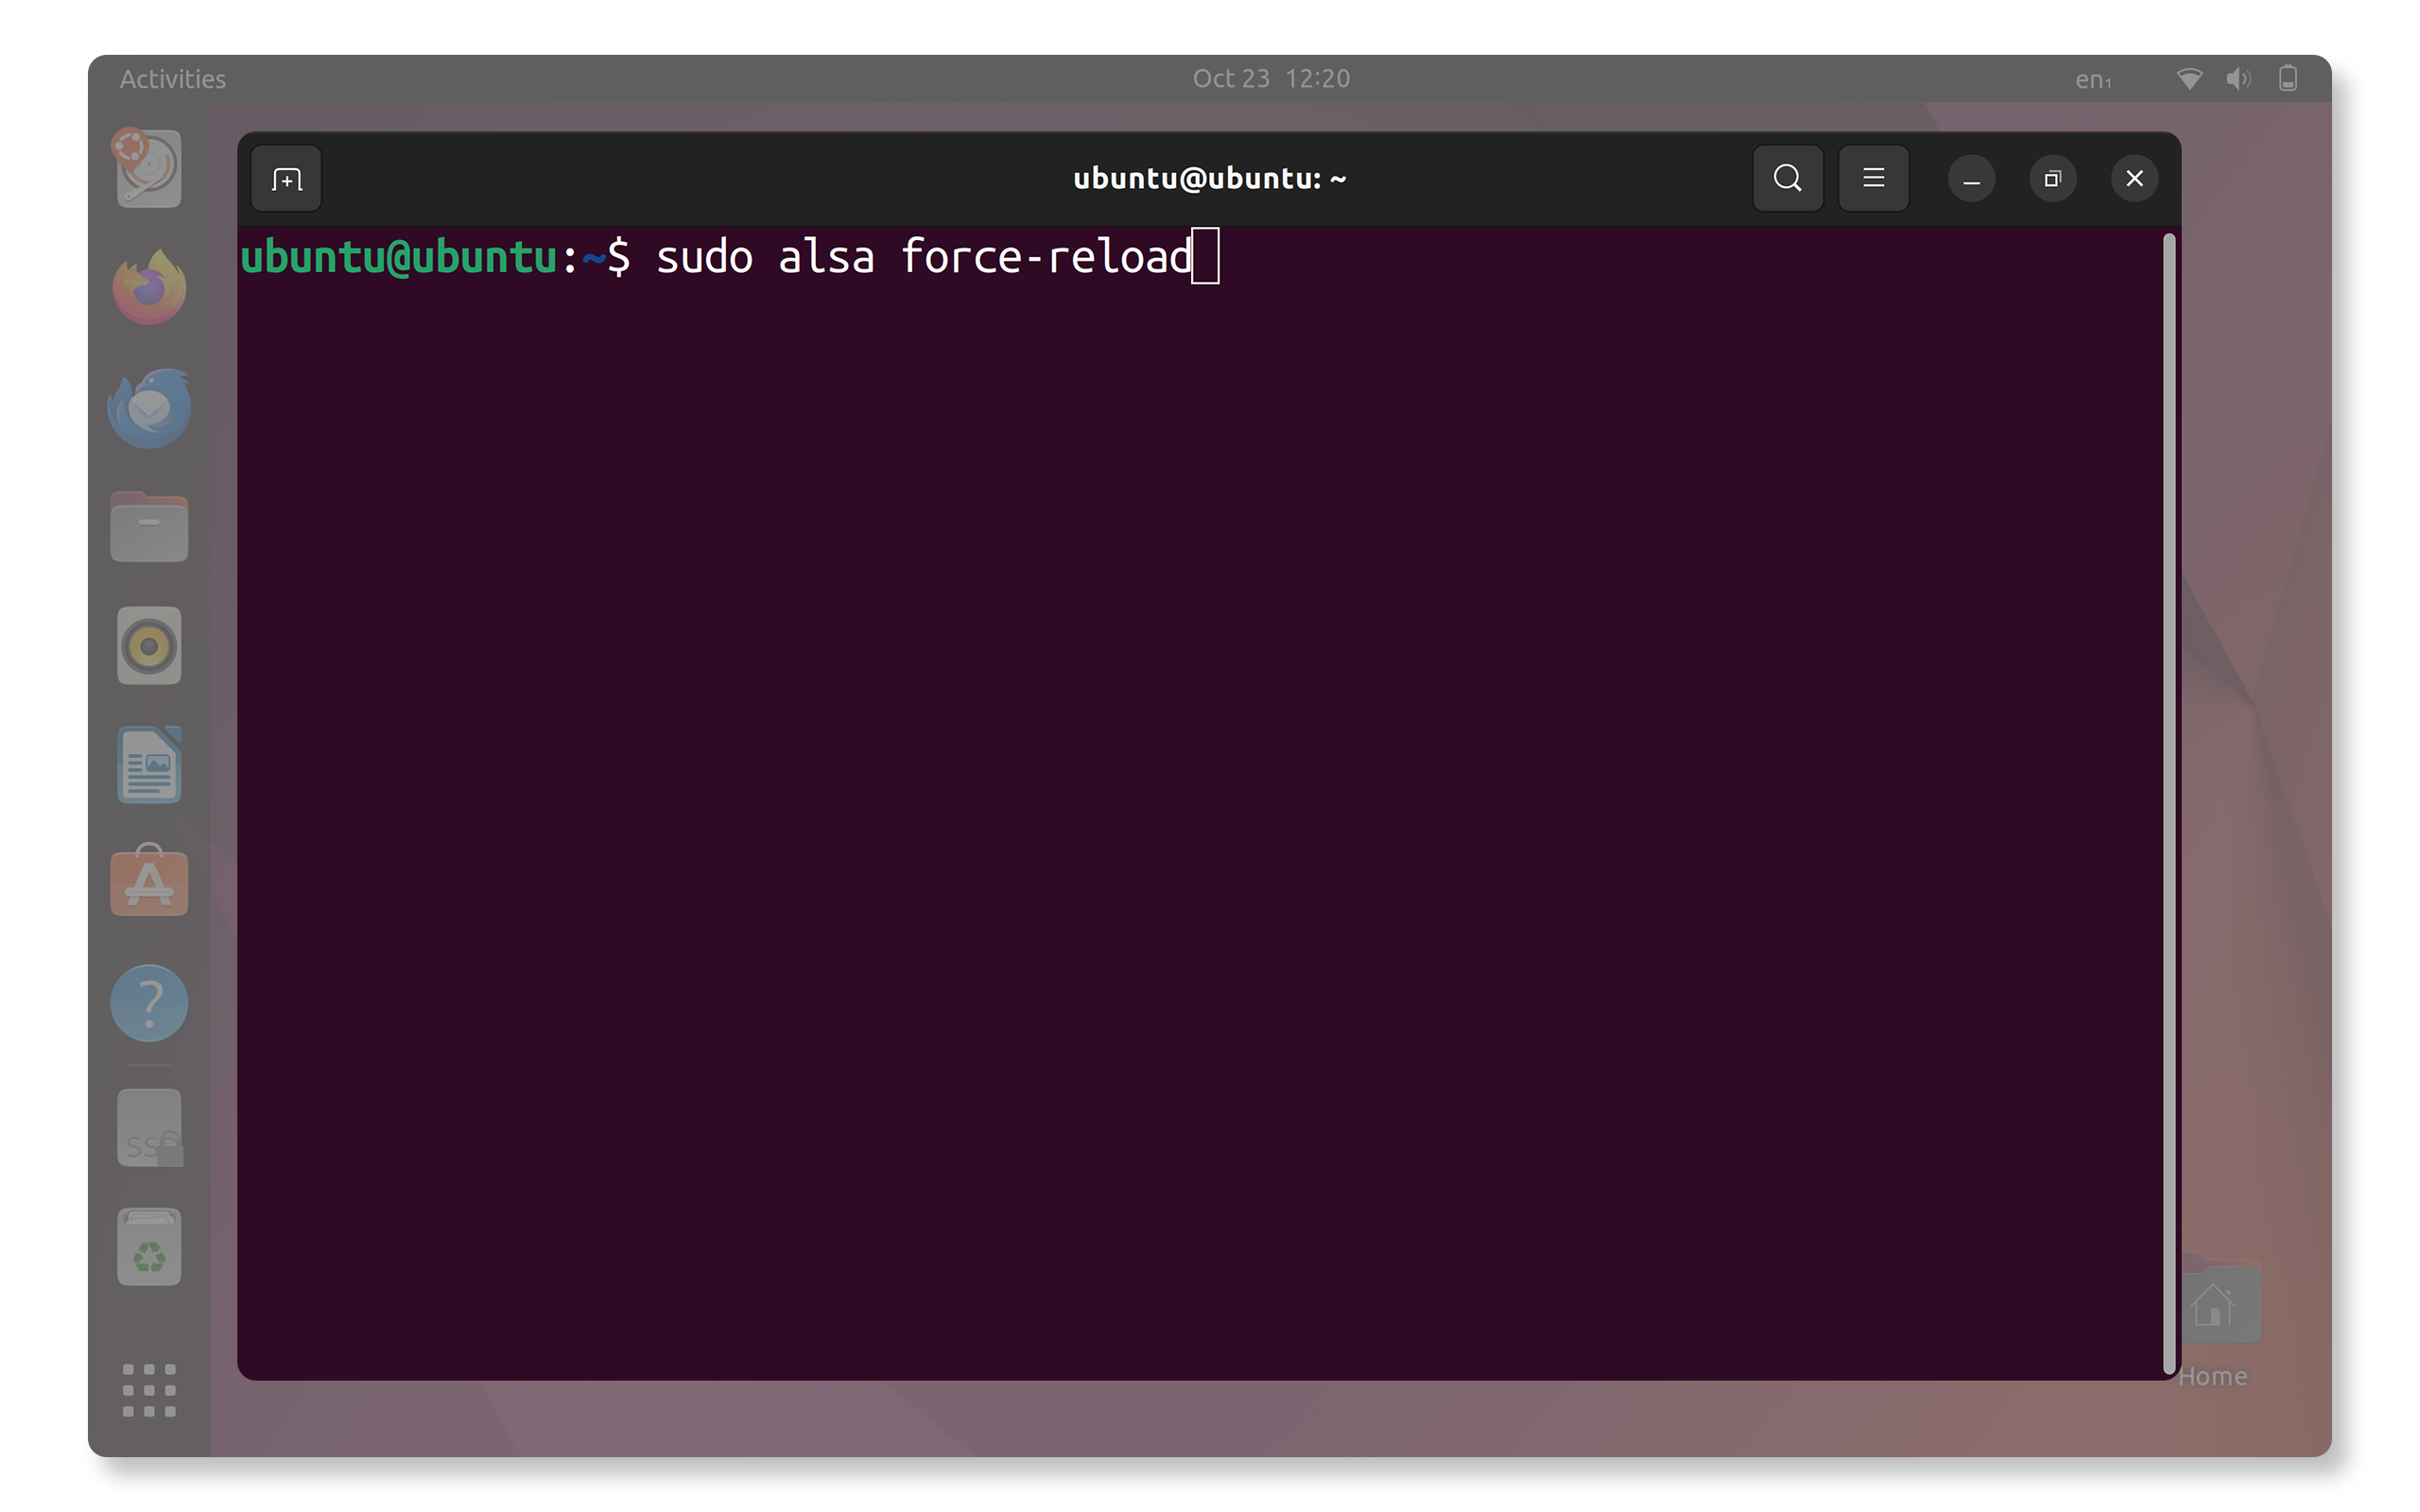
If the microphone isn’t working, compiling the ALSA audio driver might help:
- Restart the Service: Open Terminal (shortcut key Ctrl + Alt + T), type sudo alsa force-reload and press Enter to restart PulseAudio.
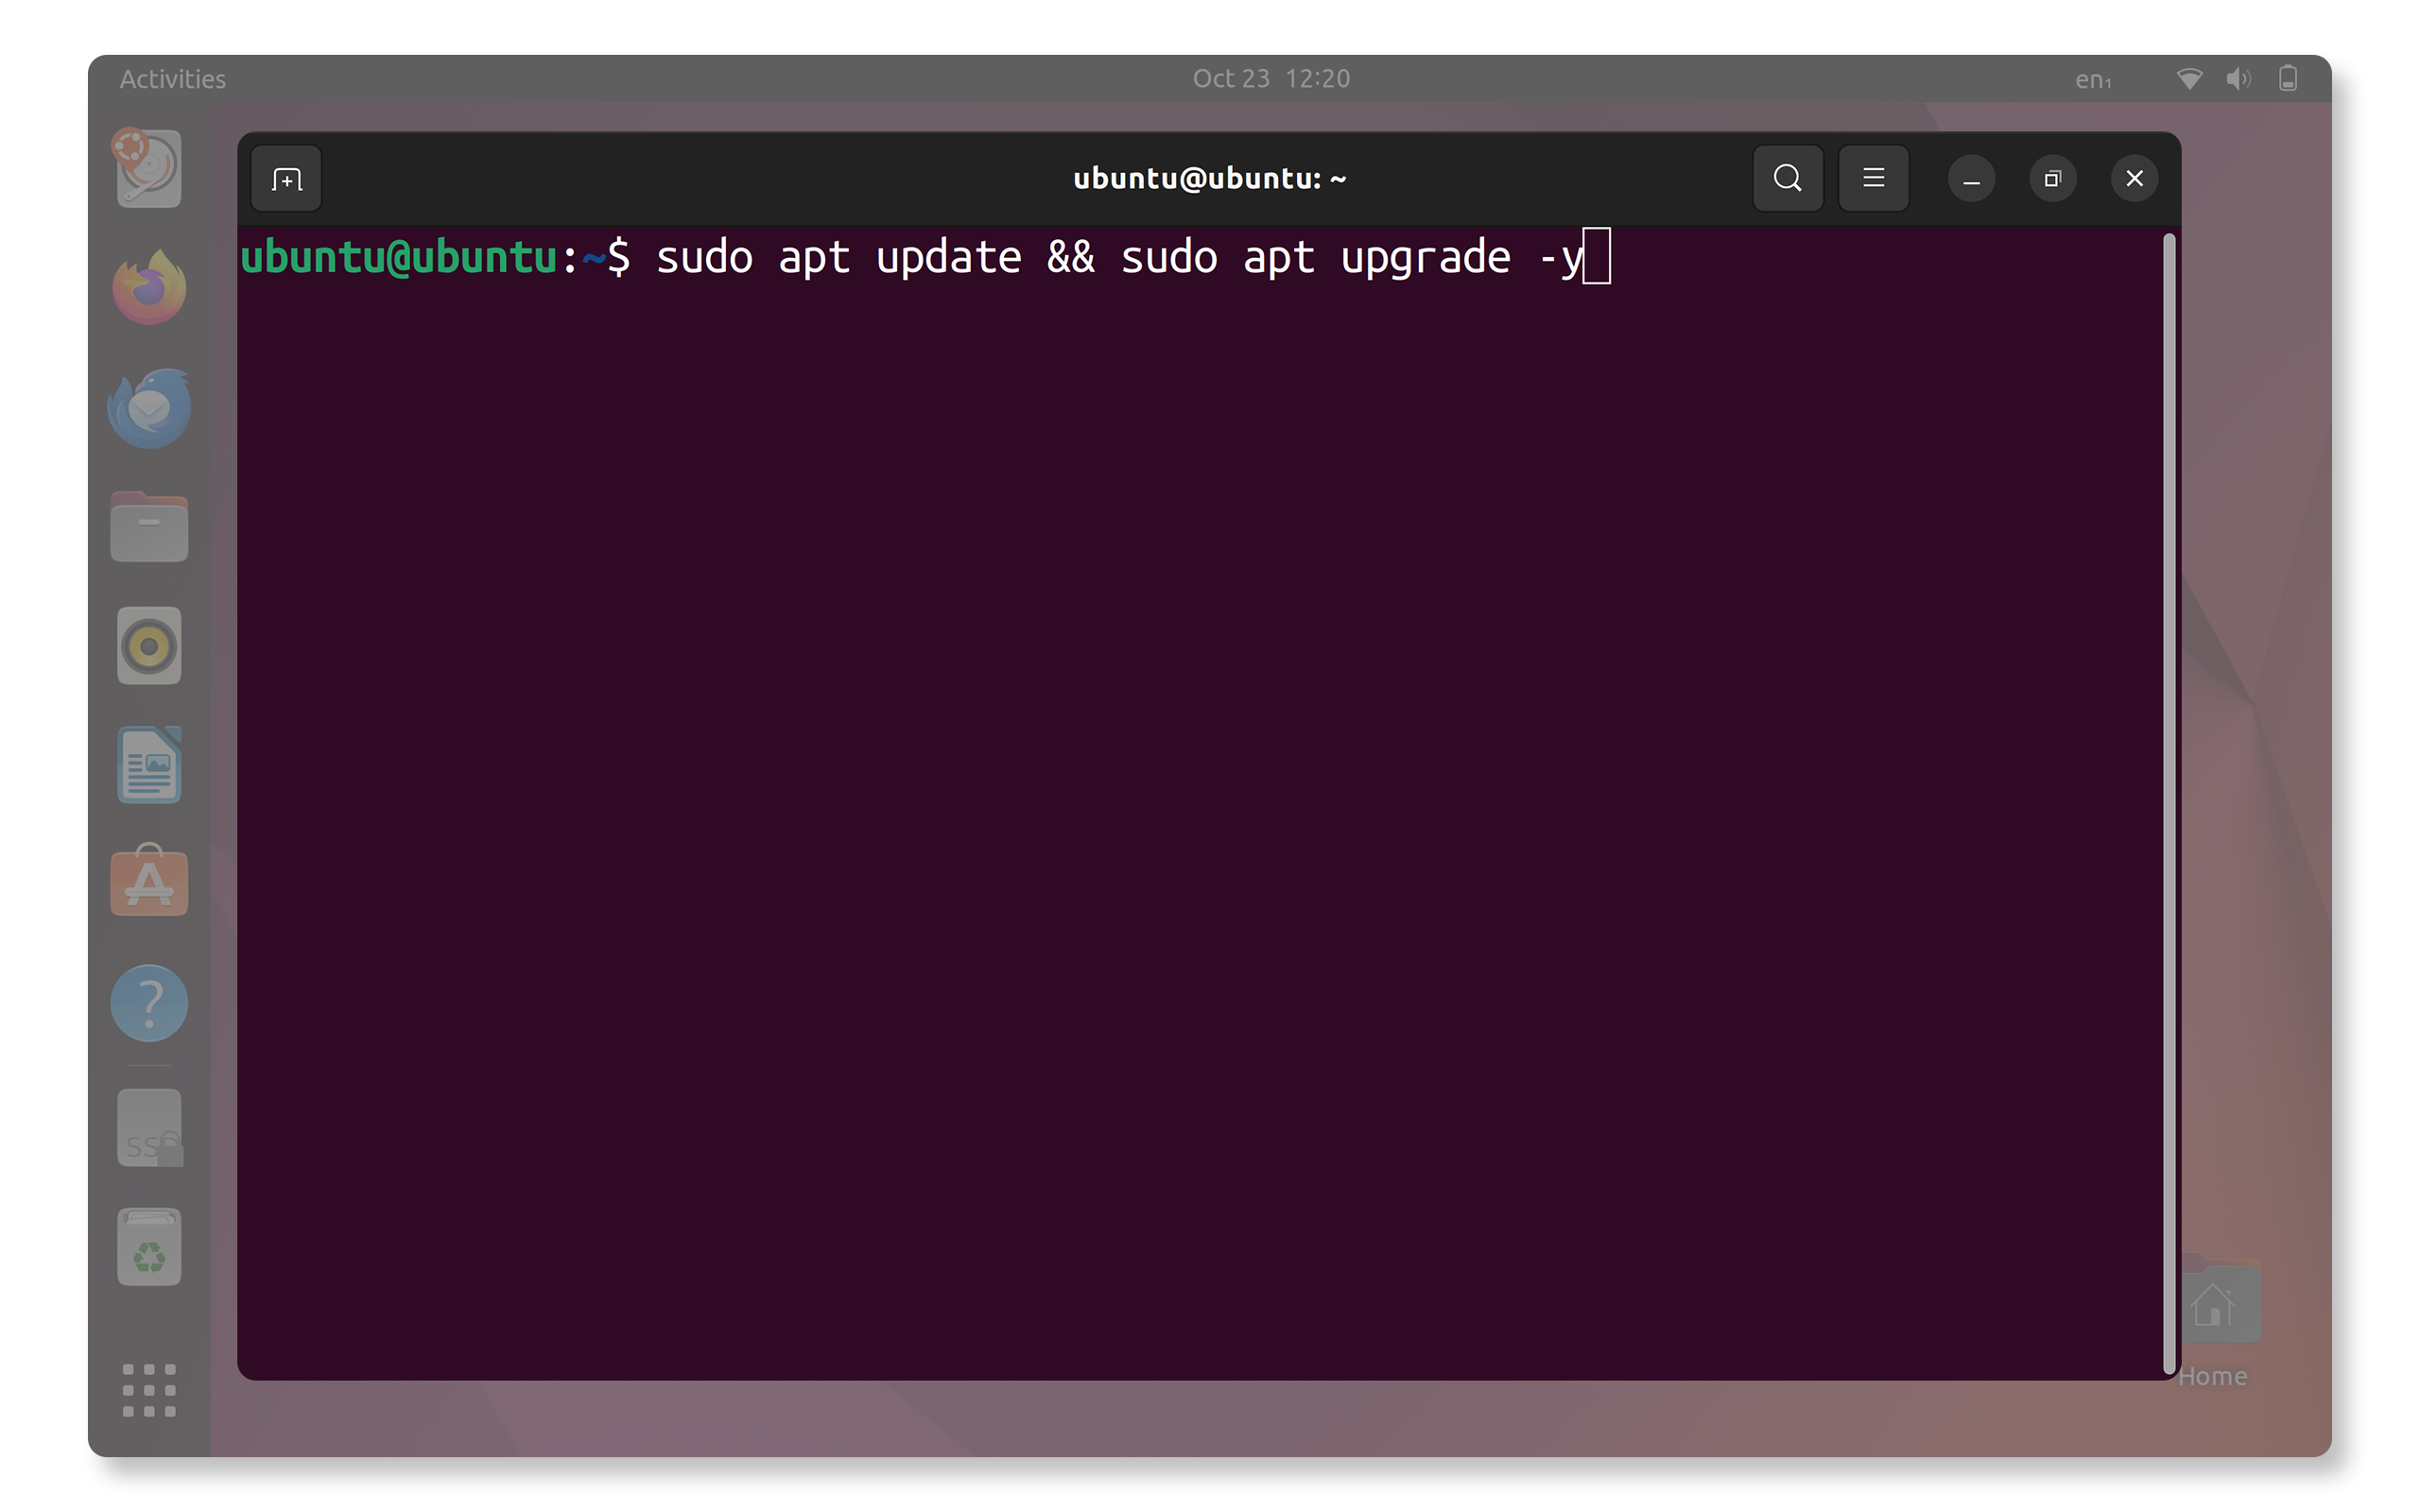
Step 4: Update Ubuntu
Updating Ubuntu system software might resolve microphone issues:
Note: Administrator rights are required to change system settings or update software.
- Update Drivers: Open Terminal (shortcut key Ctrl + Alt + T) and type sudo apt update && sudo apt upgrade -Y and press Enter.
Additional Tips for External Microphones
If you’re using an external microphone, there are a few additional steps to consider.
Testing with Different Devices
Plug the microphone into another computer to see if it works. This can help determine if the issue is with your microphone or the computer.
Switching USB Ports
For USB microphones, try connecting to different USB ports, as some ports might be incompatible or faulty.
Unpair and Pair
For Bluetooth microphones or headsets, try to unpair and repair the Bluetooth device.
If the microphone still won’t work, try these additional steps to resolve microphone problems.
Preventive Measures
To prevent future microphone issues, follow these tips:
- Regularly Update Drivers: Keep BIOS, audio and system drivers updated to avoid compatibility problems.
- Monitor Privacy Settings: Review app permissions periodically to ensure necessary apps can access the microphone.
- Avoid Third-Party Interference: Some third-party audio and antivirus software can conflict with microphone drivers, so use only trusted programs.
Frequently Asked Questions (FAQ)
Here are some popular questions and answers about common microphone issues on laptops and desktops.
1: Why is my microphone not working on my Dell laptop?
- There can be several reasons your microphone isn't working, including microphone is disabled in the BIOS or UEFI settings, incorrect audio settings, outdated drivers, or physical connection issues.
- Follow the troubleshooting steps above to identify and fix microphone problem on Windows or Ubuntu.
2: My microphone works in some apps but not others. Why?
- This can happen if certain apps lack microphone permissions. Check your app permissions in Windows Privacy settings.
3: Can BIOS updates fix microphone issues?
- Yes, in some cases. BIOS or UEFI updates can improve hardware compatibility, which might help with microphone recognition and performance.
4: How do I test if my microphone is working?
- To test your microphone in Windows, go to Start > Settings > System > Sound, select your microphone, click Start test, and speak into it.
- To test your microphone in Ubuntu, go to Sound settings and use the input level indicator.
5: How can I boost my microphone volume on Windows?
- Go to Start > Settings > System > Sound, under Input, and use the volume slider to increase the microphone volume.
6: How do I enable my microphone in Ubuntu?
- Go to Sound settings, select your microphone under Input, and ensure it is not muted. Use the volume slider to adjust the microphone level.
7: Why is my microphone producing distorted sound?
- Distorted sound can be caused by high input levels or interference.
- Reduce the microphone volume in the sound settings and move the microphone away from potential sources of interference.
- Disable audio enhancements in Windows. Select the microphone to access the device properties and then turn off audio enhancements (if available).
8: How do I update my microphone drivers on Windows?
- Use Dell’s SupportAssist app in Windows to check and update drivers.
- Some Dell devices have Dell Update, Alienware Update, or Dell Command Update to automatically update drivers.
- For third-party microphones, open Device Manager, expand Audio inputs and outputs, right-click your microphone, and select Update driver. Choose Search automatically for updated driver software.
9: Can I use an external microphone with my Dell laptop?
- You can use an external microphone with your Dell laptop.
- USB microphones and headsets with built-in microphones work too.
- Make sure it's connected or paired using Bluetooth properly and set as the default input device in sound settings.
10: Do Dell desktops have built-in microphones?
- Most Dell desktops don’t have built-in microphones. But Dell all-in-one computers do. Check your computer’s specs in the user manual.
- If you need a microphone, you can use an external one, like a headset mic, Bluetooth mic, or USB mic. Just plug it into your computer, and you’re all set.
11: How do I fix microphone issues after a Windows update?
- If a Windows update caused the issue, you can roll back the driver. Open Device Manager, right-click the microphone, go to Properties, and click Roll Back Driver in the Driver tab.
12: What should I do if my microphone is not detected in Ubuntu?
- Ensure the microphone is properly connected.
- Open Sound settings and select the microphone under Input. If it’s not listed, update the drivers with sudo apt update && sudo apt upgrade -y.
13: How do I fix low microphone volume on my Dell computer?
- In Windows, go to Start > Settings > System > Sound, select your microphone, and adjust the volume slider under Input.
- In Ubuntu, open Sound settings and use the volume slider under Input.
14: How do I change the audio settings on common chat apps like Microsoft Teams, Google Meet, and Zoom?
- These apps have their own audio controls to pick which mic records your voice.
- Manage audio device settings in apps like Microsoft Teams, Skype, Zoom, Google Meet, and Discord.
15: What if none of the troubleshooting steps work?
- Additional Troubleshooting: Follow these additional steps to resolve microphone issues.
- Use Dell Community Forums: Join the Dell Community Forums to get help from other users.
Video Resources
Discover how to easily pair and connect Bluetooth devices to your Windows 11 PC in this helpful tutor ial video.
...

