Dell Threat Defense Admin Guide Custom Authentication implementation instructions
Zusammenfassung: Dell Threat Defense's Custom Authentication setting allows you to add Microsoft Azure as your external identify provider. This includes Single Sign-On (SSO).
Dieser Artikel gilt für
Dieser Artikel gilt nicht für
Dieser Artikel ist nicht an ein bestimmtes Produkt gebunden.
In diesem Artikel werden nicht alle Produktversionen aufgeführt.
Weisungen
Note:
- As of May 2022, Dell Threat Defense has reached End of Maintenance. This article is no longer updated by Dell. For more information, reference Product Life Cycle (End of Support / End of Life) Policy for Dell Data Security. If you have any questions on alternative articles, either reach out to your sales team or contact endpointsecurity@dell.com.
- Reference Endpoint Security for additional information about current products.
Affected Products:
- Dell Threat Defense
- Log in to your Azure account and create a new Active Directory.
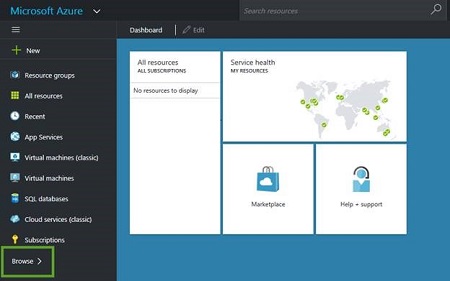
- Click Browse (bottom of the left navigation pane).
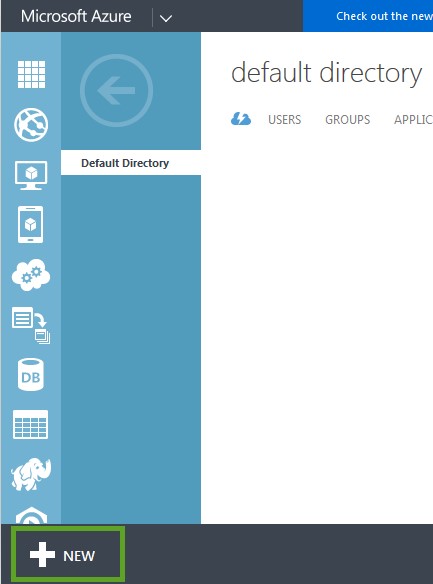
- Click Active Directory.
- Click New (lower-left).
- Click Directory > Custom Create. Then Add directory window displays.
- Enter the directory information (Name, Domain Name, and Country or Region), then click the check mark to save.
- Select the directory, then click Add User to add users to this active directory.
Note: The username in the active directory must match the username in Threat Defense.
- Click Browse (bottom of the left navigation pane).
- Add the application to your organization.
- Click Add (lower-middle).
- Click Add an application that my organization is developing.
- Type a name, ensure that Web Application and Web API are selected, then click Next (arrow).
- For a Sign-on URL, use the following (based on your region):
- For App ID URI, use the following (based on your region):
- Click Save (check mark).
- Click View Endpoints (bottom-middle).
- Copy the X.509 certificate.
- Copy the Federation Metadata Document URL, paste it into a new browser tab, then press Enter. The XML file displays in the browser tab.
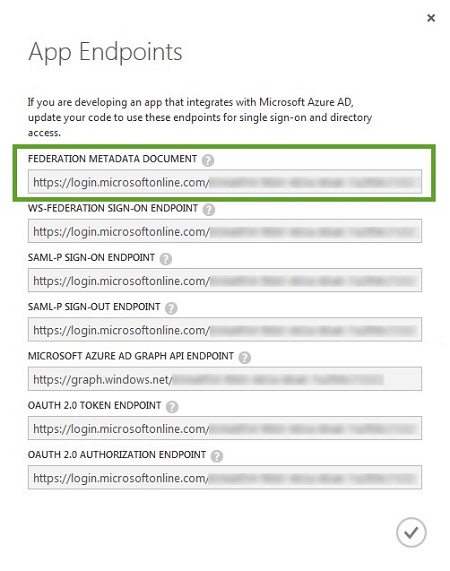
- Copy the X509 Certificate and paste it into a text document.

- Close the XML file browser tab.
- Copy the SAML-P Sign-on Endpoint URL and paste it into a text document.
- Log in to the Cylance Console.
- Go to Settings > Applications.
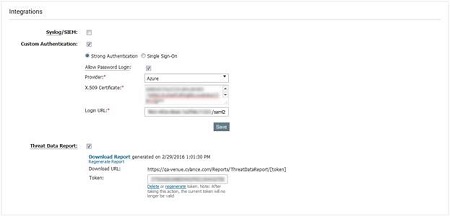
- Select Custom Authentication, under Integration.
- Select Azure from the provider list.
- Paste the Azure certificate (X.509 certificate, obtained in step 4).
- Add the SAML-P Sign-on Endpoint URL (provided by Azure, obtained in step D).
- Click Save.
- Copy the Federation Metadata Document URL, paste it into a new browser tab, then press Enter. The XML file displays in the browser tab.
Troubleshooting
If your Microsoft Azure authentication does not work when attempting to log in to the Cylance Console:
- Check your Microsoft Azure and Threat Defense Console settings to ensure that the settings are entered correctly.
- In Step 2, try configuring the App ID URI with the same information as the Sign-on URL (example: https://dellthreatdefense.cylance.com/EnterpriseLogin/ConsumeSaml)
To contact support, reference Dell Data Security International Support Phone Numbers.
Go to TechDirect to generate a technical support request online.
For additional insights and resources, join the Dell Security Community Forum.
Betroffene Produkte
Dell Threat DefenseArtikeleigenschaften
Artikelnummer: 000124769
Artikeltyp: How To
Zuletzt geändert: 19 Apr. 2026
Version: 11
Antworten auf Ihre Fragen erhalten Sie von anderen Dell NutzerInnen
Support Services
Prüfen Sie, ob Ihr Gerät durch Support Services abgedeckt ist.