Article Number: 000131901
在使用 PCIe M2 磁碟機的系統上載入 Ubuntu
Summary: 在 PCIe M2 硬碟上安裝 Ubuntu 的步驟。
Article Content
Instructions
本文提供如何使用 PCIe M2 磁片磁碟機在系統上安裝 Ubuntu 的相關資訊。
未看見硬碟
在只有 PCIe 型 m2 磁片磁碟機的系統上開機至 Ubuntu 14.04/15.04 媒體時。您可能會看到安裝程式找不到硬碟 (安裝程式預設為僅尋找 /dev/sdx) (圖 1)。 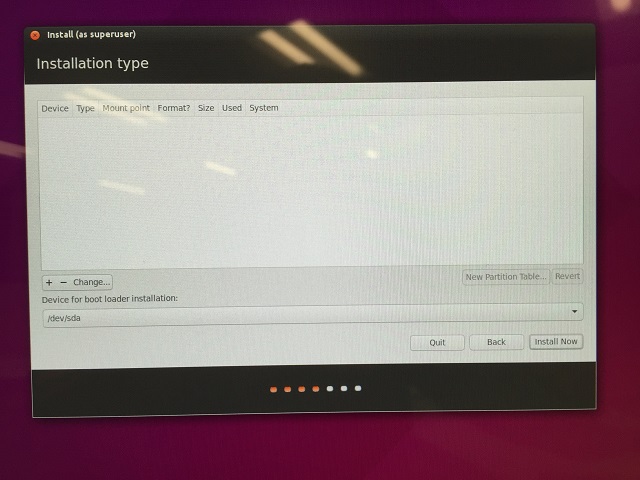
圖 1
NVME 載入
注意:使用者應移至系統 BIOS (開機時 F2),並將 SATA 設定變更為 AHCI。如果在此變更後仍看不到磁片磁碟機。使用者應依照以下指示操作。
在開機時間新增下列核心引數:
nvme_load=YES
- 當您看到鍵盤提示字元時,請按下 F12 鍵 (圖 2):

圖 2
- 按 Enter 鍵以選取語言
- 按下 F6 鍵
- 按下 Esc 鍵
- 修改開機選項以新增「nvme_load=YES」,並移除「quiet splash ---」
之前 (圖 3):

圖 3
之後 (圖 4):

圖 4
按 Enter 鍵。
NVME 磁片磁碟機現已在安裝程式中提供 (圖 5): 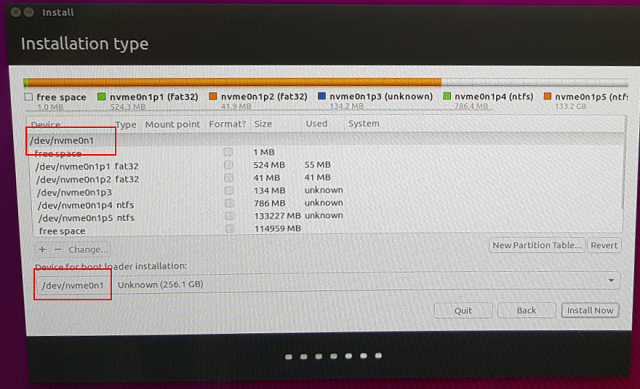
圖 5
- 控制器:Nvme0
- 連接埠:N1
- 分區:Px
Ubuntu 的詳細資訊
如果您對此文章有進一步的問題,請聯絡 Dell 技術支援。
Additional Information
Article Properties
Last Published Date
04 Jan 2024
Version
5
Article Type
How To