Connectrix B-Series: How to Replace SFP Transceiver.
Summary: Procedures on how to Replace an SFP Transceiver for All Connectrix Brocade B-Series
This article applies to
This article does not apply to
This article is not tied to any specific product.
Not all product versions are identified in this article.
Instructions
How to Replace an SFP Transceiver for All Connectrix Brocade B-Series
The following articles provide instructions on how to remove and replace various optical transceivers for the Connectrix Brocade B Series.
Select the instructions below based on the type of optical transceiver being replaced:
Removing and replacing an SFP, SFP+, or XFP optical transceiver
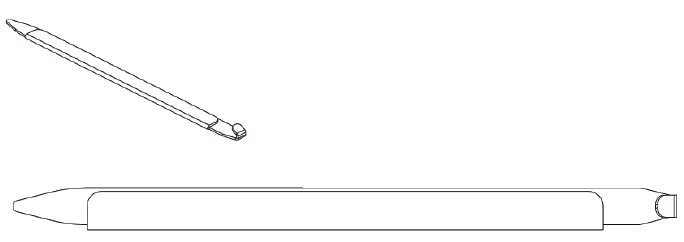
Most EMC Connectrix switches and backbones come with a transceiver extraction tool and holster. The extraction tool is designed to remove transceivers from switches and blades where the space is limited.
Extraction Tool
Removing an SFP, SFP+, or XFP transceiver
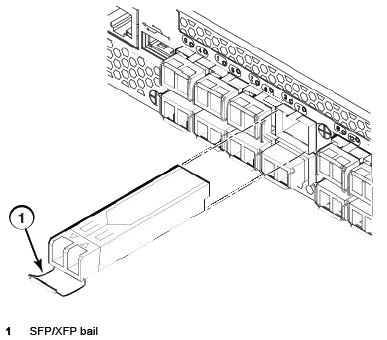
To remove an SFP, SFP+, or XFP transceiver, complete the following steps.
-
Remove any cables that are inserted into the transceiver. Use the extraction tool to open the cable latching mechanism.
-
Pull the bail (wire handle) away from its pivot point and out, sliding the transceiver out of the switch or blade.
Replacing an SFP, SFP+, or XFP transceiver
- Position the optical transceiver so that the key is oriented correctly to the port. Insert the transceiver into the port until it is firmly seated and the latching mechanism clicks.
Transceivers are keyed so that they can only be inserted with the correct orientation. If a transceiver does not slide in easily. Confirm that it is correctly oriented.
- Position a cable so that the key (the ridge on one side of the cable connector) is aligned with the slot in the transceiver. Insert the cable into the transceiver until the latching mechanism clicks.
Cables are keyed so that they can be inserted in only one way. If a cable does not slide in easily. Confirm that it is correctly oriented.
Removing and replacing an mSFP optical transceiver
NOTE: mSFP optical transceivers should not be inserted into ports that are intended for SFP or SFP+ transceivers. They will fault on power-up For Fabric OS 6.4.0 and later.
To replace an mSFP transceiver, complete the following steps. Note: It is recommended that the optical cable should be either removed from or inserted into the mSFP while the transceiver is out of the switch or blade.
Removing an mSFP transceiver
NOTE: The mSFP transceivers are used only with the FC8-64 port blade. Narrower OM-3 LC cables are used to connect the FC8-64. These cables are offered by major manufacturers like Corning, Molex, and Amphenol.
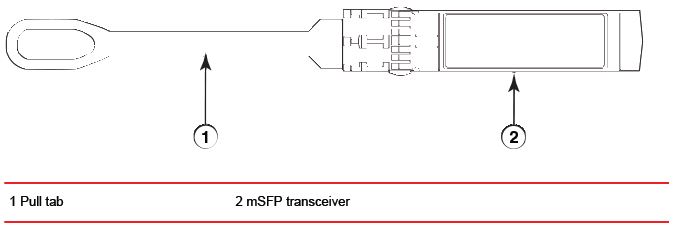
CAUTION: The pull tabs are not designed to be bent. Doing so may result in damage to the pull tab.
-
Grasp the pull tab firmly and pull the unit out of the port.
-
Remove the cable from the transceiver.
Replacing an mSFP transceiver
-
Insert the cable into the new transceiver until the latching mechanism clicks.
-
Position the optical transceiver so that the key is oriented correctly to the port. Insert the transceiver into the port until it is firmly seated and the latching mechanism clicks.
Transceivers are keyed so that they can only be inserted with the correct orientation. If a transceiver does not slide in easily. Confirm that it is correctly oriented.
Removing and replacing a QSFP optical transceiver
Use this procedure to remove and replace QSFP transceivers that are supported on the FC16-64 port blades and core switch blades. Do not use the extraction tool to remove the QSFP transceivers. Follow these guidelines while removing and replacing QSFP transceivers:
-
The QSFP transceivers are used only with the FC16-64 port blades and core switch blades. However, the part numbers of QSFP transceivers that are supported on FC16-64 port blade and the core blades are not the same and are not interchangeable.
-
It is recommended that the optical cable should be either removed from or inserted into the QSFP while the transceiver is out of the blade due to the port density.
-
QSFP optical transceivers should NOT be inserted into ports that are intended for SFP+ or mSFP transceivers. They will fault on power-up.
-
Cables for QSFP transceivers should not be used with standard SFP+ or mSFP transceivers.
-
The pull tabs are not designed to be bent. Doing so may result in damage to the pull tab.
Removing a QSFP transceiver
Complete the following steps to remove a QSFP cable.
-
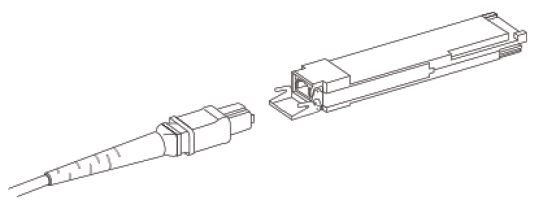
Grasp the rubber housing on the end of the cable and pull it straight out of the QSFP transceiver.
-
If the QSFP transceiver also needs to be replaced, remove the QSFP transceiver by rotating the bail down and using the bail to pull the transceiver out of the connector on the blade.
-
Repeat for each cable that requires replacement.
QSFT Transceiver
Replacing a QSFP transceiver
Complete the following steps to replace a QSFP transceiver.
-
If the QSFP transceiver is being replaced, grasp the bail of the new QSFP and push the QSFP into the connector on the blade until it is firmly seated. The QSFP is keyed to fit into the connector in one way. The status LED initially blinks amber after installation, then displays steady amber.
-
Grasp the QSFP cable by the rubber housing and push it into the QSFP transceiver until it is firmly seated. The cable housing is keyed to fit into the QSFP in one way.
The status LED displays steady amber until both ends of the cable are inserted and the link is established. When the link is fully established, the LED displays steady green.
-
Repeat for each cable that requires replacement.
Once all the cables are attached, refer to the Fabric OS Administrator's Guide for the configuration procedure.
Affected Products
Connectrix B-Series HardwareProducts
Connectrix DS-5100BArticle Properties
Article Number: 000021333
Article Type: How To
Last Modified: 30 Oct 2025
Version: 4
Find answers to your questions from other Dell users
Support Services
Check if your device is covered by Support Services.