General Information About the Dell AC511 and AC511M Soundbars
Summary: This article provides general information about the Dell AC511 and AC511M soundbars.
This article applies to
This article does not apply to
This article is not tied to any specific product.
Not all product versions are identified in this article.
Instructions
Table of Contents:
Overview
Note: More detailed information can be found in the soundbar User Guides:
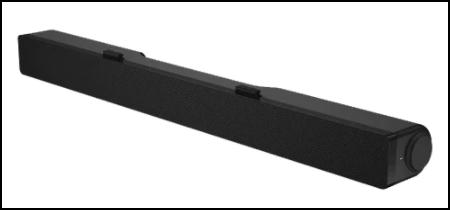
The Dell AC511 and AC511M are soundbars that attach to certain Dell monitors. There are two variants of the AC511 soundbar:
- The Dell AC511 soundbar attaches to the bottom of certain Dell monitors.
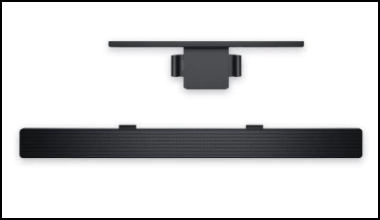
- The Dell AC511M soundbar attaches to the stand of certain Dell monitors with an included bracket.
Specifications
The AC511 and AC511M soundbar technical information:
| Feature | Description |
|---|---|
| Dimensions (W x D x H) | 16 in x 1.9 in x 1.5 in |
| Controls | Volume knob |
| LEDs | Power ON and OFF indicator |
| Mounting | AC511: At the bottom of the monitor AC511M: On the monitor stand with a bracket |
| Power Supply | USB |
Supported Displays
The AC511 and AC511M soundbars can be installed on the following monitors:
| Speaker | Monitor Model |
|---|---|
| AC511 | E1914H, E2014H, E2214H, E2214Hv, E2314H E2414H, P1914S, P2014H, P2214H, P2314H, P2414H P2714H, U23.8, U2414H, UP2414HQ, U34, U3214HQ |
| AC511M | E1914H, E1914He, E1916H, E1916He, E1916HL, E1916HM, E1916HV, E2014H, E2014T, E2015HV, E2016, E2016H, E2016HV, E2214H, E2214Hv, E2215HV, E2216H, E2216HV, E2218HN, E2219HN, E2314H, E2316H, E2316Hr, E2318H, E2318HN, E2318HR, E2318HX, E2414H, E2414Hr, E2414Hx, E2417H, E2418HN, E2715H, P1914S P1917S, P1917SWh, P2014H, P2016, P2017H, P2018H, P2214H, P2217 P2217H, P2217Wh, P2219H (with mount), P2219HC (with mount), P2314H, P2317H P2317HWh, P2319H (with mount), P2414H, P2415Q, P2416D, P2417H, P2418D P2418HZ, P2418HZm, P2419H (with mount), P2419HC (with mount), P2714H P2714T, P2715Q, P2717H, P2719H (with mount), P2719HC (with mount) S2719HS (with mount), U2414H, U2415, U2417HJ, U2419H (with mount), U2419HC (with mount) U2515H, U2713H, U2715H, U2719D (with mount), U2719DC (with mount), U2917W U3219Q (with mount), UP2516D, UP2716D, UP2718Q, UP3017, UP3216Q, UZ2215H |
Note: If you have a monitor not on this list, you can check the monitor's User Guide for compatibility with the soundbar.
Connecting the Soundbar
AC511:
The following instructions can be used to install the soundbar on a Dell compatible monitor.
- Gently peel off the slot covers at the bottom of the monitor.
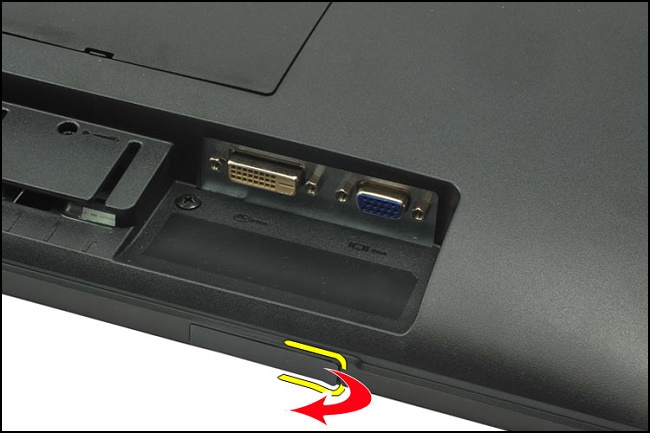
- Align the hook on the soundbar to the slot at the bottom of the monitor.
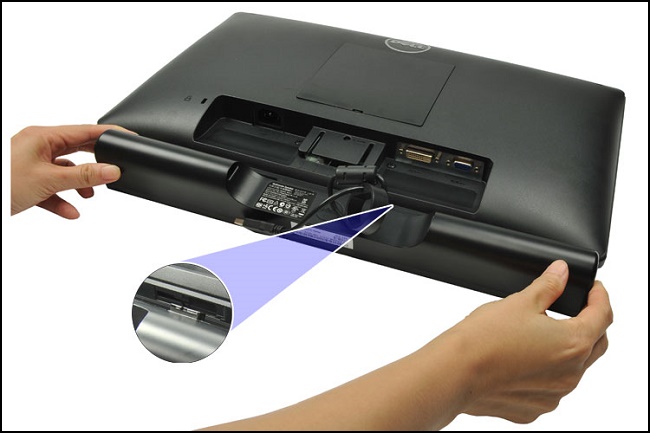
- Slide the soundbar to secure it on the monitor.
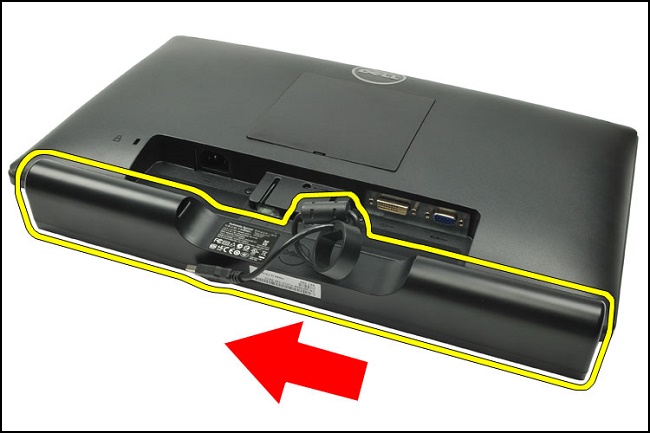
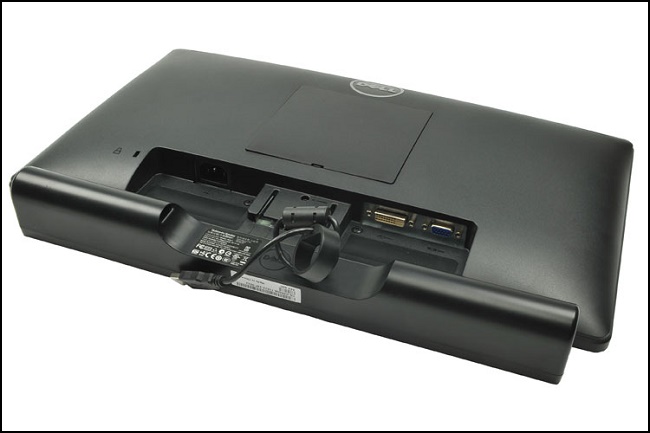
- Sound bar attached to monitor complete.
AC511M:
The following instructions can be used to install the soundbar on a Dell compatible monitor.
- Pull the bracket’s clamp.
 Note: Use the thick rubber cushion between the bracket and the nonswivel base monitor stand.
 - Secure the bracket to the monitor stand.

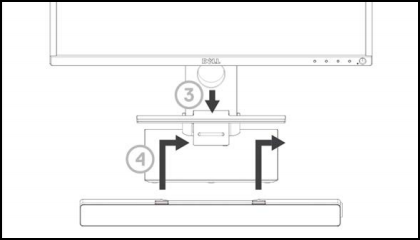
- Push the bracket down to align it with the stand base.
- Align the tabs on the soundbar with the slots on the bracket. Slide the soundbar to the right to secure the soundbar to the bracket.
Troubleshooting
The following can be used to troubleshoot various issues with the AC511 and AC511M soundbars.
| Symptom | What You May Experience | Possible Solution |
|---|---|---|
| Soundbar not functioning properly | Soundbar that is not detected or sync. |
|
| No Sound | The speaker has power, and the power LED indicator is on. |
|
| Distorted Sound | Computer's audio is used as the audio source. |
|
| Distorted Sound | Other audio sources are used. |
|
| Unbalanced Sound Output | Sound from only one side of the portable speaker. |
|
| Low Volume | Volume is too low. |
|
| Buzzing Noise from Soundbar Speaker | Is the soundbar speaker properly attached to the monitor and there is no obstruction? |
|
| Line-in No Sound | Is the audio line-in cable plugged in? |
|
| Line-in No Sound | Is the external audio device turned on or playing audio? |
|
| Line-in Distortion | Is the line-in cable properly plugged in? |
|
| Headphone Jack Has No Sound | USB or external audio source not playing music or volume is at 0%. |
|
| Headphone Jack Distortion | Is the headphone line-in cable properly plugged in? |
|
| Cable not long enough and extension cable cannot connect to soundbar USB cable | USB extension cable |
|
| Soundbar Cannot Mount To Monitor | T-Hook |
|
| Missing Items | Package check. |
|
More Information
Affected Products
Dell Stereo Soundbar - AC511M, Dell USB Soundbar AC511Article Properties
Article Number: 000125748
Article Type: How To
Last Modified: 11 Nov 2025
Version: 20
Find answers to your questions from other Dell users
Support Services
Check if your device is covered by Support Services.