Upgrade using the WD19 and WD19S Docks Cable Module Customer Kit
Summary: The following article provides information about the installation process required to upgrade the Dell WD19 and WD19S series dock. It requires you to fit the appropriate Cable Module Customer Kit from Dell. ...
This article applies to
This article does not apply to
This article is not tied to any specific product.
Not all product versions are identified in this article.
Instructions
The Dell WD19 and WD19S series Dock Upgrade Process
The Dell WD19 and WD19S series Dock are designed in three variations that all use the same dock base assembly.
The versions are:
- Dell Dock WD19 and WD19S
- Dell Performance Dock WD19DC and WD19DCS
- Dell Thunderbolt Dock WD19TB and WD19TBS
There are five upgrade customer kit options available that allow you to modify a WD19 and WD19S series dock to a different configuration:
- WD19 and WD19S to WD19TB, WD19TBS kit with a 180-watt AC Adapter
- WD19DC and WD19DCS to WD19TB, WD19TBS kit without an AC adapter
- WD19 and WD19S to WD19DC kit with a 210-watt AC adapter
- WD19 and WD19S to WD19DC, WD19DCS kit without an AC adapter
- WD19, WD19S, WD19DC, WD19DCS, WD19TB, WD19TBS, to WD22TB4 kit without an AC adapter (180-watt AC Adapter required)
Note: The availability of the dock upgrade kit varies regionally. Contact your Dell Sales representative for upgrade kit availability in your region.
Note: For proper operation as a Dell Thunderbolt dock, a 180-watt AC adapter is required. Whereas for proper operation as a Dell Performance Dock (using a dual connection to a Dell Precision Workstation) a 210-watt AC Adapter is required.
Installation guide for the Upgrade Kit
Once you receive your upgrade kit for your Dell (WD19 and WD19S) Dock, follow these steps to complete the dock upgrade:
Note: Before installing the upgrade, ensure that the most current Dock Firmware update is installed. You can download the firmware from the Dell Support Website.
Note: Remove All of the cables from the Dell Dock and disconnect the AC adapter before changing the cable kit module.
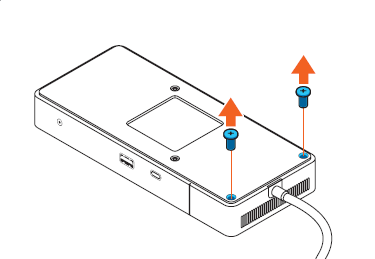
-
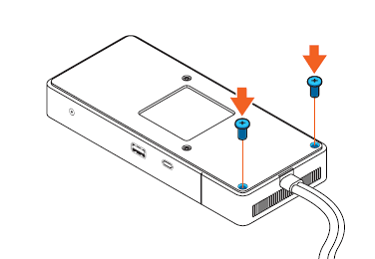
Turn the Dock so that the Dell Logo is pointing down and remove the two Philips head screws from the cable module assembly.
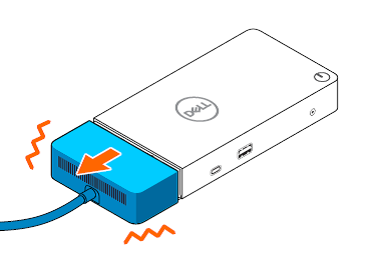
-
Turn the Dock so that the Dell Logo is pointing up. Slide the cable assembly from the dock's base a few millimeters until it stops.
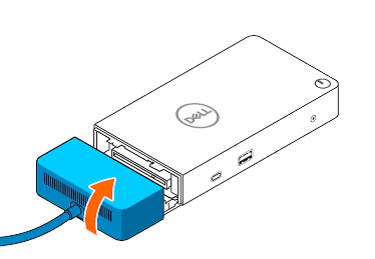
-
Tilt the cable module up slightly.
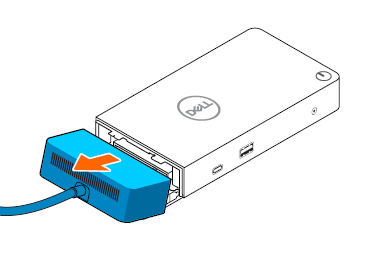
-
Remove the cable module from the dock's base.
-
Remove the upgrade cable module from the shipping box.
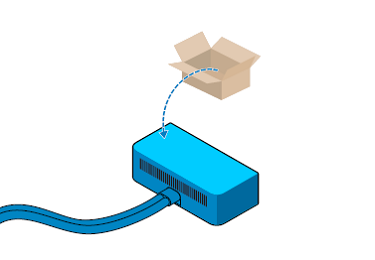
-
Slide the new cable module down along the track on the dock's base.
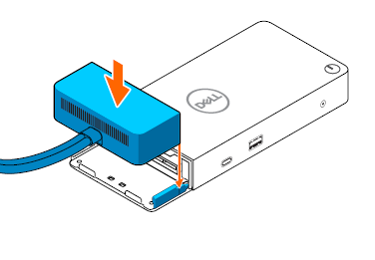
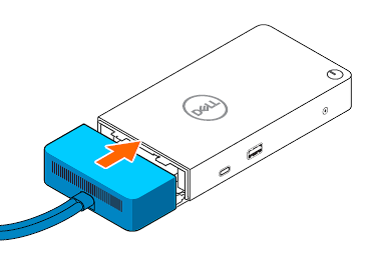
-
Slide the new cable module onto the dock's base until it is fully seated.
-
Turn the dock so that the Dell Logo is pointing down again.
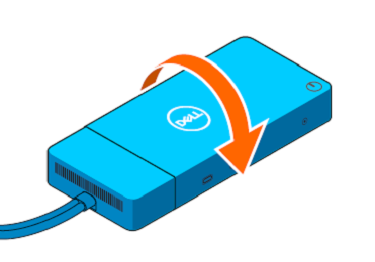
-
Reinstall the two Philips head screws.
-
Where it was in the kit, reconnect the cables and the new AC adapter.
Affected Products
Dell Dock WD19, Dell Performance Dock - WD19DC, Dell Performance Dock – WD19DCS, Dell Dock – WD19S, Dell Thunderbolt Dock - WD19TB, Dell Thunderbolt Dock – WD19TBS, Dell Thunderbolt Dock – WD22TB4Article Properties
Article Number: 000127539
Article Type: How To
Last Modified: 20 Apr 2026
Version: 13
Find answers to your questions from other Dell users
Support Services
Check if your device is covered by Support Services.