PowerEdge: Windows Essentials Server 2016: Stopping at 16 Percent At Initial Settings
Summary: This article provides information about Windows Server 2016 Essentials where in the initial settings it stops responding at 16% according to the screens below. This issue occurs when installing the OS with the media shipped with the equipment. ...
This article applies to
This article does not apply to
This article is not tied to any specific product.
Not all product versions are identified in this article.
Symptoms
Note: This article is part of the Server Tutorials: Support Tools, available at PowerEdge: Server Support Articles
In Windows Server 2016 Essentials, the initial settings hang at 16% according to the screens below. This issue occurs when installing the OS with the media shipped with the equipment.
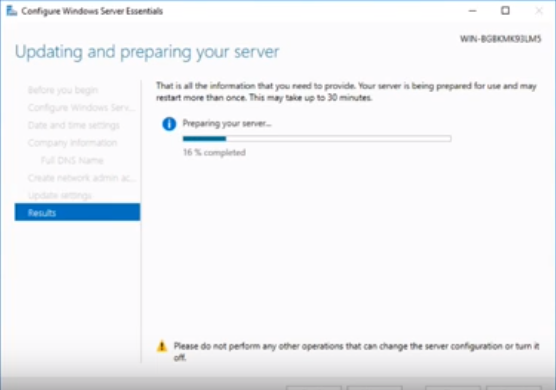
Figure 1: Updating and Preparing your Server 16%
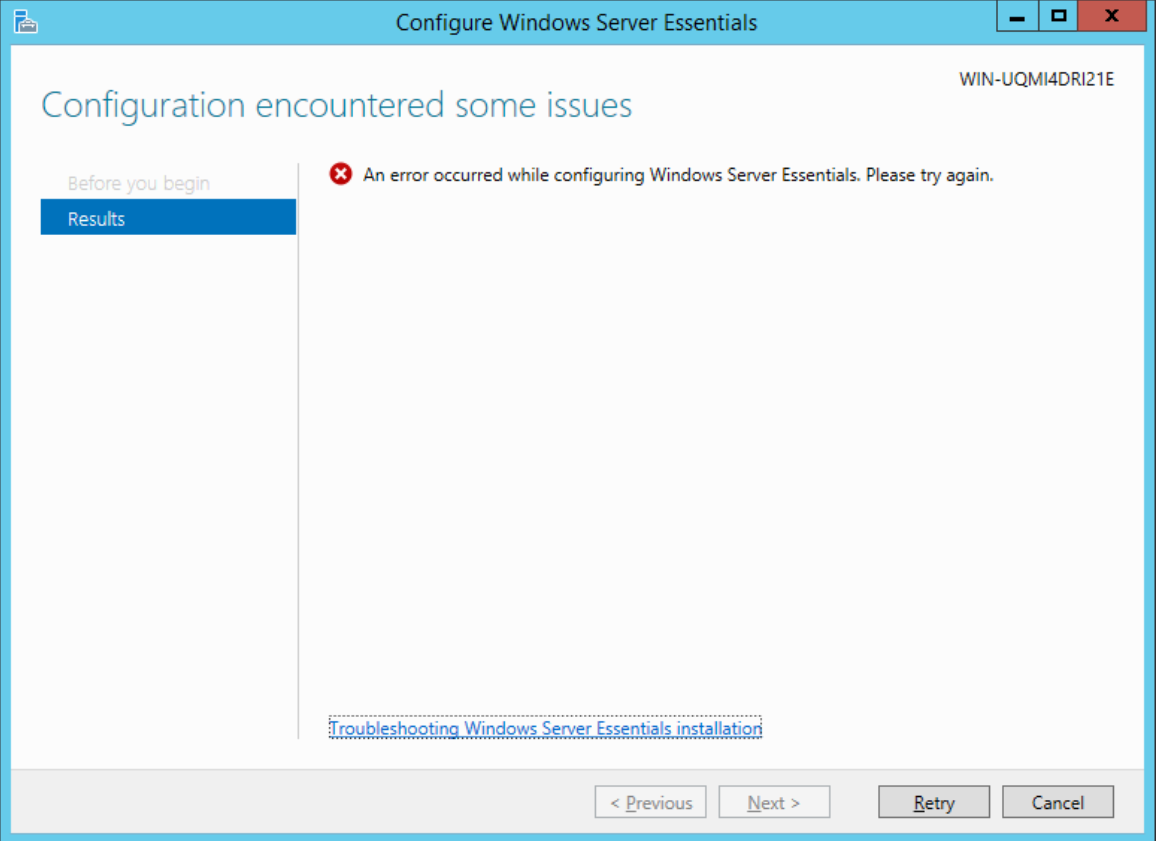
Figure 2: An error occurred while configuring windows server essentials 2016.
Cause
This is due to not having a fixed IP with DNS configured prior to the configuration.
Resolution
Solution Steps
- Access the Advanced System Properties and change the server name as defined by the client and restart the machine.
Caution: This name cannot be changed later.
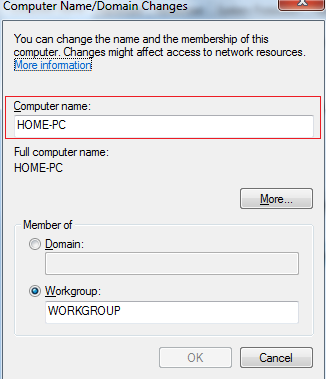
Figure 3 Computer Name and Domain Changes
- Define a fixed IP on the server by Active Directory Domain Services (ADDS) and Domain Name System (DNS).
Note: The primary DNS must be the same IP address.
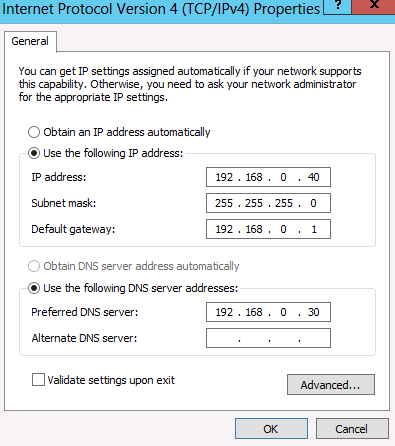
Figure 4: Static IP address
- Open the Server manager Dashboard and then go to Add Roles and Features.
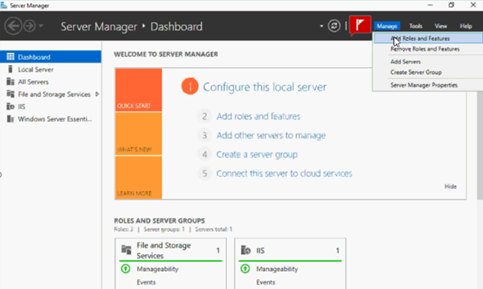
Figure 5: Add roles and features
- Advance the following screen:
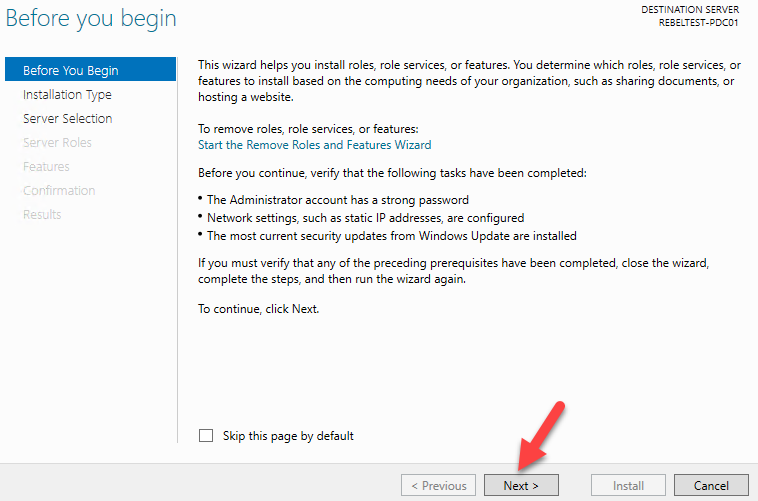
Figure 6: Before you begin
- Select the Role-based or Feature-based installation option and go ahead.
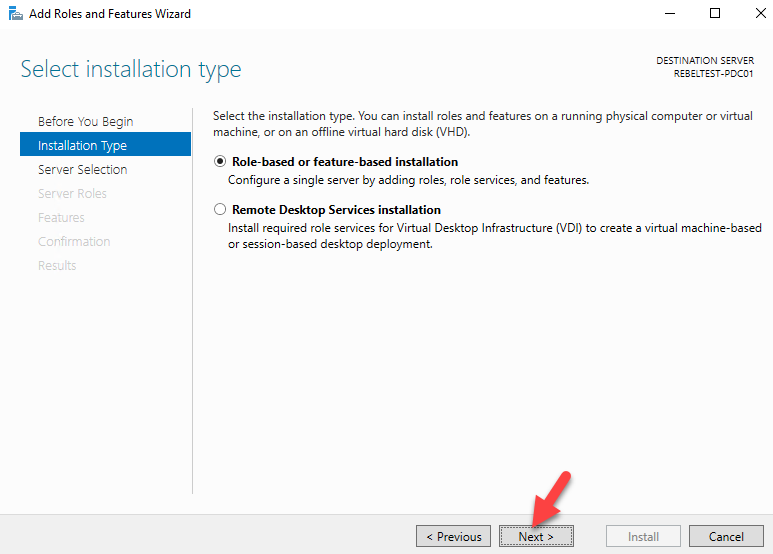
Figure 7: Select the installation type.
- Select the option selected below and advance.
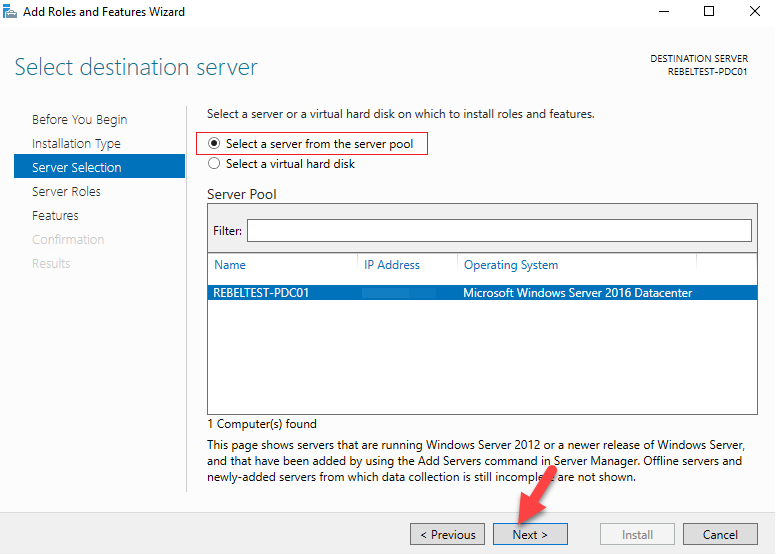
Figure 8: Select a destination server
- Add the "DNS Server" and "Active Directory Domain Services"
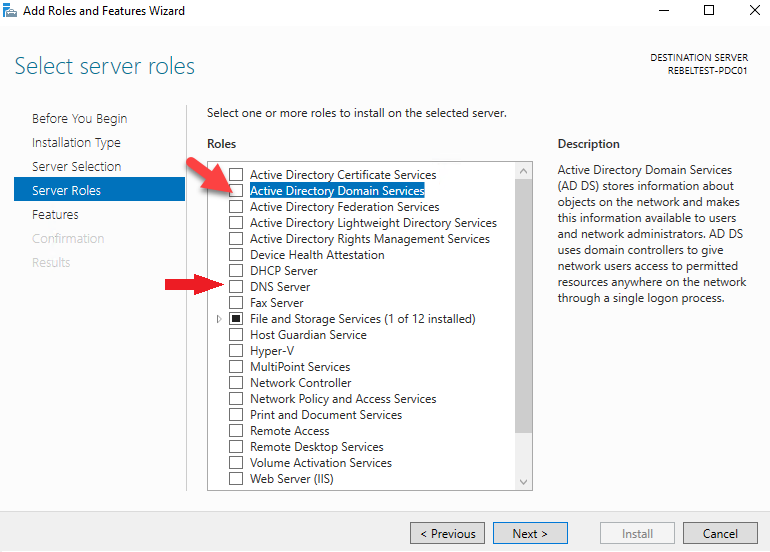
Figure 9: Select server roles.
- Select Add Features
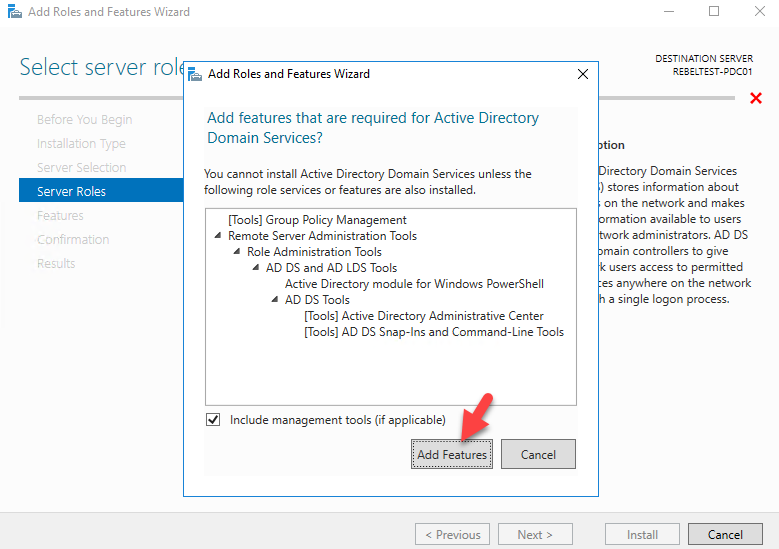
Figure 10: Add Roles and features Wizard.
- The features page, keep it default and click next to proceed.
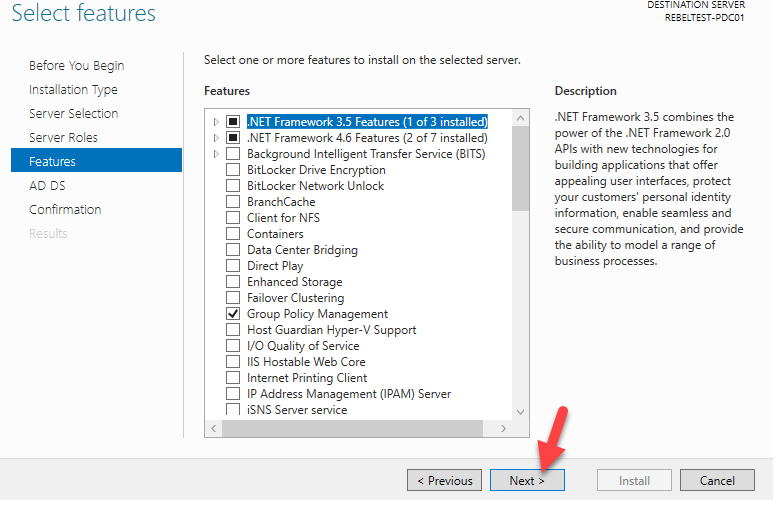
Figure 11: Select features.
- In next windows it gives brief descriptions about AD DS service. Click Next
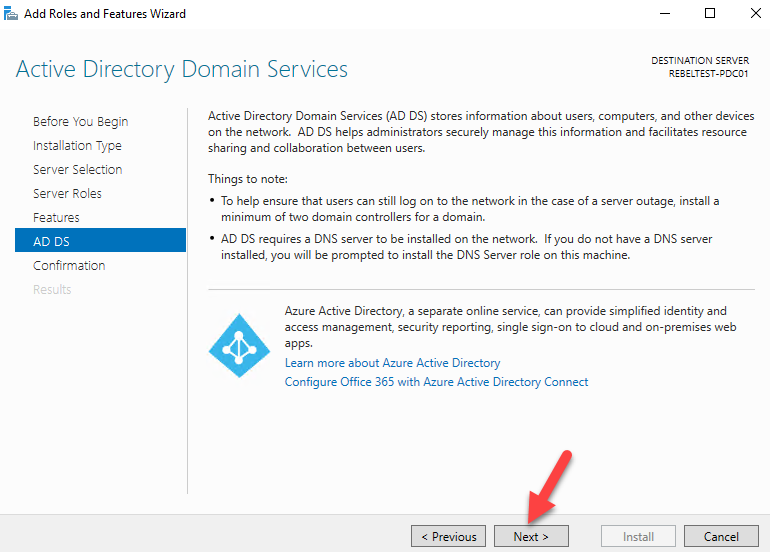
Figure 12: Active Directory Domain Services
- Then it gives the confirmation about install, click Install to start the role installation process.
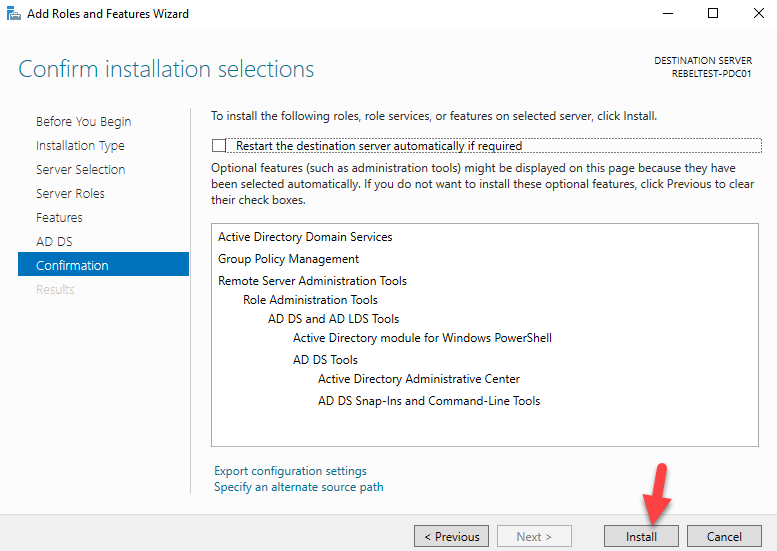
Figure 13: Confirm installation selection.
- Wait for the added features and then advance again.
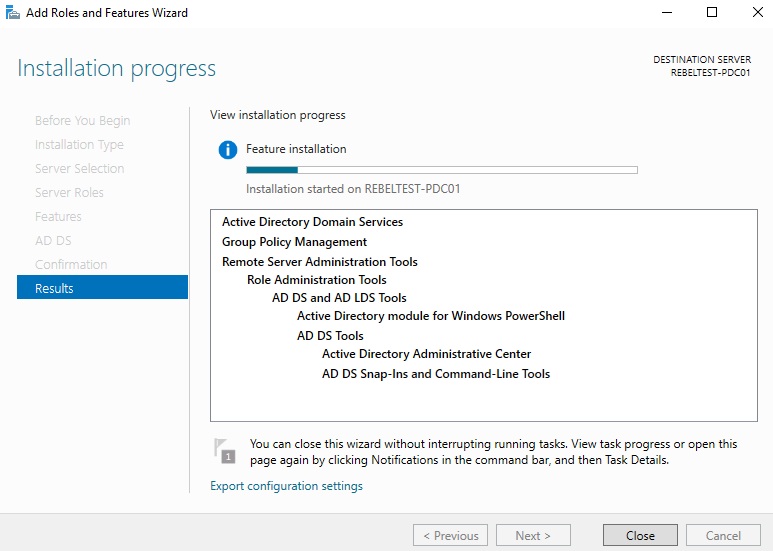
Figure 14: Installation progress
- Once installation completes, click the option Promote this server to a domain controller.
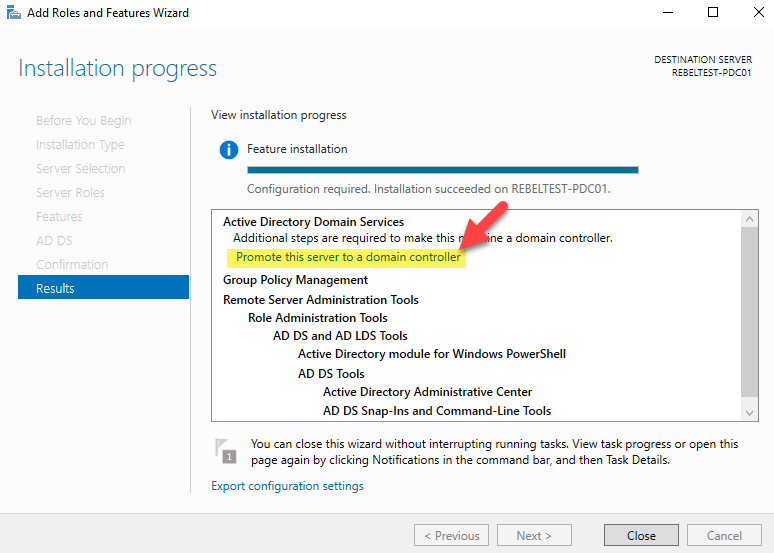
Figure 15: promote this server to a domain controller.
- Select the Add a New Forest Option. For the Root Domain Name, type the name of the client domain.
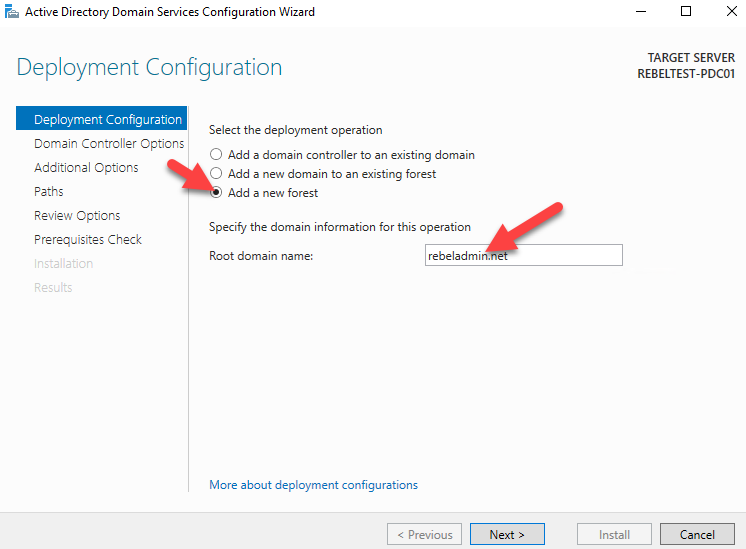
Figure 16: Deployment Configuration
- In this step important information is defined, such as forest and domain functional levels, installation and integration with DNS, Global Catalog and Domain Restore Password. Keep what is already selected, enter your recovery password and click the Next button.
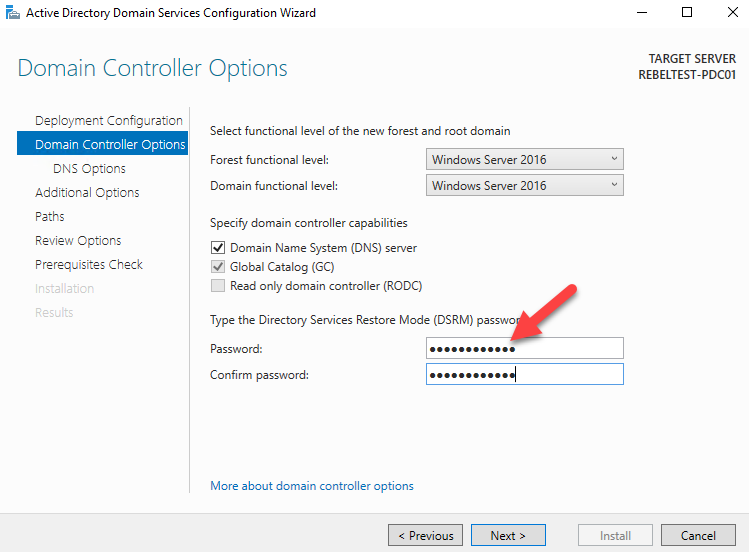
Figure 17: Domain Controller Options
- A new search is performed on the network, now for the NETBIOS name. If there are no matches, the domain name is kept.
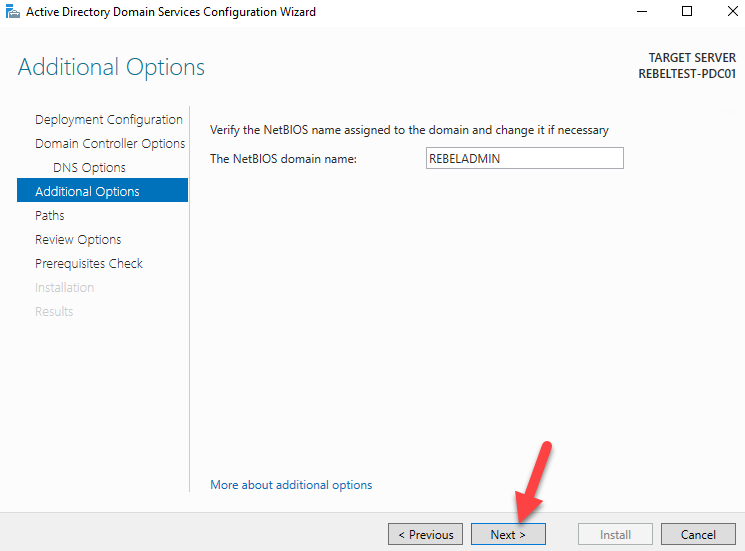
Figure 18: NetBIOS name Assignment
- This screen defines where the database, logs, and files of the domain are written. Keep the pattern and click the Next button to move forward.
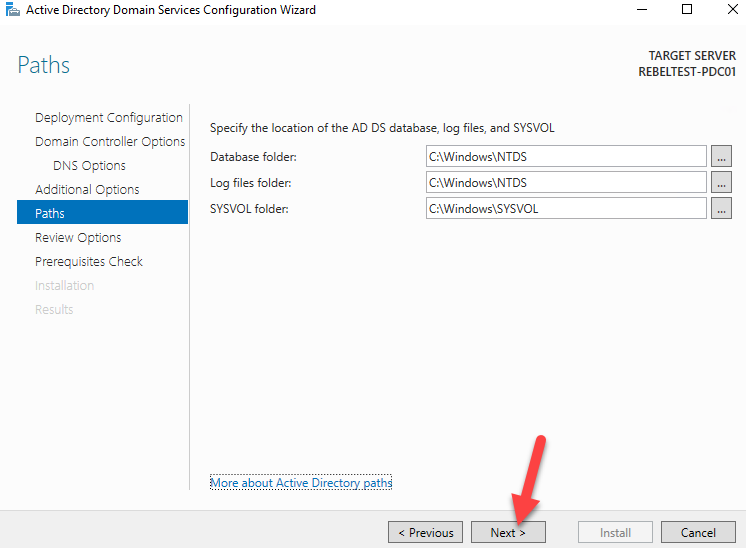
Figure 19: Specify the location of the AD DS database.
- This screen displays a report of everything that was selected and configured for the Domain deployment. A deployment script is obtained by clicking the View script button.
- Click the Next button to proceed.
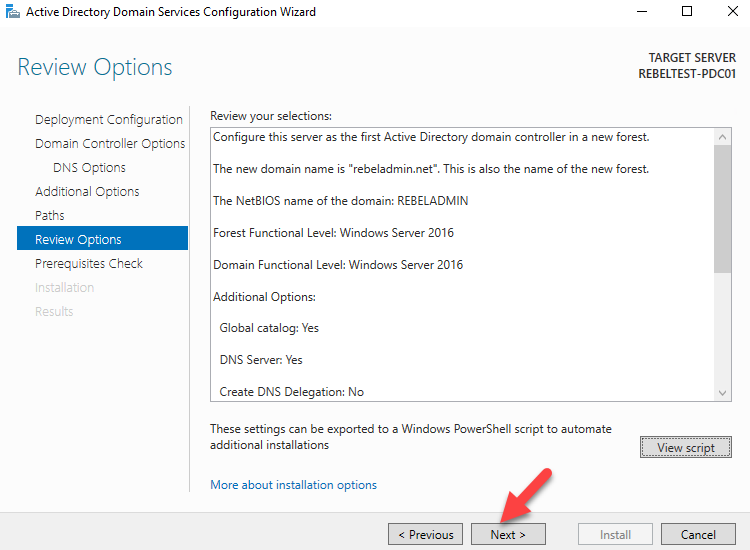
Figure 20: Review Options
- The alert for DNS is present again, check for further alerts if there are any, if the information does not appear All prerequisite checks passed successfully.
- Click the Install button to proceed.
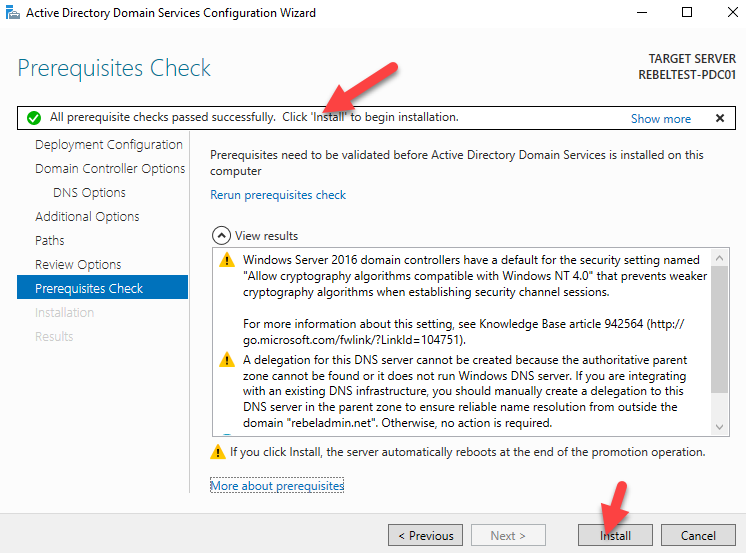
Figure 21: Prerequisites Check
- After the installation, the system restarts automatically. Once it comes back, log in to the server as the domain admin.
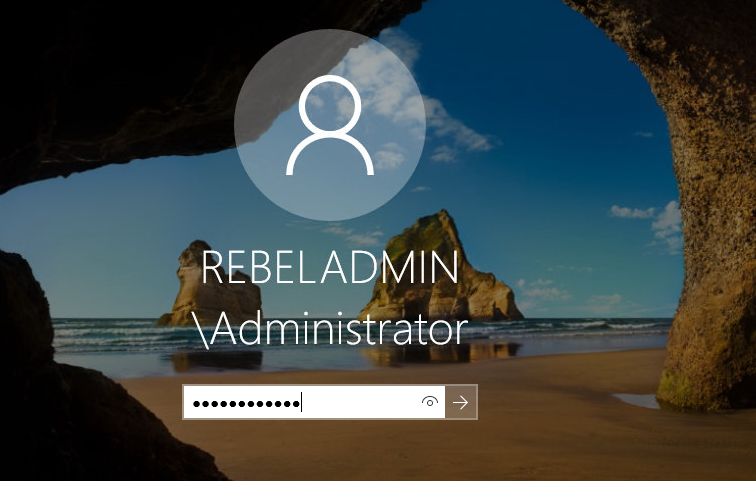
Figure 22: Windows Login screen
- After restarting, the error may occur again as below.
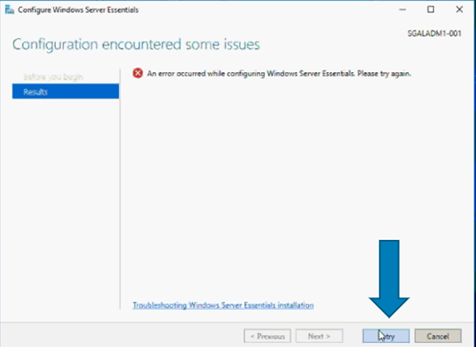
Figure 23: Configuration Error Wizard
- In this case, click Retry and advance normally.
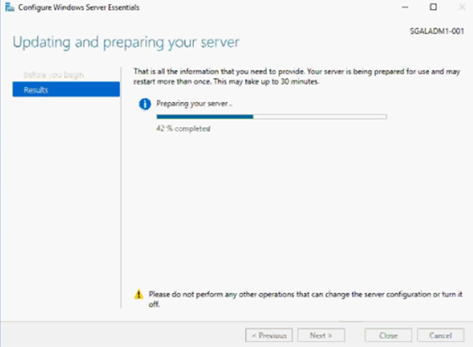
Figure 24: Configuration Wizard retry progress
Affected Products
Microsoft Windows Server 2016Article Properties
Article Number: 000146750
Article Type: Solution
Last Modified: 09 Jul 2026
Version: 11
Find answers to your questions from other Dell users
Support Services
Check if your device is covered by Support Services.