Locate Your Unique DNS Values in Office 365
Summary: To create the DNS records you need for Office 365 services at your domain registrar or DNS host, you must use specific values for the records.
This article applies to
This article does not apply to
This article is not tied to any specific product.
Not all product versions are identified in this article.
Instructions
Affected Products:
- Office 365
If you are in the middle of the Office 365 domain setup wizard, you see the DNS values on the wizard pages. But if you have closed the wizard, you can follow the steps here to find the values.
Domains and DNS: Set up a custom domain name
- Find the TXT record value for verifying domain ownership
- Sign in to the Microsoft Online Portal
.
- Go to Domains.
- Sign in to the Microsoft Online Portal
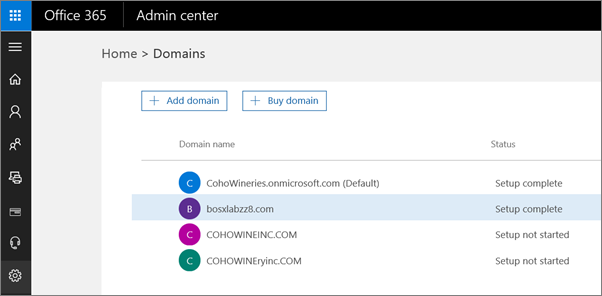
Figure 1: (English Only) Go to Domains
- On the Domains page, click your domain.
- Choose Start setup. You go back to the Domains setup wizard to see the specific value you must add.
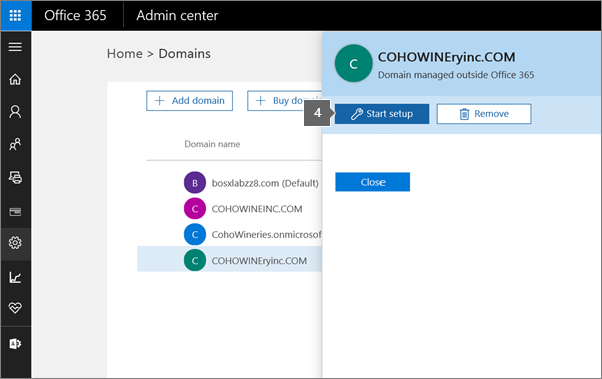
Figure 2: (English Only) Choose Start setup
- On the Add this TXT record page, you find step-by-step instructions to add a TXT record to verify your domain.
Note: If your DNS host does not let you add TXT records, you see MX record instead of TXT record.

Figure 3: (English Only) Required DNS settings
- Copy the MS=msXXXXXXXX value (including the MS= part) shown on the page.
- Update your DNS records for step-by-step instructions to add the portal.
- Find all other values to set up Office 365
To locate all other DNS values to set up Office 365, including MX record values for email follow the steps below.
- Sign in to the Microsoft Online Portal
- Select Domains.
- On the Domains page, select your domain.
- Click Domain settings to see the DNS records to add.
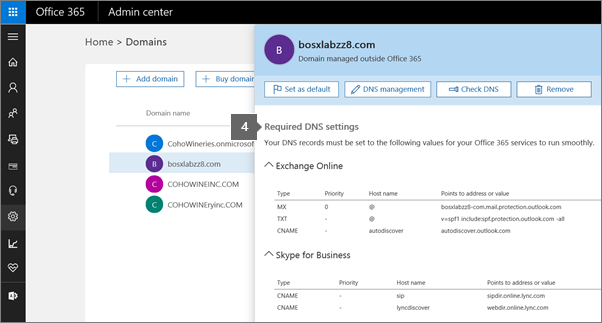
Figure 4: (English Only) Click Domain settings
- Update your DNS records (internal link) for step-by-step instructions to add the portal.
Note:
- You want to keep this information available while you update your DNS host, so you can copy and paste the values.
- The groups of DNS records that are listed on the page depend on your choices listed under Domain purpose.
Affected Products
Microsoft 365 from DellProducts
Microsoft 365 from DellArticle Properties
Article Number: 000184778
Article Type: How To
Last Modified: 19 Mar 2024
Version: 5
Find answers to your questions from other Dell users
Support Services
Check if your device is covered by Support Services.