Re-imaging ThinOS on a Latitude 3440, Latitude 5440, and OptiPlex 7410 AIO
Summary: Wyse ThinOS may be reinstalled using a USB drive that is supplied by Dell support.
This article applies to
This article does not apply to
This article is not tied to any specific product.
Not all product versions are identified in this article.
Instructions
Affected Platforms:
- Latitude 3440
- Latitude 5440
- OptiPlex 7410 All-in-One
Affected Operating Systems:
- Wyse ThinOS
Note: For system board replacement service scenario, the ThinOS Recovery USB Key is dispatched with the replacement system board.
- Insert the Thin OS Recovery USB Key into a USB port of the device.
- Power on the device, press F2 to enter BIOS setup.
Note: The BIOS admin password is
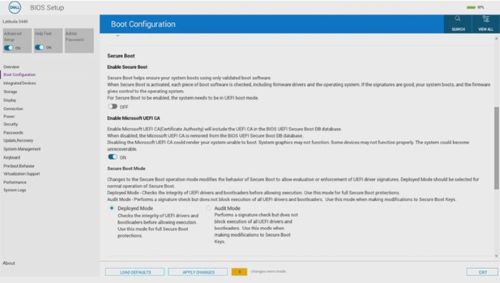
Fireport. - Go to Boot Configuration and check that Secure Boot is Disabled.
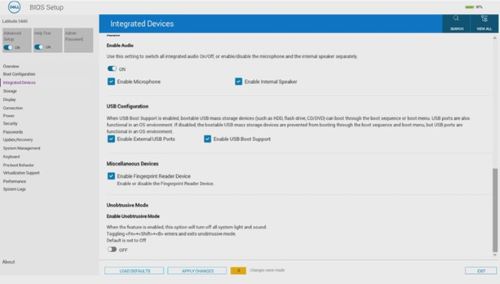
- Go to Integrated Devices and Enable USB boot support.
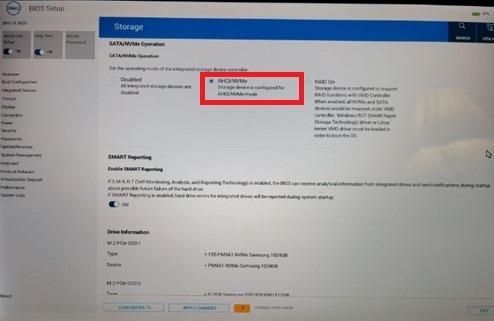
- Go to Storage, SATA/NVMe Operations and select ACHI/NVMe.
- Save the settings and Exit.
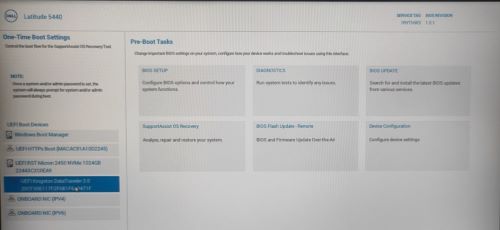
- When the Thin Client reboots, press F12 to trigger the Boot Menu and select the bootable ThinOS Recovery USB drive and Press Enter.
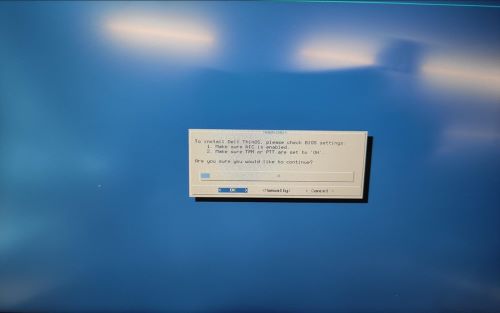
- Select OK at the screen below.
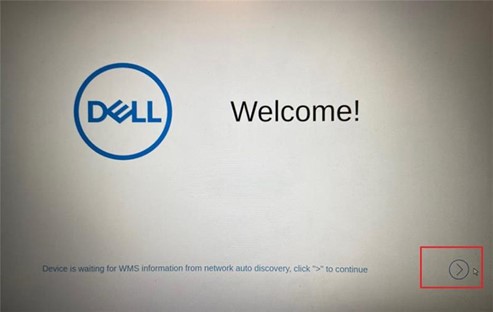
- Once the installation is completed, the EULA screen is displayed. Select Click here to accept all EULA's checkbox and click Accept.

- Click the next arrow at the Welcome screen.
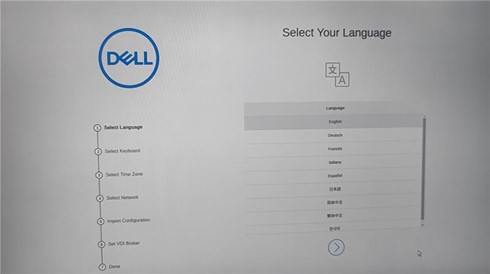
- Press Ctrl + Esc to bypass the Out of Box Experience (OOBE) Setup at the Language Selection screen.
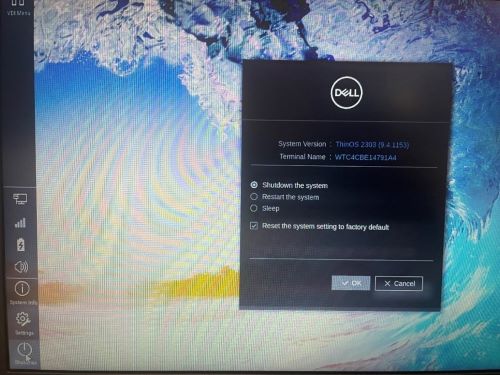
- At the ThinOS desktop, select the option Reset the system setting to factory default and Shutdown the device.
Affected Products
Latitude 3440, Latitude 5440, OptiPlex All-In-One 7410, Dell ThinOSArticle Properties
Article Number: 000194945
Article Type: How To
Last Modified: 04 Feb 2025
Version: 8
Find answers to your questions from other Dell users
Support Services
Check if your device is covered by Support Services.