Dell Data Wipe: Complete Guide for Secure Data Removal
Summary: Dell Data Wipe securely erases all internal storage via BIOS—ideal for resale, repurpose, or disposal. Protect privacy with enterprise-grade erasure.
Instructions
What is Dell Data Wipe?
Dell Data Wipe is a built-in security feature that completely erases all data from your computer's internal storage. Think of it as a digital shredder that makes your files unrecoverable – perfect when you're selling, donating, or repurposing your Dell computer.
This feature is already built into your computer's BIOS (the system that starts your computer), so you don't need to download or install anything extra.
Why Use Dell Data Wipe?
- Protect Your Privacy When you delete files normally, they can often be recovered with special software. Dell Data Wipe ensures your personal information, photos, documents, and passwords are completely gone forever.
- Save Time and Effort Instead of manually deleting files and reformatting drives, Dell Data Wipe handles everything automatically using professional-grade erasure methods.
- Meet Security Standards Dell Data Wipe uses the same data removal standards that businesses and government agencies trust to protect sensitive information.
- Works on All Storage Types Whether your computer has a traditional hard drive, modern SSD, or other storage types, Dell Data Wipe can handle them all.
When Should You Use Dell Data Wipe?
- Before selling or donating your computer Remove all personal data so the next owner can't access your information.
- When repurposing for work Clean your personal computer before using it for business purposes.
- Before returning a leased computer Ensure your company data is completely removed.
- When disposing of an old computer Protect yourself from identity theft by making sure no data can be recovered.
Important Things to Know Before You Start
How to Use Dell Data Wipe
Step 1: Back Up Important Files
Before starting, save any files you want to keep to an external drive or cloud storage. Once Dell Data Wipe runs, there's no going back.
Step 2: Access Your Computer's BIOS
- Restart your computer
- As soon as you see the Dell logo, press F2 repeatedly until you enter BIOS Setup
- Use your mouse or keyboard arrow keys to navigate the menus
Step 3: Find the Data Wipe Option
For most Dell computers:
- Go to Security
- Look for Data Wipe in Next Boot
For Alienware computers:
- Go to Advanced
- Select Maintenance
- Look for Data Wipe in Next Boot

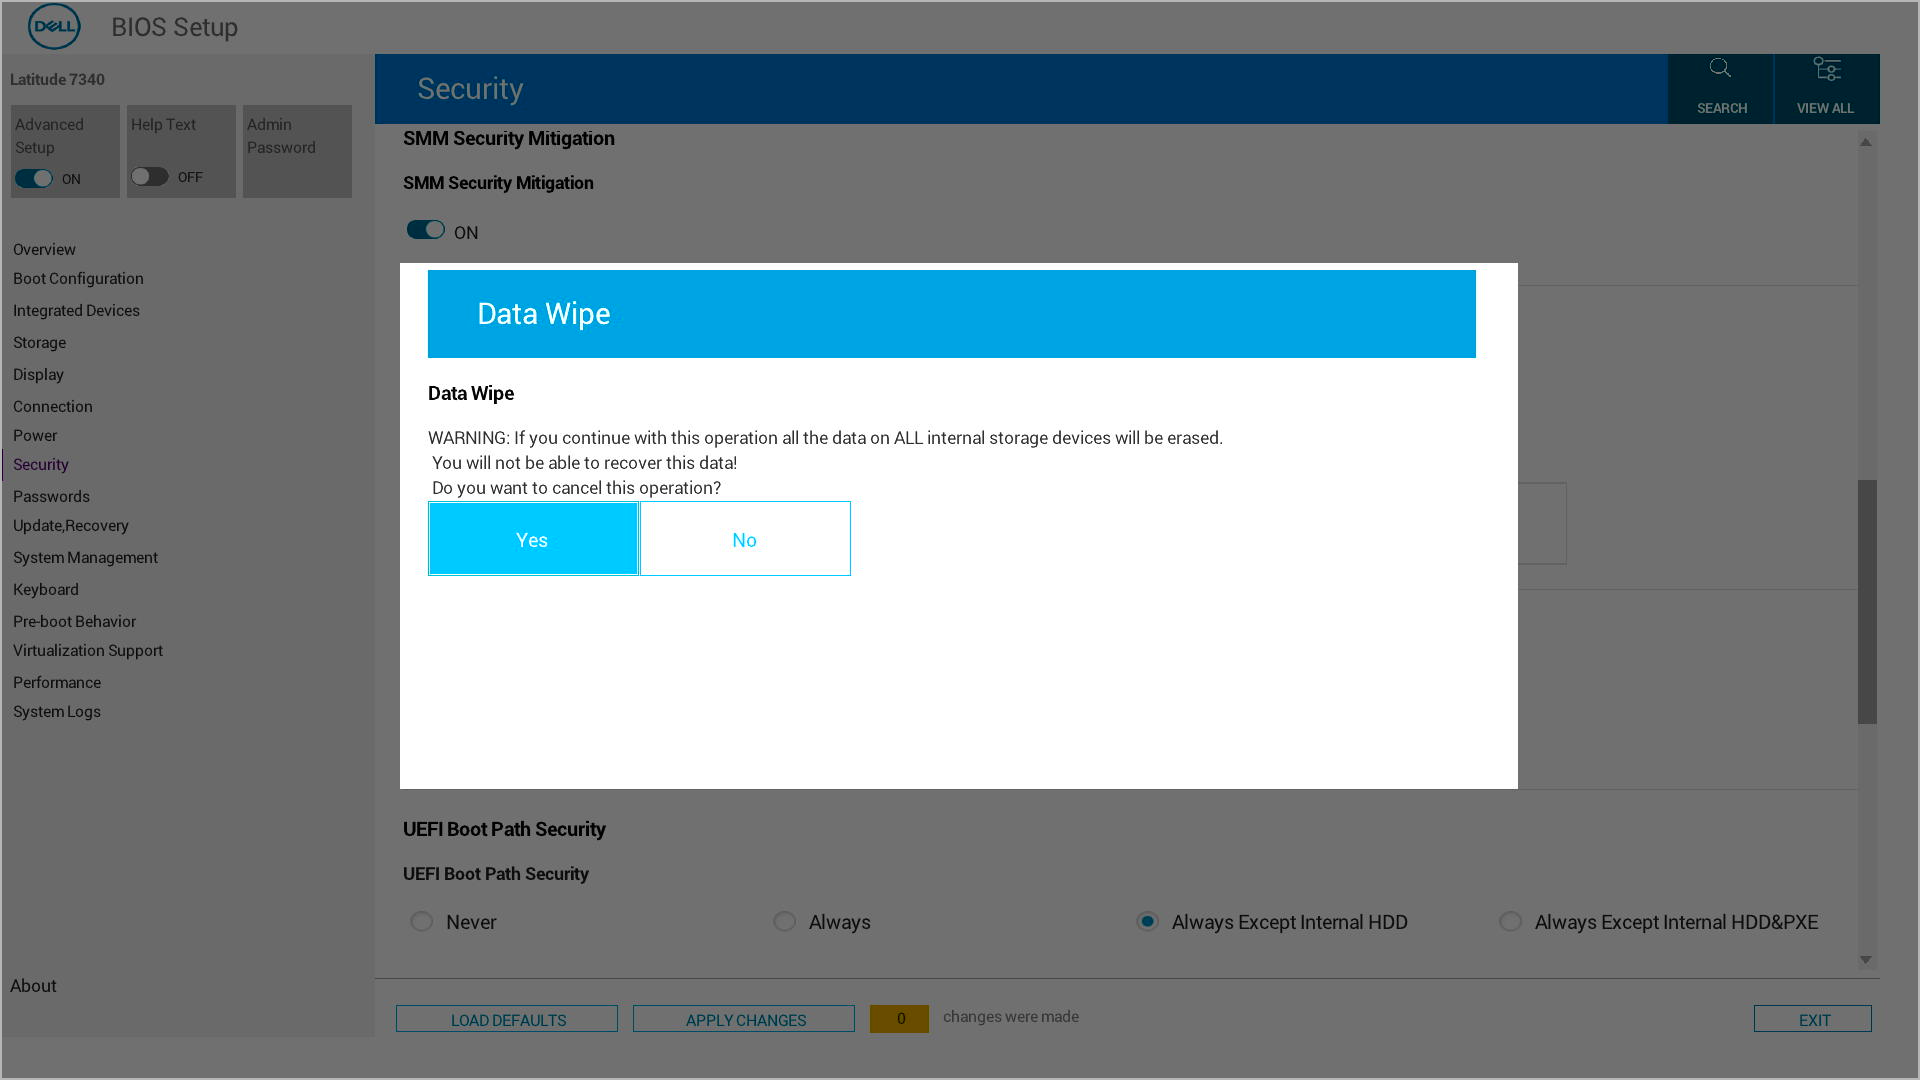
Step 4: Enable Data Wipe
- Select "Wipe on Next Boot" or "Start Data Wipe"
- The system will ask you to confirm twice – this is to make sure you really want to erase everything
- Carefully read each confirmation message
- Select Yes to proceed
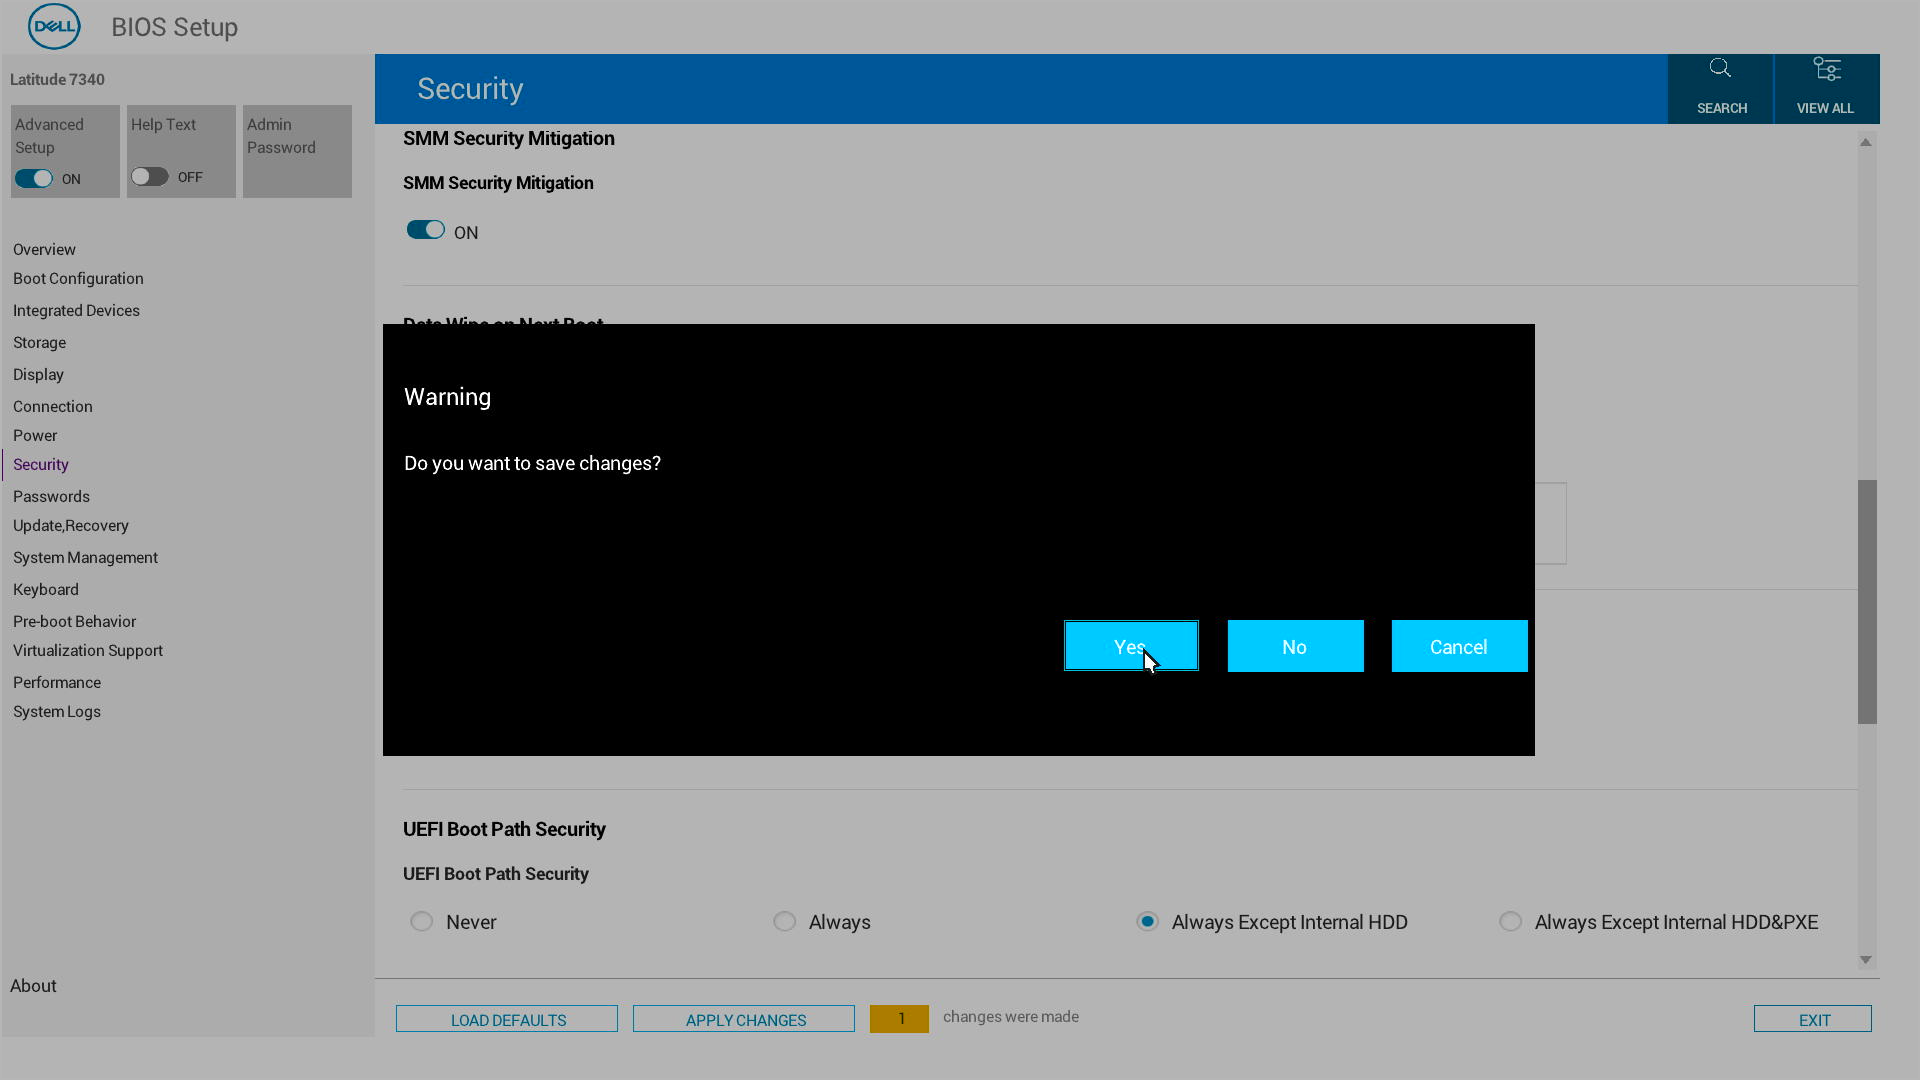
Step 5: Exit and Start the Process
- Save your changes and exit BIOS Setup
- Your computer will restart automatically
- The data wipe process will begin
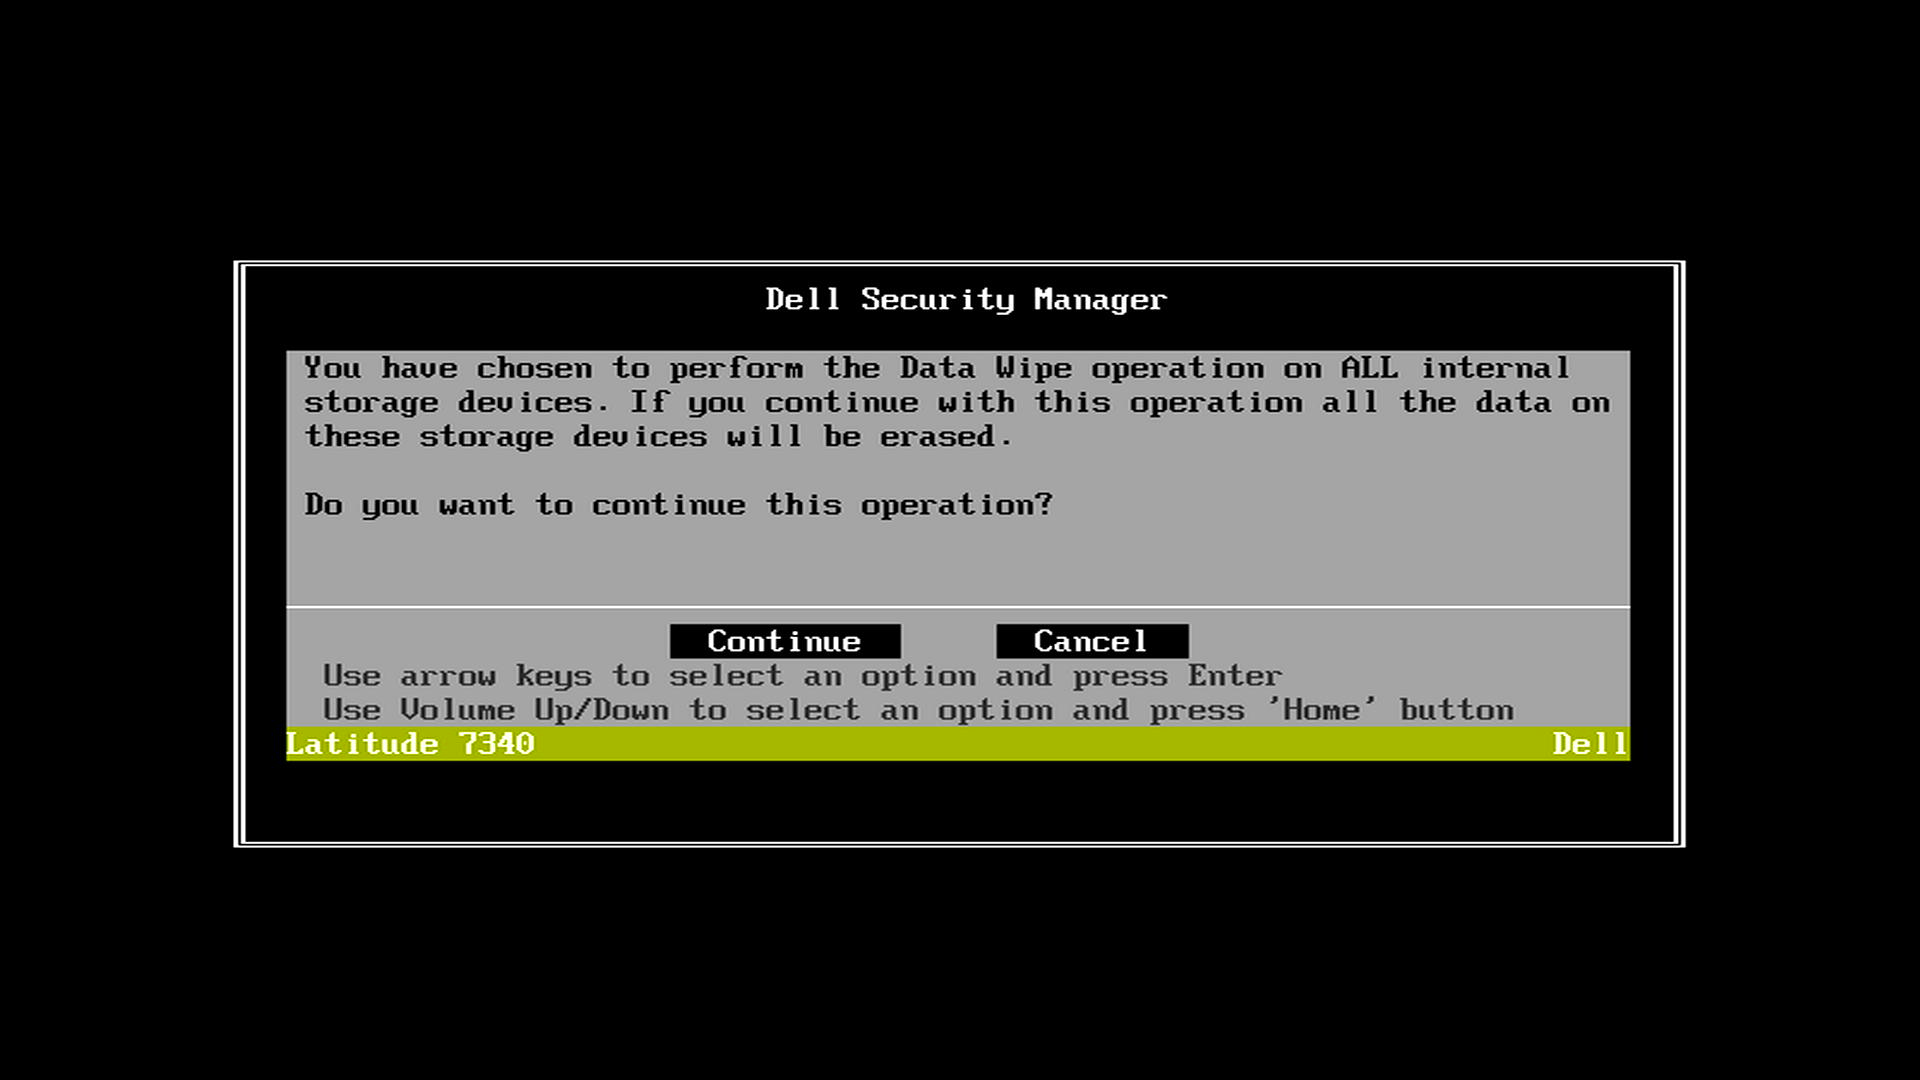
Step 6: Final Confirmations
After restart, you'll see additional confirmation prompts. You can still cancel at this point if you change your mind.
Once you confirm, the data removal process starts and cannot be stopped.
What Happens Next?
Success: You'll see a green message saying, "Data Wipe Completed Successfully." Your computer is now ready for its new purpose.
If something goes wrong: You'll see an error message telling you to "Reboot the system and reinstall the OS." Contact Dell Support if you need help.
Is My Dell Computer Compatible?
Dell Data Wipe works on most newer Dell computers, including:
- Alienware
- Dell
- Dell Pro
- Dell ProMax
- Inspiron
- XPS
- OptiPlex
- Latitude
- Vostro
- Precision Workstations
To check if your computer supports Dell Data Wipe:
- Enter BIOS Setup (press F2 at startup)
- Look for the "Data Wipe in Next Boot" option in Security or Advanced/Maintenance
- If you see this option, your computer supports Dell Data Wipe
Additional Information
Don't have Dell Data Wipe feature on your system? Check out How to Clear and Wipe a Hard Drive