Article Number: 000134956
通过使用DCIP 4.1的SCCM制作Intel Skylake系统的映像
Article Content
Resolution
本文提供了有关“通过使用Dell Client Integration Pack (DCIP) 4.1的System Center Configuration Manager (SCCM) 2012制作Intel Skylake系统的映像”的信息。
通过SCCM 2012制作Skylake系统的映像。
本文提供了有关使用Dell Client Integration Pack 4.1版本将Windows映像应用到带Intel skylake芯片组的戴尔系统的指导。
注:本文适用于充分了解用于制作Windows映像的SCCM2012的用户。
制作映像步骤。
下载Dell Client Integration Pack。
注:确保WinPE CAB版本与引导映像完全匹配;如果是PE 5.0,使用WinPE 5.0 CAB等。建议将Windows 10 PE用于Intel Skylake芯片组系统。
注:如果使用Server 2008:必须安装Microsoft热修补程序:KB 3025419 - Can’t import drivers into System Center Configuration Manager(无法将驱动程序导入到System Center Configuration Manager),然后继续操作:
- 将新引导映像添加到SCCM 2012:
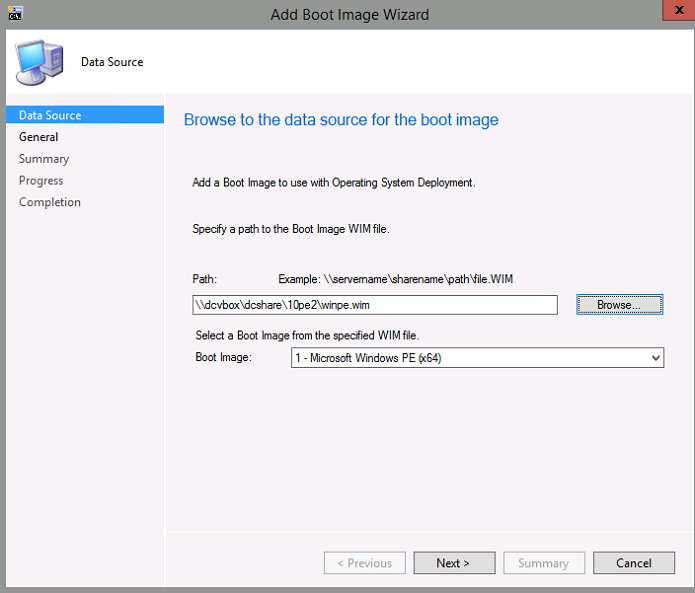
注:安装DCIP的Boot Images(“引导映像”)下的新按钮: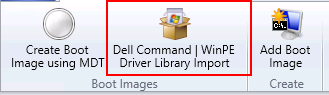
- 使用DCIP WINPE驱动程序导入向导添加WinPE 10 CAB文件A01(或更高版本):
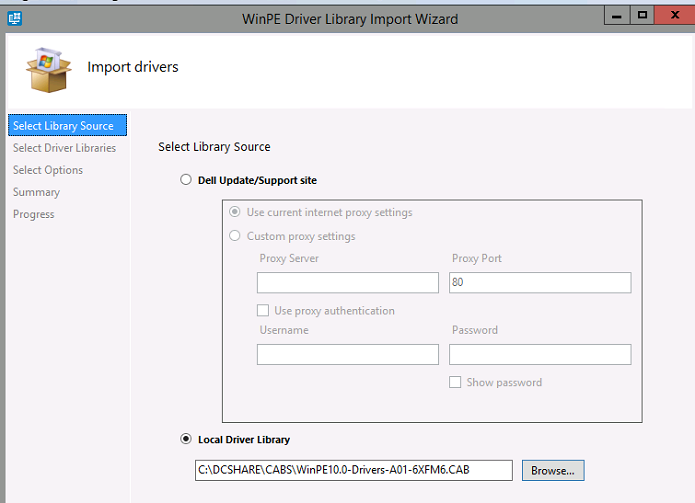
- 选择新引导映像以集成Windows 10 PE CAB:
如果不使用DCIP,则将Windows 10 PE CAB驱动程序导入一个名为W10PEx64-A01的文件夹和类别(或任何已导入的CAB文件版本):
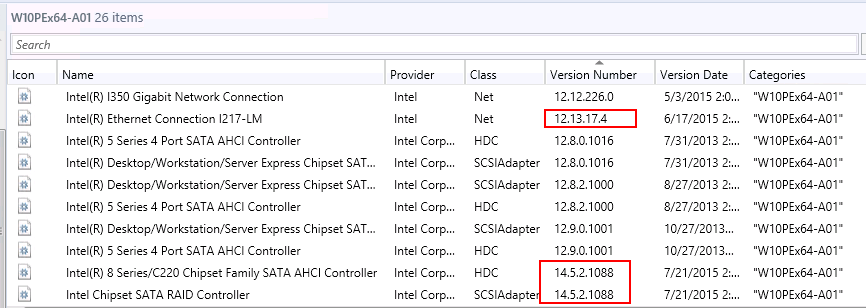
确保Intel Rapid Storage驱动程序是14.5.2.x或更高版本,Intel Ethernet驱动程序是12.13.x或更高版本。
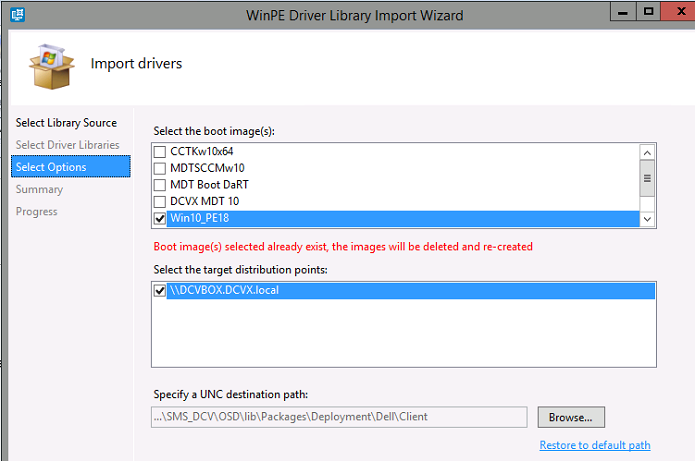
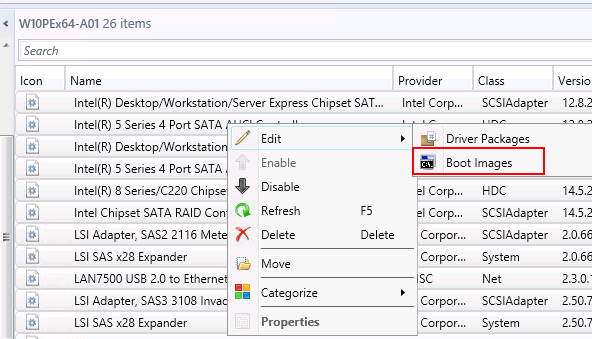
选择PE10x64文件夹中的所有驱动程序,然后右键单击选择Edit Boot Images(“编辑引导映像”):
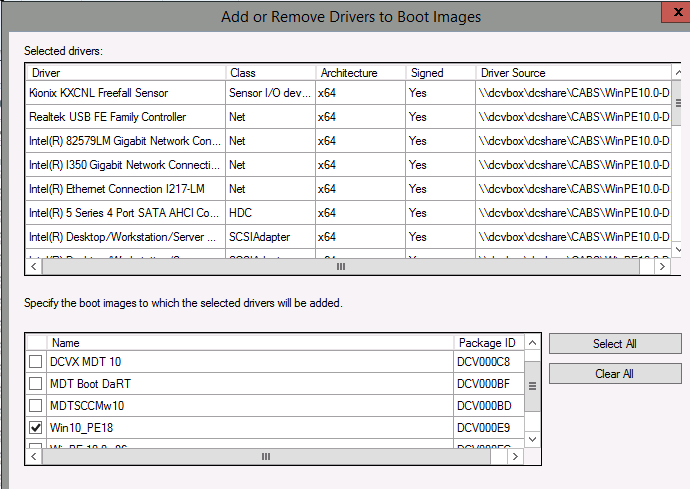
选择新的引导映像:
更新分发点。
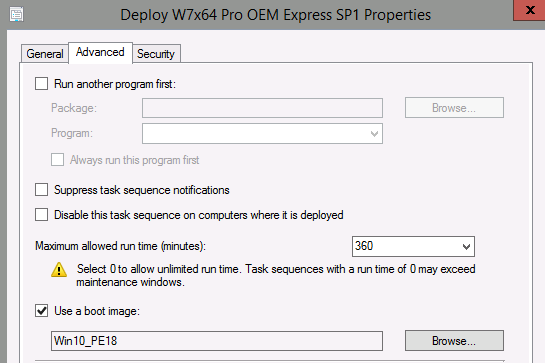
- 创建Task Sequence(“任务序列”)的new Boot image(新引导映像)部分:
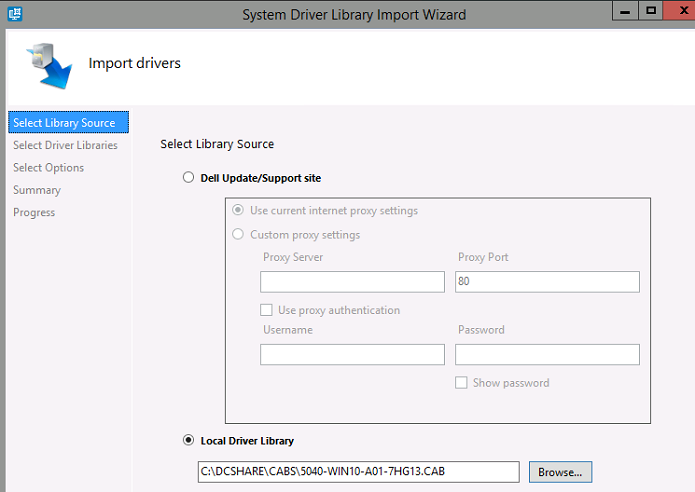
- 导入用于目标系统的正确的CAB文件:
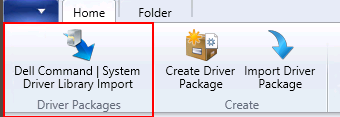
注:新的Dell Command System Driver Library Import(“戴尔命令系统驱动程序库导入”)按钮:
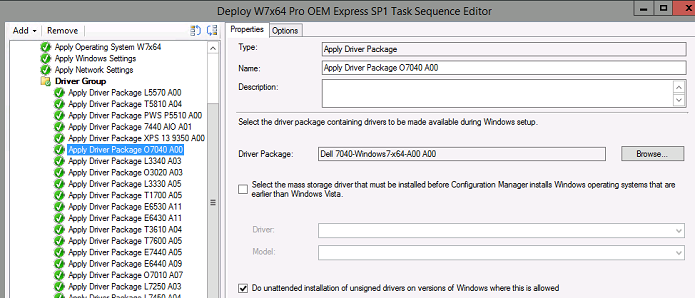
- 将驱动程序包添加到Task Sequence(任务序列)。
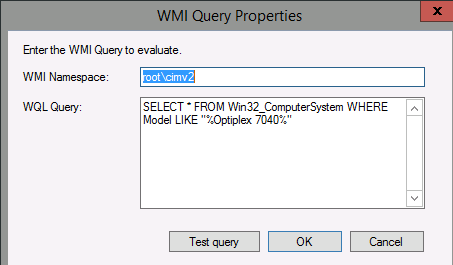
- 使用Windows Management Instrumentation (WMI)呼叫将正确的CAB文件发送到正确的系统:
- 启动Task Sequence(任务序列)
可能需要的可选步骤:将NVMe修复注入Windows 7映像:
更新以在Windows 7和Windows Server 2008 R2的NVM Express中添加本机驱动程序支持
将KB2990941解压缩至C:\dcshare\NVMEw7fix
在Windows 7 SP1或Windows Server 2008 R2 SP1中安装热修补程序2990941后,出现“0x0000007E”停止错误
将KB3087873解压缩至c:\dcshare\NVMEw7fix2
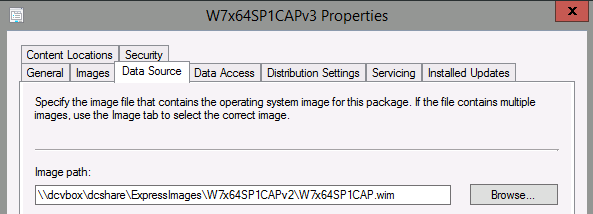
- 转至SCCM中的Windows 7 image(Windows 7映像)。
- 转至Properties(属性)。
- 选择Data Source(数据源),并记下映像WIM文件的位置。
- 安装Windows 7映像并集成NVMe修补程序:
- DISM/mount-wim /wimfile:c:\dcshare\ExpressImages\W7x64SP1CAPv2\W7x64SP1CAP.wim/index:1/mountdir:c:\dcshare\temp
- DISM/image:c:\dcshare\temp/add-package/packagepath:c:\dcshare\nvmew7fix
- DISM/image:c:\dcshare\temp/add-package/packagepath:c:\dcshare\nvmew7fix2
- DISM/unmount-wim/mountdir:c:\dcshare\temp/commit
- 转至Windows 7 image(Windows 7映像)下的Images(映像)选项卡。
- 单击Reload(重新加载)。
- 为映像Update the Distribution Point(更新分发点)。
Article Properties
Last Published Date
20 Nov 2020
Version
2
Article Type
Solution