Connectrix: How to collect a switch log file with a PuTTY session, step by step
Summary: This article assists with step by step instructions on how to collect the supportshow log using PuTTY.
Ez a cikk a következő(k)re vonatkozik:
Ez a cikk nem vonatkozik a következő(k)re:
Ez a cikk nem kapcsolódik egyetlen konkrét termékhez sem.
Ez a cikk nem azonosítja az összes termékverziót.
Instructions
This article assists with step by step instructions on how to collect the supportshow log using PuTTY.
- Double-click the PuTTY icon to launch the application.
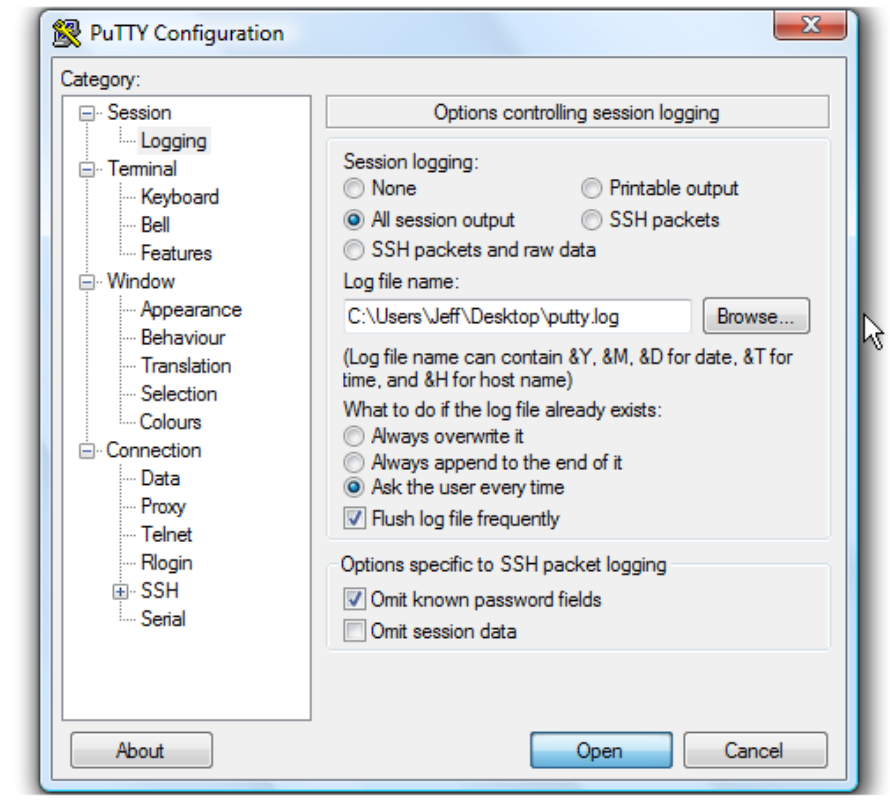
- Click Logging. The logging settings are listed on the right.

Instructions on how to save the log file to a desktop.
- Click All session output.
- Leave Putty.log as the log file name.

- Click Browse to choose the save location.
- Ensure that Desktop is selected here.

- Click Save.
- Ensure Ask the user every time is selected, then click Open to begin the session.
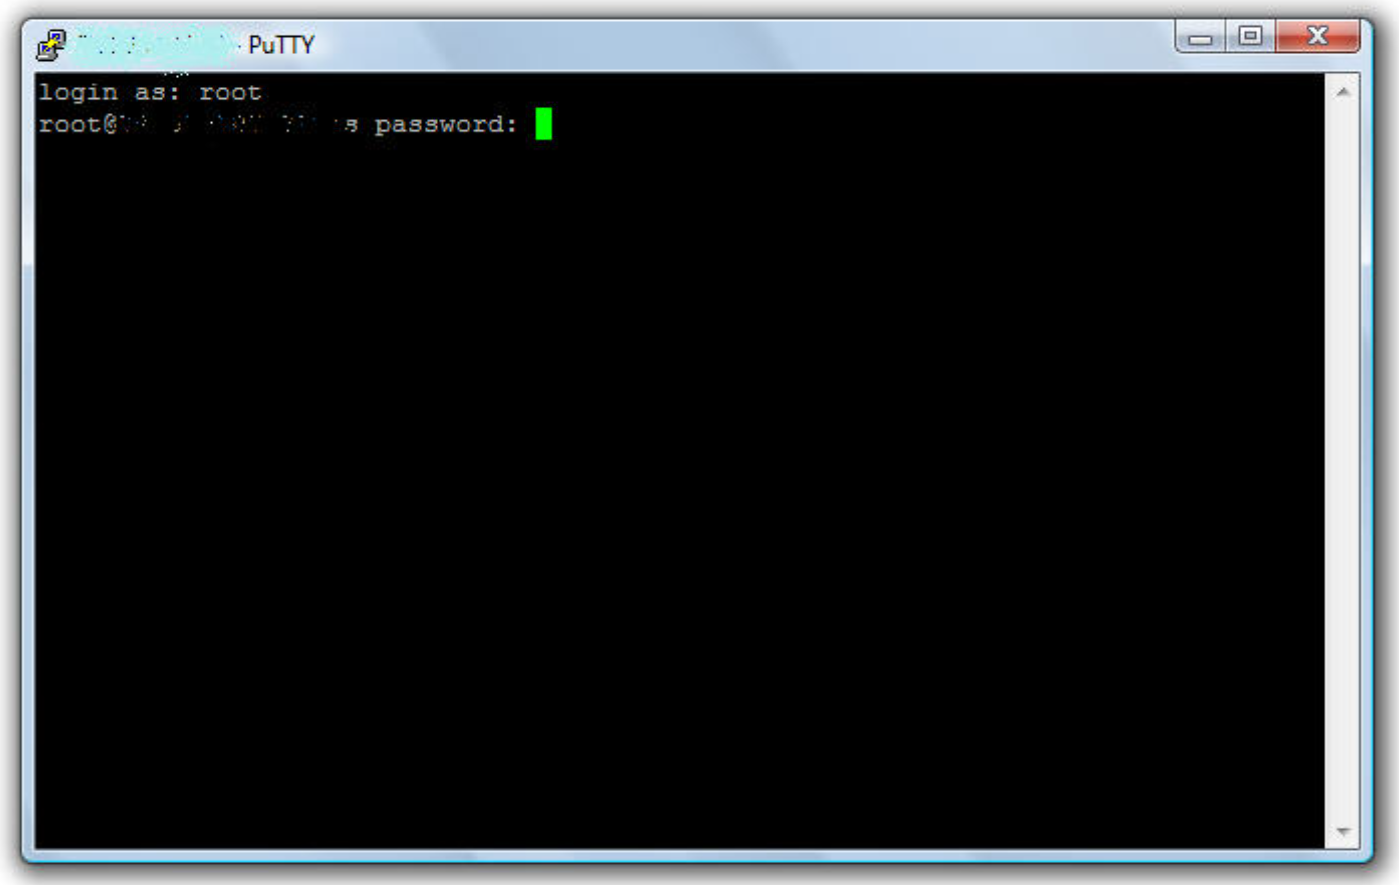
- Type the username, then push the <Enter> key.

- Type the password, then push the <Enter> key.

- Regarding the Brocade switch, run supportshow command to collect switch log.
- Regarding the Cisco switch, run show tech-support details | no-more command to collect switch log.
- Type Exit, then push <Enter> key to close PuTTY.
A log file is now saved to the desktop.
This is the end of the tutorial. You now know how to create a log file of your PuTTY sessions.
Additional Information
Videos
Érintett termékek
Connectrix MDS-SeriesTermék tulajdonságai
Article Number: 000018926
Article Type: How To
Utoljára módosítva: 12 szept. 2025
Version: 5
Választ kaphat kérdéseire más Dell-felhasználóktól
Támogatási szolgáltatások
Ellenőrizze, hogy a készüléke rendelkezik-e támogatási szolgáltatással.