How to Rebuild the Policy Proxy and Message Broker for Dell Data Security Server
Сводка: Learn how to rebuild Policy Proxy and Message Broker services for Dell Data Security or Dell Data Protection servers by using these instructions.
Инструкции
The Dell Data Security (formerly Dell Data Protection) server may need the Policy Proxy or Message Broker service to be rebuilt for:
- Troubleshooting
- Policy communication
- Inventory flow
Affected Products:
- Dell Security Management Server
- Dell Data Protection Enterprise Edition Server
- Dell Security Management Server Virtual
- Dell Data Protection Virtual Edition Server
Affected Versions:
- 8.0 and later
Affected Operating Systems:
- Windows
- Linux
The rebuild process varies between Dell Data Security server products:
- Dell Data Security Management Server (formerly Dell Data Protection Enterprise Edition Server)
- Dell Data Security Management Server Virtual (formerly Dell Data Protection Virtual Edition Server)
Click either Dell Security Management Server or Dell Security Management Server Virtual for more information.
Dell Data Security Management Server
Click either Policy Proxy or Message Broker for steps on the rebuild process.
Policy Proxy
- Log in to the Dell Security Management Server.
- Stop the <PRODUCT> Policy Proxy service.
Note:
- <PRODUCT>=
- Version 8.15 and later = Dell
- Version 8.14.1 and earlier = Dell Data Protection
- For more information, reference How to Stop and Start Services in Dell Security Management Server.
- <PRODUCT>=
- Go to
<DRIVE>\ProgramData\Dell\GateKeeper\.Note: <DRIVE> = Drive installed with Dell Security Management Server - Right-click the
Queuefolder and then select Rename. - Rename the
Queuefolder toQueue.old.
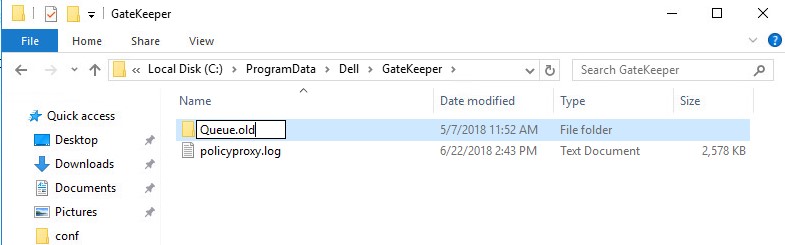 Warning: Do not delete the original
Queuefolder. - Right-click the Windows start menu and then click Run.
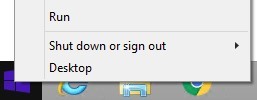
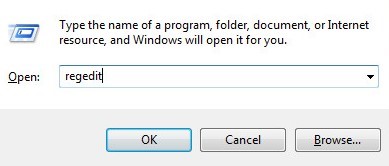
- In the Run UI, type
regeditand then press CTRL+SHIFT+ENTER. This runs the Registry Editor as admin.
 Caution:
- If done incorrectly, modifying the Windows Registry can lead to data loss or operating system corruption. Dell Technologies recommends that you back up data before proceeding with any Windows Registry edit. It is also recommended that a full backup of the Windows Registry is made before starting the edit. See How to Modify the Windows Registry
for additional information.
- Contact Dell Data Security Support for assistance if you have concerns about performing this step.
- If done incorrectly, modifying the Windows Registry can lead to data loss or operating system corruption. Dell Technologies recommends that you back up data before proceeding with any Windows Registry edit. It is also recommended that a full backup of the Windows Registry is made before starting the edit. See How to Modify the Windows Registry
- In the Registry Editor, go to
HKEY_LOCAL_MACHINE\Software\WOW6432Node\Dell\GateKeeper. - Double-click
GGCID. - Delete the Value data and then press OK.
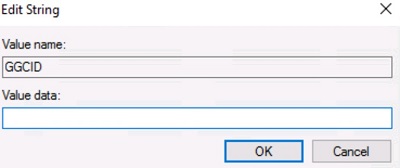
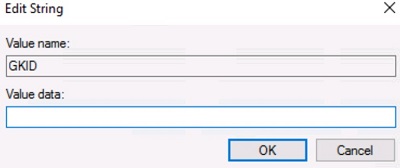
- Double-click
GKID. - Delete the Value data and then press OK.
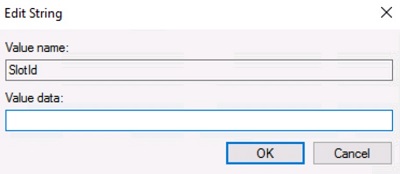
- Double-click
SlotId. - Delete the Value data and then press OK.
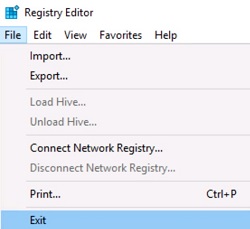
- Click File and then select Exit.
- Start the <PRODUCT> Policy Proxy service.
Note:
- The Policy Proxy queue folder,
GGCID,GKID, andSlotIdwill be re-created after service restart. - For more information, reference How to Stop and Start Services in Dell Security Management Server.
- The Policy Proxy queue folder,
Message Broker
- Log in to the Dell Security Management Server.
- Stop all <PRODUCT> services.
Note:
- <PRODUCT>=
- Version 8.15 and later = Dell
- Version 8.14.1 and earlier = Dell Data Protection
- For more information, reference How to Stop and Start Services in Dell Security Management Server.
- <PRODUCT>=
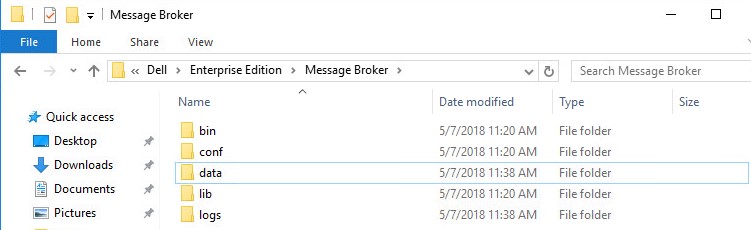
- Go to
<DRIVE>:\Program Files\Dell\Enterprise Edition\Message Broker\.
 Note: <DRIVE> = Drive installed with Dell Security Management Server
 - Right-click the
Datafolder and then select Rename. - Rename the
Datafolder todata.old.
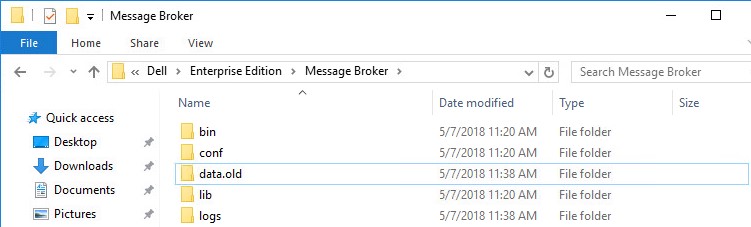 Warning: Do not delete the original
Datafolder. - Start the <PRODUCT> services.
Note:
- The Message Broker Data folder is re-created within 5 minutes of restarting the services.
- For more information, reference How to Stop and Start Services in Dell Security Management Server.
Dell Data Security Management Server Virtual
The instructions differ between 9.11.0 and Later and 9.10.1 and Earlier. Click the appropriate product version for steps on the rebuild process. For versioning information, reference How to Identify the Dell Data Security Server Version.
9.11.0 and Later
Click either Policy Proxy, Force a Clean Activation of Policy Proxy, or Message Broker for steps on the rebuild process.
Policy Proxy
- Log in to the Dell Enterprise Server Virtual administration console.
 Note:
Note:- The default credentials for Dell Security Management Server Virtual are:
- Username: delluser
- Password: delluser
- An administrator can change the default password within the product’s virtual appliance menu.
- The default credentials for Dell Security Management Server Virtual are:
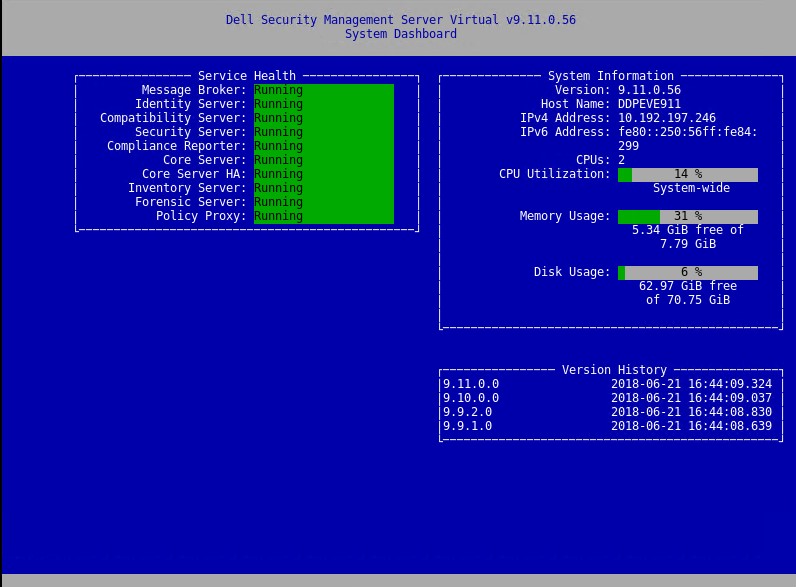
- Stop Dell Security Management Server Virtual services.
Note: For more information, reference How to Stop and Start Services in Dell Security Management Server Virtual.
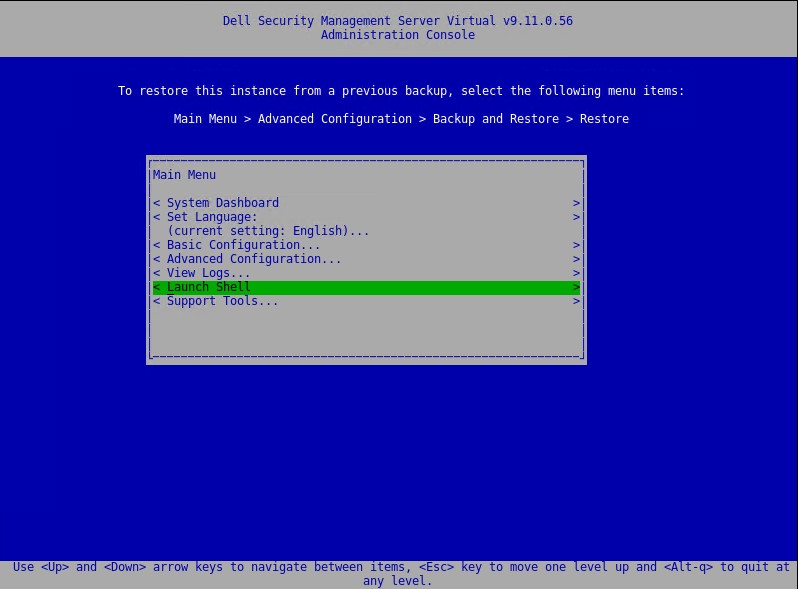
- From the Main Menu, select Launch Shell and then press Enter.
- Type the following command and then press Enter.
su dellsupport
- Enter the password for dellsupport and then press Enter.
- Type the following command and then press Enter.
sudo rm -R /home/delluser/.wine/drive_c/users/Public/Application\ Data/Dell/GateKeeper/Queue/
- Type the following command and then press Enter twice to return to the main menu.
exit
- Start Dell Security Management Server Virtual services.
Force a Clean Activation of Policy Proxy
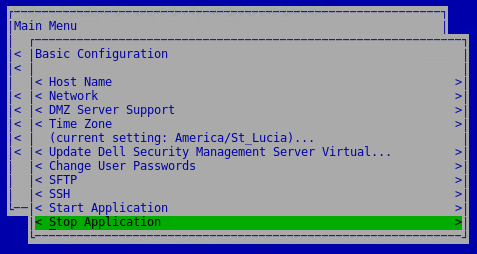
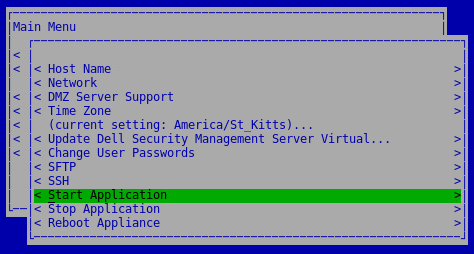
- From the administration console, go to Basic Configuration, then Stop Application, and then press Enter.
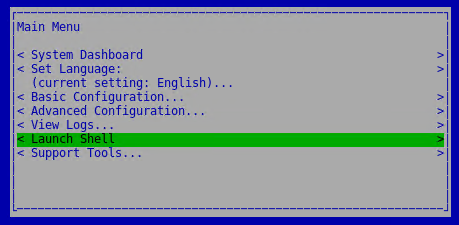
- Press ESC to return to the Main Menu, then arrow down to Launch Shell and then press Enter.
- Switch to the dellsupport user by typing the following command and then press Enter.
su dellsupport Note: The default password is dellsupport.
 - Create a backup of the system.reg file by typing the following command and then press Enter.
sudo cp /home/delluser/.wine/system.reg /home/delluser/.wine/system.reg.bck
- Clear the value for
GGCIDin the system.reg file by typing the following command and then press Enter.sudo sed -i 's/^"GGCID"="[^~"]*"$/"GGCID"=""/g' /home/delluser/.wine/system.reg
- Clear the value for
GKIDin the system.reg file by typing the following command and then press Enter.sudo sed -i 's/^"GKID"="[^~"]*"$/"GKID"=""/g' /home/delluser/.wine/system.reg
- Switch back to the administration console by typing the following command and then press Enter.
su delluserNote: The default password isdelluser. - Start services by going to Basic Configuration, then Start Application and then press Enter.
Message Broker
- Log in to the Dell Enterprise Server Virtual administration console.
 Note:
Note:- The default credentials for Dell Security Management Server Virtual are:
- Username:
delluser - Password:
delluser
- Username:
- An administrator can change the default password within the product’s virtual appliance menu.
- The default credentials for Dell Security Management Server Virtual are:
- Stop Dell Security Management Server Virtual services.
Note: For more information, reference How to Stop and Start Services in Dell Security Management Server Virtual.
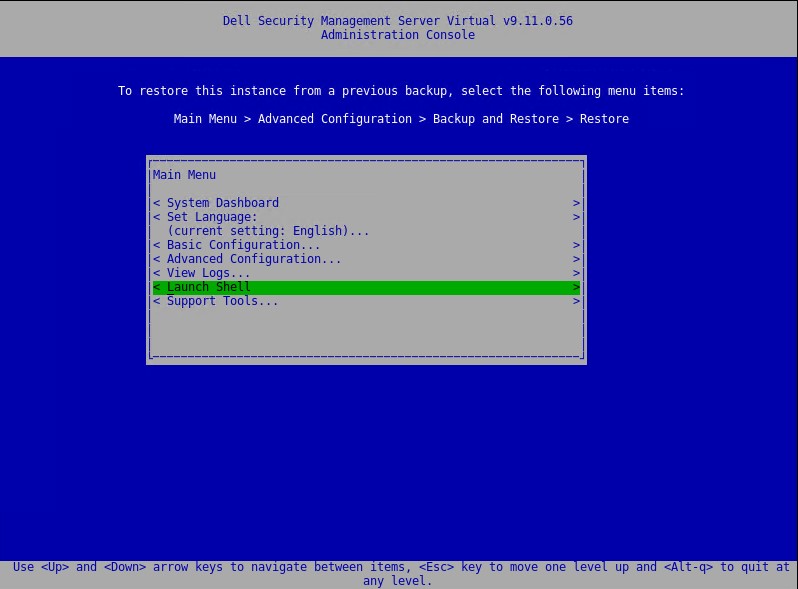
- From the main menu, select Launch Shell and then press Enter.
- Type the following command and then press Enter.
su dellsupport
- Enter the password for dellsupport and then press Enter.
- Type the following command and then press Enter.
sudo rm -R /opt/dell/server/message-broker/data
- Type the following command and then press Enter twice to return to the Main Menu.
exit - Start Dell Security Management Server Virtual services.
9.10.1 and Earlier
Click either Policy Proxy or Message Broker for steps on the rebuild process.
Policy Proxy
- Log in to the Dell Enterprise Server Virtual administration console.
 Note:
Note:- The default credentials for Dell Security Management Server Virtual are:
- Username: ddpuser
- Password: ddpuser
- An administrator can change the default password within the product’s virtual appliance menu.
- The default credentials for Dell Security Management Server Virtual are:
- Stop Dell Security Management Server Virtual services.
Note: For more information, reference How to Stop and Start Services in Dell Security Management Server Virtual.
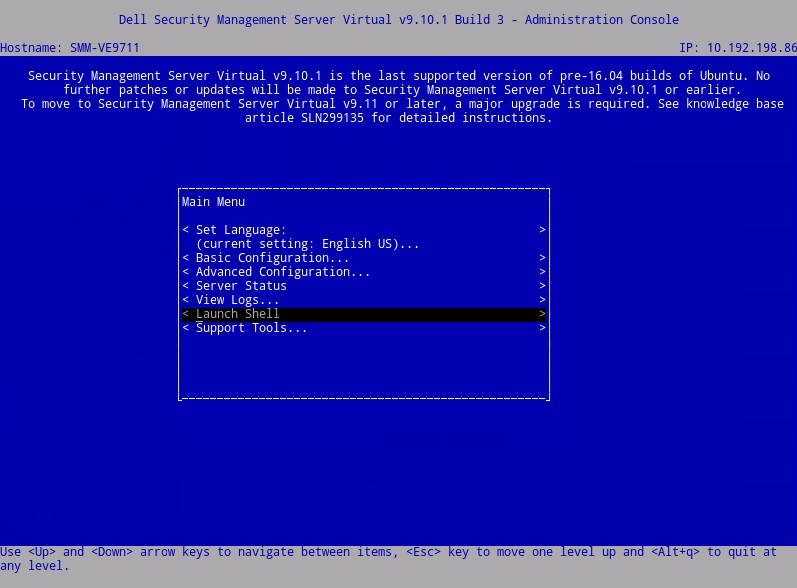
- From the Main Menu, select Launch Shell and then press Enter.
- Type the following command
and then press Enter.su ddpsupport
- Enter the password for ddpsupport and then press Enter.
- Type the following command and then press Enter.
sudo rm -R /home/ddpuser/.wine/drive_c/users/Public/Application\ Data/Dell/GateKeeper/Queue/
- Type the following command and then press Enter twice to return to the Main Menu.
exit
- Start Dell Security Management Server Virtual services.
Note: For more information, reference How to Stop and Start Services in Dell Security Management Server Virtual.
Message Broker
- Log in to the Dell Enterprise Server Virtual administration console.
 Note:
Note:- The default credentials for Dell Security Management Server Virtual are:
- Username: ddpuser
- Password: ddpuser
- An administrator can change the default password within the product’s virtual appliance menu.
- The default credentials for Dell Security Management Server Virtual are:
- Stop Dell Security Management Server Virtual services.
Note: For more information, reference How to Stop and Start Services in Dell Security Management Server Virtual.
- From the Main Menu, select Launch Shell and then press Enter.
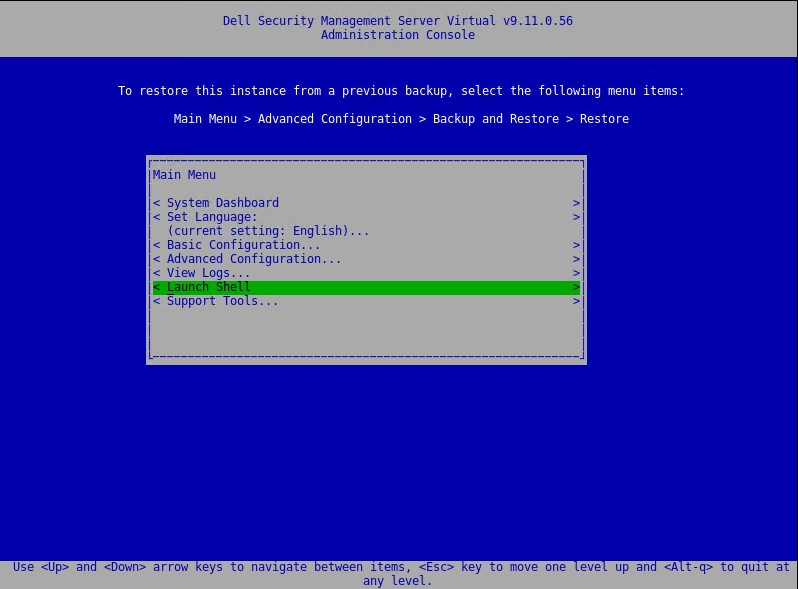
- Type the following command and then press Enter.
su ddpsupport
- Enter the password for ddpsupport and then press Enter.
- Type the following command and then press Enter.
sudo rm -R /opt/dell/server/message-broker/data
- Type the following command and then press Enter twice to return to the Main Menu.
exit
- Start Dell Security Management Server Virtual services.
Note: For more information, reference How to Stop and Start Services in Dell Security Management Server Virtual.