Avamar | NDMP: How to deploy the virtual vNDMP accelerator node
摘要: This knowledge base article explains how to deploy the vNDMP accelerator.
本文章適用於
本文章不適用於
本文無關於任何特定產品。
本文未識別所有產品版本。
說明
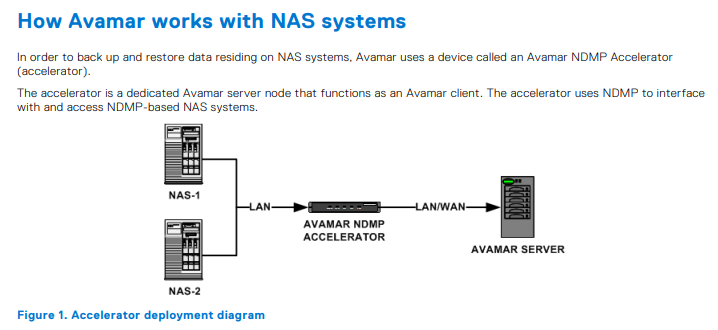
This Knowledge base gives instructions on how to deploy NDMP in simple steps, before deploying vNDMP check the respective product support guides to know if it's supported. For example, IDPA DP4400 - Adding a Virtual vNDMP node to Avamar on a DP4400 system is not supported
Avamar standalone customers can deploy vNDMP but customers are responsible for planning, deploying and upgrading the vNDMP.
For upgrading NDMP, follow this article. Avamar / IDPA / PPDP: How to upgrade NDMP accelerator
Note: Customers having issues while deploying can open a support ticket to get assistance.
To install vNDMP we need to have access to vCenter with the appropriate access level and Avamar details to register NDMP.
Note: Ensure there is a free IP/Hostname and its registered with DNS before starting.
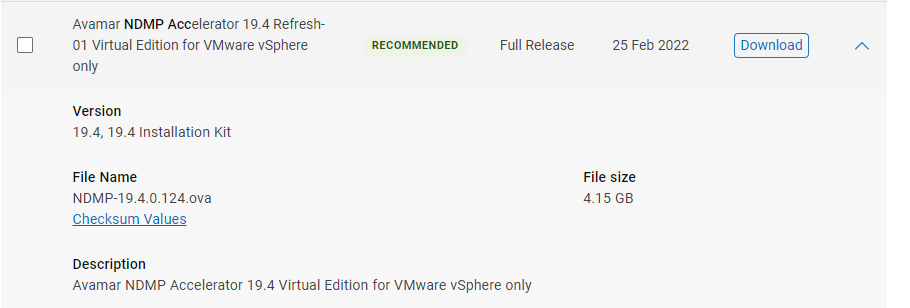
Downloading Avamar vNDMP ova
OVA file and can be obtained from Solve software download link or online support page.
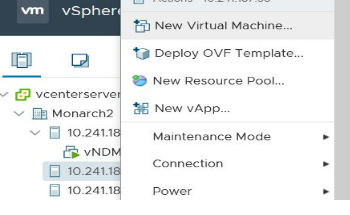
Deploying NDMP in vCenter.
Right click the vCenter or ESX to get the below screen and select " Deploy OVF template ".
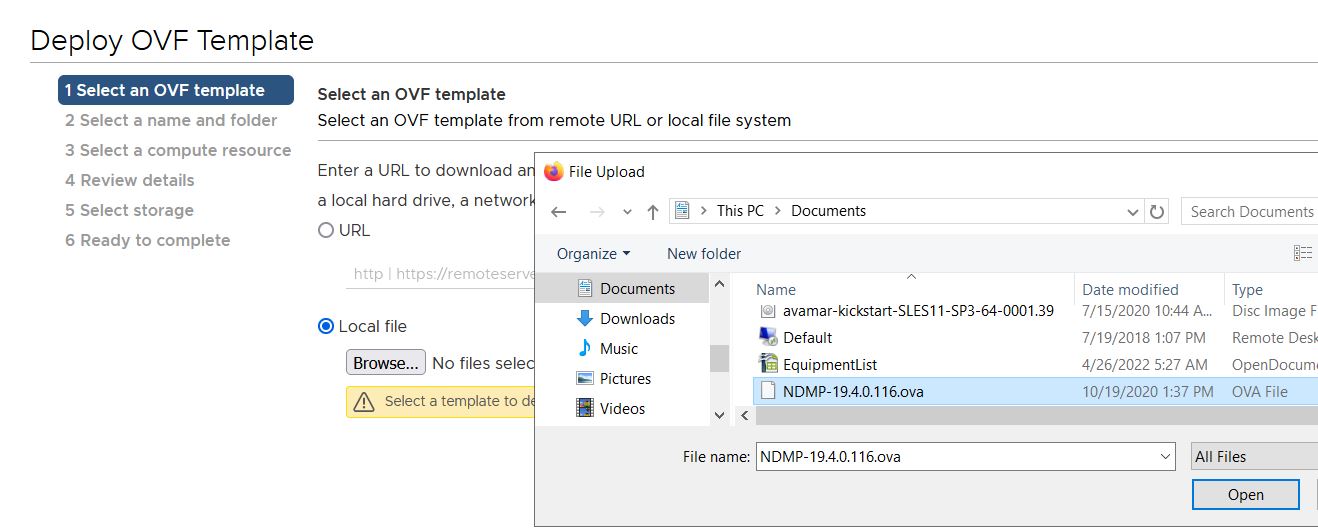
Once deploy OVF is selected and the below screen would be presented. Select " Local file " option and select the downloaded OVA file.
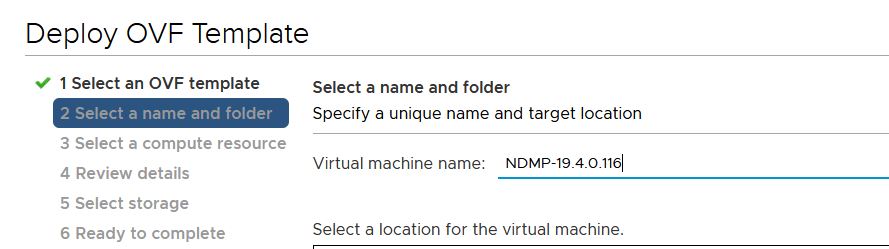
Name the vNDMP, here it picked the default name. This will be the VM name shown in vCenter, not the Hostname.
Compute resource.
Select the appropriate ESX to deploy the vNDMP.
Review Details and license.
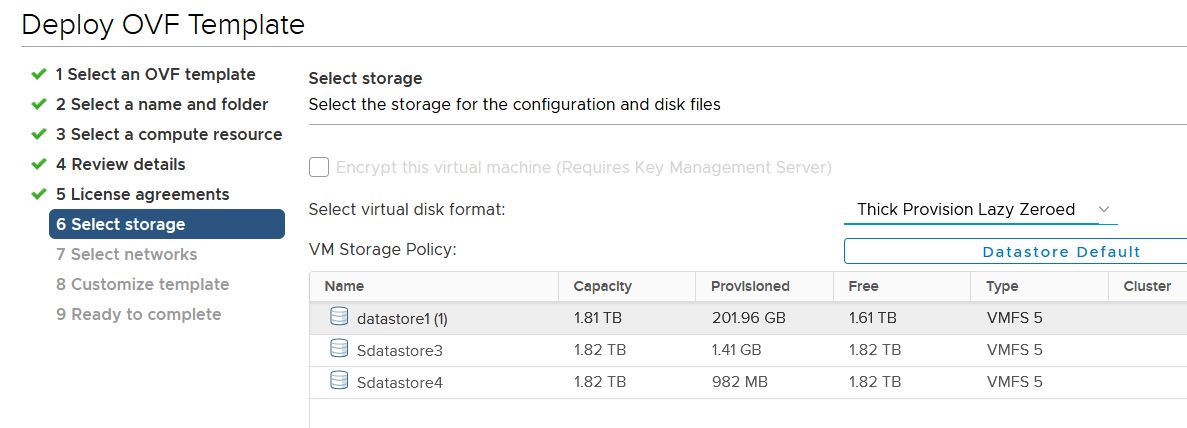
Select Storage.
Selecting storage is very important, if the required space is not available deployment would fail.
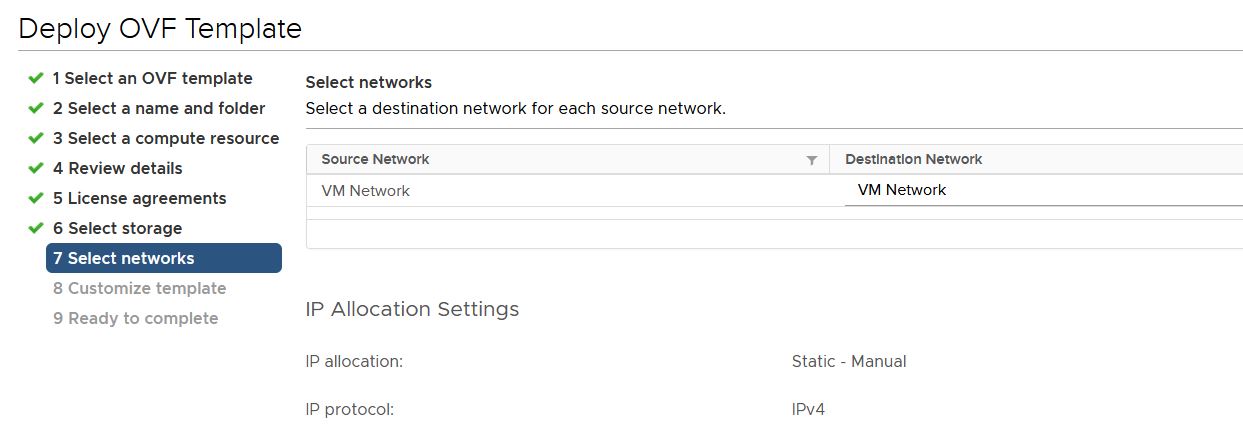
VM Network settings.
Select appropriate VM network based on infrastructure.
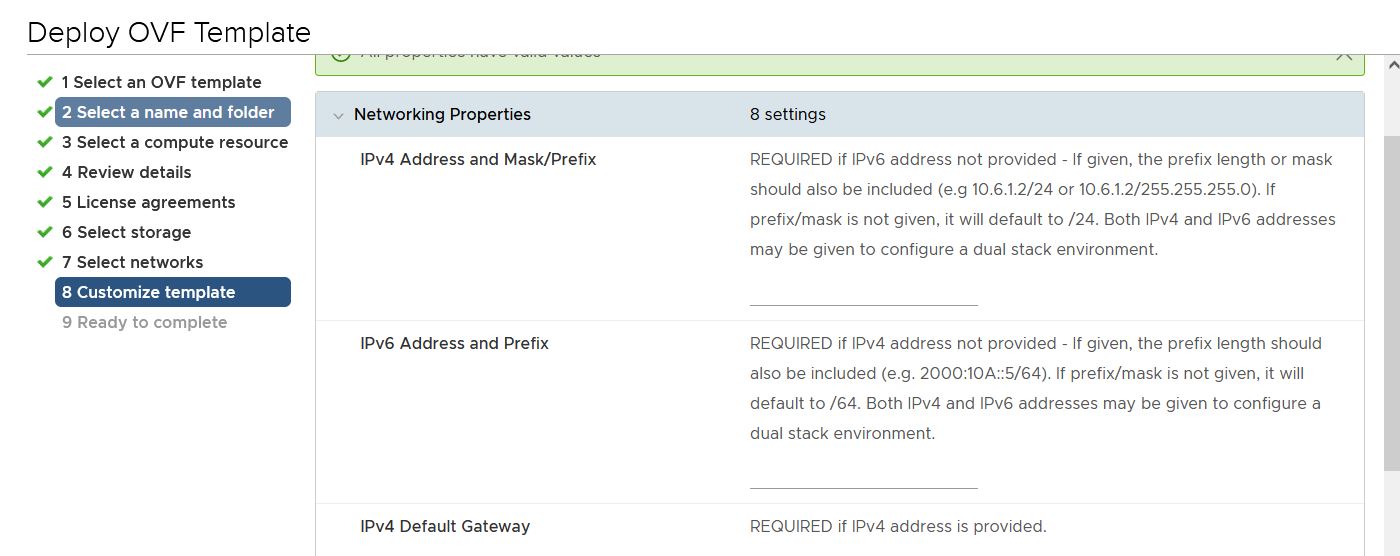
Customize template.
This gives opportunity to enter IP address, Subnet, and default gateway along with DNS details.
Finish deploying the VM by completing the task. Notice VM being deploying on vCenter and power on once deployed.
Configuring vNDMP.
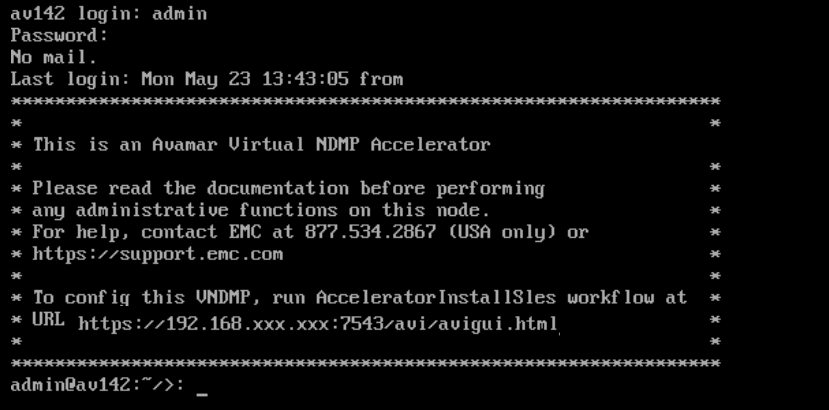
Once the OVF is deployed and powered ON, launch the remote console with default admin credentials.
The following message would be presented on how to configure the NDMP. Use the details provided onscreen and enter the URL in the web browser.
Avamar Installation Manager screen would be presented. Use root credential to log in to the AVI installer.
Select SW release on the left and the install package would be shown on the right side.
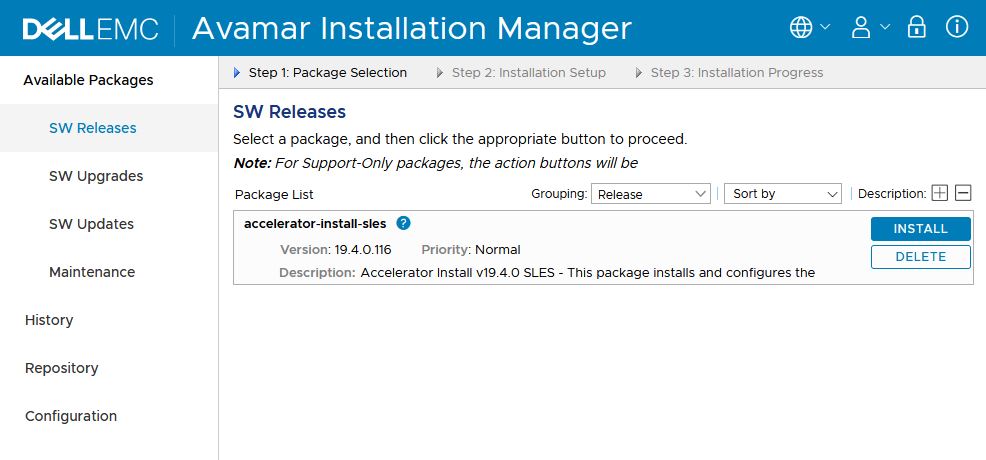
Select install to continue configuring NDMP.
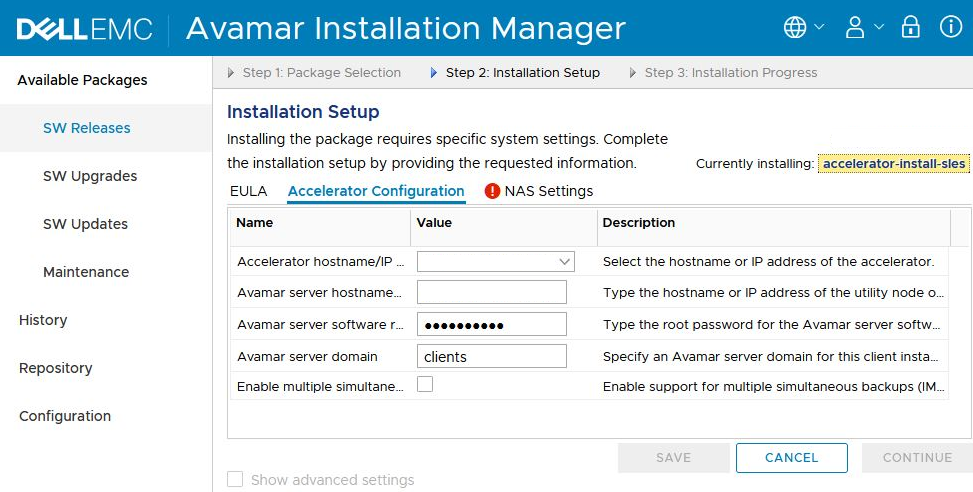
Enter details related to vNDMP (accelerator)
- IP address or hostname.
- Avamar server hostname or IP address.
- Avamar server password.
- Domain can be kept default as client or change accordingly.
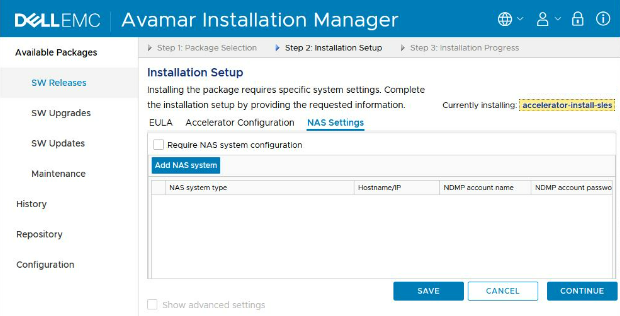
NAS Settings
Enter NAS system details by adding NAS.
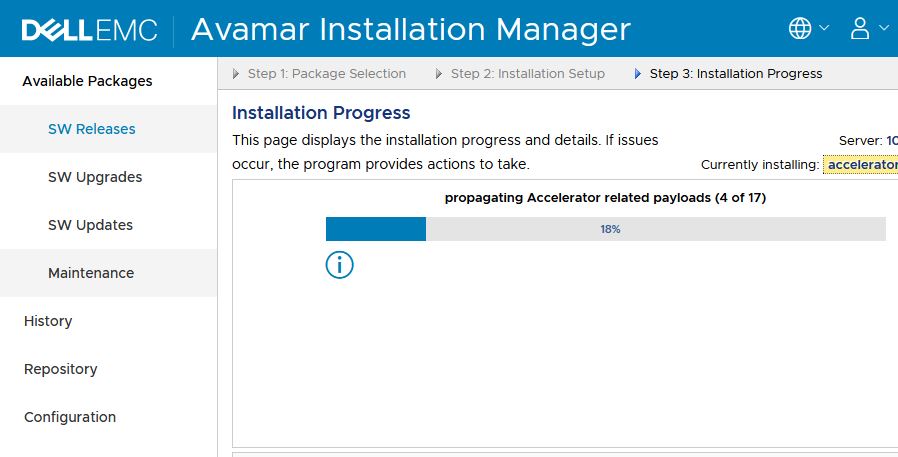
Installation progress
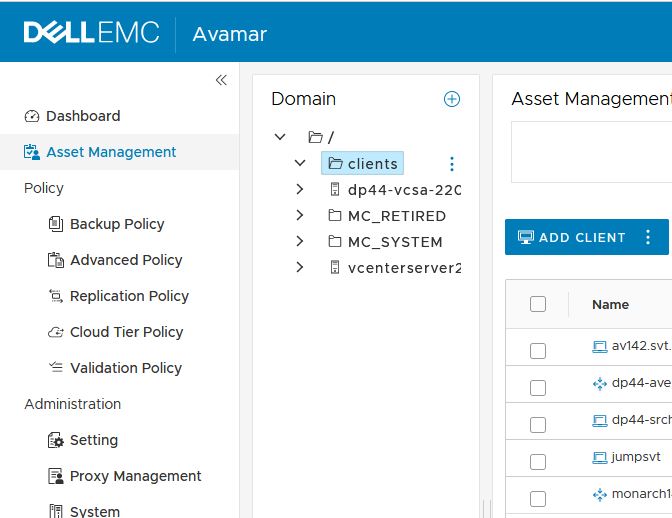
Verify if the deployed NDMP is registered in Avamar console AUI.
In the example below we had deployed vNDMP av142 and registered it under client’s domain.
Check the user guide to know more details.
Avamar NDMP Accelerator for NAS Systems 19.4 User Guide
受影響的產品
Avamar產品
Avamar Plug-in for NDMP, Avamar Server, Avamar Virtual Edition文章屬性
文章編號: 000200321
文章類型: How To
上次修改時間: 14 5月 2026
版本: 4
向其他 Dell 使用者尋求您問題的答案
支援服務
檢查您的裝置是否在支援服務的涵蓋範圍內。