文書番号: 000139777
TPM is Unable to Change Between 1.2 or 2.0 Because TPM is Owned
概要: This article describes an issue where the TPM cannot be configured because it is in an owned state.
文書の内容
現象
The TPM cannot be configured because it is already in an owned status.
原因
Every time that a Windows 10 system with TPM is restarted, Windows 10 will take ownership of the TPM automatically, unless Windows 10 is specifically instructed not to take ownership.
The process of upgrading to TPM 2.0 or downgrading to TPM 1.2 requires that ownership be released prior to the change.
解決方法
These instructions will prevent Windows 10 from automatically re-taking ownership of TPM:
- Run PowerShell as an Administrator: (Type PowerShell in the Search box, right-click PowerShell on the menu, click Run as Administrator.(See Figure 1.)
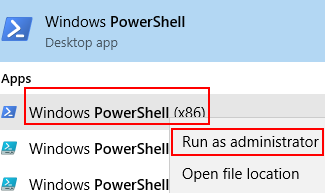
Figure 1. Opening PowerShell - In Powershell run the following command: Disable-TpmAutoProvisioning then press the Enter key. (See Figure 2.)
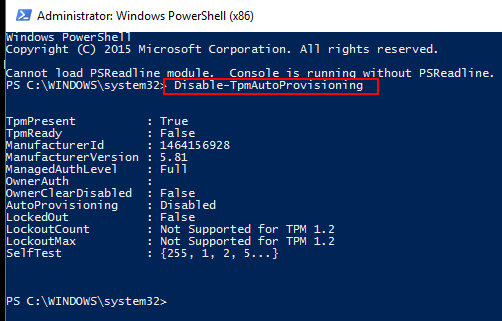
Figure 2. Disabling TPM Auto-provisioning in PowerShell. - If Dell Data Protection (DDP) is installed, you will need to complete these additional steps:
- Open the Services Desktop App (Type services.msc in the search box, then press the Enter key)
- Set the DellMgmtAgent Windows service to Disabled
- Stop the DellMgmtAgent Windows service
- Set the DellMgmtLoader Windows service to Disabled
- Stop the DellMgmtLoader Windows service
- Proceed with clearing the TPM
- In the search box, type the command: tpm.msc then press the Enter key to open the TPM management console. (See figure 3.)
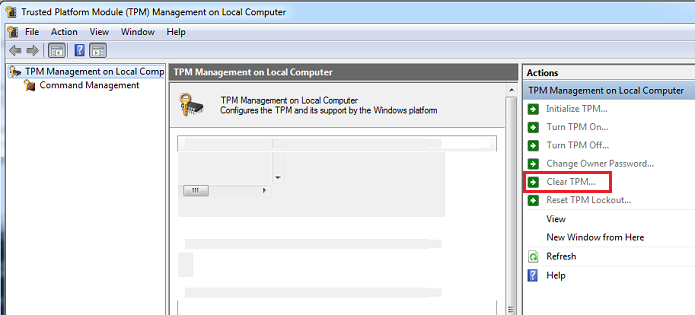
Figure 3. TPM Management Console - Choose the Clear TPM option.
- The system will restart and then power off, then power on again.
- Do not enter the BIOS, let the boot back to Windows.
- Run the Dell TPM 1.2 firmware utility or Dell TPM 2.0 firmware utility with the AC adapter connected to the system.
- If Dell Data Protection (DDP) is installed, you will need to complete these additional steps:
- Set the DellMgmtLoader Windows service to Automatic
- Start the DellMgmtLoader Windows service
- Set the DellMgmtAgent Windows service to Automatic
- Start the DellMgmtAgent Windows service
Optional
You can run the following command using the command line to determine if the TPM is owned. (Press CTRL+R, type cmd, then right click cmd.exe and run as administrator)
Type: Wmic /namespace:\\root\CIMV2\Security\MicrosoftTpm path Win32_Tpm get /value then press the Enter key. (See Figure 4.)

Figure 4 - TPM ownership status
その他の情報
Recommended Articles
Here are some recommended articles related to this topic that might be of interest to you.
- How to Successfully Update the TPM Firmware on your Dell Computer
- Dell Computers That Can Upgrade from TPM Version 1.2 to 2.0
- How to Update the TPM Firmware When You Get the Error Message "The update image is not for this system"
- TPM firmware update failing when run from PowerShell or Command Prompt
- TPM Must Be Cleared Before Using A Deployment Task Sequence
文書のプロパティ
影響を受ける製品
Desktops & All-in-Ones, Laptops, Workstations
最後に公開された日付
22 12月 2023
バージョン
6
文書の種類
Solution