Willkommen
Willkommen bei Dell
- Bestellungen schnell und einfach aufgeben
- Bestellungen anzeigen und den Versandstatus verfolgen
- Erstellen Sie eine Liste Ihrer Produkte, auf die Sie jederzeit zugreifen können.
- Verwalten Sie mit der Unternehmensverwaltung Ihre Dell EMC Seiten, Produkte und produktspezifischen Kontakte.
Artikelnummer: 000197685
Guide to Disk Cloning with SupportAssist OS Recovery
Zusammenfassung: Learn how to clone a hard drive using Dell SupportAssist OS Recovery v5.5.1 and later, if there is hardware upgrades, disaster recovery, or computer replacements.
Artikelinhalt
Weisungen
Affected Products:
- Dell SupportAssist OS Recovery
Affected Versions:
- v5.5.1 and later
Dell SupportAssist OS Recovery v5.5.1 and later supports Disk Cloning functionality. Disk cloning is the process of creating a one-for-one copy of a hard drive or solid-state drive (SSD).
Disk cloning may be needed during:
- Hardware upgrade
- Disaster Recovery
- Computer replacement
Requirements to use disk cloning:
- The primary drive must be bootable into Windows.
- BitLocker must be disabled.
- Secondary hard drive, SSD, or USB drive with greater disk space as the original hard drive or SSD
- A power adapter is connected for the entire process.
To create a disk clone:
- On boot, hold the F12.
- In the One-Time Boot Settings menu, click SupportAssist OS Recovery.
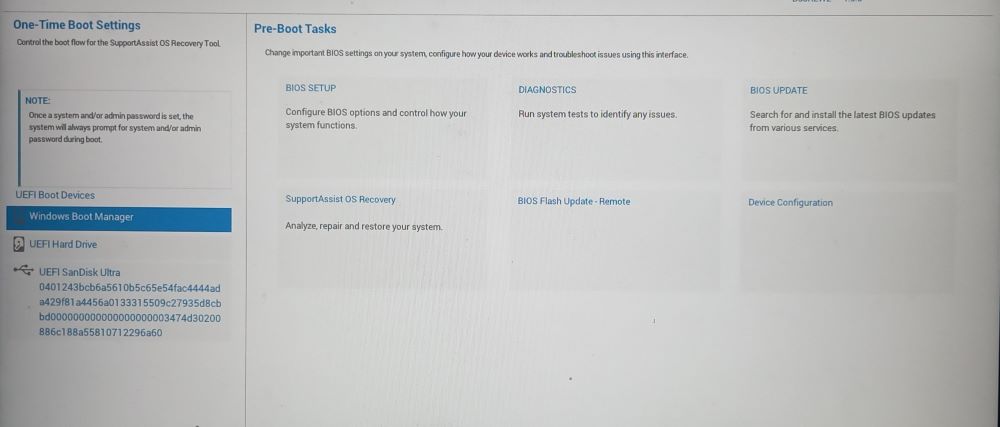
Figure 1: (English Only) One-Time Boot Settings menu
- Click Back Up Files / Disk Cloning.
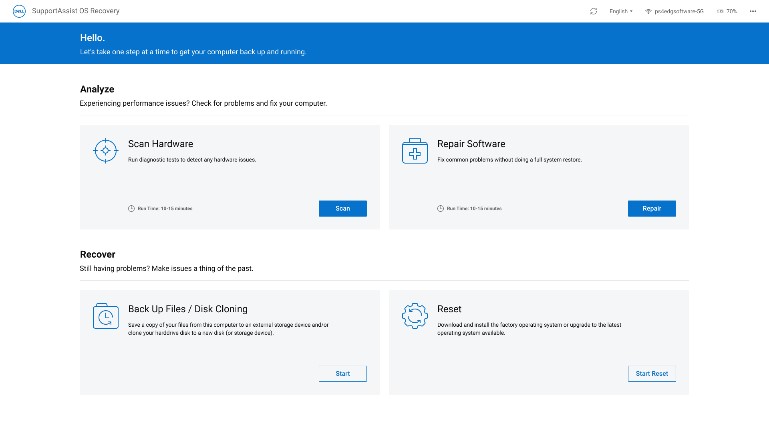
Figure 2: (English Only) SupportAssist OS Recovery
- Select Disk Cloning and then click Next.
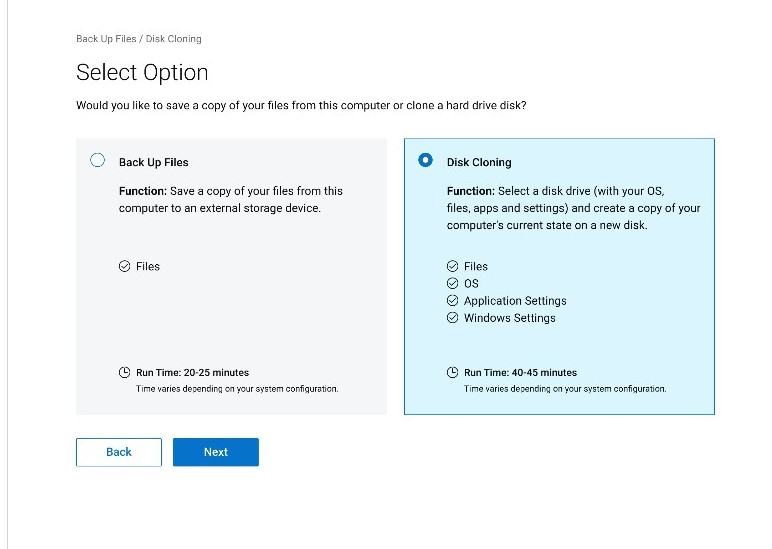
Figure 3: (English Only) Disk Cloning
- Select and then click Next for one of the following options:
- Hard drive that is already installed
- This option should be selected when cloning an internal hard drive or SDD to a secondary internal computer hard drive or SDD.
- Hard drive in a USB housing
- This option should be selected when cloning an internal hard drive to an external USB enclosure that contains a hard drive or SDD.
- USB storage device
- This option should be selected when cloning from an internal hard drive or SDD to an external USB drive.
- Hard drive that is already installed
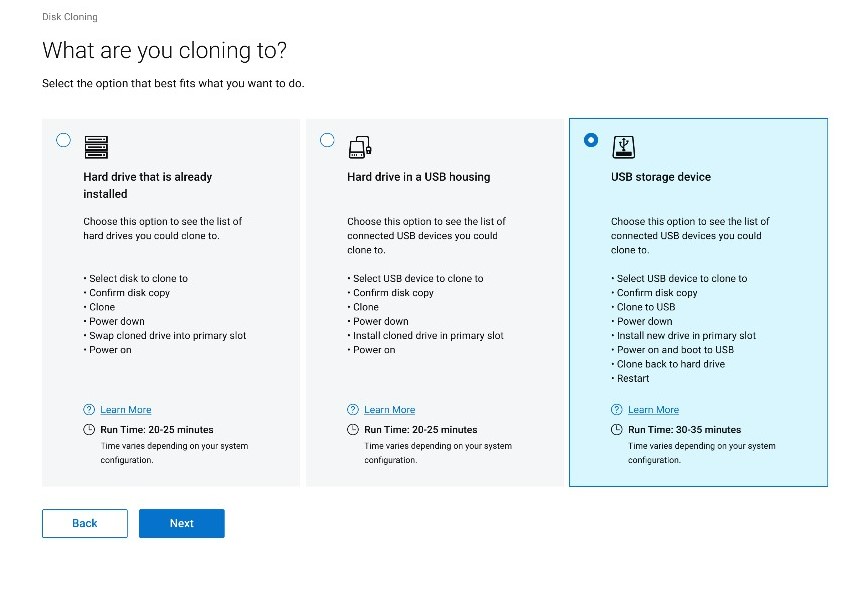
Figure 4: (English Only) What are you cloning to
- Select the appropriate destination drive and then click Next.
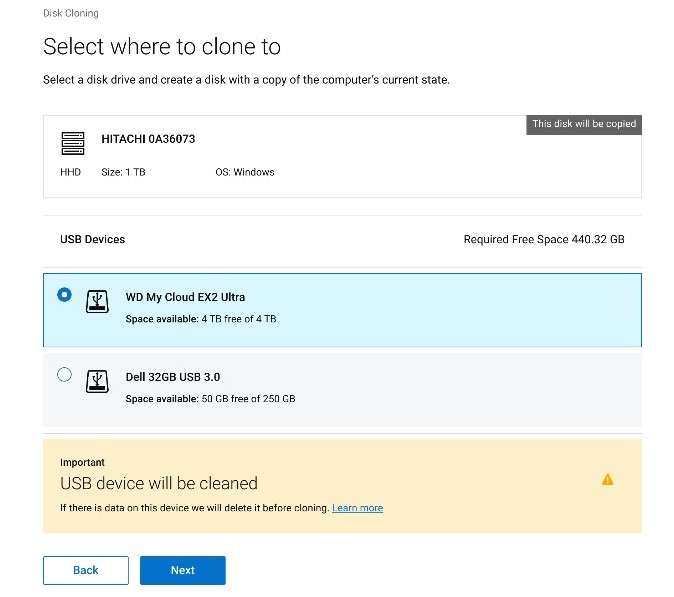
Figure 5: (English Only) Select where to clone to
- Click Next to confirm disk cloning.
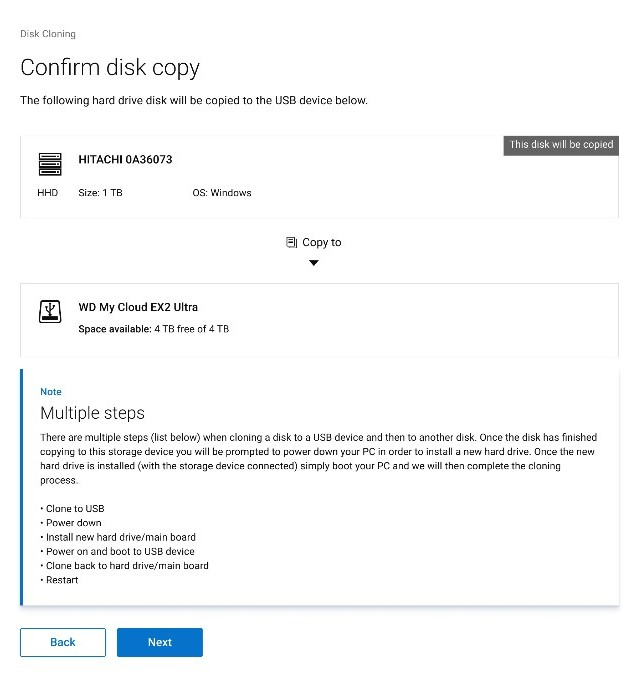
Figure 6: (English Only) Your disk copy was a success, continue the cloning process
- Once the cloning process is complete, click Continue to turn off the computer.
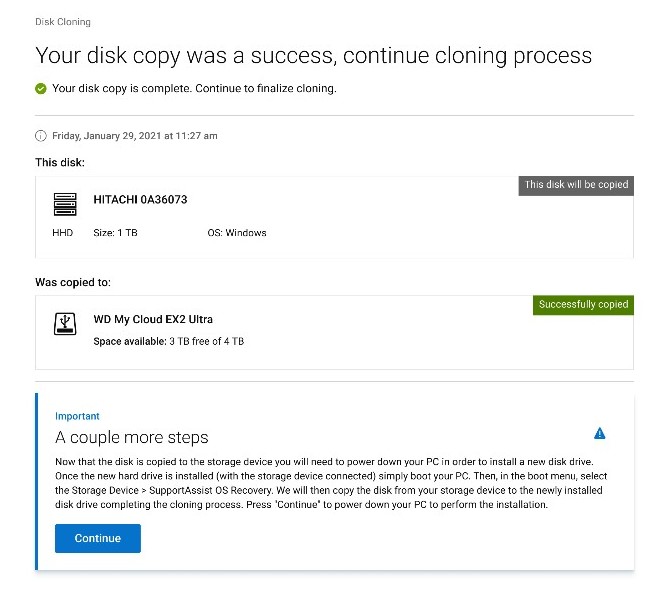
Figure 7: (English Only) Continue the cloning process.
- On shutdown, swap the old hard drive or SDD with the replacement drive.
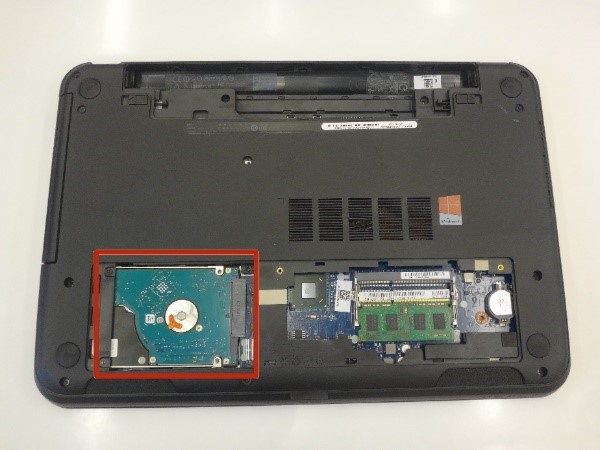
Figure 8: Hard drive location
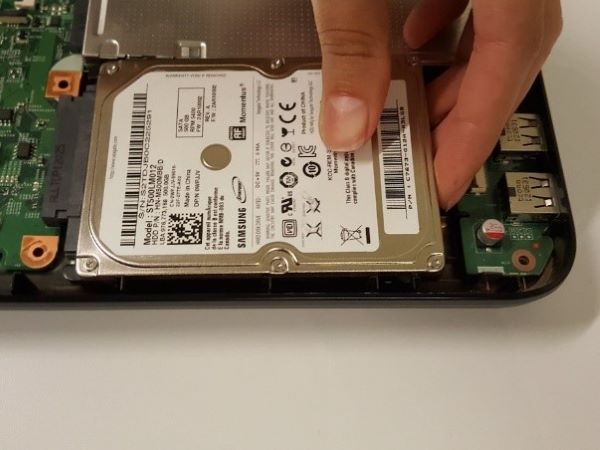
Figure 9: Replace hard drive
- Ensure the cloned drive (step 6) is connected and then turn on the computer while pressing F12 to access the one-time boot menu.
- Select the cloned drive and then press Enter.
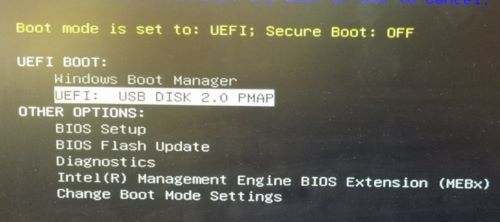
Figure 10: (English Only) One-Time Boot menu
- The example screenshot reflects USB DISK 2.0 being the cloned drive.
- This drive name may differ in your environment.
- If a Hard drive that is already installed was selected (Step 5) no further action is required.
- On SupportAssist OS Recovery launch, click Okay.
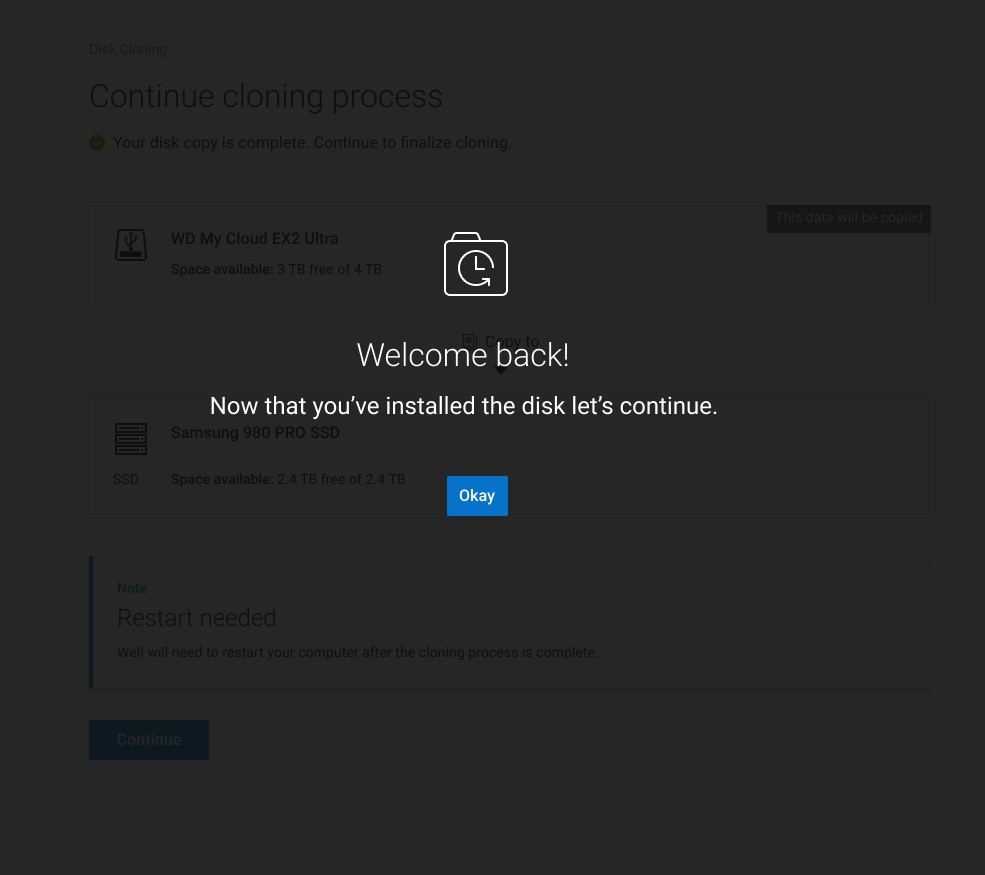
Figure 11: (English Only) Welcome back!
- Click Continue to clone the destination drive (step 6) to the replacement drive (step 8).
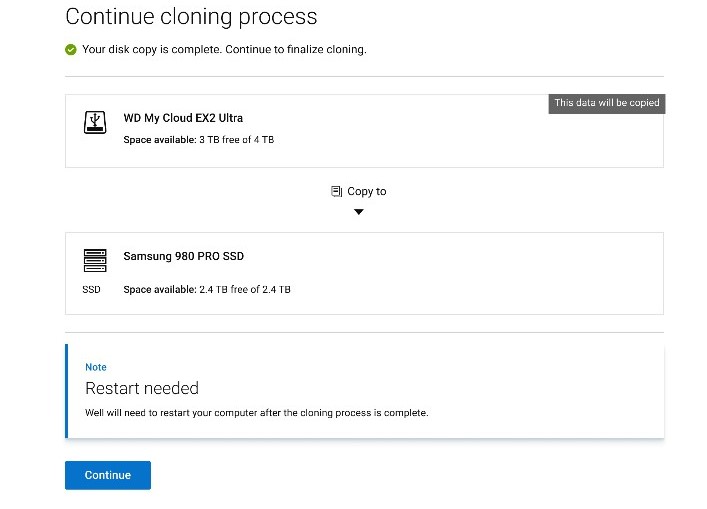
Figure 12: (English Only) Continue cloning process
- On success, click Continue to boot from the newly installed primary drive.
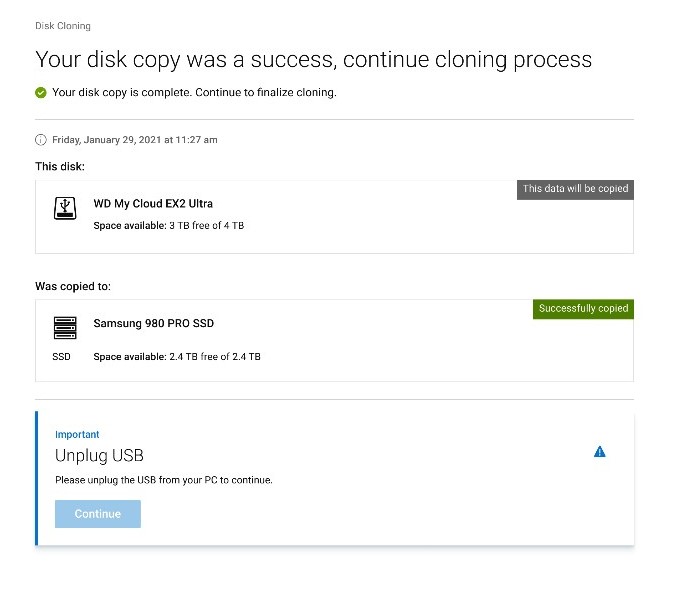
Figure 13: (English Only) Unplug USB
Weitere Informationen
Recommended Articles
Here are some recommended articles related to this topic that might be of interest to you.
Artikeleigenschaften
Betroffenes Produkt
SupportAssist OS Recovery
Letztes Veröffentlichungsdatum
14 März 2024
Version
10
Artikeltyp
How To