How to Run a Power Supply Unit Self-Test On a Dell Desktop or All-in-One Computer
Summary: Learn how to run a self-test diagnostic on the power supply unit of a Dell desktop or all-in-one computer. Built-in Self Test (BIST) helps determine if the power supply unit is working. ...
Instructions
Dell Inspiron, XPS, OptiPlex, Precision, and Vostro desktops come with a handy built-in self-test (BIST) feature for the power supply unit (PSU). This feature, along with the LED indicator on the PSU, helps you check if everything's working fine.
If your PSU is not delivering enough power, your computer cannot not turn on.
Common reasons for power supply failure are:
- Faulty or damaged power cable
- Non-working power outlet
- Faulty power strip or surge protector
- Faulty power supply unit
How to identify if my Dell desktop has a power supply unit with built-in self-test?
Look for the BIST on the back panel of your desktop, next to the power cable connector. On some smaller chassis types, you must remove the computer cover to see the BIST on the side of the PSU.
Examples of a power supply unit with the built-in self-test button
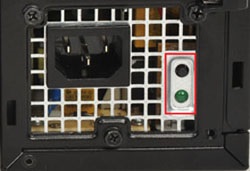
Figure 1: Example of a BIST button on the power supply of a desktop computer
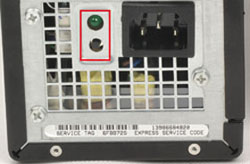
Figure 2: Second example of a BIST button on the power supply of a desktop computer
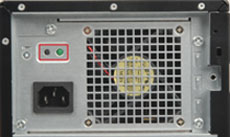
Figure 3: Third example of a BIST button on the power supply of a desktop computer
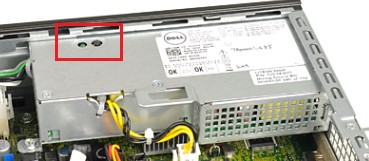
Figure 4: Fourth example of a BIST button on the power supply of a desktop computer
Examples of a power supply unit without the built-in self-test button
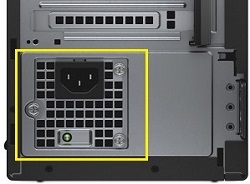
Figure 5: Example of a power supply without the BIST button
How to use the built-in self-test to diagnose power supply issues?
Running a Self-Test on Your PSU with a Button
- Turn off the computer.
- Press the BIST button and check if the LED lights up.
- The LED should be solid, not flickering or flashing.
- The power supply fan should turn on. If the fan does not spin correctly, consider the self-test failed even if the LED lights up.
- If the BIST LED turns on, your power supply is delivering power to the computer.
- If the BIST LED does not turn on or the PSU fan does not spin correctly, your power supply is not delivering power. Disconnect and reconnect the power cable and try again. If the LED still does not turn on, contact Dell Technical Support for repair options.
Running a Self-Test on Your PSU without a Button
- Turn off your computer.
- Disconnect the power cable from the PSU and wait for 15 to 20 seconds.
- After 15 to 20 seconds, reconnect the power cable to the computer.
- The LED light should turn on for 3 seconds and then turn off.
- If the BIST LED turns on, your power supply is delivering power to the computer.
- If the BIST LED does not turn on or the PSU fan does not spin correctly, your power supply is not delivering power. Disconnect and reconnect the power cable and try again. If the LED still does not turn on, contact Dell Technical Support for repair options
Additional Information
Tutorial on Dell’s Built In Self Test for power supplies if No Power
Duration: 02:56
Closed captions: This video is available in multiple languages. Click the Closed Caption icon and select the language that you want.