PowerEdge: How to create a bootable USB drive for OS Installation
Summary: This article provides information about how to create a bootable USB drive from and OS ISO file for manual installation.
This article applies to
This article does not apply to
This article is not tied to any specific product.
Not all product versions are identified in this article.
Instructions
Creating a bootable USB drive from a downloaded ISO file
- Creating a bootable USB drive requires use of a tool that can make the USB drive bootable and copy the contents of the ISO file onto the USB drive.
- This article covers the two most commonly used tools, Rufus
, and balenaEtcher
- The tool balenaEtcher is simple to use and supports multiple OS's including Linux and macOS. Rufus is only supported on Windows operating systems, but it provides additional configuration options if advanced setup is required.
Table of Contents:
Creating a bootable USB drive using balenaEtcher:

Supported Operating Systems:
- Linux; most distros; Intel 64-bit
- Windows 10 and later; Intel 64-bit
- macOS 10.13 (High Sierra) and later; both Intel and Apple Silicon
Follow the below steps to create a bootable ISO using balenaEtcher:
- Download the latest version of balenaEtcher from here: https://etcher.balena.io/

- Install balenaEtcher using the downloaded exe file and once installed run it.
- Once opened up the first step is to select the ISO file to use, select Flash from File which launches the file explorer to select the downloaded ISO file.

- After selecting the ISO file, the next option to select target will be available. Click Select Target to open a list of detected USB drives and select the disk to make it bootable.


- After choosing the USB drive from the list, click the Select button which returns to the main screen to now see that the Flash button is available.
- Click the Flash option to begin creating the bootable USB drive using the selected ISO file.


- Once the flash has completed, close the application and plug the Bootable USB drive into the system to begin installation.
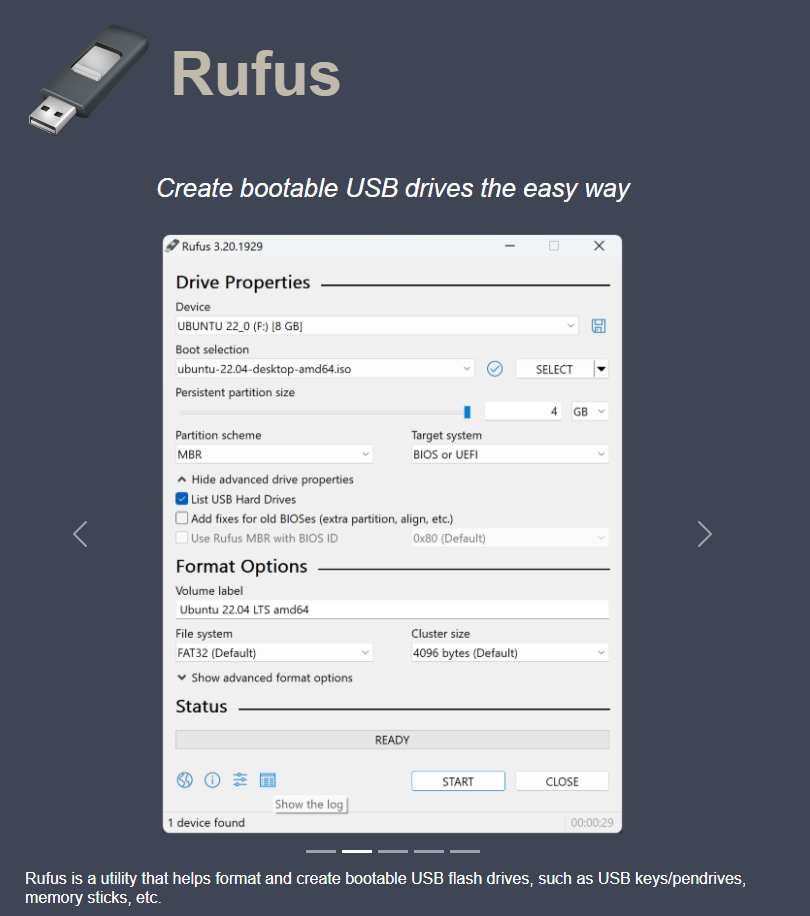
Creating a bootable USB drive using Rufus:
System Requirements:
- Windows 8 or later
Follow the below steps to create a bootable ISO using Rufus:
- Download the latest version of Rufus from here: Rufus

- Once the ISO is downloaded, run the file directly no install is required.
- Under the Device option, you can confirm that the correct USB drive is selected using the dropdown option.
- To load the ISO file, click SELECT to browse to the local USB file.

- Once the ISO has been chosen, it automatically fills out certain fields based on the detected ISO.

- Select either GPT or MBR from the partition scheme dropdown depending on what type of system being used and if its using UEFI mode or legacy BIOS mode where MBR may be needed.

- Once the required options have been selected, proceed with the creation by clicking START.

- After clicking start you are prompted to confirm the mode to use, the recommended option is ISO image mode. DD image mode is typically used for cloning disks.

- After selecting the mode to use the next prompt warns you that this will destroy all data on the selected USB drive, click OK to continue.

- After confirming to proceed, see the progress of the USB flash until it completes.


- Once the USB flash has completed, close the application and then take the USB drive to the system to install on.
Affected Products
C Series, HS Series, Modular Infrastructure, Rack Servers, Tower Servers, XE Servers, XR Servers, OEM Server SolutionsArticle Properties
Article Number: 000334285
Article Type: How To
Last Modified: 26 June 2025
Version: 2
Find answers to your questions from other Dell users
Support Services
Check if your device is covered by Support Services.