Dell Networking OS10: Interface Trunk Mode Configuration
Summary: How to configure OS10 Trunk Mode on an Interface.
Instructions
Prerequisites:
Switch has a factory-default configuration with VLANs 10 and 11 configured.
Instructions
Instructions for setting up the management interface network connection:
-
Open the CLI using the console or management IP for your S-series switch.
-
Log in to the privileged exec mode as default admin credentials. (OS10: user=
admin, password=admin). -
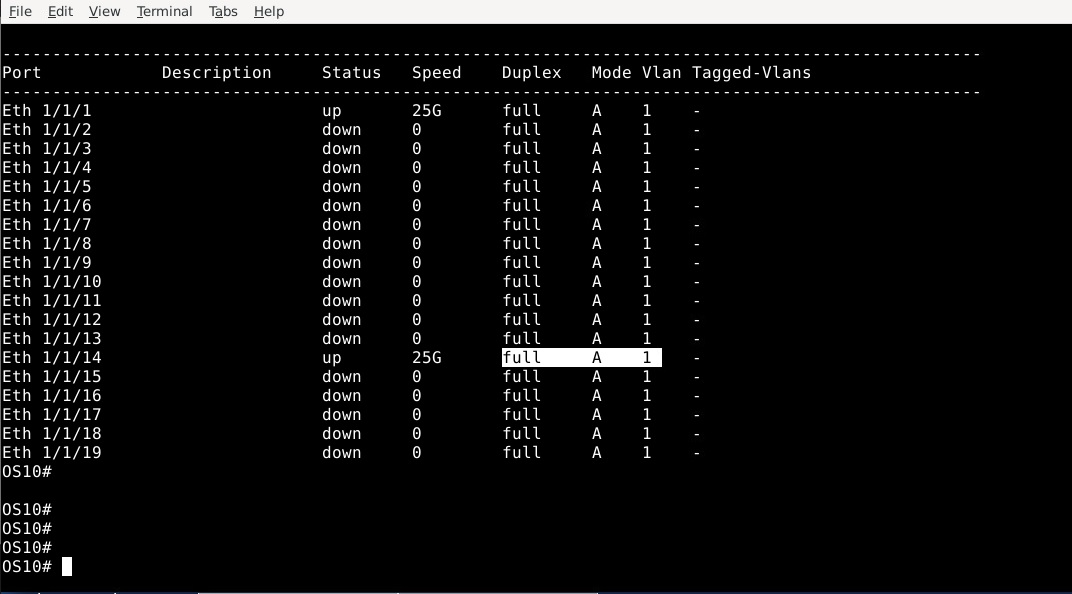
Show the status of the interfaces, noting the A for "access" mode:
OS10# show interface status
Observe the Eth 1/1/14 interface, highlighted below. It is in mode A for access.
-
To modify the switch configuration, run the following command then press Enter.
OS10# configure terminal
OS10(config)#
-
To configure the Ethernet 1/1/14 interface, enter the following command:
OS10(config)# interface ethernet 1/1/14
OS10(conf-if-eth1/1/14)#
-
To change the interface mode to trunk with the following command:
OS10(conf-if-eth1/1/14)# switchport mode trunk
OS10(conf-if-eth1/1/14)#
-
Configure which trunk vlans will be assigned to the interface with the following.
OS10(conf-if-eth1/1/14)# switchport trunk allowed vlan 10,11
OS10(conf-if-eth1/1/14)#
-
Configure which access vlan will be assigned to the port with the following command
OS10(conf-if-eth1/1/14)# switchport access vlan 1
OS10(conf-if-eth1/1/14)#
-
Exit the interface and configuration back to exec mode with the following command
OS10(conf-if-eth1/1/14)# end
OS10#
-
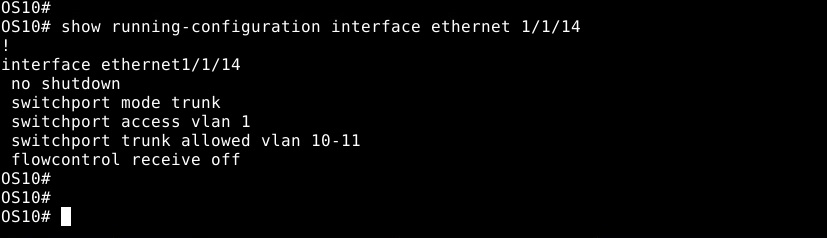
Verify the configuration changes made on the interface with the command:
show running-configuration interface ethernet 1/1/14
-
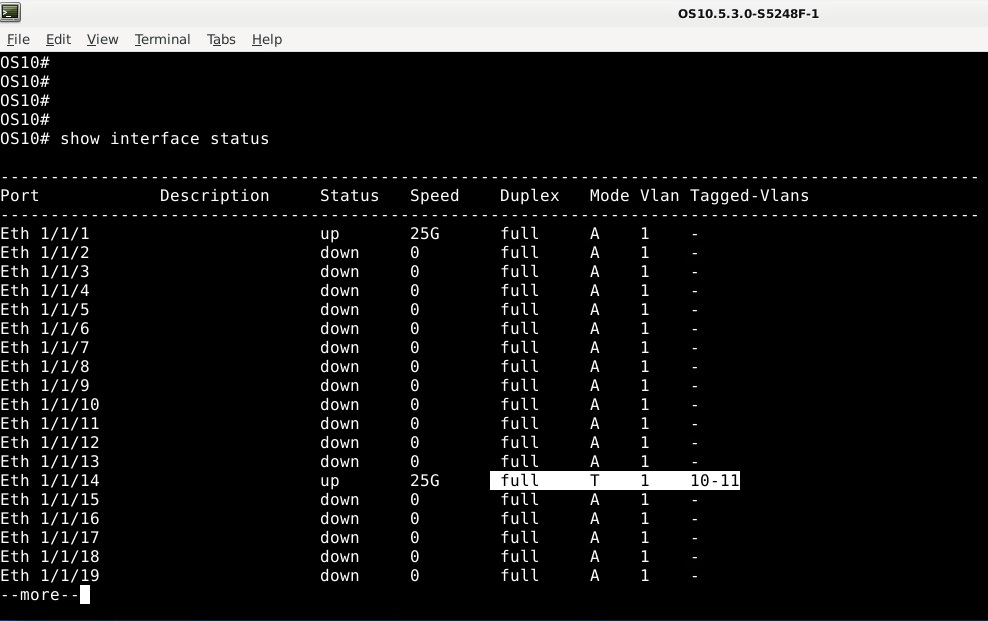
To verify the changes to the interface with the command:
show interface status. Verify that the Mode is now T for trunk. Access VLAN 1 is applied and tagged VLANS 10 and 11 are also assigned.
-
To save the configuration changes, use the following command.
OS10# write memory
OS10#
For further assistance, see the Dell EMC SmartFabric OS10 User Guide Release Documentation or reach out to Dell Technical Support.
Additional Information
Refer to this video: