How to Perform a Critical Registry Update for SupportAssist for Business PCs Insight Telemetry
Summary: Learn how to perform a critical registry update for SupportAssist for Business PCs software using version 4.5.3 or earlier.
Instructions
SupportAssist for Business PCs using version 4.5.3 or earlier uses an Entrust certificate. The Entrust certificate has an expiration of July 02, 2025. Unfortunately, there is no option to renew or reissue the certificate, as Entrust has ceased issuing certificates. For more information, refer to the Entrust TLS Certificate Information Center or Entrust Certificate Distrust
.
Affected Software:
- SupportAssist for Business PCs
Affected Versions:
- v4.5.3 or earlier
Follow these instructions to update the registry if SupportAssist auto update has been turned off from the TechDirect Connect & Manage group configuration. The entire computer fleet must have the registry settings updated by one of the two methods listed below to view PC Insights telemetry in TechDirect.
Update Method 1
If you have a Technical Customer Success Manager or Service Account Manager, contact them to receive a PowerShell script. The PowerShell script updates all required registry settings for SupportAssist for Business PCs.
Update Method 2
Follow these step-by-step instructions to update the registry settings of SupportAssist for Business PCs manually without the use of a PowerShell script.
- Click the Start button, search for
Registry Editor, right-click Registry Editor, then click Run as administrator. - Go to the path
Computer\HKEY_LOCAL_MACHINE\SOFTWARE\Dell\Dell Insights. - On the right pane, add a DWord by right-clicking New and then selecting DWord (32-bit) Value. Set the Value name as
DisableCertificatePinningand set the Value data as1.
- Go to the left pane, right-click Dell Insights, select New and then Key. Enter
Tenantto create a key folder. - Go to the right pane of the
Tenantfolder and add a DWord by right-clicking New and then selecting DWord (32-bit) Value. Set the Value name asDisableCertificatePinningand set the Value data as1.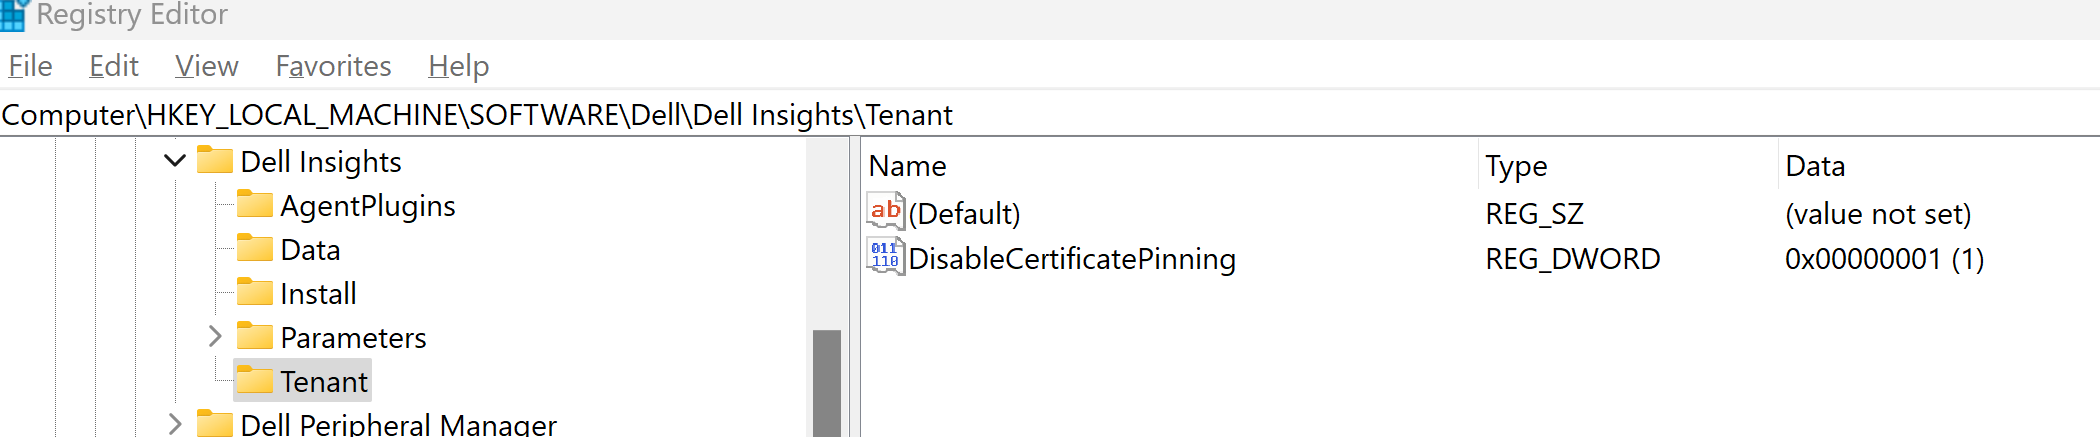
- Go to the path
Computer\HKEY_LOCAL_MACHINE\SOFTWARE\Dell\Dell TechHub\AgentRegistration\{A9C6E2C0-4169-424D-9523-FDAB060A4FA6}. - Go to the right pane and add a DWord by right-clicking New and then selecting DWord (32-bit) Value. Set the default Value name as
New Value #1, then double-click it, set Value data to2, then rename the Value name tocommandto restart the sub agent. - Once the
commandDword is added with the value of2, thecommandDword is automatically removed by the subagent after initiating the restart. - Click the View menu, click Refresh, and then check if the sub agent is stopped and started again by seeing the
StatusDescriptionis Running. - If the
StatusDescriptionsays Stopped, wait for 10 to 15 seconds and then refresh the window to see theStatusDescriptionof Running.