How to Run a Diagnostic Test Using SupportAssist
Summary: This article provides instructions on how to run hardware diagnostics using SupportAssist on a Dell computer.
This article applies to
This article does not apply to
This article is not tied to any specific product.
Not all product versions are identified in this article.
Instructions
Running a hardware scan enables you to detect hardware issues on your Dell computer. By default, SupportAssist scans your computer hardware once a month to detect hardware issues. You can also manually perform one of the following to identify a hardware issue:
- Scan a specific hardware component.
- Run a quick hardware scan.
- Run a stress test.
To learn more about SupportAssist, see the SupportAssist user guide.
NOTE: SupportAssist is preinstalled on all Windows computers that are shipped out of the Dell factory. If SupportAssist is not preinstalled, download and install SupportAssist. To learn more, see SupportAssist FAQs.
NOTE: You must have administrator privileges to install SupportAssist.
NOTE: Some tests for specific devices require user interaction. Always ensure that you are present at the computer terminal when the diagnostic tests are performed.
How to Scan the System Hardware using SupportAssist
Watch this video to learn how to run a hardware scan using SupportAssist.
Duration: 00:02:47 (hh:mm:ss)
When available, closed caption (subtitles) language settings can be chosen using the Settings or CC icon on this video player.
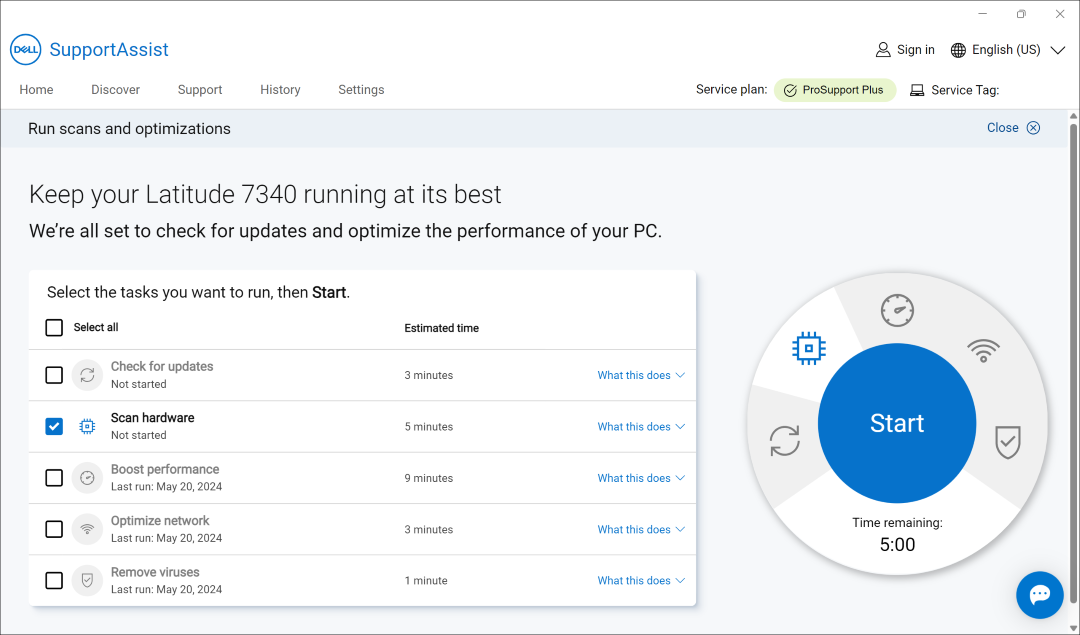
Quick hardware scan in SupportAssist
A quick scan of your computer detects issues in hardware components such as the hard drive, processor, memory module, and so on.
NOTE: Dell Technologies recommends saving and closing all files and applications and ensuring that your device is plugged into a power source.
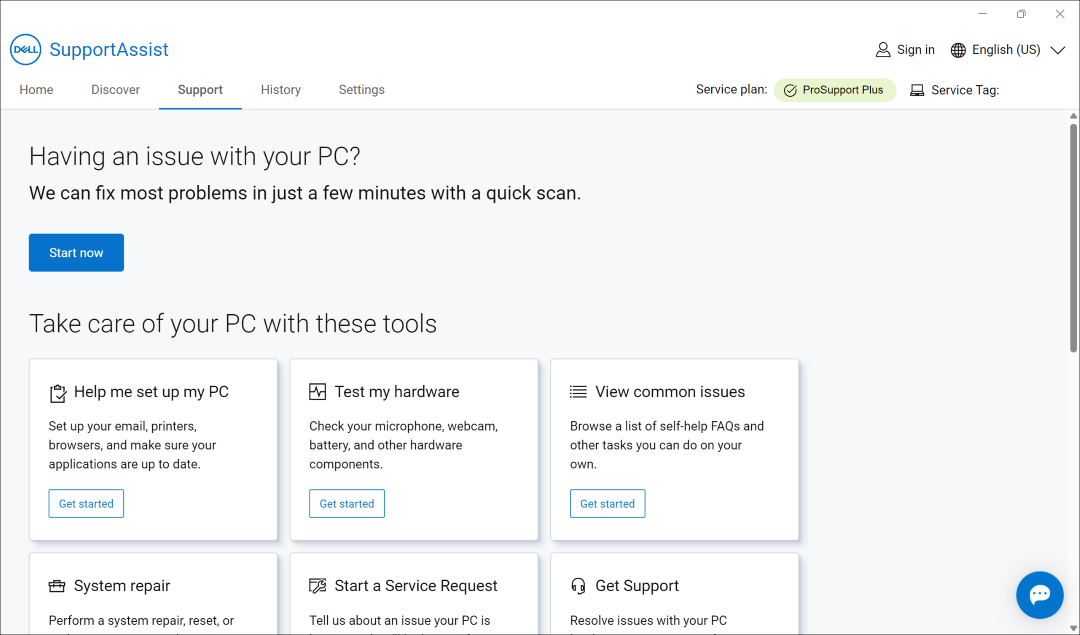
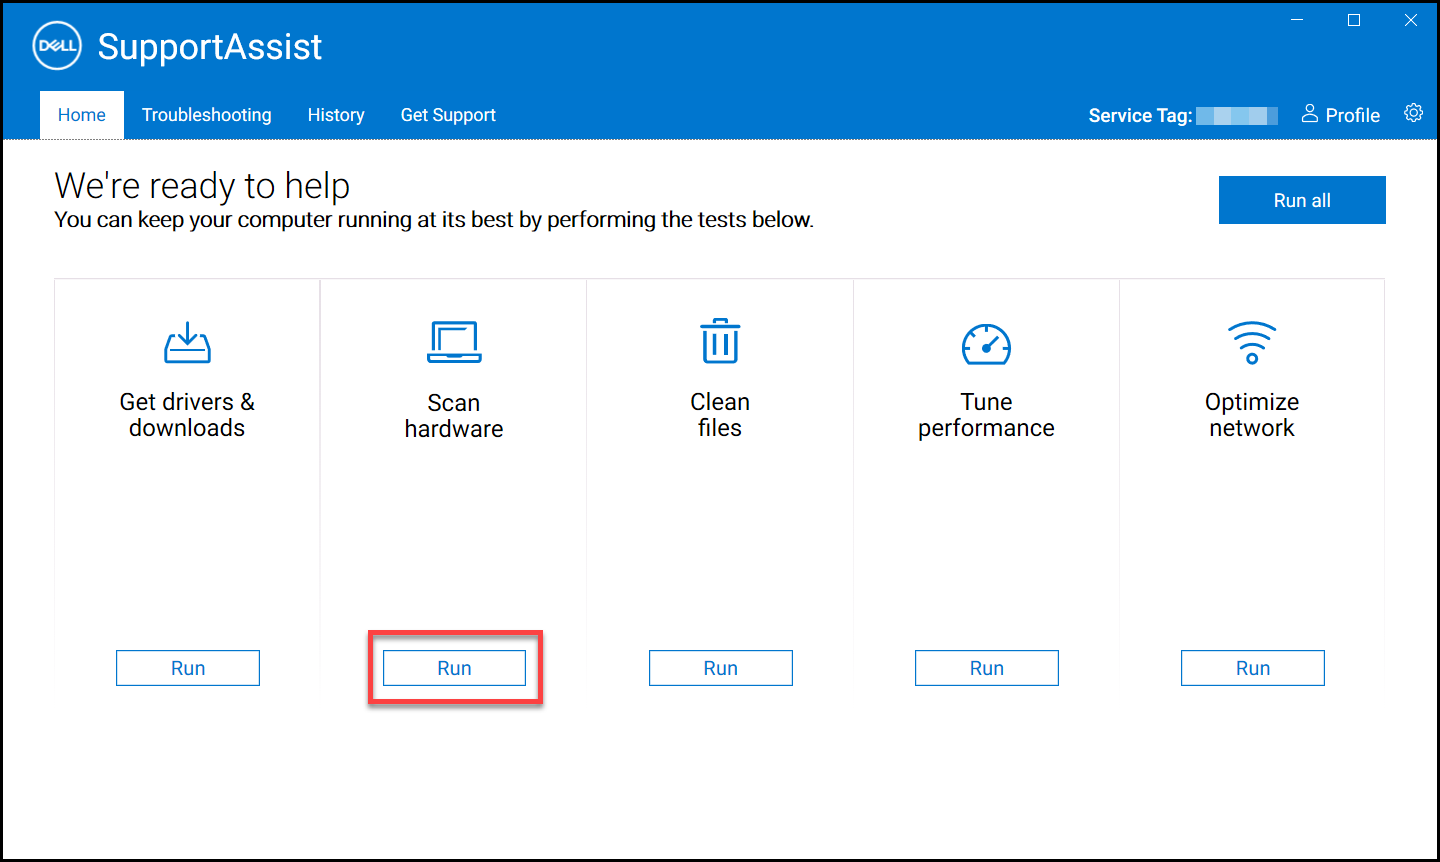
- Open the SupportAssist app and select Scan hardware (chip icon).

- Select Start. This does a thorough scan of your entire computer, including your display and other connected devices.
Scan a specific hardware component in SupportAssist
SupportAssist enables you to test or scan a specific hardware component that is installed in your computer.
NOTE: Dell Technologies recommends saving and closing all files and applications and ensuring that your device is plugged into a power source.
- Open the SupportAssist app and select Support.

- Under Test my hardware, select Get started.

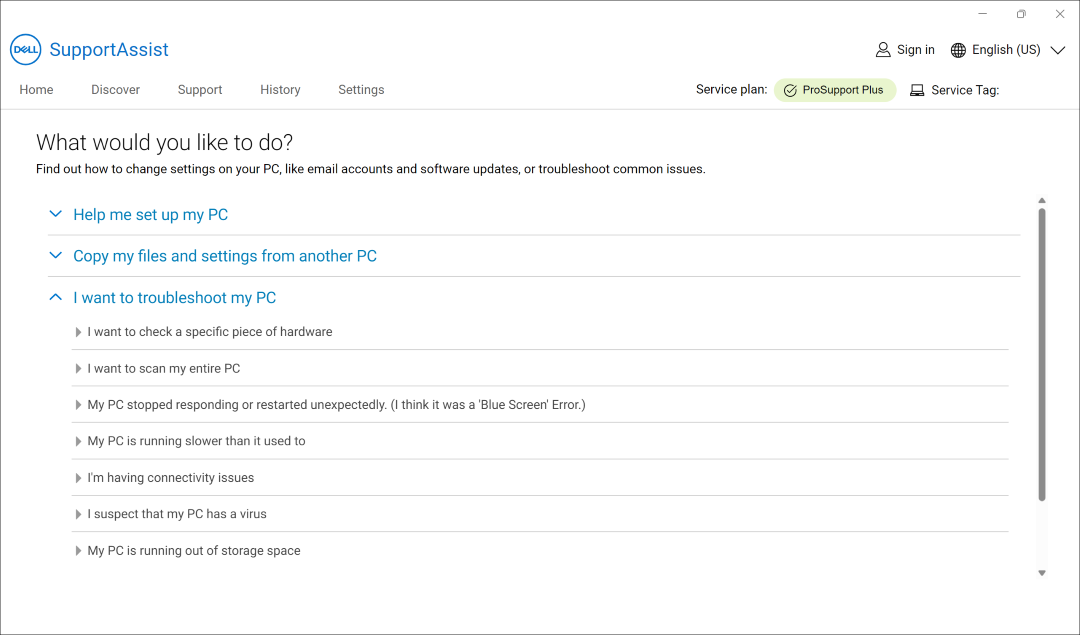
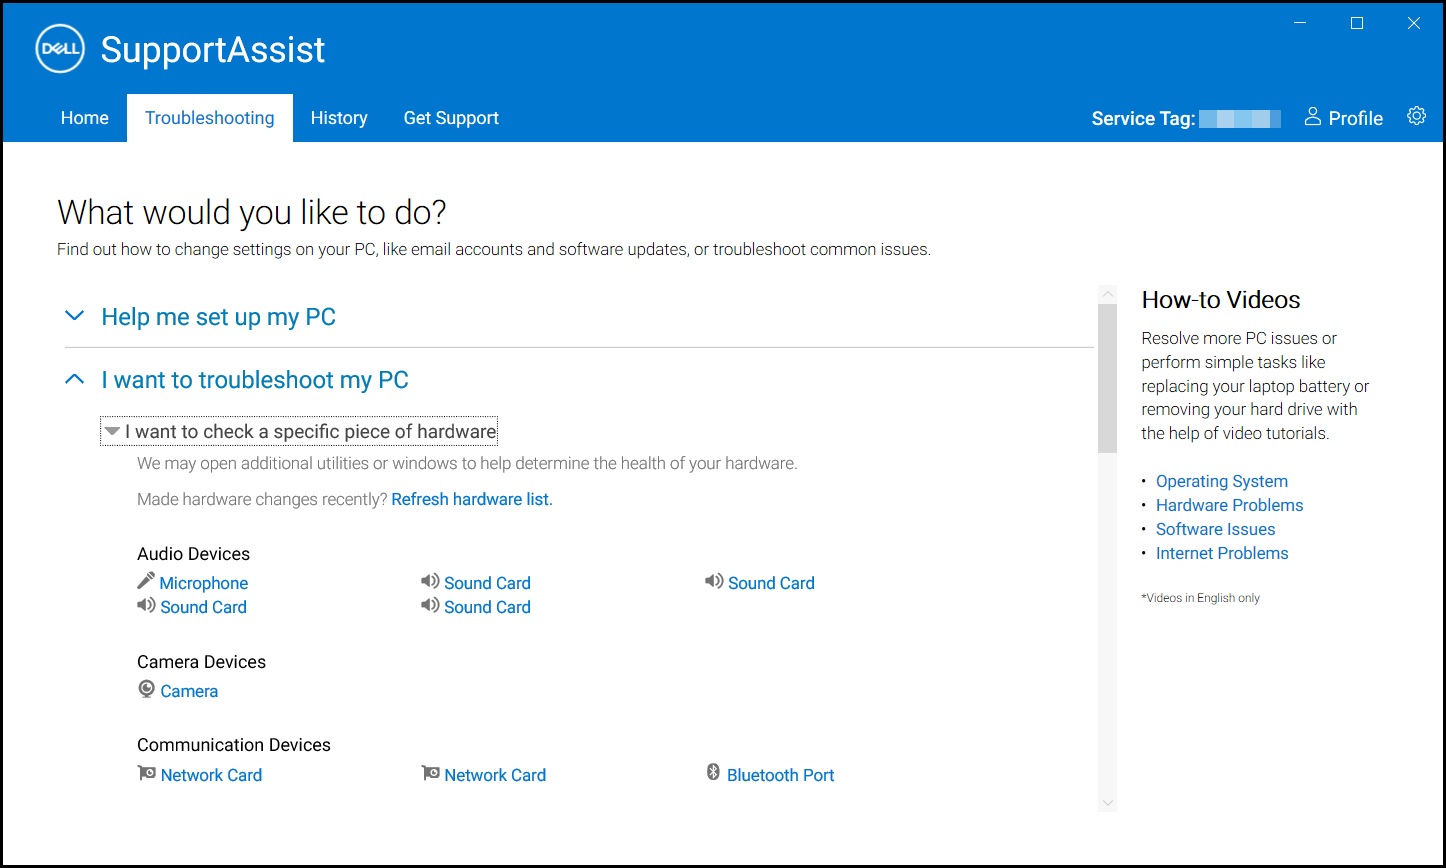
- Under the I want to troubleshoot my PC section, select I want to check a specific piece of hardware.
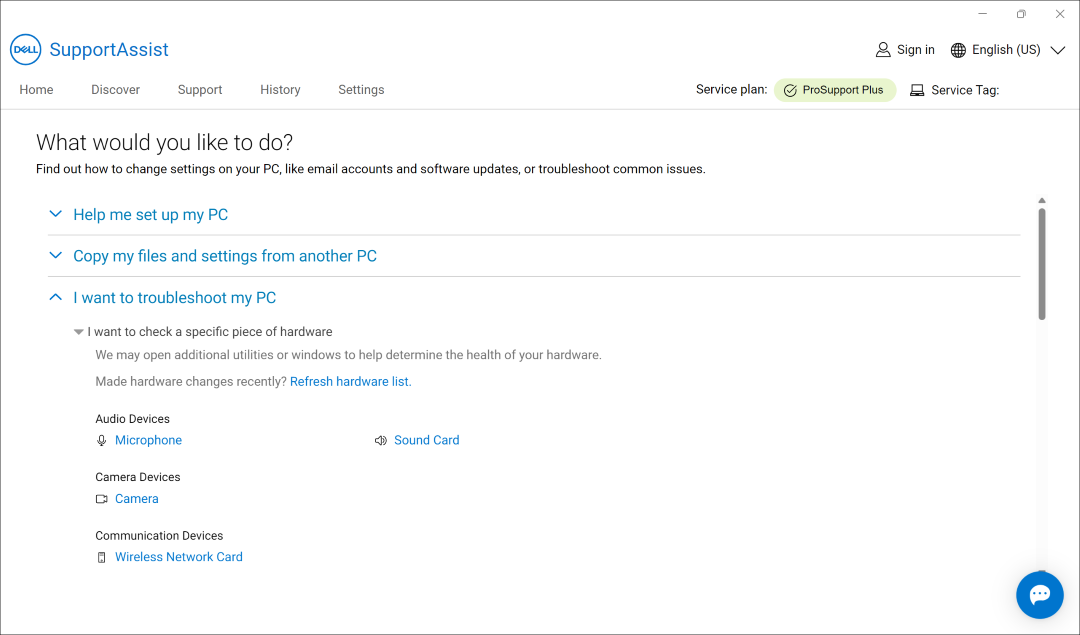
- Select the component to test. The list of components varies depending on the configuration of your Dell computer. SupportAssist may open additional utilities or windows to help determine the health of the hardware. If a component is not listed because of recent hardware changes, select Refresh hardware list.
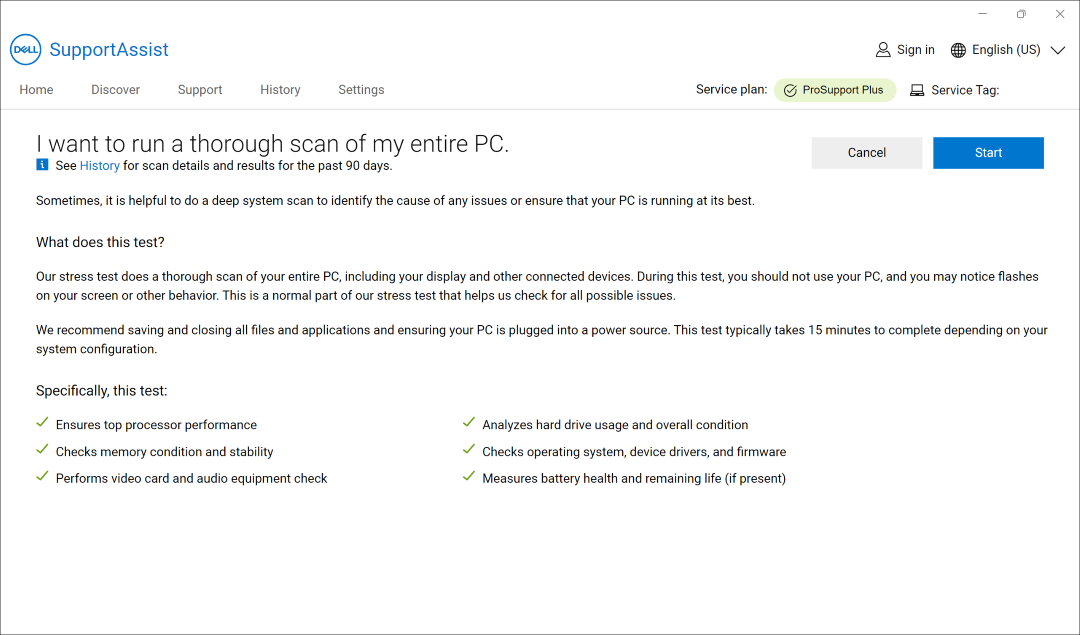
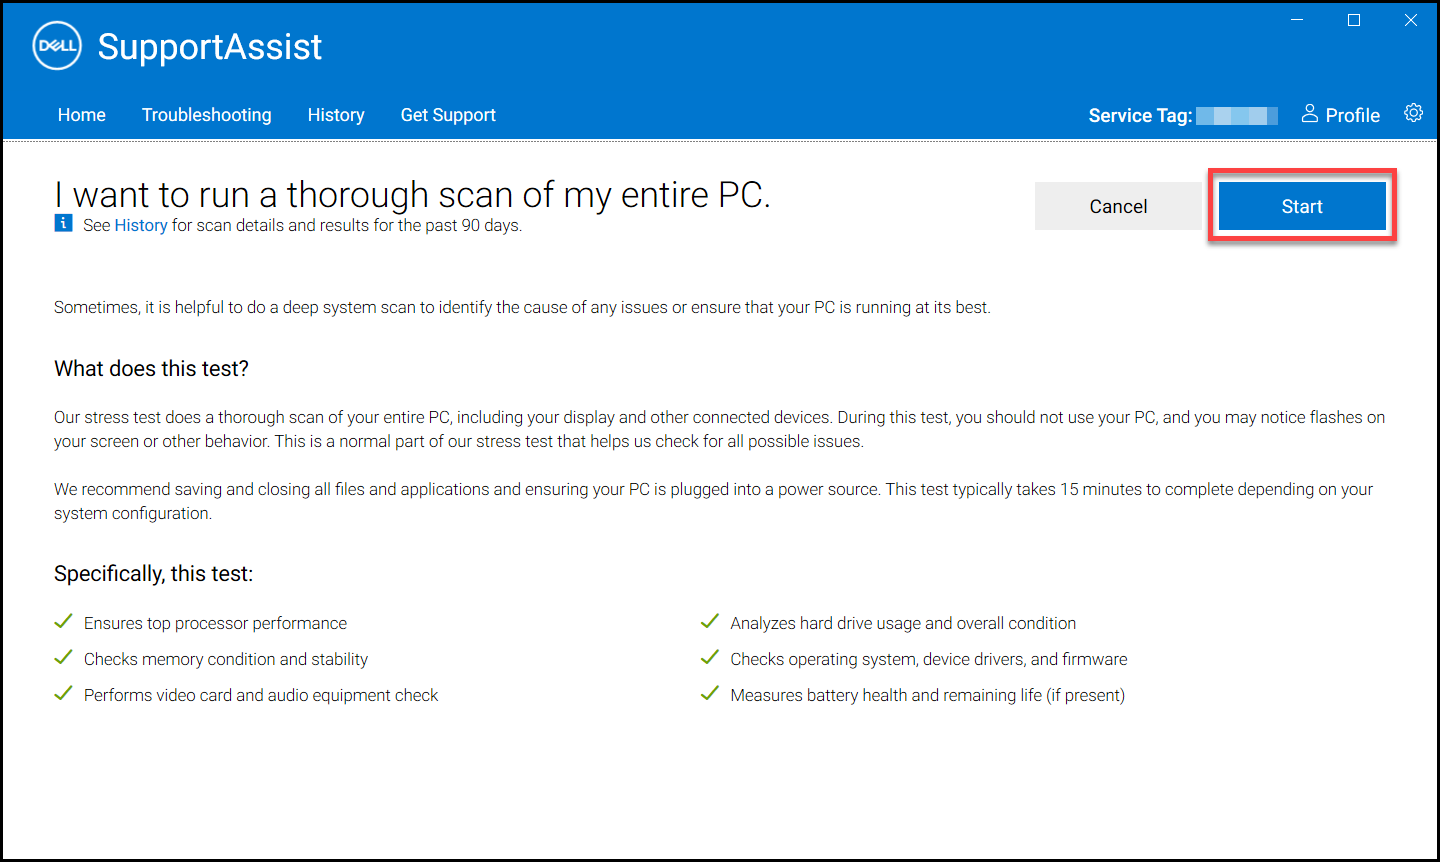
Full system scan or stress test in SupportAssist
SupportAssist helps perform a deep system scan to identify the cause of any issues or ensure that your computer is running at its best. The stress test does a thorough scan of the computer, including the display and other connected devices.
NOTE: Dell Technologies recommends saving and closing all files and applications and ensuring that your device is plugged into a power source.
- Open the SupportAssist app and select Support.
- Under Test my hardware, choose Get started.
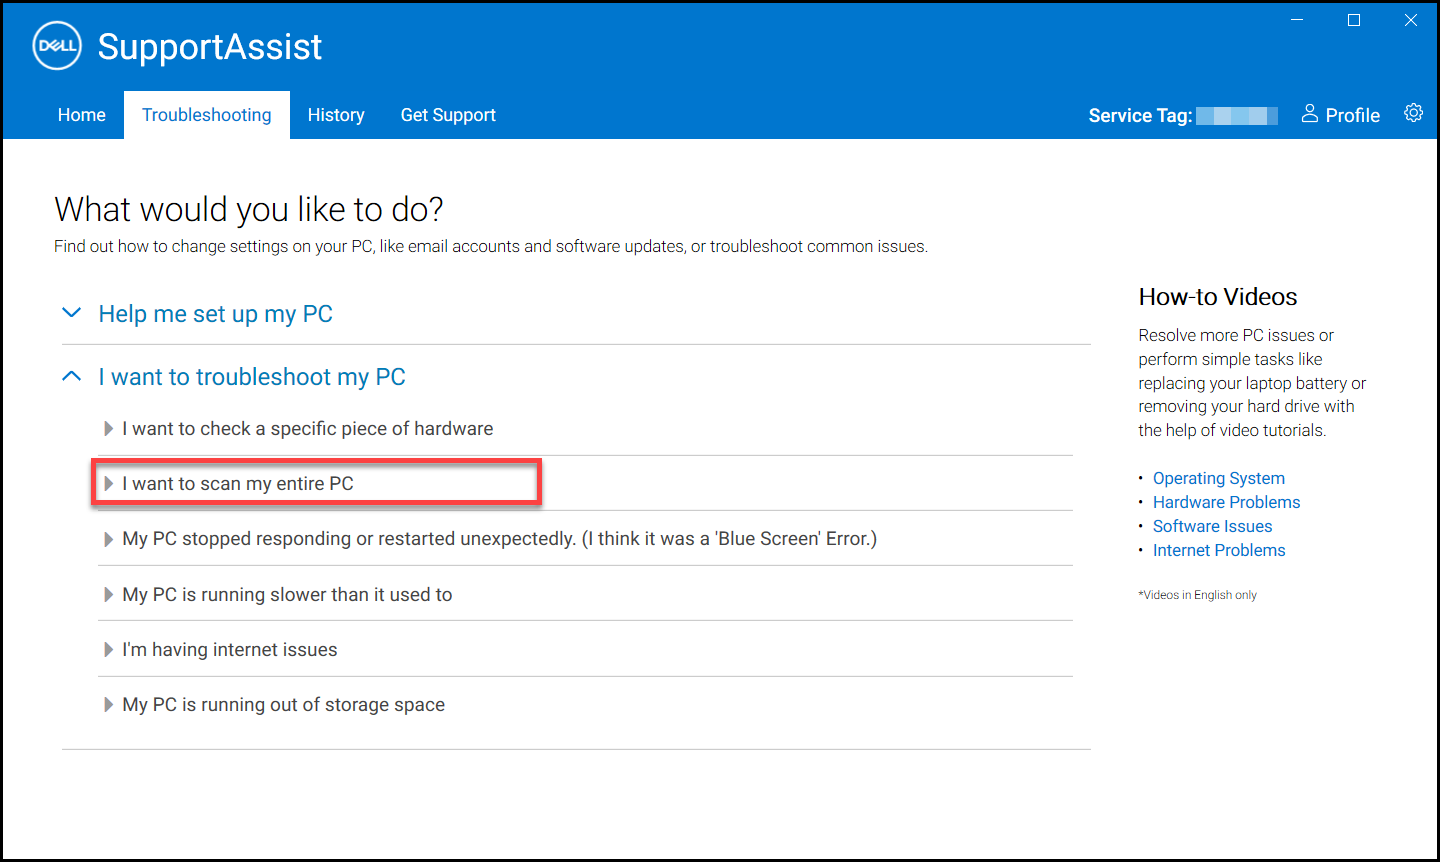
- Under the I want to troubleshoot my PC section, select I want to scan my entire PC.

- Select Start. This does a thorough scan of your entire personal computer, including your display and other connected devices.
How to Scan an Entire Computer using SupportAssist
Watch this video to learn how to run a full hardware scan using SupportAssist.
Duration: 00:00:31 (hh:mm:ss)
When available, closed caption (subtitles) language settings can be chosen using the Settings or CC icon on this video player.
See these Dell Knowledge Base articles for other diagnostics tests available from Dell:
- How to Run a Preboot Diagnostic Test on a Dell Computer
- How to Run a Dell Online Diagnostic Test
- How to Run a Diagnostic Test on a Dell Monitor
- How to Run the LCD Built-in Self-Test on a Dell Laptop
- How to Run a Power Supply Unit Self Test On a Dell Desktop or All-in-One Computer
- How to Run Hardware Diagnostics on your PowerEdge Server
Additional Information
Scan a specific hardware component
SupportAssist enables you to scan a specific hardware component that is installed in your computer. The steps to run a scan depend on the hardware component that you select.
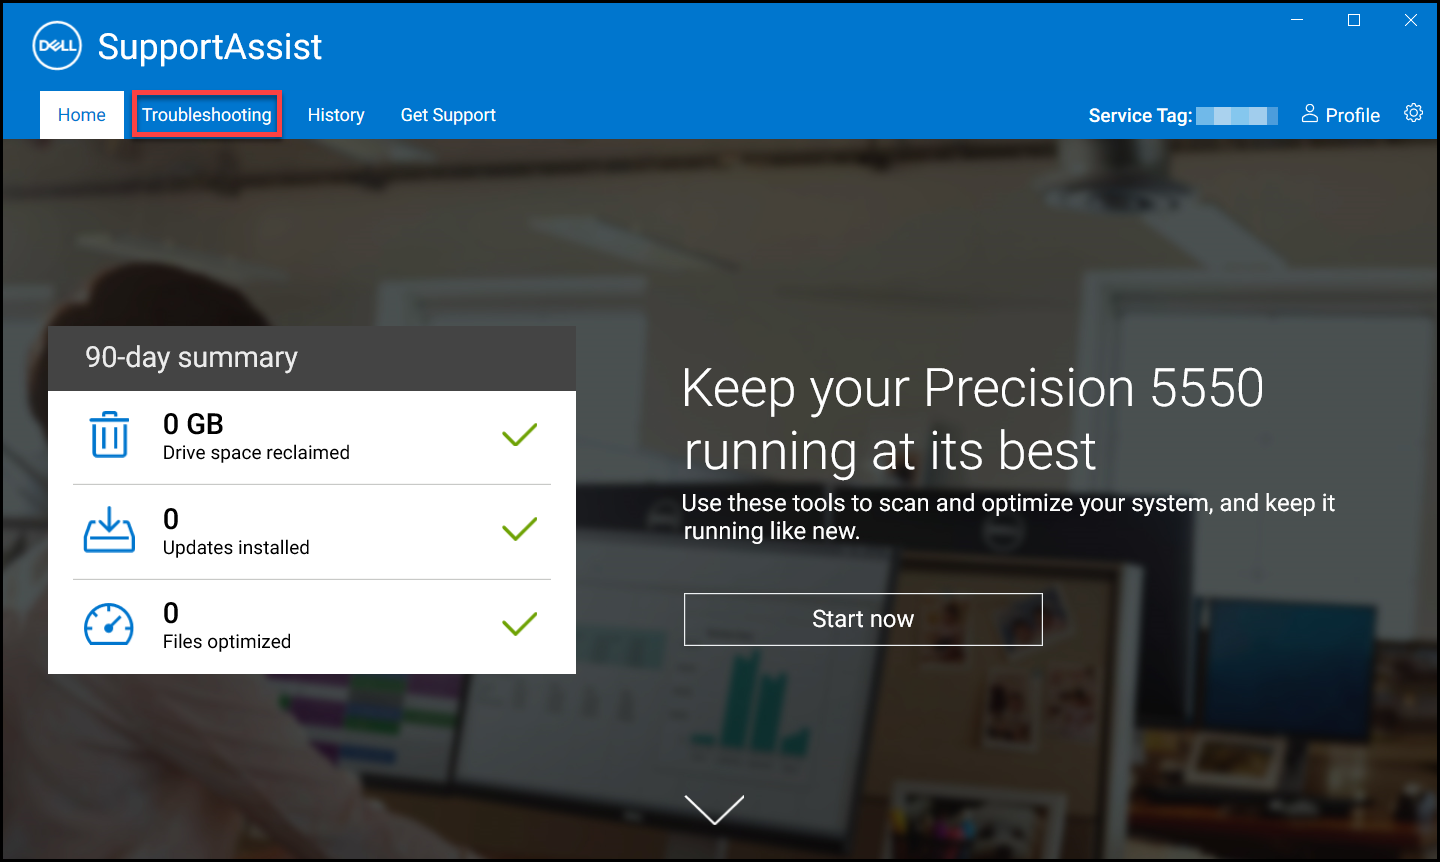
- Open SupportAssist and click the Troubleshooting tab.
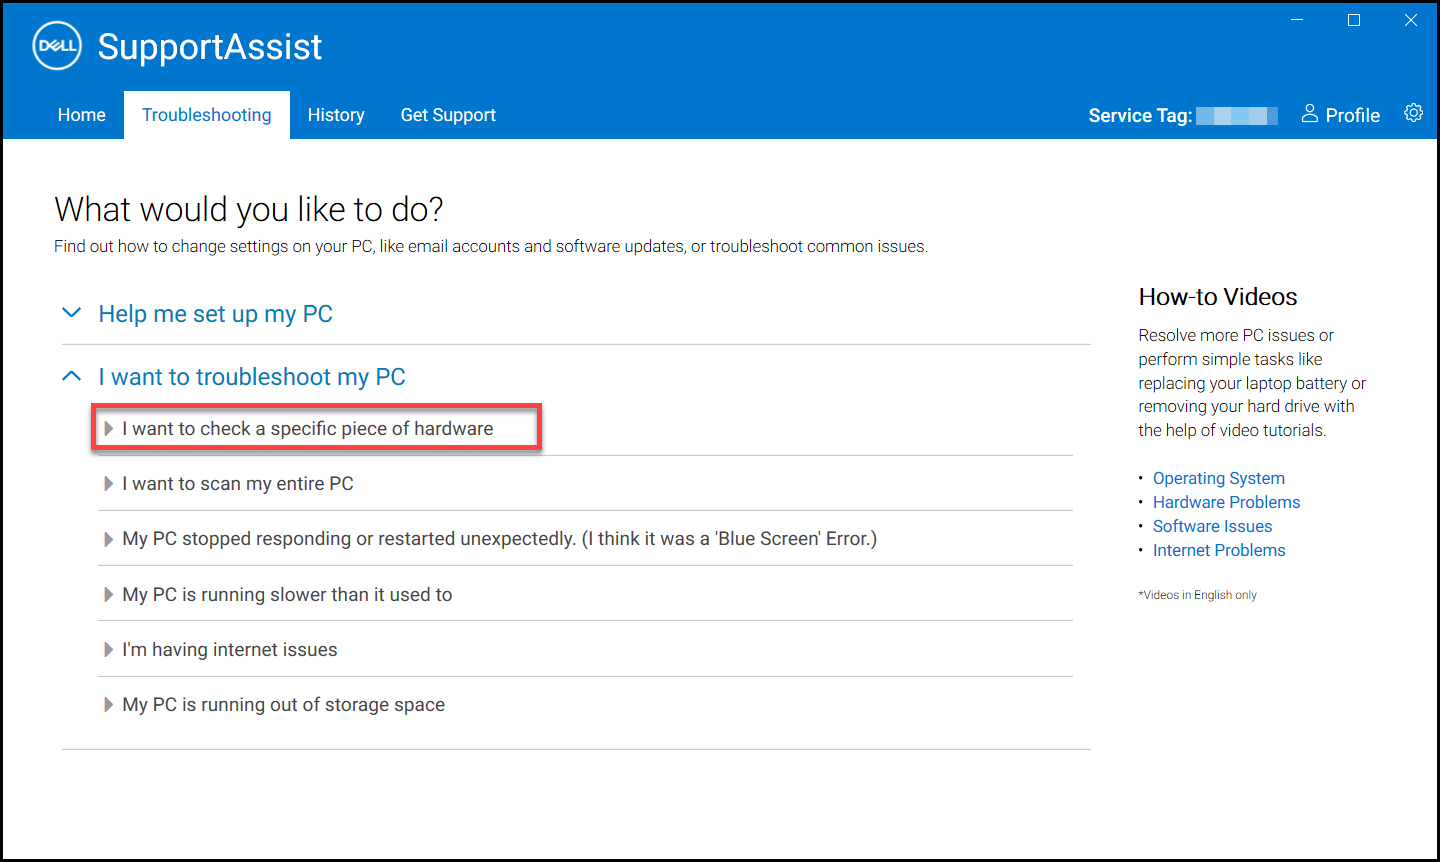
- Click I want to troubleshoot my PC and click I want to check a specific piece of hardware. The list of hardware components that are available on your computer is displayed.
NOTE: To update the list of hardware components that are displayed, click the Refresh hardware link.
- Select the device to test.
- Follow any on-screen instructions to complete the test.
Run a quick hardware scan
A quick scan of your computer detects issues in hardware components such as the hard drive, processor, memory module, and so on.
- Open SupportAssist and click the down-arrow icon.
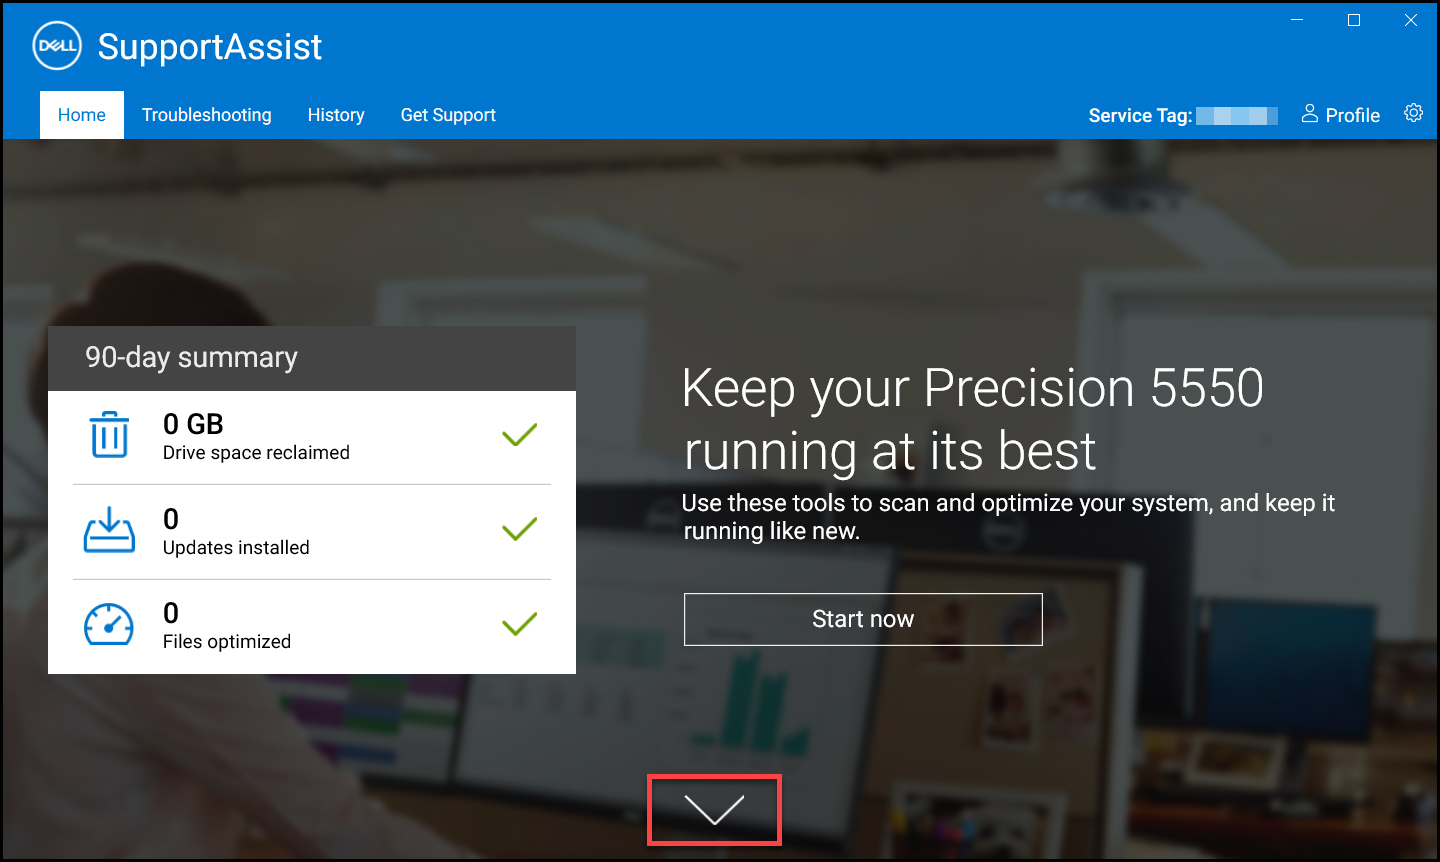
- On the Scan Hardware tile, click Run.
Run a stress test
A stress test detects issues in components such as the system board, optical drives, and camera. It also detects issues in components that are scanned during a quick scan.
- Open SupportAssist and click the Troubleshooting tab.

- Click I want to troubleshoot my PC and then click I want to scan my entire PC.
- Click Start. A message is displayed prompting you to save your files and close all applications.
- After you save your files and close all the applications, click OK to run the test. During the test, the name of the task that is running is displayed above the tiles and the progress is displayed on the Scan Hardware tile.
Affected Products
Alienware, Dell All-in-One, Dell Pro All-in-One, Dell Pro Max Micro, Dell Pro Max Slim, Dell Pro Max Tower, Dell Pro Micro, Dell Pro Slim, Dell Pro Tower, Dell Slim, Dell Tower, Inspiron, Legacy Desktop Models, OptiPlex, Vostro, XPS, G Series
, G Series, Alienware, Dell Laptops, Dell Plus, Dell Pro, Dell Pro Max, Dell Pro Plus, Dell Pro Premium, Inspiron, Latitude, Dell Pro Rugged, Vostro, XPS, Legacy Laptop Models, Fixed Workstations, Mobile Workstations, Dell Pro Max Micro XE FCM2250, Dell Pro Max Slim XE FCS1250, Dell Pro Max Tower T2 XE FCT2250, Dell Pro Max 16 XE MC16250, Dell Pro Micro Plus XE QBM1250, Dell Pro Slim Plus XE5 QBS1250, Dell Pro Tower Plus XE5 QBT1250, SupportAssist for Home PCs, SupportAssist for Business PCs
...
Article Properties
Article Number: 000198182
Article Type: How To
Last Modified: 13 May 2026
Version: 12
Find answers to your questions from other Dell users
Support Services
Check if your device is covered by Support Services.