Dell Networking SONiC: Upgrade or Downgrade SONiC Using SCP Protocol with Software like WINSCP
Summary: This article explains Dell Networking SONiC upgrade or downgrade using SCP protocol in the WINSCP application.
This article applies to
This article does not apply to
This article is not tied to any specific product.
Not all product versions are identified in this article.
Instructions
Note: You can use any application which supports the SCP protocol to upload a firmware file to the switch. In this article, we are using WINSCP application to demonstrate the process.
Steps:
- Ensure that there is ample space in the switch to copy the SONiC file. Use the command:
df /home -h
Sample output
admin@sonic:~$ df /home -h
Filesystem      Size  Used Avail Use% Mounted on
root-overlay     29G  5.0G   23G  18% /
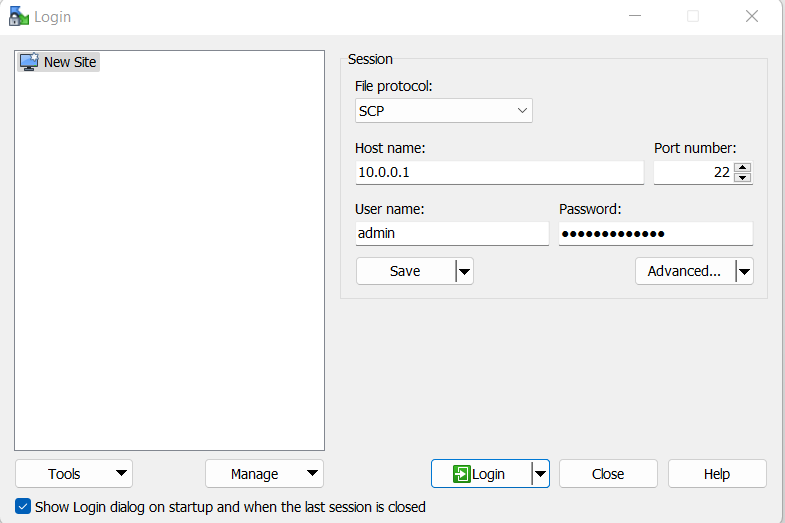
- Log in to switch using WINSCP. Use SCP as file protocol.
- Copy the file into the switch and note the file path. In below, the file path is /home/admin.
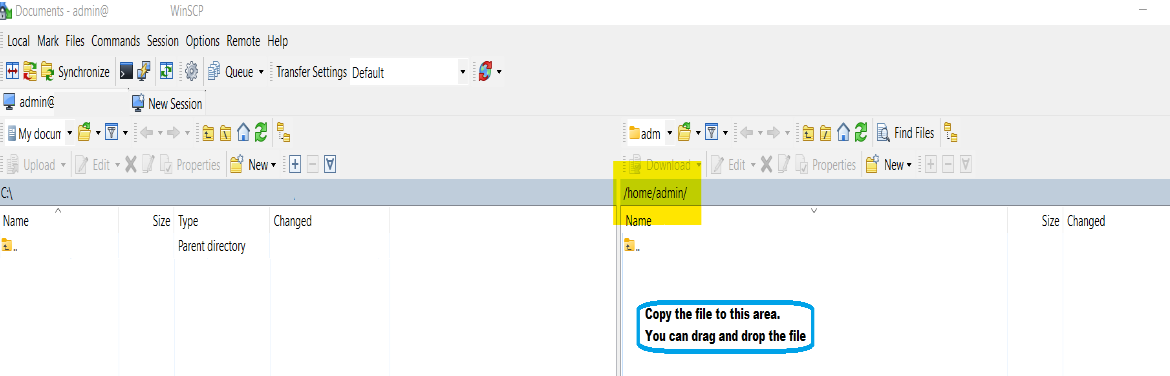
Below is a sample screenshot after copying the file successfully. The file name of SONiC upgrade file is Enterprise_SONiC_OS_4.0.5_Edge_Standard.bin.

Log in to the switch using SSH and any terminal application like PuTTY.
NOTE: Ensure saving the configuration using command write memory before issuing the image install command and we have a backup of the configuration.
Below is the list of commands that we are using:
| Command | Explanation |
|---|---|
admin@sonic:~$ sonic-cli |
Log in to Dell SONiC |
sonic# dir home:/ |
Check if SONiC version file is copied properly to home directory. |
sonic# write memory |
Save Configuration |
sonic# image install file://<File path>/<Install File.bin> |
Install the file. Ensure to use the full file path. For example, /home/admin/ |
sonic# show image status |
Check Image install progress. |
sonic# show image list |
Show image list |
sonic# reboot |
Reboot switch |
sonic# show version |
Show Sonic Version |
Optional Commands:
| Command | Explanation |
|---|---|
sonic# image set-default <Image file> |
In case the appropriate SONiC image is not selected as Next, configure it manually. |
sonic# image remove <all/image file> |
Remove old firmware to save space. |
Sample output:
- Log in to Dell SONiC. Use Command:
sonic-cli

admin@sonic:~$ sonic-cli
sonic#
- Check if the file is properly copied using command:
dir home:/

sonic# dir home:/
-------------------------------------------------------------------------
Date(Last Modified)      Size(Bytes)    Type      Filename
-------------------------------------------------------------------------
2023-02-23 19:22         1032101870     -         Enterprise_SONiC_OS_4.0.5_Edge_Standard.bin
- Save the configuration. Use Command:
write memory

sonic# write memory
- Install Dell SONiC. We must use the full file path, for example, /home/admin/File-name.bin. Use Command image install file:
//<File path>/<Install File.bin>

sonic# image install file://home/admin/Enterprise_SONiC_OS_4.0.5_Edge_Standard.bin
%Info: Check 'show image status' for image install progress.
- Check Image install progress using command:
show image status

sonic# show image status
-----------------------------------------------------------
Global operation status  : GLOBAL_STATE_SUCCESS
-----------------------------------------------------------
File operation status    : TRANSFER_VALIDATION
File size(bytes)         : 0
File transfer bytes      : 0
File download speed      : 0 KB/s
File progress            : 100%
Transfer start time      : 2022-09-30 17:42:22+0000
Transfer end time        : 2022-09-30 17:42:22+0000
-----------------------------------------------------------
Install operation status : INSTALL_STATE_SUCCESS
Install start time       : N/A
Install end time         : N/A
sonic#
- Verify if the new Version is chosen as next booting file using command:
show image list

sonic# show image list
Current: SONiC-OS-4.0.3-Campus
Next: SONiC-OS-4.0.5-Campus
Available:
SONiC-OS-4.0.5-Campus
SONiC-OS-4.0.3-Campus
(Optional) In case the appropriate SONiC image is not selected as Next, configure it manually. Usually this is not required.
sonic# image set-default SONiC-OS-4.0.5-Campus
- Reboot
sonic#
sonic# reboot
reboot in process .....
Waiting for the reboot operation to complete
- After Reboot, verify SONiC is upgraded (Output trimmed for brevity):
admin@sonic:~$ sonic-cli
sonic# show version

Software Version  : 4.0.5-Campus
Product           : Enterprise SONiC Distribution by Dell Technologies
- After upgrade, ensure the SONiC file is deleted from home (usually it gets deleted on its own):
sonic# dir home:/
-------------------------------------------------------------------------
Date(Last Modified)      Size(Bytes)    Type      Filename
-------------------------------------------------------------------------
sonic#
(Optional) In the case Dell SONiC file is not deleted, delete using command:
delete home://<filename>

sonic# delete home://Enterprise_SONiC_OS_4.0.5_Edge_Standard.bin
Proceed to delete home://Enterprise_SONiC_OS_4.0.5_Edge_Standard.bin? [y/N]:y

sonic# dir home:/
-------------------------------------------------------------------------
Date(Last Modified)      Size(Bytes)    Type      Filename
-------------------------------------------------------------------------
Affected Products
Enterprise SONiC Distribution, PowerSwitch E3200-ON Series, Dell EMC Networking N3200-ON, PowerSwitch S5212F-ON, PowerSwitch S5224F-ON, PowerSwitch S5232F-ON, PowerSwitch S5248F-ON, PowerSwitch S5296F-ON, PowerSwitch Z9100-ON, PowerSwitch Z9264F-ONArticle Properties
Article Number: 000212674
Article Type: How To
Last Modified: 11 Apr 2024
Version: 4
Find answers to your questions from other Dell users
Support Services
Check if your device is covered by Support Services.