How to Package and Upload ASP.NET Core Runtime 8.0 x64 for Use in Microsoft Intune
Summary: This article provides information about how to package and upload ASP.NET Core Runtime 8.0 x64 for use in Microsoft Intune.
Ez a cikk a következő(k)re vonatkozik:
Ez a cikk nem vonatkozik a következő(k)re:
Ez a cikk nem kapcsolódik egyetlen konkrét termékhez sem.
Ez a cikk nem azonosítja az összes termékverziót.
Instructions
Package ASP.NET Core Runtime 8.0 x64 with Microsoft Win32 Content Prep Tool and upload aspnetcore-runtime-8.0.16-win-x64.intunewin for use in Microsoft Intune as a prerequisite for Dell software solutions by following these steps.
Affected Products:
- Dell Pro AI Studio
- Dell Trusted Device
- Dell Client Device Manager
Prerequisites
- Download the Microsoft Win32 Content Prep Tool
 from Microsoft’s GitHub and extract it to a temporary folder. Example C:\Temp
 - Download ASP.NET Core Runtime 8.0 x64 and place it in a temporary folder. Example C:\Temp\App
- In the temporary folder, create a folder called Output. Example C:\Temp\Output
Using the Microsoft Win32 Content Prep Tool to create an .intunewin file
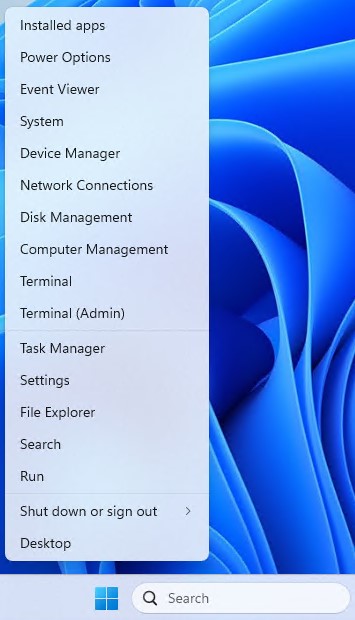
- Right-click the Windows start menu and select Terminal.
- Change the directory in the Terminal to where you extracted your files. Example Type cd C:\Temp\ and press Enter.

- Type .\IntuneWinAppUtil.exe -c C:\Temp\App\ -s C:\Temp\App\aspnetcore-runtime-8.0.16-win-x64.exe -o C:\Temp\Output\

Uploading aspnetcore-runtime-8.0.16-win-x64. Intunewin to Microsoft Intune
- Open a browser and go to https://intune.microsoft.com/

- Click Apps

- Click All Apps

- Click Create

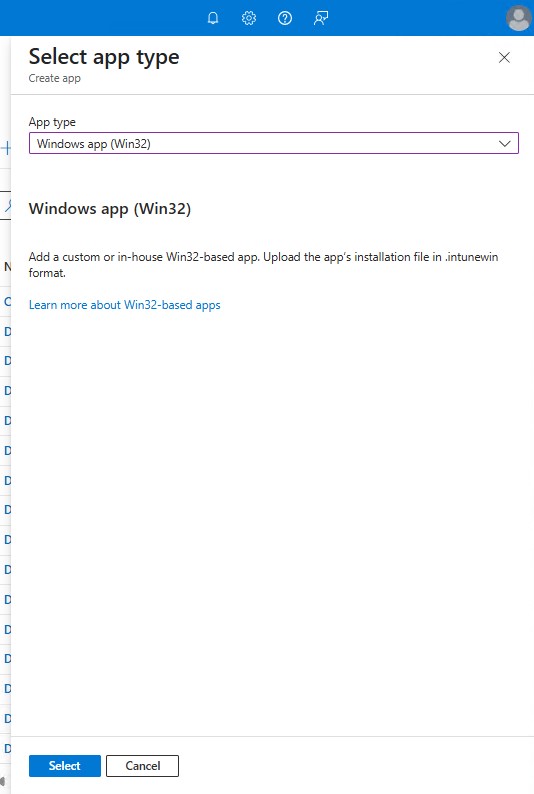
- In the Select app type pane under App Type, pick Windows app (Win32) and then click Select.
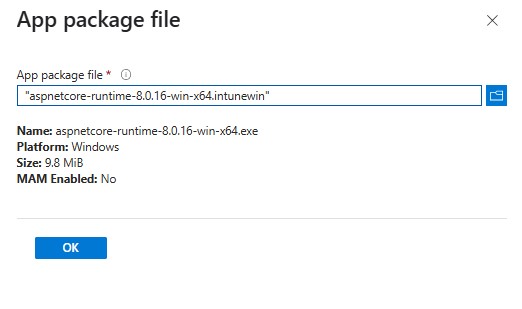
- Click Select the app package file and locate the aspnetcore-runtime-8.0.16-win-x64.intunewin was created in Step 3. Then click OK.
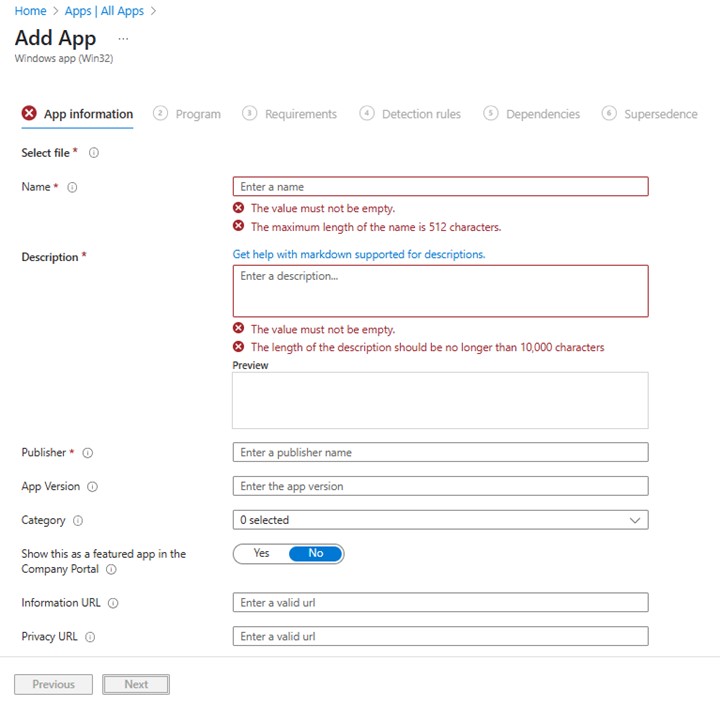
- On the App information page, enter Name, Description, Publisher, and any other additional details. Then click Next.
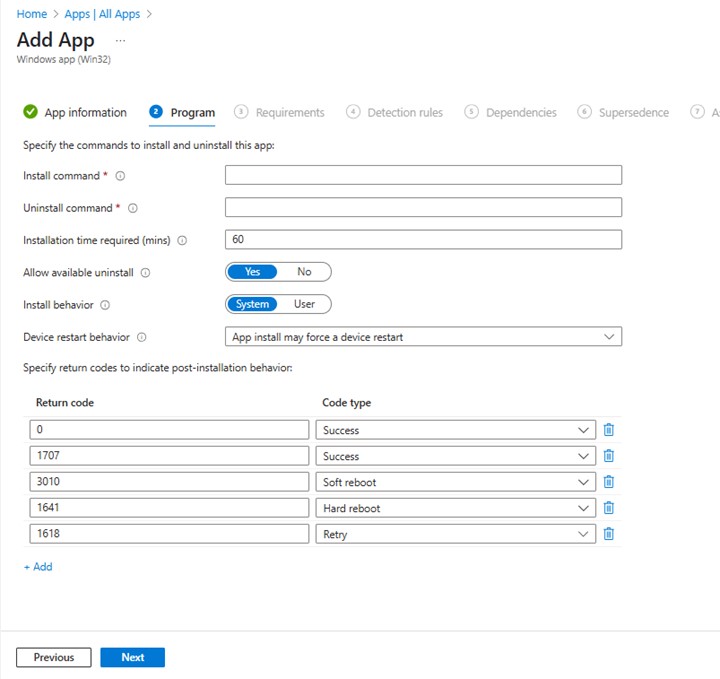
- On the program page, input the below information and then click Next.
- Install Command: aspnetcore-runtime-8.0.16-win-x64.exe /install /quiet /norestart
- Uninstall Command: aspnetcore-runtime-8.0.16-win-x64.exe /uninstall /quiet /norestart
- On the requirements screen, set any needed requirements for operating systems architecture and Minimum operating system, then click Next.

- On Detection Rules, select Manually Configure Detection Rules and then click Add
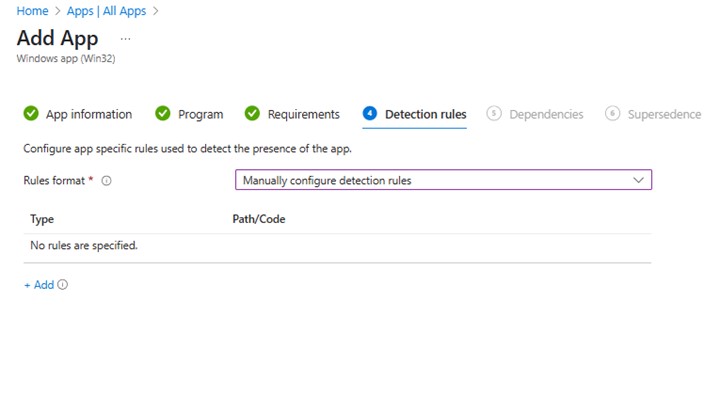
- On the Detection Rule pane, input the information below and click OK.
- Rule Type: MSI
- MSI product code: {2B76FF3A-309D-3050-9C41-C98FB593258D}

- Back on the Detection rules page, click Next.

- On Dependencies, click Next.

- On Supersedence, click Next.

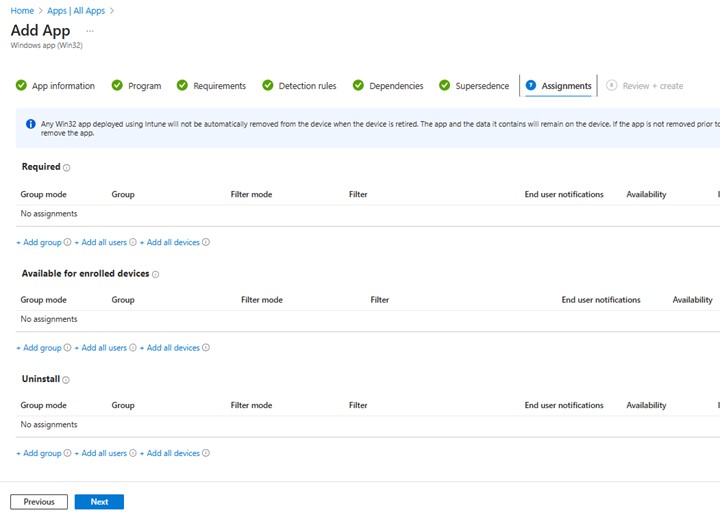
- On Assignments, select any needed configurations for your environment and click Next.
- On Review + create, confirm your configuration, and click Create

Érintett termékek
Dell Client Device Manager, Dell Pro AI Studio, Dell Trusted DeviceTermék tulajdonságai
Article Number: 000322630
Article Type: How To
Utoljára módosítva: 22 máj. 2025
Version: 1
Választ kaphat kérdéseire más Dell-felhasználóktól
Támogatási szolgáltatások
Ellenőrizze, hogy a készüléke rendelkezik-e támogatási szolgáltatással.