文書番号: 000201259
How to Script Cellular APN Changes using Microsoft Configuration Designer
概要: This article provides steps on how to configure Wireless Wide Area Network (WWAN) Access Point Names (APN) using Microsoft Configuration Designer.
文書の内容
現象
You may need to change WWAN APNs on a large deployment of computers. This may be necessary due to changes in service provider networks or when moving to a private APN.
原因
No cause information.
解決方法
Enterprises can configure cellular settings for tablets and computers that have integrated cellular modems or plug-in USB modem dongles and apply the settings in a Provisioning Package  . After the devices are configured, Users are automatically connected using the APN defined by the enterprise without needing to manually connect.
For Users who work in different locations, you can configure one APN to connect when the Users are at work and a different APN when the Users are traveling.
Prerequisites
Note: You can get the APN details from your mobile provider.
- Windows 10, Desktop Editions (Home, Pro, Enterprise, Education)
- Tablet or Computer with integrated cellular modem or plug-in USB modem dongle
- Windows Configuration Designer
- APN (the address that your Computer uses to connect to the Internet when using the cellular data connection)
How to Configure Cellular Settings in a Provisioning Package
- In Windows Configuration Designer, Start a New Project using the "Advanced Provisioning" option.
- Enter a name for your project, and then click "Next".
- Select "All Windows desktop editions", click "Next", and then click "Finish".
- Go to "Runtime settings > Connections > EnterpriseAPN".
- Enter a name for the connection, and then click "Add" (Figure 1).
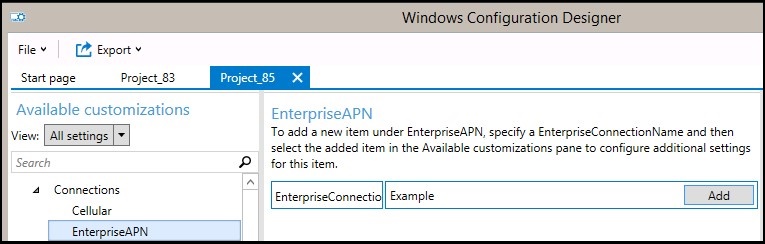
Figure 1 - The connection appears in the "Available customizations" pane. Select it to view the settings that you can configure for the connection (Figure 2).
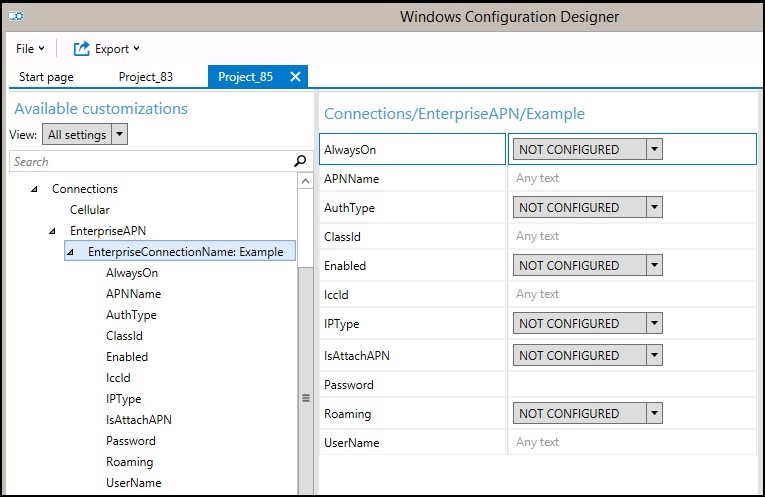
Figure 2
The following table describes the settings available for the connection.Setting Description Always On By default, the Connection Manager will automatically attempt to connect to the APN when a connection is available. You can disable this setting. APNName Enter the name of the APN. AuthType You can select None (the default), or specify Auto, PAP, CHAP, or MSCHAPv2 authentication. If you select PAP, CHAP, or MSCHAPv2 authentication, you must also enter a username and password. ClassId This is a GUID that defines the APN class to the modem. This is only required when IsAttachAPN is true and the attach APN is not only used as the Internet APN. Enabled By default, the connection is enabled. You can change this setting. IccId This is the Integrated Circuit Card ID (ICCID) associated with the cellular connection profile. IPType By default, the connection can use IPv4 and IPv6 concurrently. You can change this setting to only IPv4, only IPv6, or IPv6 with IPv4 provided by 46xlat. IsAttachAPN Specify whether this APN should be requested as part of an LTE Attach. Password If you select PAP, CHAP, or MSCHAPv2 authentication, enter a password that corresponds to the username. Roaming Select the behavior that you want when the device is roaming. The options are:
-Disallowed
-Allowed (default)
-Domestic Roaming
-Use OnlyForDomesticRoaming
-UseOnlyForNonDomesticRoaming
-UseOnlyForRoamingUserName If you select PAP, CHAP, or MSCHAPv2 authentication, enter a username. - After you configure the connection settings, Build the Provisioning Package .
Build Package
- After you are done configuring your customizations, select Export, and then select Provisioning Package (Figure 3).
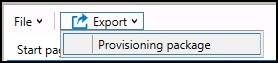
Figure 3 - In the Describe the provisioning package window, enter the following information, and then select Next:
- Name - This field is prepopulated with the project name. You can change this value by entering a different name in the Name field.
- Version in Major.Minor format - Optional. You can change the default package version by specifying a new value in the Version field.
- Owner - Select IT Admin. For more information, see Precedence for Provisioning Packages .
- Rank (between 0-99) - Optional. You can select a value between 0 and 99, inclusive. The default package rank is 0.
- In the Select security details for the provisioning package window, you can select to encrypt and/or sign a provisioning package with a selected certificate, and then select Next. Both selections are optional:
- Encrypt package - If you select this option, an autogenerated password is shown on the screen.
- Sign package - If you select this option, you must select a valid certificate to use for signing the package. You can specify the certificate by selecting Select and choosing the certificate that you want to use to sign the package.
-
Note: You should only configure provisioning package security when the package is used for device provisioning and when the package has content with sensitive security data, such as certificates or credentials that should be prevented from being compromised. When applying an encrypted and/or signed provisioning package, either during OOBE or through the setting UI, the package can be decrypted, and if signed, be trusted without explicit user consent. An IT administrator can set policy on a user device to restrict the removal of required packages from the device, or the provisioning of potentially harmful packages on the device.
If a provisioning package is signed by a trusted provisioner, it can be installed on a device without a prompt for user consent. In order to enable trusted provider certificates, you must set the TrustedProvisioners setting prior to installing the trusted provisioning package. This is the only way to install a package without user consent. To provide additional security, you can also set RequireProvisioningPackageSignature, which prevents users from installing provisioning packages that are not signed by a trusted provisioner.
- In the Select where to save the provisioning package window, specify the output location where you want the provisioning package to go once it is built, and then select Next. By default, Windows Configuration Designer uses the project folder as the output location.
- In the Build the provisioning package window, select Build. The provisioning package does not take long to build. The project information is displayed in the build page, and the progress bar indicates the build status.
If you need to cancel the build, select Cancel. This cancels the current build process, closes the wizard, and takes you back to the Customizations page. - If your build fails, an error message appears that includes a link to the project folder. You can scan the logs to determine what caused the error. Once you fix the issue, try building the package again.
If your build is successful, the name of the provisioning package, output directory, and project directory will be shown.
If you choose, you can build the provisioning package again and pick a different path for the output package. To do this, select Back to change the output package name and path, and then select Next to start another build. - When you are done, select Finish to close the wizard and go back to the Customizations page.
Apply a Provisioning Package
Applies to:
- Windows 10
- Windows 11
Provisioning packages can be applied to a device during initial setup (out-of-box experience or "OOBE") and after ("runtime").
Note:
- Applying a provisioning package to a desktop device requires administrator privileges on the device.
- You can interrupt a long-running provisioning process by pressing ESC.
Tip
In addition to the following methods, you can use the PowerShell cmdlet Install-ProvisioningPackage with -LogsDirectoryPath to get logs for the operation.
During Initial Setup
To apply a provisioning package from a USB drive during initial setup:
- Start with a device on the initial setup screen. If the device has gone past this screen, reset the device to start over. To reset, go to Settings > System > Recovery > Reset this PC (Figure 4).
Figure 4 - Insert the USB drive. If nothing happens when you insert the USB drive, press the Windows key five times.
- If there is only one provisioning package on the USB drive, the provisioning package is applied. See step 5.
- If there is more than one provisioning package on the USB drive, Windows setup recognizes the drive and ask how you want to provision the device. Select Install provisioning package and select Next (Figure 5).
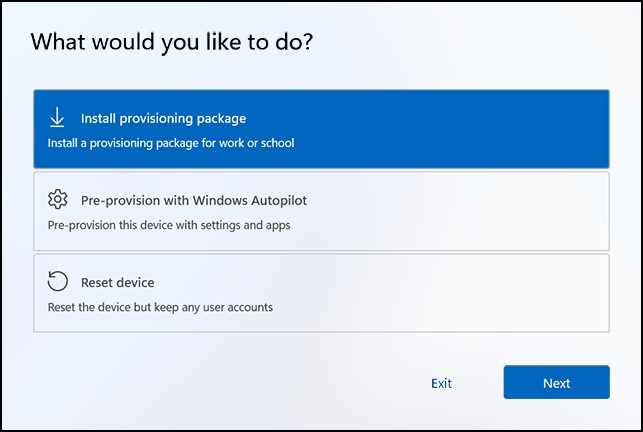
Figure 5
- Select the provisioning package (.ppkg) that you want to apply, and select Yes (Figure 6).
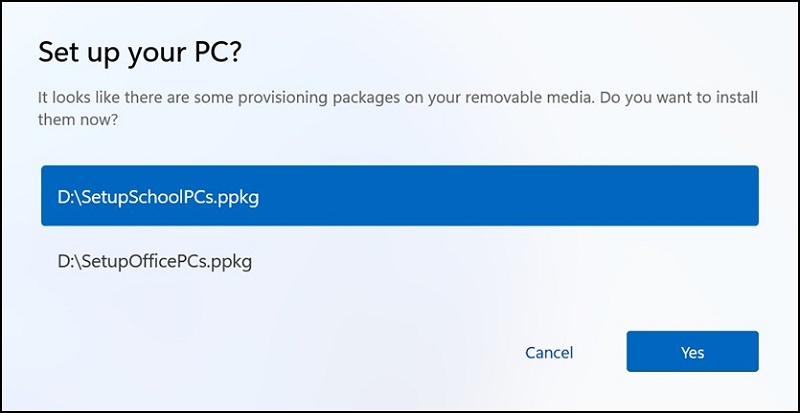
Figure 6 - The selected provisioning package will install and apply to the device (Figure 7).
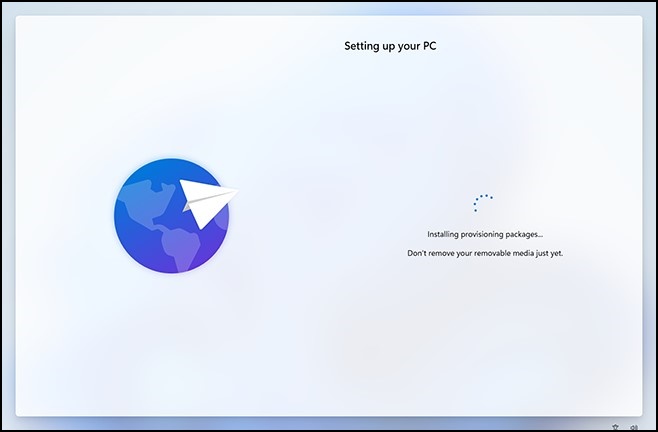
Figure 7 - Wait for the device to load and begin applying the provisioning package. Once you see "You can remove your removable media now!" you can remove your USB drive. Windows will continue provisioning the device.
After Initial Setup
Provisioning packages can be applied after initial setup through Windows settings or by simply double-clicking a provisioning package.
Windows Settings
- Insert the USB drive, then go to Settings > Accounts > Access work or school > Add or remove a provisioning package > Add a package (Figure 8).
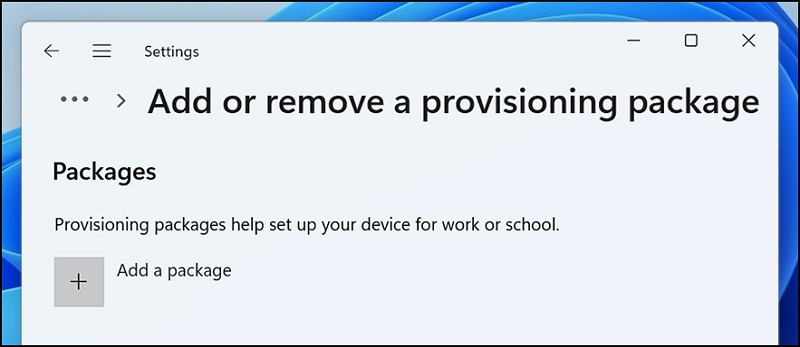
Figure 8 - Choose the method that you want to use, such as Removable Media (Figure 9).
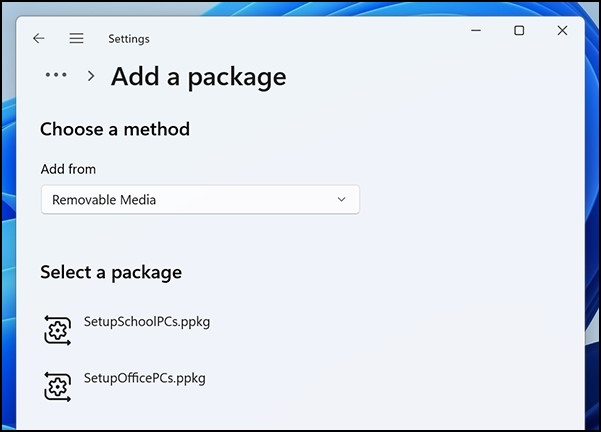
Figure 9 - Select the provisioning package (.ppkg) that you want to apply, and select Add (Figure 10).
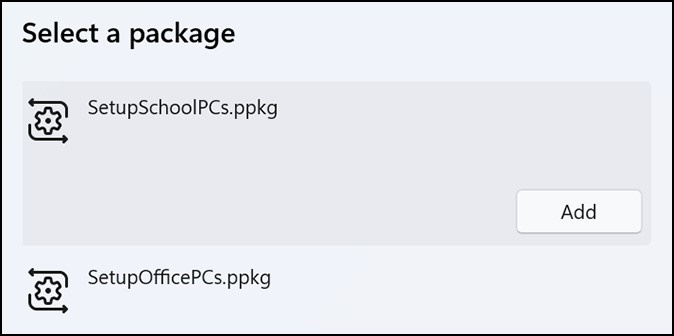
Figure 10 - Provisioning packages require administrator privileges as they can modify system policies and run scripts at the system level. Ensure you trust the package that you are installing before accepting the UAC prompt. Select Yes (Figure 11).
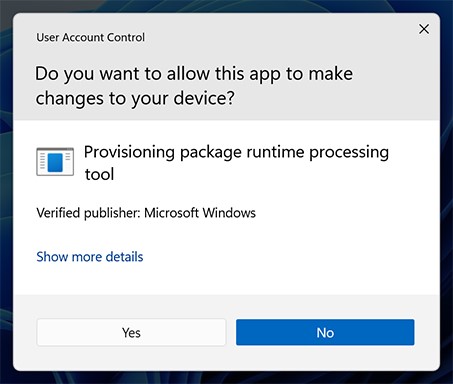
Figure 11 - The provisioning runtime asks if the package is from a source you trust. Verify that you are applying the correct package and that it is trusted. Select Yes, add it.
- Yes, add it (Figure 12).

Figure 12
Apply Directly
To apply a provisioning package directly, such as from a USB drive, folder, network, or SharePoint site:
- Go to the provisioning package and double-click it to begin the installation (Figure 13).
Figure 13 - Provisioning packages require administrator privileges as they can modify system policies and run scripts at the system level. Ensure you trust the package that you are installing before accepting the UAC prompt. Select Yes (Figure 14).

Figure 14 - The provisioning runtime asks if the package is from a source you trust. Verify that you are applying the correct package and that it is trusted. Select Yes, add it (Figure 15).
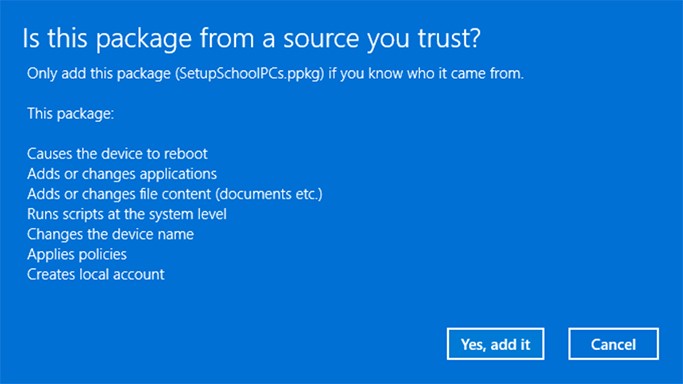
Figure 15
文書のプロパティ
影響を受ける製品
Laptops
最後に公開された日付
30 11月 2022
バージョン
3
文書の種類
Solution