Connectrix: How to collect a switch log file with a PuTTY session, step by step
Zhrnutie: This article assists with step by step instructions on how to collect the supportshow log using PuTTY.
Tento článok sa vzťahuje na
Tento článok sa nevzťahuje na
Tento článok nie je viazaný na žiadny konkrétny produkt.
V tomto článku nie sú uvedené všetky verzie produktov.
Pokyny
This article assists with step by step instructions on how to collect the supportshow log using PuTTY.
- Double-click the PuTTY icon to launch the application.
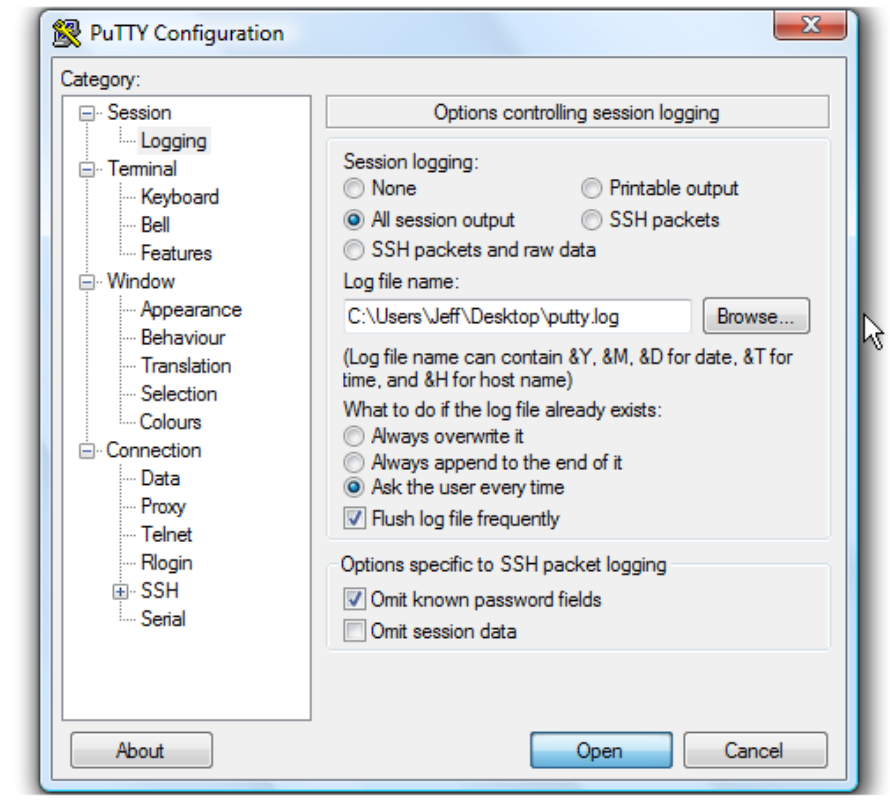
- Click Logging. The logging settings are listed on the right.

Instructions on how to save the log file to a desktop.
- Click All session output.
- Leave Putty.log as the log file name.

- Click Browse to choose the save location.
- Ensure that Desktop is selected here.

- Click Save.
- Ensure Ask the user every time is selected, then click Open to begin the session.
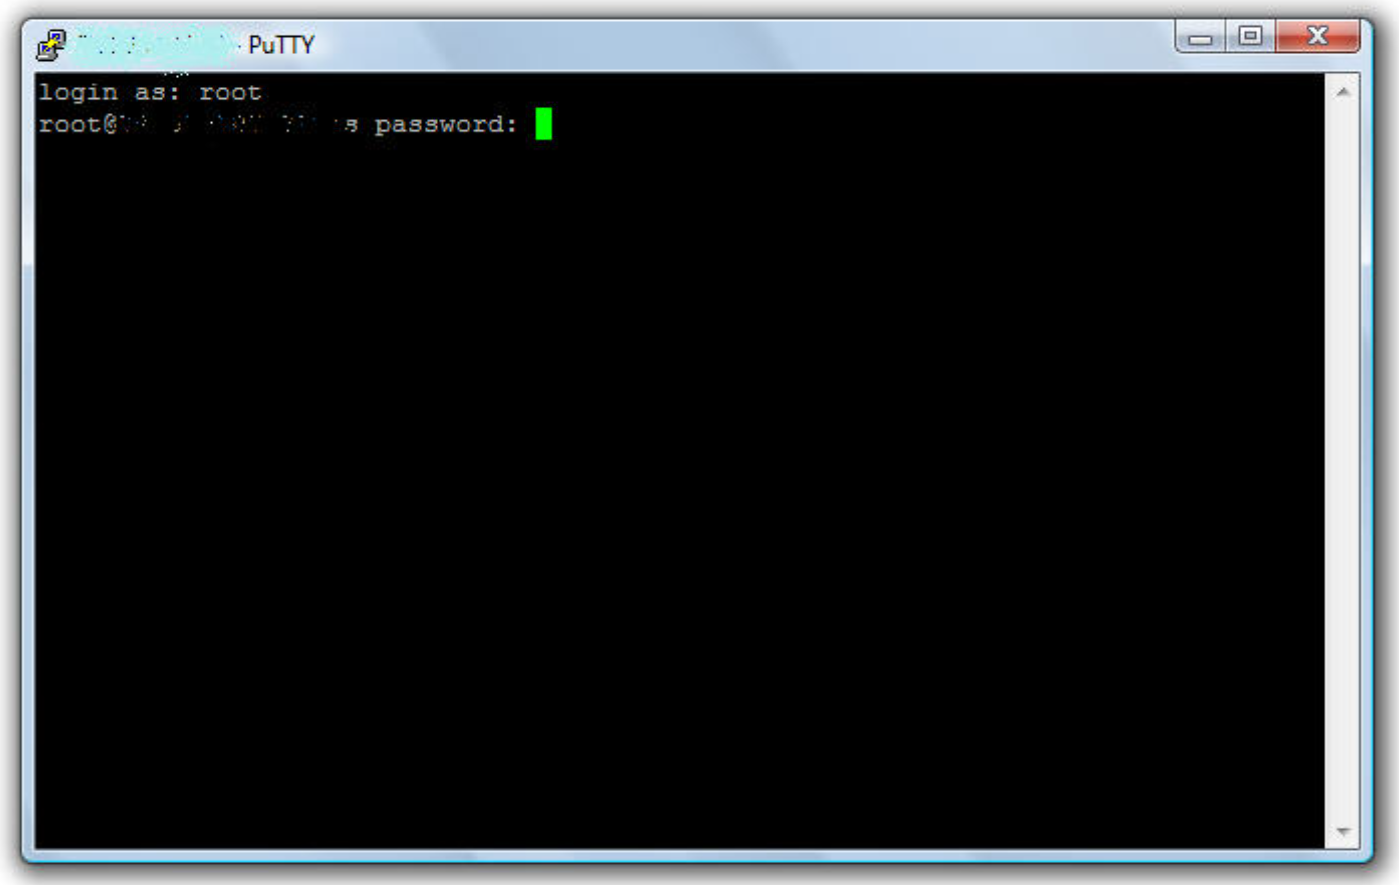
- Type the username, then push the <Enter> key.

- Type the password, then push the <Enter> key.

- Regarding the Brocade switch, run supportshow command to collect switch log.
- Regarding the Cisco switch, run show tech-support details | no-more command to collect switch log.
- Type Exit, then push <Enter> key to close PuTTY.
A log file is now saved to the desktop.
This is the end of the tutorial. You now know how to create a log file of your PuTTY sessions.
Ďalšie informácie
Videá
Dotknuté produkty
Connectrix MDS-SeriesVlastnosti článku
Číslo článku: 000018926
Typ článku: How To
Dátum poslednej úpravy: 12 sep 2025
Verzia: 5
Nájdite odpovede na svoje otázky od ostatných používateľov spoločnosti Dell
Služby podpory
Skontrolujte, či sa na vaše zariadenie vzťahujú služby podpory.