TPM is Unable to Change Between 1.2 or 2.0 Because TPM is Owned
Zhrnutie: This article describes an issue where the TPM cannot be configured because it is in an owned state.
Tento článok sa vzťahuje na
Tento článok sa nevzťahuje na
Tento článok nie je viazaný na žiadny konkrétny produkt.
V tomto článku nie sú uvedené všetky verzie produktov.
Symptómy
The TPM cannot be configured because it is already in an owned status.
Príčina
Every time that a Windows 10 system with TPM is restarted, Windows 10 takes ownership of the TPM automatically, unless Windows 10 is instructed not to take ownership.
The process of upgrading to TPM 2.0 or downgrading to TPM 1.2 requires that ownership be released prior to the change.
Riešenie
These instructions prevent Windows 10 from automatically re-taking ownership of TPM:
- Run PowerShell as an Administrator: (Type PowerShell in the Search box, right-click PowerShell on the menu, click Run as Administrator.(See Figure 1.)

Figure 1. Opening PowerShell - In Powershell run the following command: Disable-TpmAutoProvisioning then press the Enter key. (See Figure 2.)
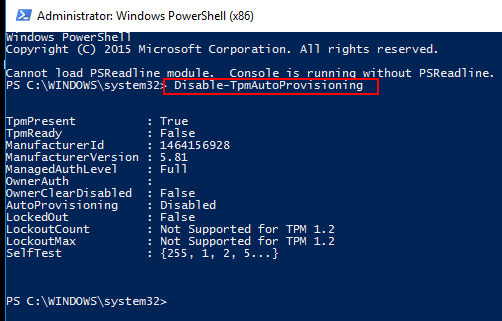
Figure 2. Disabling TPM Auto-provisioning in PowerShell. - If Dell Data Protection (DDP) is installed, you must complete these additional steps:
- Open the Services Desktop App (Type services.msc in the search box, then press the Enter key)
- Set the DellMgmtAgent Windows service to Disabled
- Stop the DellMgmtAgent Windows service
- Set the DellMgmtLoader Windows service to Disabled
- Stop the DellMgmtLoader Windows service
- Proceed with clearing the TPM
- In the search box, type the command: tpm.msc then press the Enter key to open the TPM management console. (See figure 3.)

Figure 3. TPM Management Console - Choose the Clear TPM option.
- The system restarts and then power off, then power on again.
- Do not enter the BIOS, let the boot back to Windows.
- Run the Dell TPM 1.2 firmware utility or Dell TPM 2.0 firmware utility with the AC adapter connected to the system.
- If Dell Data Protection (DDP) is installed, you must complete these additional steps:
- Set the DellMgmtLoader Windows service to Automatic
- Start the DellMgmtLoader Windows service
- Set the DellMgmtAgent Windows service to Automatic
- Start the DellMgmtAgent Windows service
Optional
You can run the following command using the command line to determine if the TPM is owned. (Press CTRL+R, type cmd, then right click cmd.exe and run as administrator)
Type: Wmic /namespace:\\root\CIMV2\Security\MicrosoftTpm path Win32_Tpm get /value then press the Enter key. (See Figure 4.)

Figure 4 - TPM ownership status
Dotknuté produkty
Alienware, Dell All-in-One, Dell Pro All-in-One, Dell Pro Max Micro, Dell Pro Max Slim, Dell Pro Max Tower, Dell Pro Micro, Dell Pro Slim, Dell Pro Tower, Dell Slim, Dell Tower, Inspiron, Legacy Desktop Models, OptiPlex, Vostro, XPS, G Series
, G Series, Alienware, Dell Plus, Dell Pro, Dell Pro Max, Dell Pro Plus, Dell Pro Premium, Inspiron, Latitude, Dell Pro Rugged, Vostro, XPS, Legacy Laptop Models, Latitude Tablets, XPS Tablets, Fixed Workstations, Mobile Workstations, Dell Pro Max Micro XE FCM2250, Dell Pro Max Slim XE FCS1250, Dell Pro Max Tower T2 XE FCT2250, Dell Pro Max 16 XE MC16250, Dell Pro Micro Plus XE QBM1250, Dell Pro Slim Plus XE5 QBS1250, Dell Pro Tower Plus XE5 QBT1250
...
Vlastnosti článku
Číslo článku: 000139777
Typ článku: Solution
Dátum poslednej úpravy: 23 jún 2025
Verzia: 11
Nájdite odpovede na svoje otázky od ostatných používateľov spoločnosti Dell
Služby podpory
Skontrolujte, či sa na vaše zariadenie vzťahujú služby podpory.