Avamar:如何在存在多个 AD 服务器时配置 LDAP
摘要: 本文提供了在具有多个 Active Directory 服务器(其中一些服务器可能受防火墙限制)的 Avamar 环境中配置轻量级目录访问协议 (LDAP) 设置的步骤。
本文适用于
本文不适用于
本文并非针对某种特定的产品。
本文并非包含所有产品版本。
说明
以下是在具有多个 Active Directory (AD) 服务器(其中一些服务器可能受防火墙限制)的 Avamar 环境中配置 LDAP 所需的步骤。
当 ldap.properties 或 krb5.conf 文件填充了具有标准 LDAP 和 Kerberos (KRB) 端口 88、389 和 464 的 AD 服务器,环境中的防火墙会阻止这些端口。
这需要选择性搜索在环境中没有被阻止这些端口的 AD 服务器。
以下步骤说明如何在客户环境中搜索 AD 服务器并确定打开了所需端口的服务器。而 ldap.properties 和 krb5.conf 必须使用相应的 AD 服务器信息手动更新文件。
- 登录 Avamar Utility Node 并运行
nslookup客户域上的命令:
nslookup <customerdomain.com> |grep Address
示例输出
Address: 10.10.10.240#53
Address: 10.10.10.240
Address: 10.10.10.242
Address: 10.10.10.244
Address: 10.10.10.246
Address: 10.10.10.248
Address: 1234:5:678:aaaa:fff:cccc:dddd:eeee
- 重新运行命令,并将 IPv4 地址的输出发送到文件:
nslookup |grep Address | cut -d " " -f2 |grep -v ":" > /tmp/ldaplookup
- 验证
/tmp/ldaplookup仅包含以下 IP 地址:
cat /tmp/ldaplookup
示例输出
10.10.10.240
10.10.10.242
10.10.10.244
10.10.10.246
10.10.10.248
- 在USB端口上运行一个
for i循环使用/tmp/ldaplookup文件(在上面创建),直到连接到 LDAP 端口 389:
(使用 telnet 或 curl,具体取决于可用的内容)
for i in $(cat /tmp/ldaplookup) ; do timeout 30 telnet $i 389;done
或
for i in $(cat /tmp/ldaplookup); do curl -kv --max-time 30 $i:389;done
通常,如果可以访问端口 389,则还可以访问其他 KRB 端口。
建立连接后, CTRL-C 多次退出循环。或者继续浏览列表以确定哪个域控制器最适合用于 LDAP。
(记下可以连接的 AD 服务器)
输出示例 — telnet:
Trying 10.10.10.240...
Trying 10.10.10.242...
Trying 10.10.10.244...
Connected to 10.10.10.244
Escape character is '^]'
Trying 10.10.10.246...
Trying 10.10.10.248...
或
Trying 10.10.10.240...
telnet: connect to address 10.10.10.240: Connection refused
Trying 10.10.10.242...
telnet: connect to address 10.10.10.242: Connection refused
Trying 10.10.10.244...
Connected to 10.10.10.244
Escape character is '^]'
Trying 10.10.10.246...
telnet: connect to address 10.10.10.246: Connection refused
Trying 10.10.10.248...
telnet: connect to address 10.10.10.248: Connection refused
输出示例 — curl:
* Rebuilt URL to: 10.10.10.240:389/
*   Trying 10.10.10.240...
* TCP_NODELAY set
* Connection timed out after 30001 milliseconds
* stopped the pause stream!
* Closing connection 0
curl: (28) Connection timed out after 30001 milliseconds
* Rebuilt URL to: 10.10.10.242:389/
*   Trying 10.10.10.242...
* TCP_NODELAY set
* connect to 10.10.10.242 port 389 failed: Connection refused
* Failed to connect to 10.10.10.242 port 389: Connection refused
* Closing connection 0
curl: (7) Failed to connect to 10.10.10.242 port 389: Connection refused
* Rebuilt URL to: 10.10.10.244:389/
*   Trying 10.10.10.244...
* TCP_NODELAY set
Connected to 10.10.10.244 (10.10.10.244) port 389 (#0)
> GET / HTTP/1.1
> Host: 10.10.10.244:389
> User-Agent: curl/7.60.0
> Accept: */*
* Rebuilt URL to: 10.10.10.246:389/
*   Trying 10.10.10.246...
* TCP_NODELAY set
* connect to 10.10.10.246 port 389 failed: Connection refused
* Failed to connect to 10.10.10.246 port 389: Connection refused
* Closing connection 0
curl: (7) Failed to connect to 10.10.10.246 port 389: Connection refused
- 使用
nslookup用于确定 AD 服务器的完全限定域名 (FQDN) 的命令:
nslookup
命令和输出示例
nslookup 10.10.10.244
Server:    1.2.3.4
Address: 1.2.3.4:53

Non-authorative answer:
244.10.10.10.in-addr.apra    name=my-ad-server.customername.com
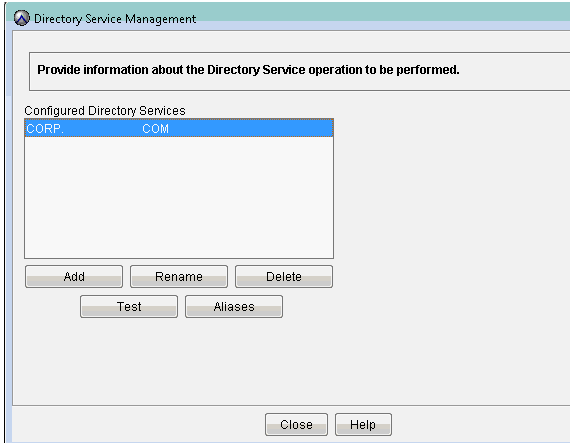
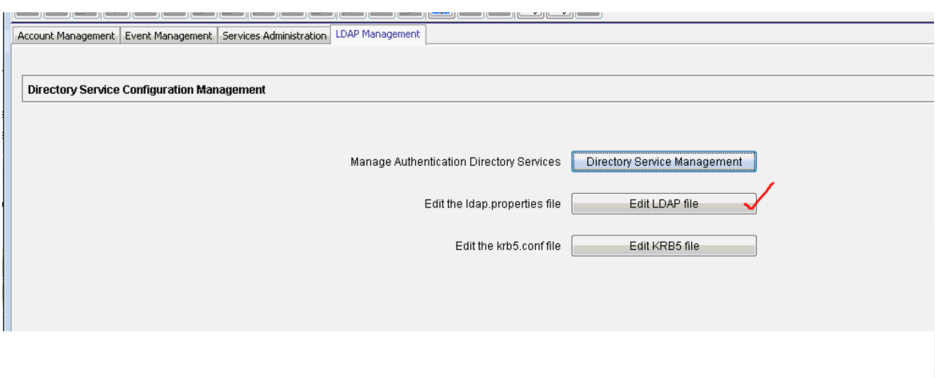
- 使用 Management Console Server (MCS) UI,执行步骤 7-15:
- 登录到 Avamar MCS UI。
- 转至 LDAP 管理(管理、LDAP 管理)
- 验证 目录服务管理屏幕 是否已输入客户域信息。
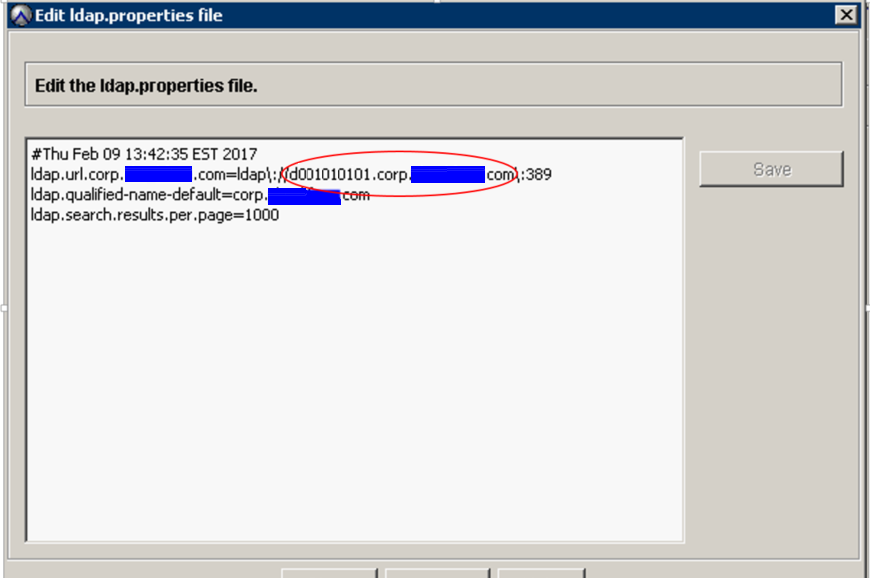
- 单击 编辑 LDAP 文件:
- 将
ldap.url.corp.userdomain.com使用上述搜索步骤中的新主机名。
示例:
ldap.url.corp.xxxxx.com=ldap\://d001010101.corp.xxx.com\:389
- 在
krb5.conf文件中定义。要更改的信息位于底部附近。

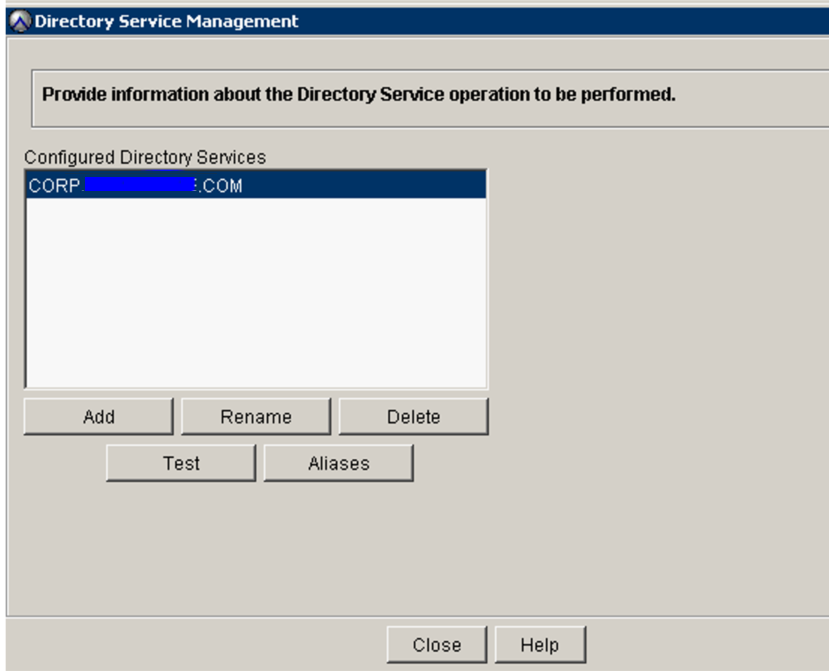
- 转至目录服务管理屏幕,并使用有效的客户凭据执行测试。
- 添加新 LDAP 映射(管理、帐户管理、新 LDAP 映射)并添加必要的 LDAP 组。下面的示例是
Avamar-admins群。
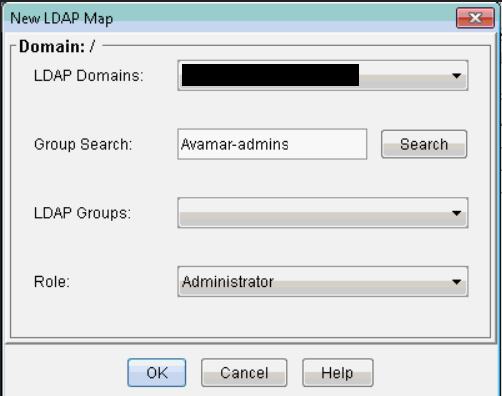
- 成功添加 LDAP (AD) 组后,通过使用作为该 LDAP 组成员的 AD 帐户登录 Avamar UI 来对其进行测试。
受影响的产品
Avamar, Avamar Server文章属性
文章编号: 000014466
文章类型: How To
上次修改时间: 21 10月 2025
版本: 13
从其他戴尔用户那里查找问题的答案
支持服务
检查您的设备是否在支持服务涵盖的范围内。