Dell Unity: How to upgrade the Unity Operating Environment (OE) (User Correctable)
摘要: This article explains two methods of upgrading the Unity OE: Unisphere UI and Command Line (uemcli)
本文适用于
本文不适用于
本文并非针对某种特定的产品。
本文并非包含所有产品版本。
说明
Caution: Before running any Unity upgrade, please visit SolVe Online and generate a procedure for your upgrade. The Procedure Generator will call out relevant KB articles which apply to your specific upgrade, with important information you need to know before you upgrade.
Method 1: Unisphere UI
- Log in to Unisphere as admin or an equivalent user. Open the Update system settings menu.

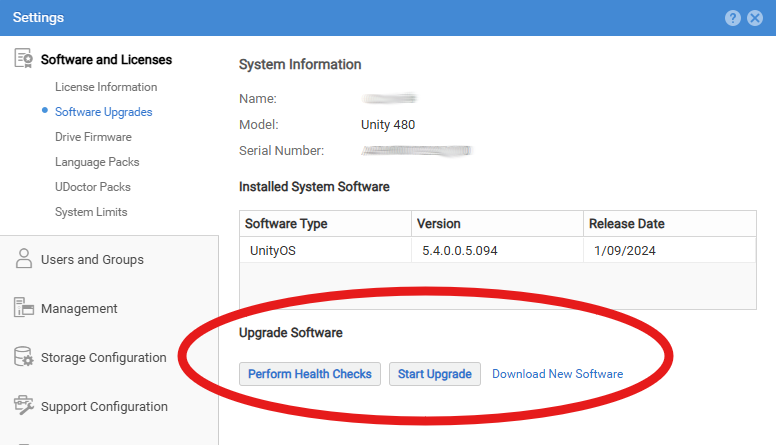
- Go to Software and Licenses > Software Upgrade. In this view, the installed Unity OE version is displayed. There are also three (3) actionable options: Perform Health Checks, Start Upgrade, and Download New Software.
- If your system has not already downloaded the new code, click on Download New Software to download the new Unity OE file.
- You will be taken to dell.com/support and the product page for your system will be opened. You may have to log in with your customer credentials in order to see the Unity OE packages. Select the version you want to install and download it to your computer. Unity will upload it in a later step.
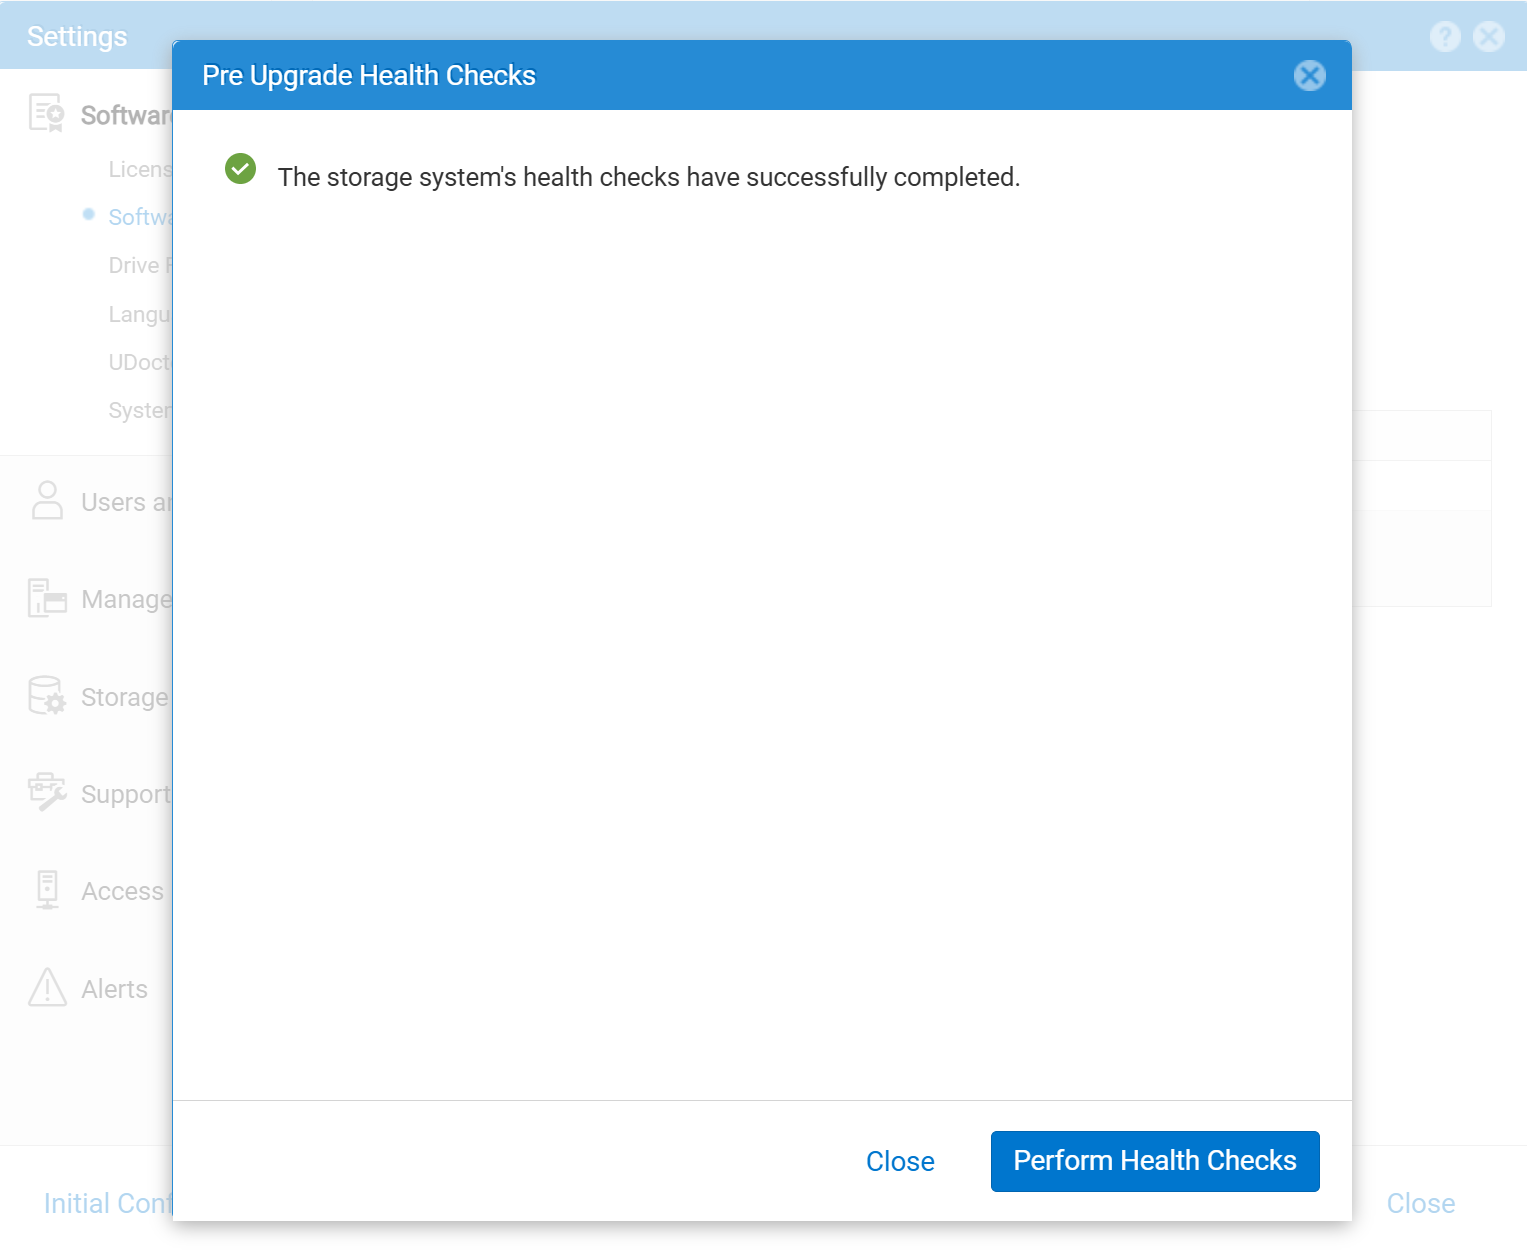
- (Optional) Perform the health checks by clicking Perform Health Checks. The health checks are optional at this stage. Health checks are also done as part of the Upgrade Wizard. If you run health checks, click Close once they are complete.
- Click Start Upgrade to launch the Upgrade Wizard.
- The upgrade will begin with Health Checks (which are not an optional step within the Upgrade Wizard).
- If your system already has the new code loaded, click Use Latest Image.
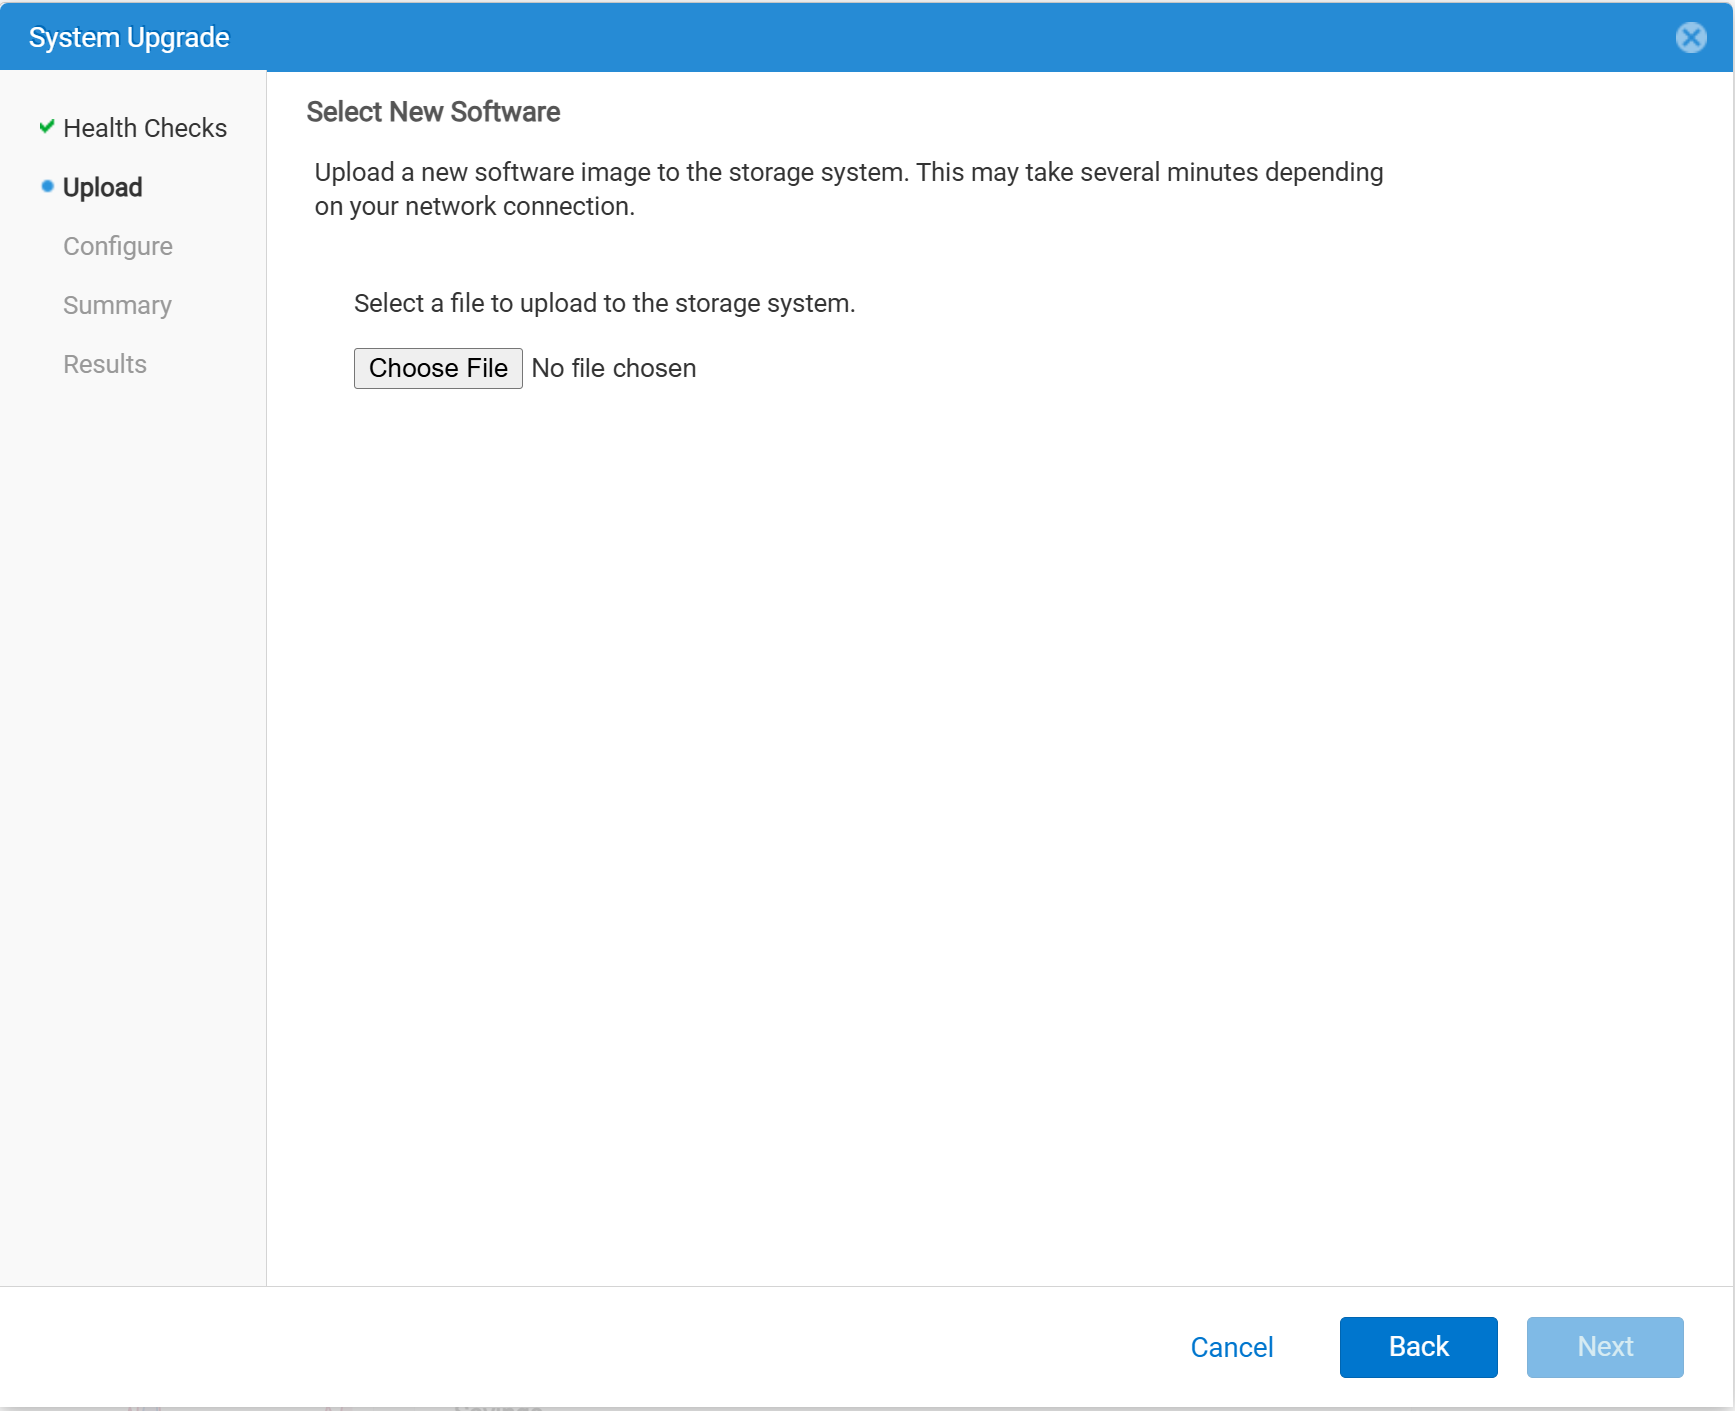
- If your system does not already have the new code downloaded, the system will prompt you to upload your previously downloaded code. Select the code file from your PC.
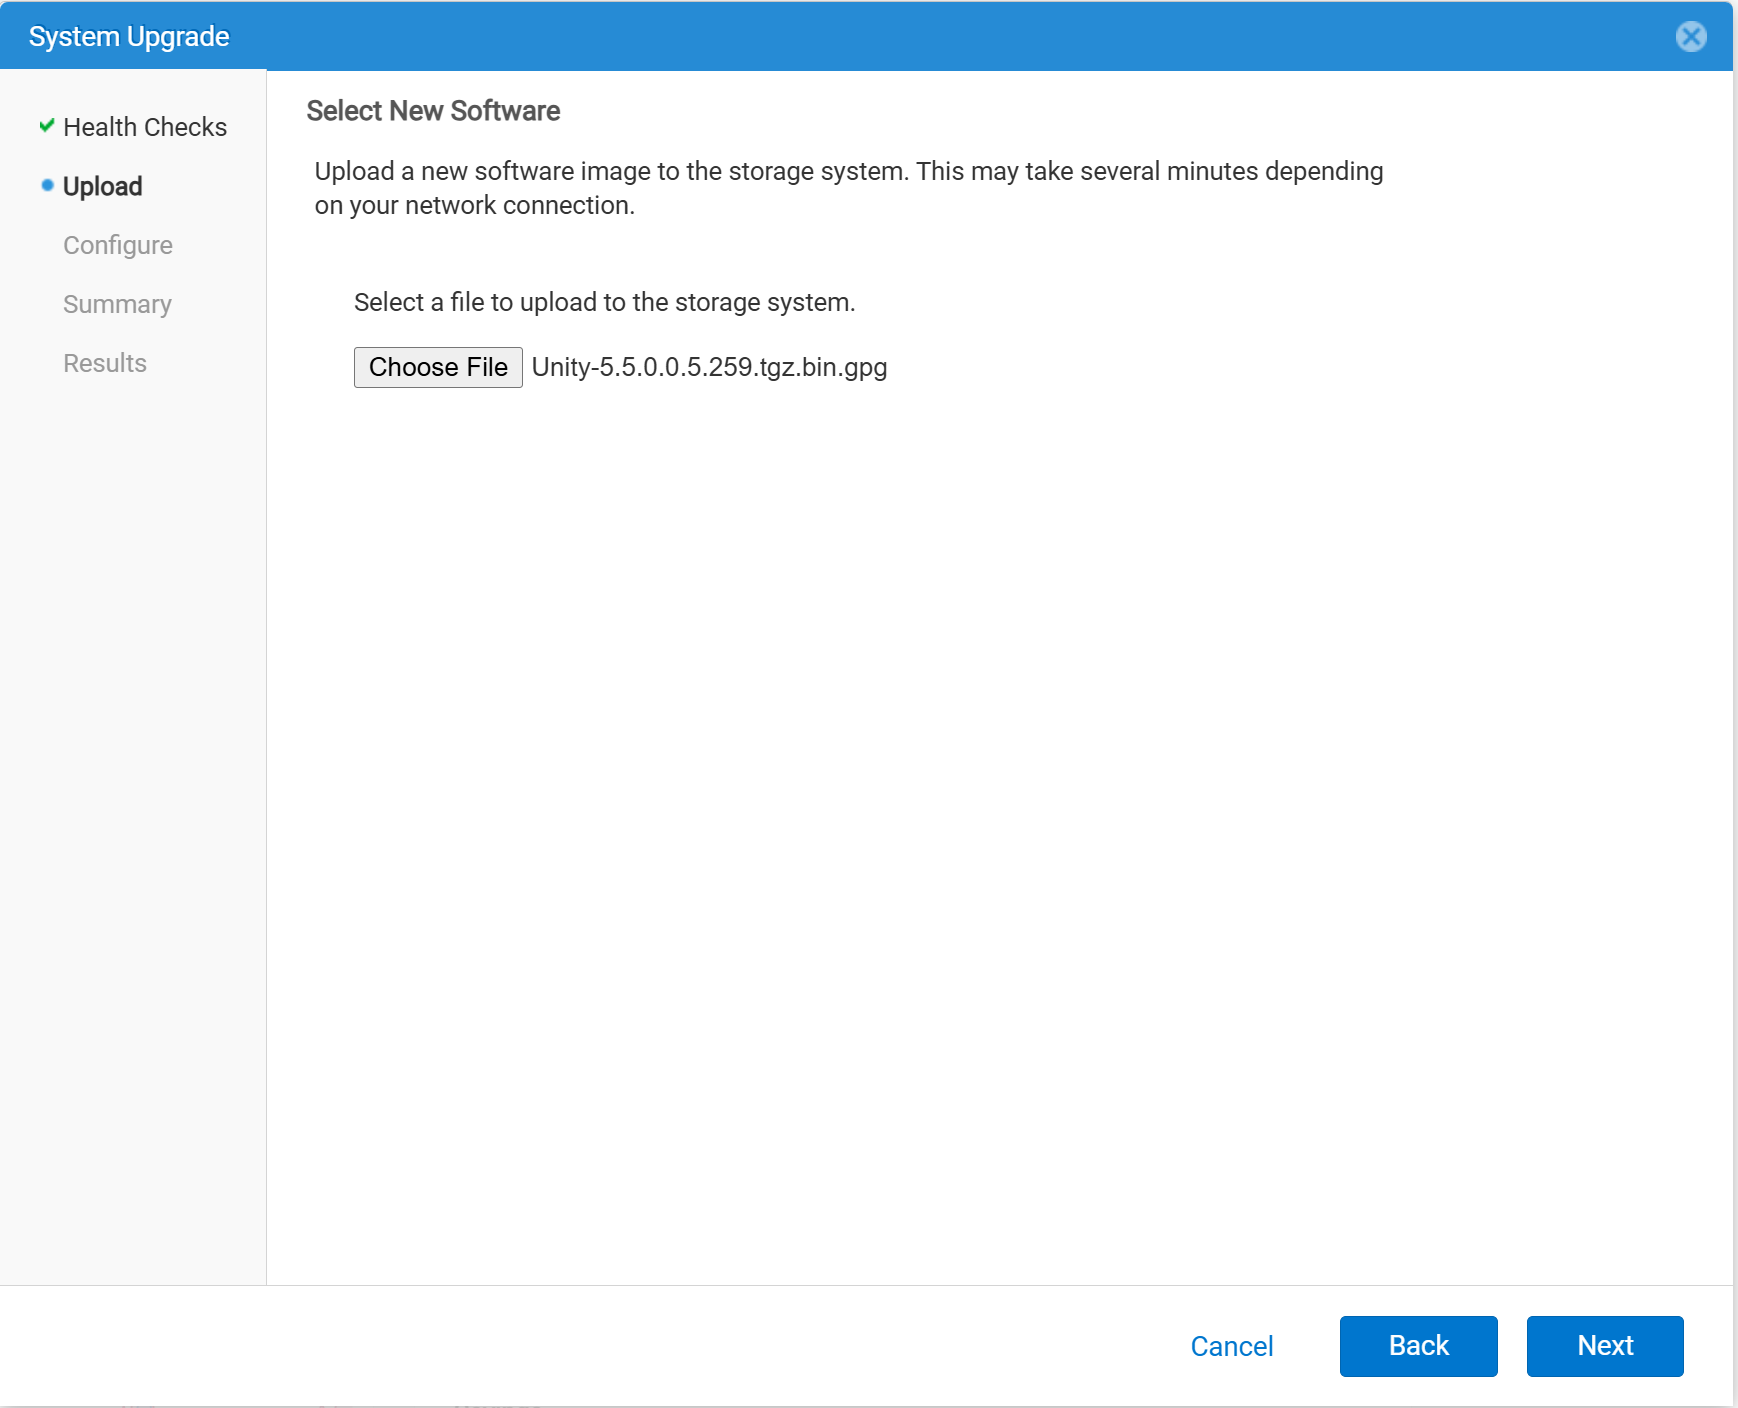
- Once the file is selected, click Next to have the system begin preparing the file for the Unity OE upgrade. This step can take around 5-10 minutes.
- The upgrade will begin with Health Checks (which are not an optional step within the Upgrade Wizard).
NOTE: If the upgrade is cancelled after this step, the image has to be deleted from /var/tmp/upgrade on the Primary Storage Processor (SP). Leaving the image bloats the Root File System (FS) and could lead to a Storage Processor (SP) panic.
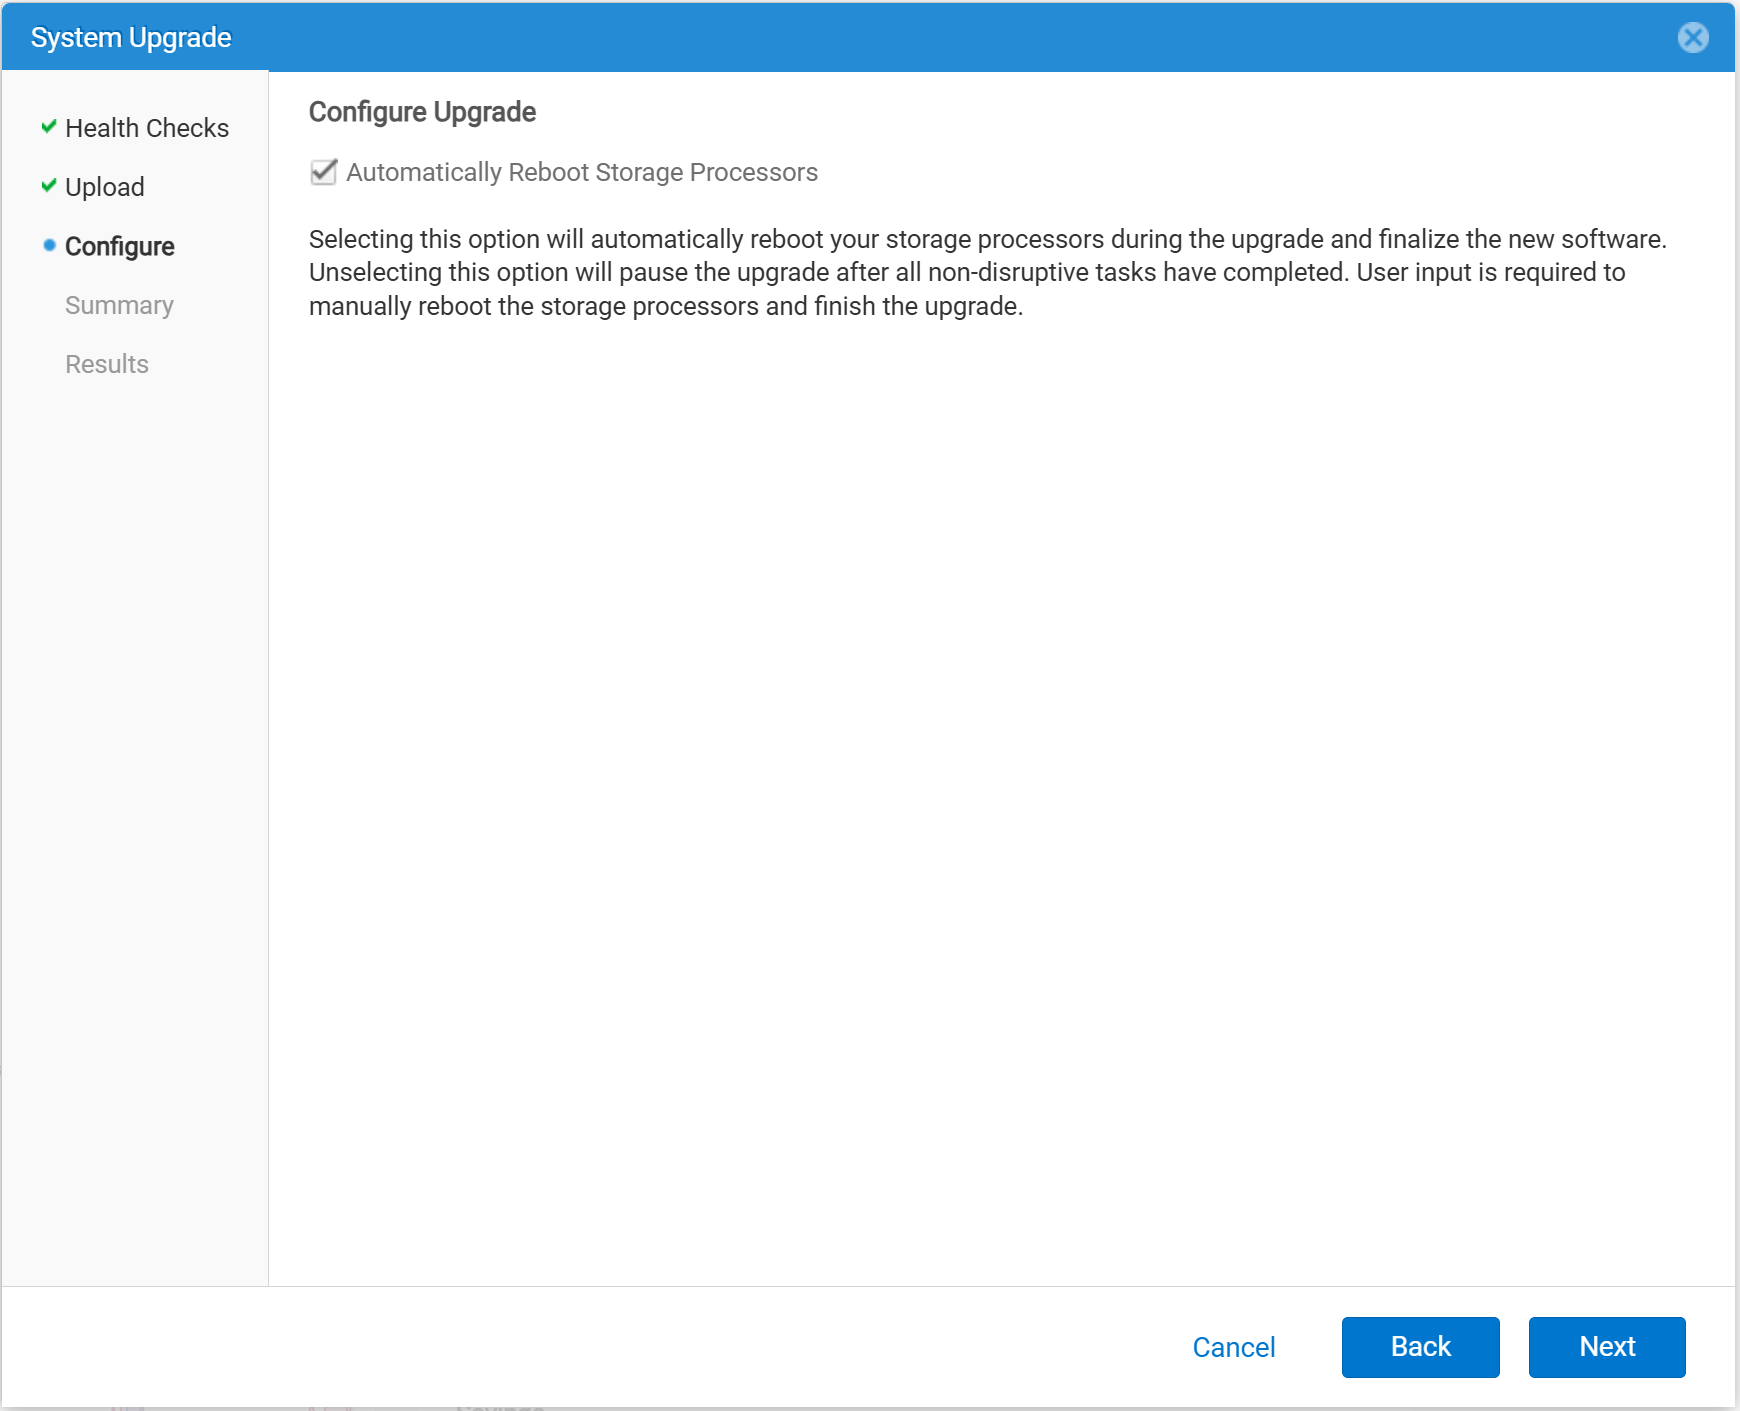
- On the Configure page, decide if the Storage Processors (SPs) can be rebooted during the upgrade process or deferred until later. If Automatically Reboot Storage Processors is left selected, the Storage Processors (SPs) reboot, one at a time, while doing the upgrade. If not selected, the Storage Processors (SPs) are rebooted later using Resume Upgrade. The default setting is to have Automatically Reboot Storage Processors is left selected.
- Review the Summary page. Verify that the installed Unity OE version and that the new Unity OE version is correct.
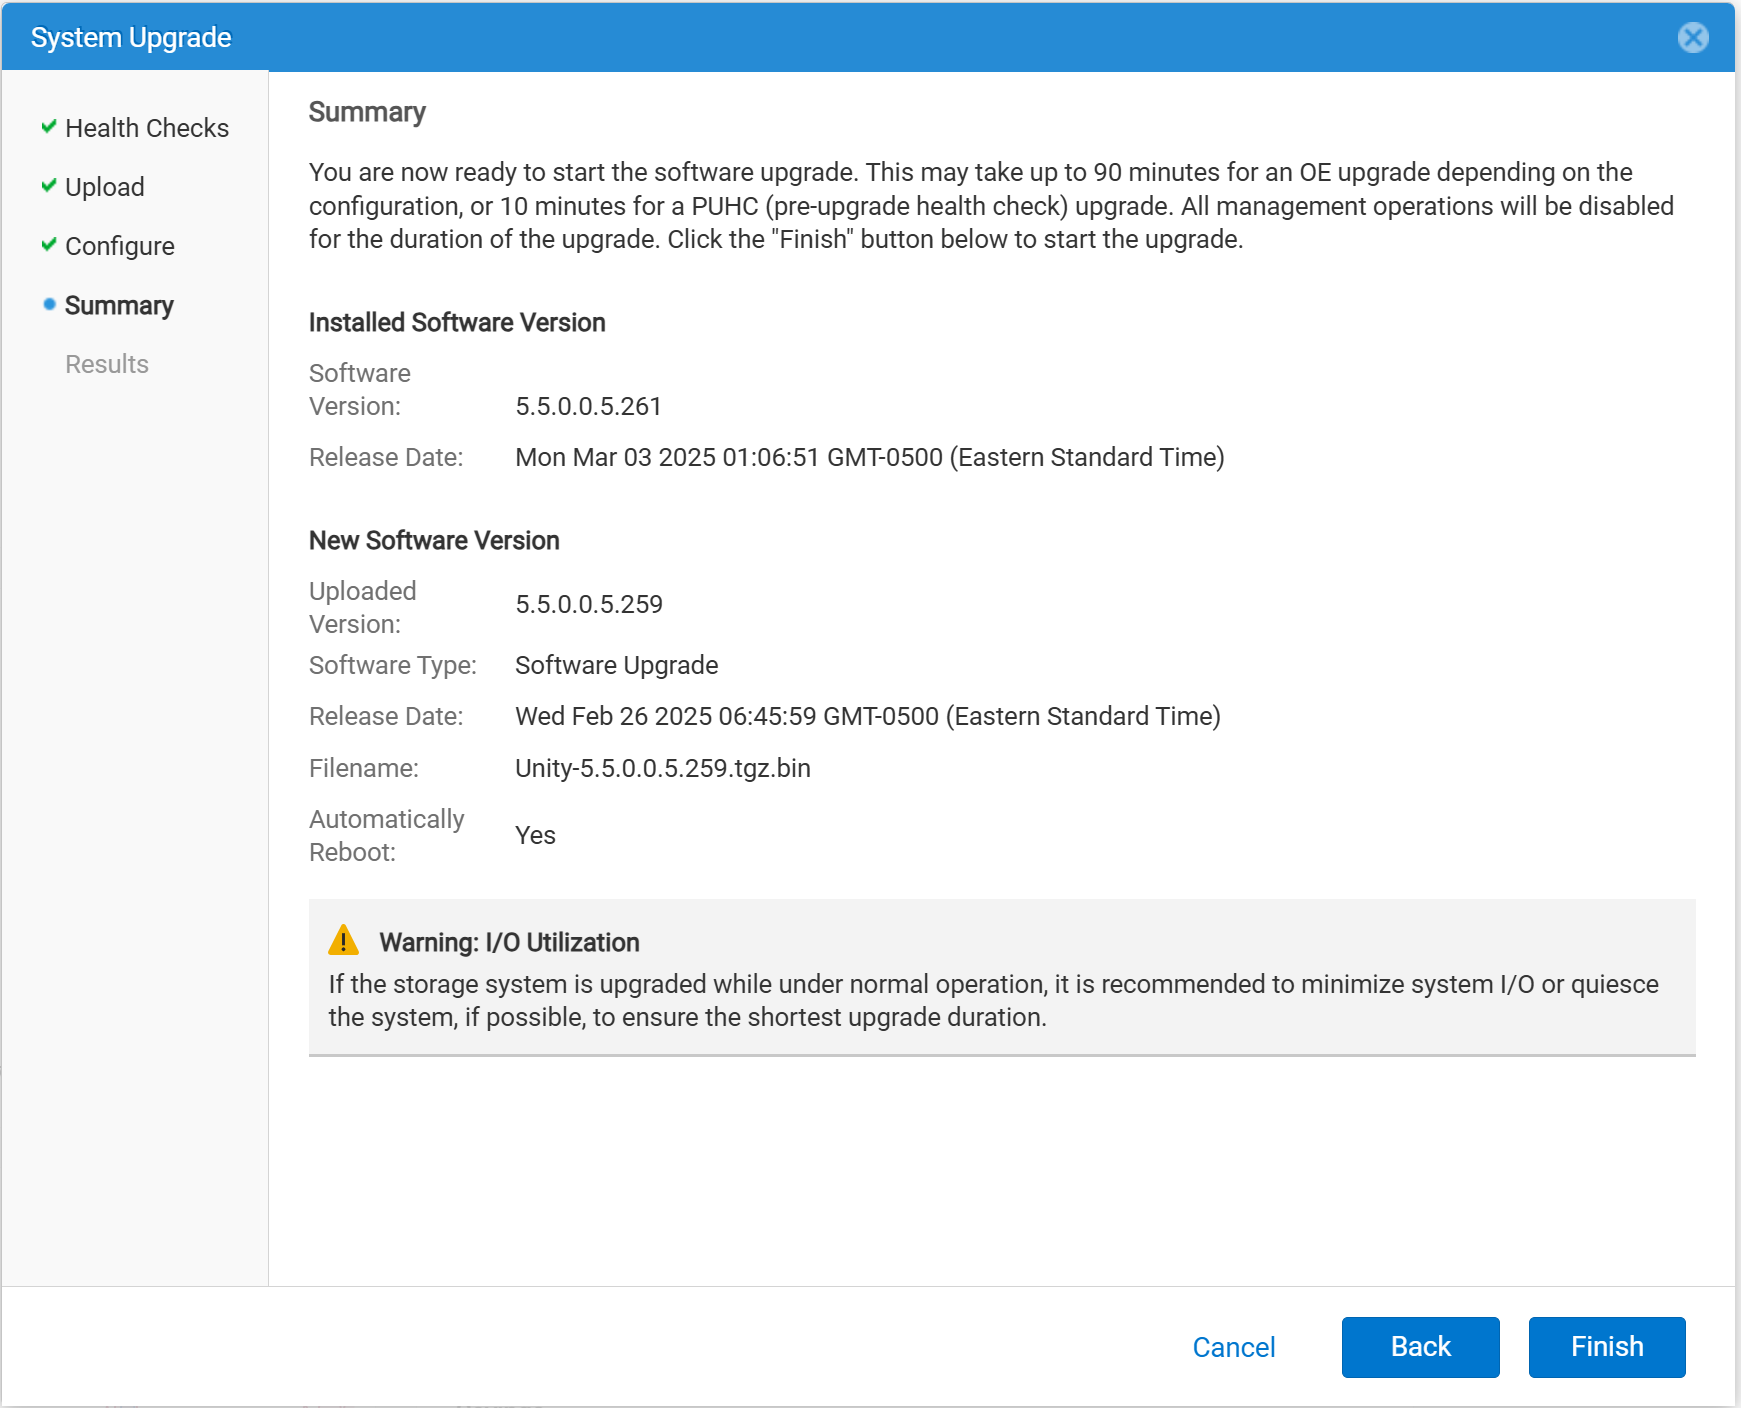
- Click Finish to start the Unity OE upgrade.
-
- If there are any errors during the upgrade, review the messages and remedies, then click Retry.
- During the upgrade, the environment may show errors or alerts due to Storage Processor (SP) reboots, not enough space, etc.
- If there are any in-depth issues, contact Dell Support.
- After the Unity OE upgrade completes, reload Unisphere. The new Unity OE version should show on SYSTEM > System View > Summary.
Method 2: Command Line (uemcli)
- Download the new Unity OE file. The new Unity OE file can be found on the Driver & Downloads page on the Dell Support Site.
- Upload the Unity OE file to the Unity array. This can be done with a file-transfer program like WinSCP or FileZilla. The file can also be uploaded using uemcli (example below).
NOTE: If the upgrade is cancelled after this step, the image has to be deleted from /var/tmp/upgrade on the Primary (SP). Leaving the image bloats the Root File System (FS) and could lead to a Storage Processor (SP) panic.
- To upload the Unity OE file to the Unity array and stage the upgrade
C:\> uemcli -d <unity_management_ip> -u admin -securePassword -upload -f c:\data\Unity-5.5.0.0.5.259.tgz.bin.gpg upgrade
- If the Unity OE file has already been uploaded to the Unity array using WinSCP, and the file only has to be staged
C:\> uemcli -d <unity_management_ip> -u admin -securePassword -upload -f /cores/service/user/Unity-5.5.0.0.5.259.tgz.bin.gpg upgrade
- Access the array by either Unity SSH or with another client that supports uemcli. For this article, Unity SSH is used. Log in with service credentials.
- Verify the image candidate ID. This shows the installed Unity OE version and the target Unity OE version for the upgrade.
17:39:08 service@UnityXT spb:~/user# uemcli /sys/soft/ver show
1: ID = INST_1 Type = installed Version = 5.4.1.0.5.006 Release date = 2024-12-03 06:06:51 Full version = Unity 5.4.1.0 (Release, Build 006, 2024-12-12 06:06:38, 5.4.1.0.5.006)
2: ID = CAND_1 Type = candidate Version = 5.5.0.0.5.259 Release date = 2025-02-26 11:45:59 Full version = Unity 5.5.0.0 (Release, Build 259, 2025-02-26 11:45:59, 5.5.0.0.5.259)
- Next, create (start) the Unity OE upgrade. Before initiating the command, decide if the Storage Processors (SPs) can be rebooted during the upgrade process or deferred until later. If the Storage Processors (SPs) cannot be rebooted during the upgrade, include -pauseBeforeReboot in the command structure. This only performs preinstall operations, and the Storage Processors (SPs) are not automatically rebooted during the upgrade.
18:08:32 service@UnityXT spb:~/user# uemcli /sys/soft/upgrade create -candId CAND_1
Operation completed successfully.
- Monitor the upgrade.
18:09:41 service@UnityXT spb:~/user# uemcli /sys/soft/upgrade show -detail
1: Status = running Creation time = 2025-05-28 18:09:22 Elapsed time = 00s Estimated time left = 1h 33m 25s Progress = Task 1 of 12 (preparing_system) Percent complete = 0%
- If -pauseBeforeReboot was within the create command (step 5), the upgrade must be resumed to continue. Also, if any health checks fail (such as a Replication Session still running), the upgrade must be resumed.
18:12:56 service@UnityXT spb:~/user# uemcli /sys/soft/upgrade resume
Operation completed successfully.
- Verify the Unity OE upgrade completes successfully.
18:39:08 service@UnityXT spb:~/user# uemcli /sys/soft/ver show
1: ID = INST_1 Type = installed Version = 5.5.0.0.5.261 Release date = 2025-03-03 06:06:51 Full version = Unity 5.5.0.0 (Release, Build 261, 2025-03-03 06:06:38, 5.5.0.0.5.261)
18:39:08 service@UnityXT spb:~/user# uemcli /sys/soft/upgrade show -detail
1: Status = completed Creation time = 2025-05-28 18:09:22 Elapsed time = 39m 46s Estimated time left = Progress = Percent complete = 100%
其他信息
Dell Technologies recommends performing Unity OE code upgrade during a low production period. There should not be any Data Unavailability (DU) or Data Loss (DL) during the upgrade. However, things may slow down and the array may have higher CPU utilization during the upgrade.
Prior to the upgrade, /cores/service should have at least 5GB free space. Usually deleting old Unity Data Collects (/EMC/backend/service/data_collection/) is the best way to free up that space.
Additional information regarding the Unity OE, release dates, recommended code, and supported upgrade paths can be found here.
受影响的产品
Dell EMC Unity, Dell EMC Unity Family |Dell EMC Unity All Flash, Dell EMC Unity Hybrid文章属性
文章编号: 000022755
文章类型: How To
上次修改时间: 01 12月 2025
版本: 9
从其他戴尔用户那里查找问题的答案
支持服务
检查您的设备是否在支持服务涵盖的范围内。