PowerEdge: How to Install PERCCLI utility on Red Hat Linux, Ubuntu Linux, VMware ESXi, and Windows Server
摘要: How to Install PERCCLI utility on Red Hat Linux, Ubuntu Linux, VMware ESXi, and Windows Server.
本文章適用於
本文章不適用於
本文無關於任何特定產品。
本文未識別所有產品版本。
說明
How to Install PERCCLI utility on Red Hat Linux, Ubuntu Linux, VMware ESXi, and Windows Server
Note: Often in other PERCCLI utility documentation, you see examples of PERCCLI commands referencing the utility name as "perccli." The name of the most recent iterations of PERCCLI is shown as "perccli64."
Table of Contents
- Installing PERCCLI on Red Hat Linux:
- Installing PERCCLI on Ubuntu Linux
- Installing PERCLI on VMware ESXi
- Installing PERCLI on Windows Server
1: Installing PERCCLI on Red Hat Linux:
Copy the PERCCLI Install File to the server:
Note: If the customer has a user interface and can browse, you can navigate to the Dell Support Site site and download the utility directly onto the system.
- When working in the command line, there are a couple of different methods we can use.
Method 1: Transferring using SSH and FTP client.
- Open the terminal on Red Hat Installation.

Figure 1: Opening Terminal in RHEL
- Change to root user.
- This is optional, but you may need to input "
sudo" for commands that require root privileges.
# su -

Figure 2: Changing to root user.
- In this example, we have an SSH service. You can use
scpcommands to transfer files from another Linux host to this. A more user-friendly option would be to use an FTP Client, such as Filezilla, or WinSCP. For this example, I am using WinSCP.

Figure 3: WinSCP details connecting using SFTP to the server.
- In the above screenshot, you see key points in WinSCP.
Note: Some personally identifiable information is blacked out.
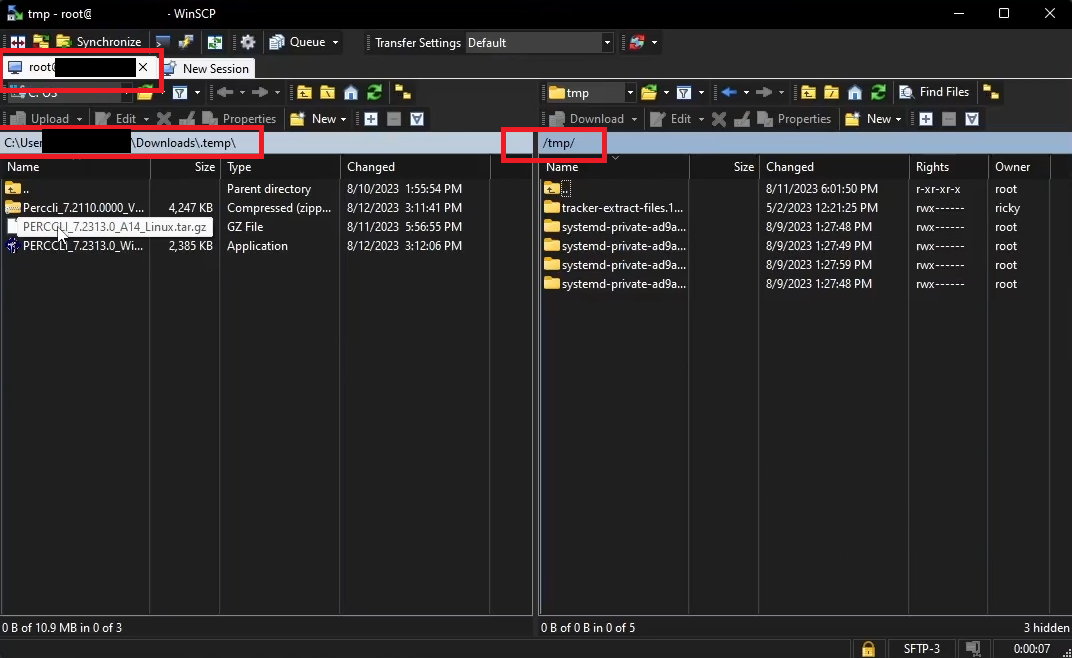
Figure 4: WinSCP directories of workstation and server
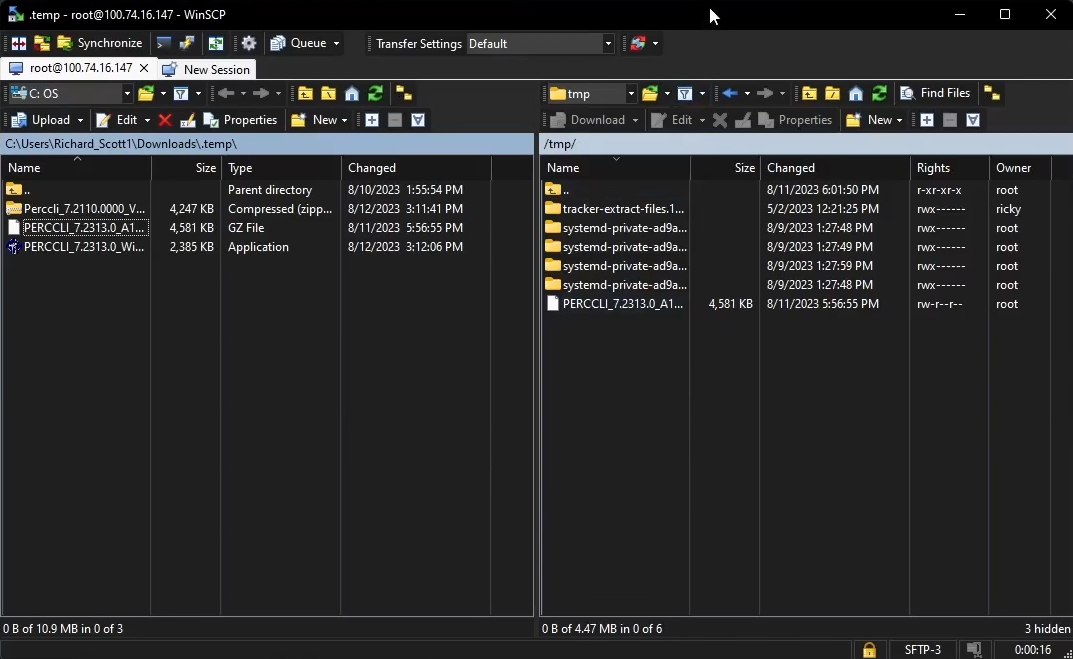
Figure 5: WinSCP showing file transferred
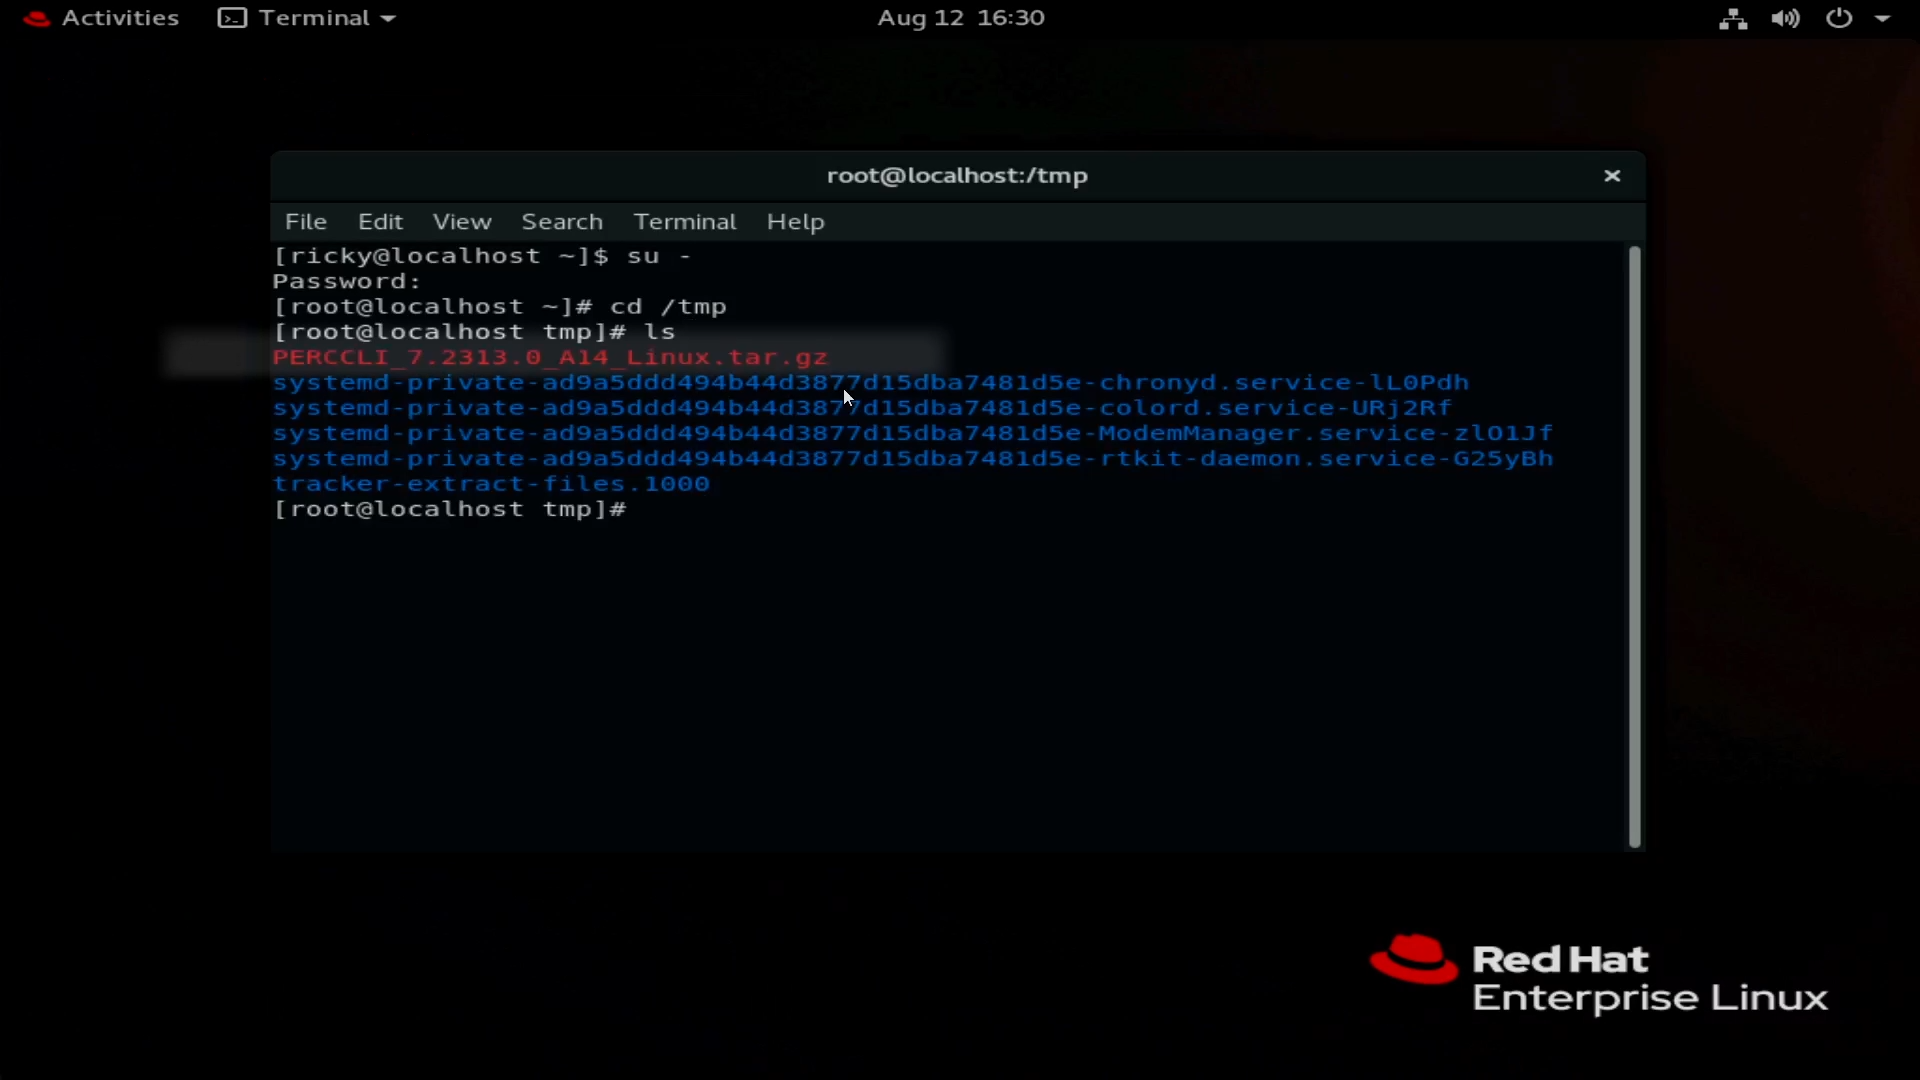
Figure 6: File shown in the terminal after transferred using WinSCP.
- Create a new Session. This opens a submenu to put server information in.
- Click New Site to begin entering server information.
- Input server information. Use SFTP and Port 22 as the protocol to transfer over the SSH tunnel. Enter hostname or IP address, user credentials to connect.
- Once logged in to the server, you can browse the file structure of the server.
- I have moved to the
/tmpdirectory as an example for this article.
- I have moved to the
- Drag the PERCCLI file over to the right side to begin transferring to the server. You see the file in the file system once transfer completes.
- Use the
lscommand to list items in the directory within the terminal.
Method 2: Using the wget command
- Browse to the Dell.com/support site and find the PERCCLI utility file.
- Copy the Link Address of the file.
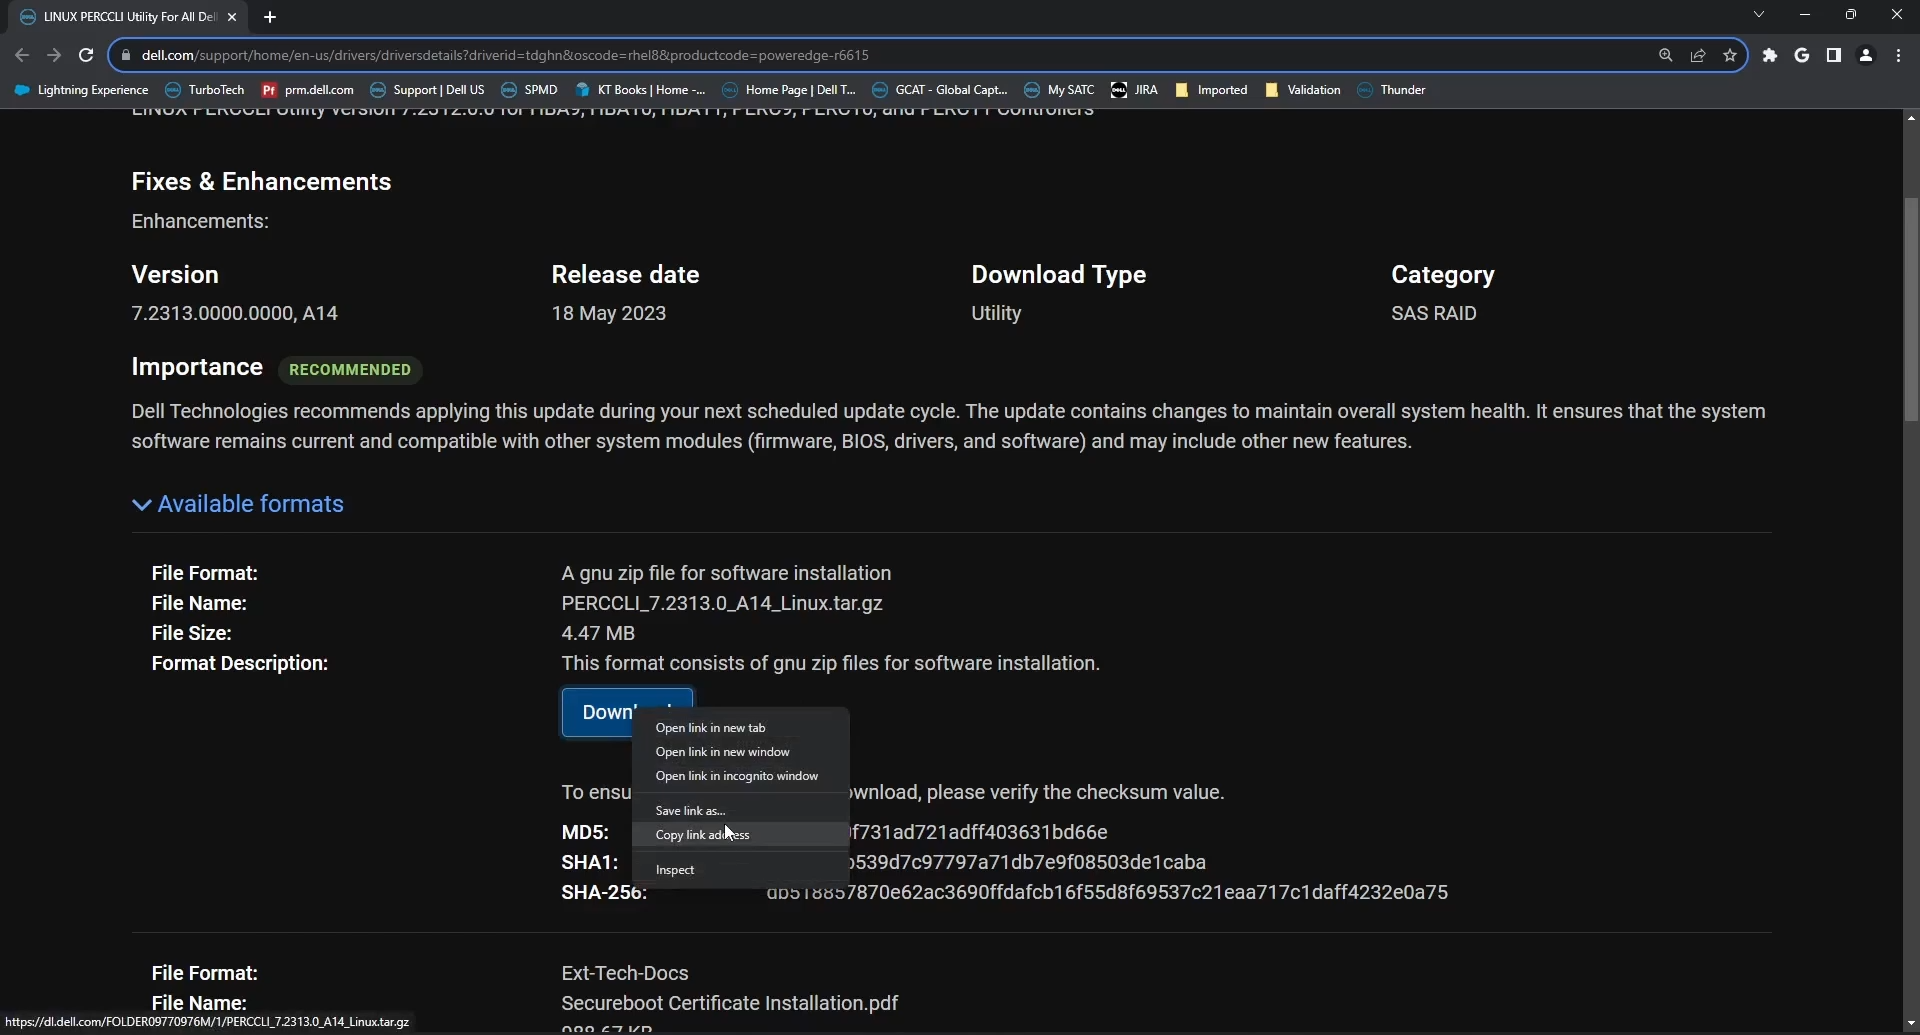
Figure 7: Downloading PERCCLI utility Linux package from Dell support site
- Back on the server, type the command:
# wget <PERCCLI link>
- In this example, I am using the iDRAC Virtual Console’s Virtual Clipboard to send the copied link to the server through the iDRAC.
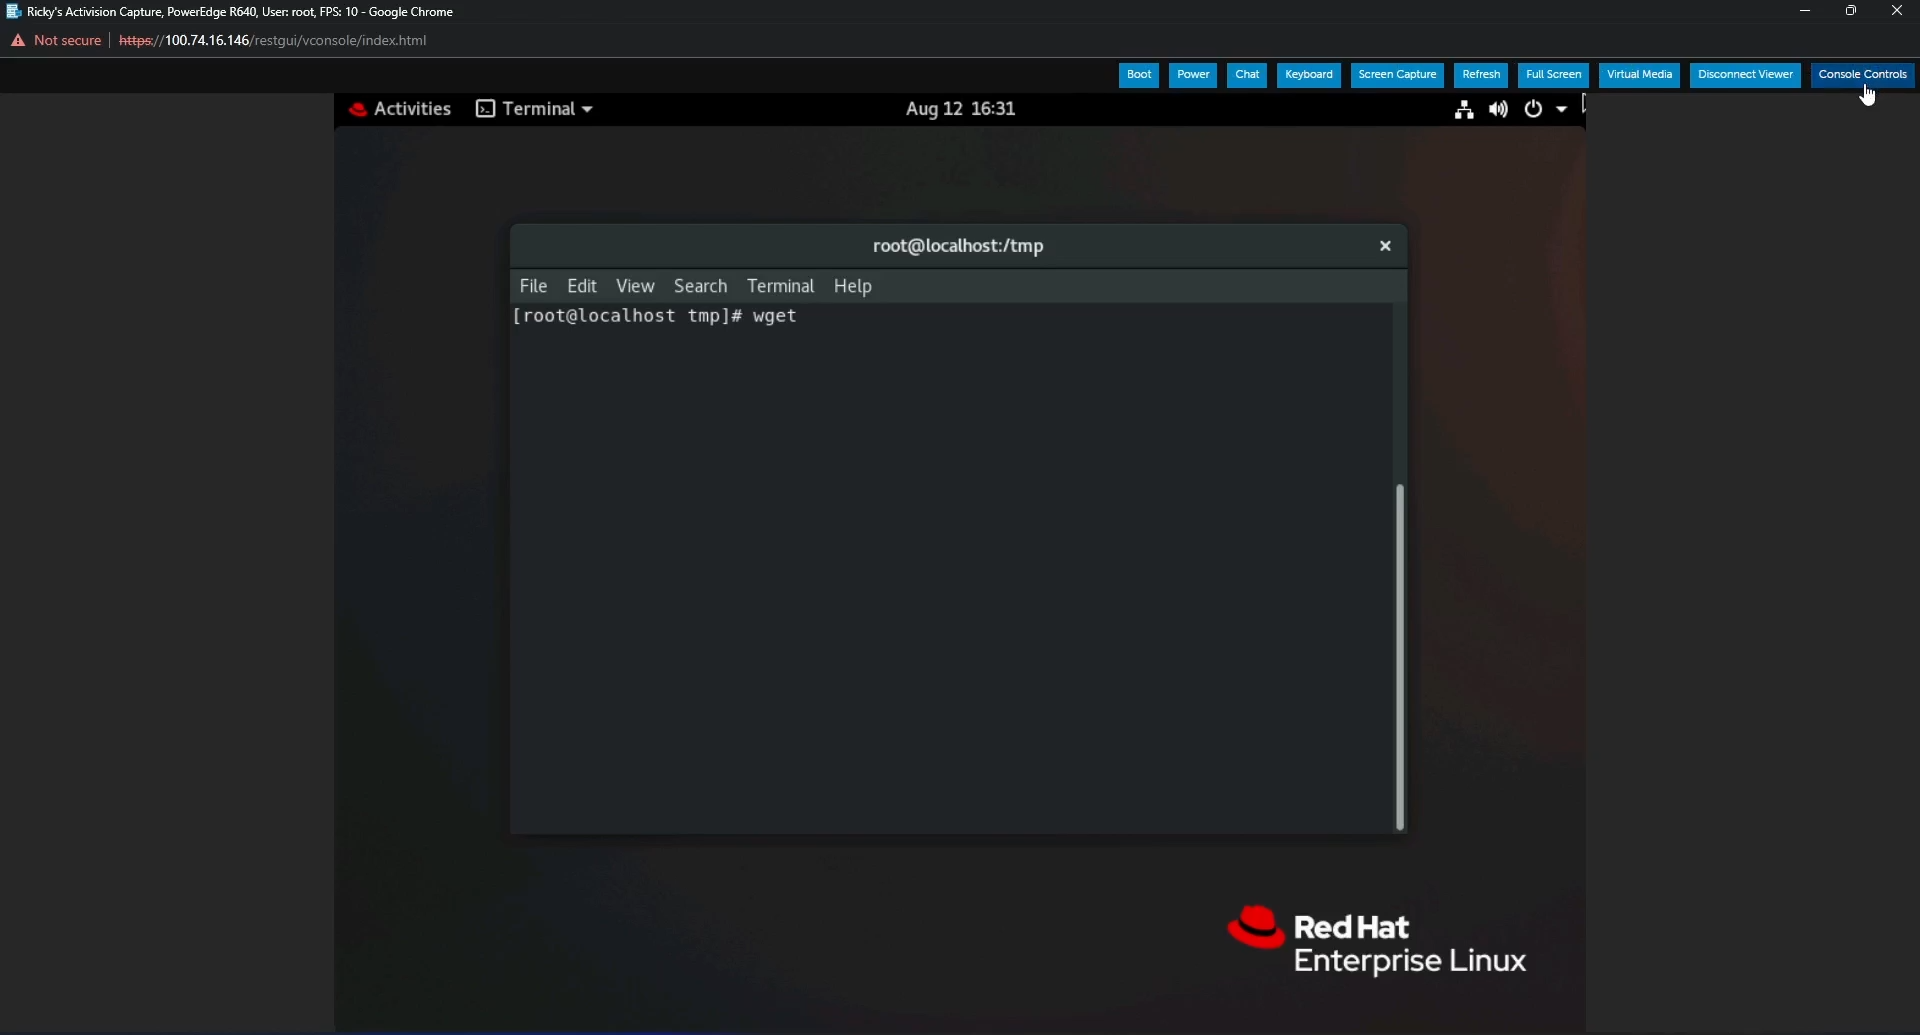
Figure 8: wget command in terminal
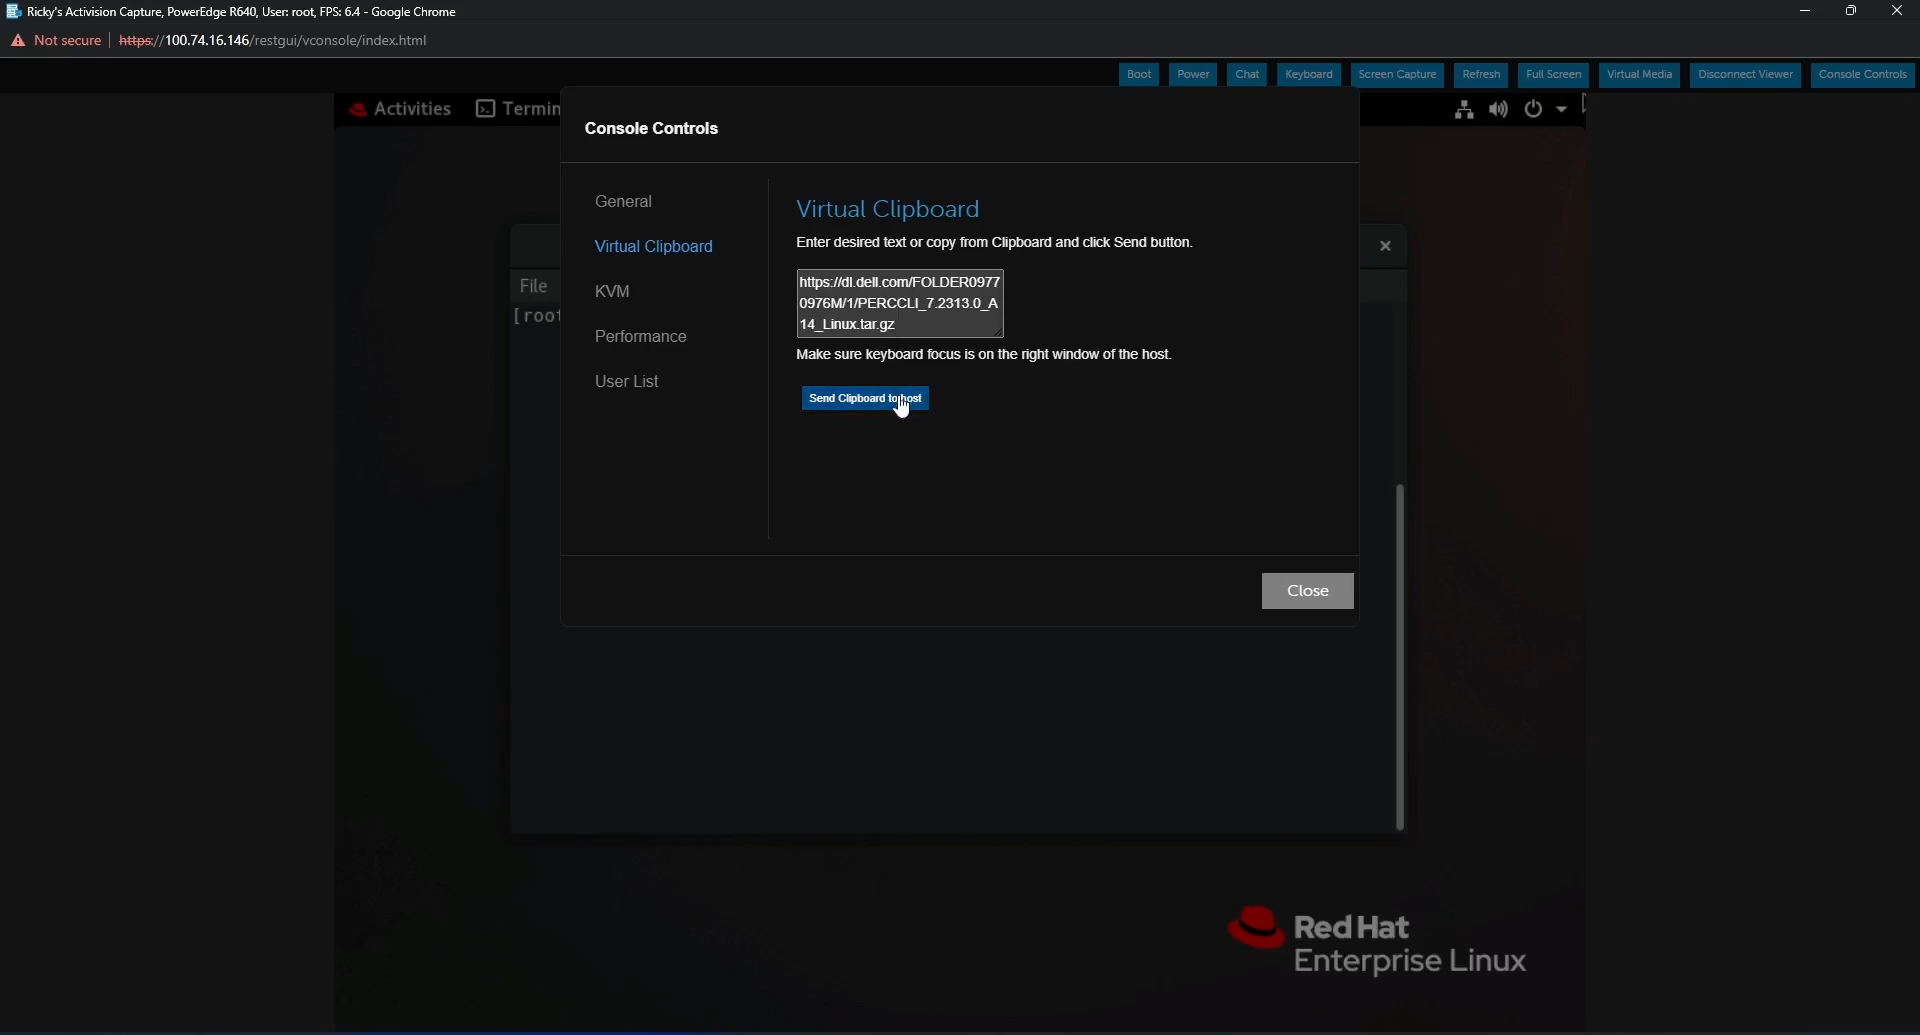
Figure 9: Copy and Paste function in iDRAC virtual clipboard to send file link to server
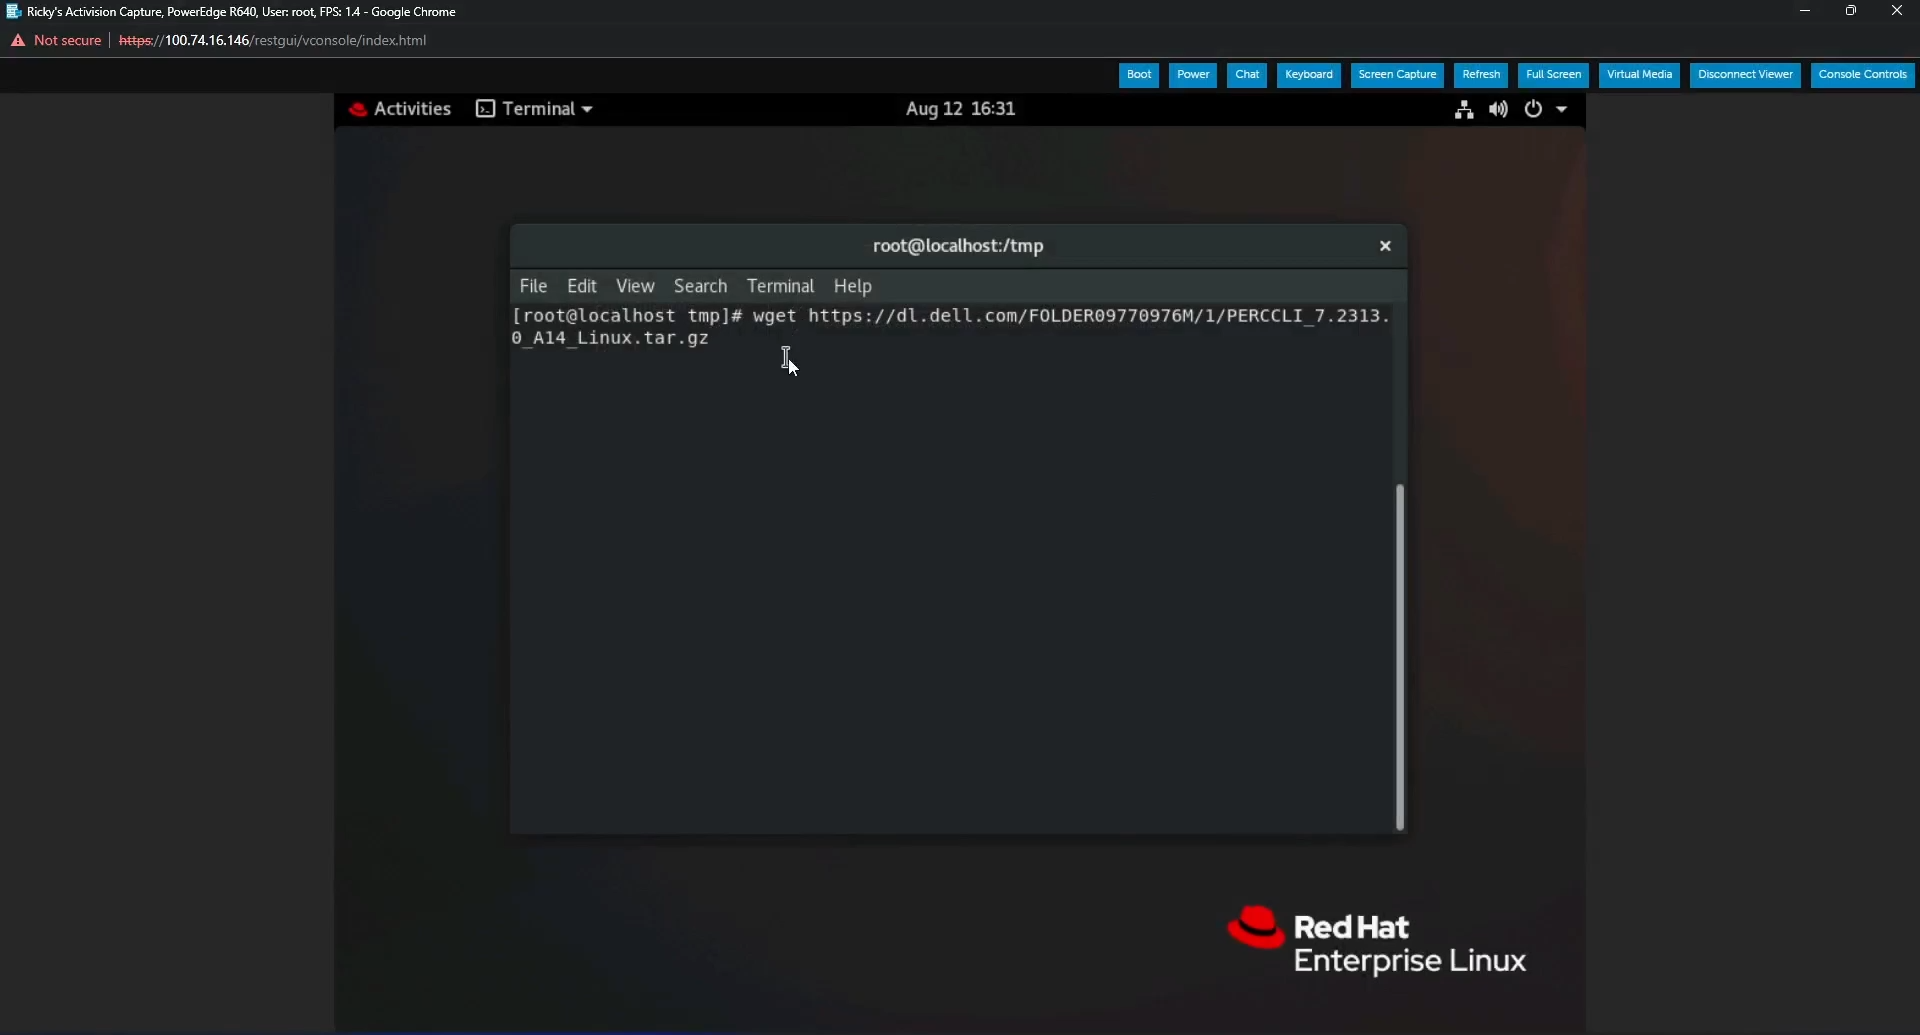
Figure 10: wget command with full link in terminal after pasting using iDRAC virtual clipboard
- Press Enter and you see the file downloading, and can verify it once complete with the ls command.
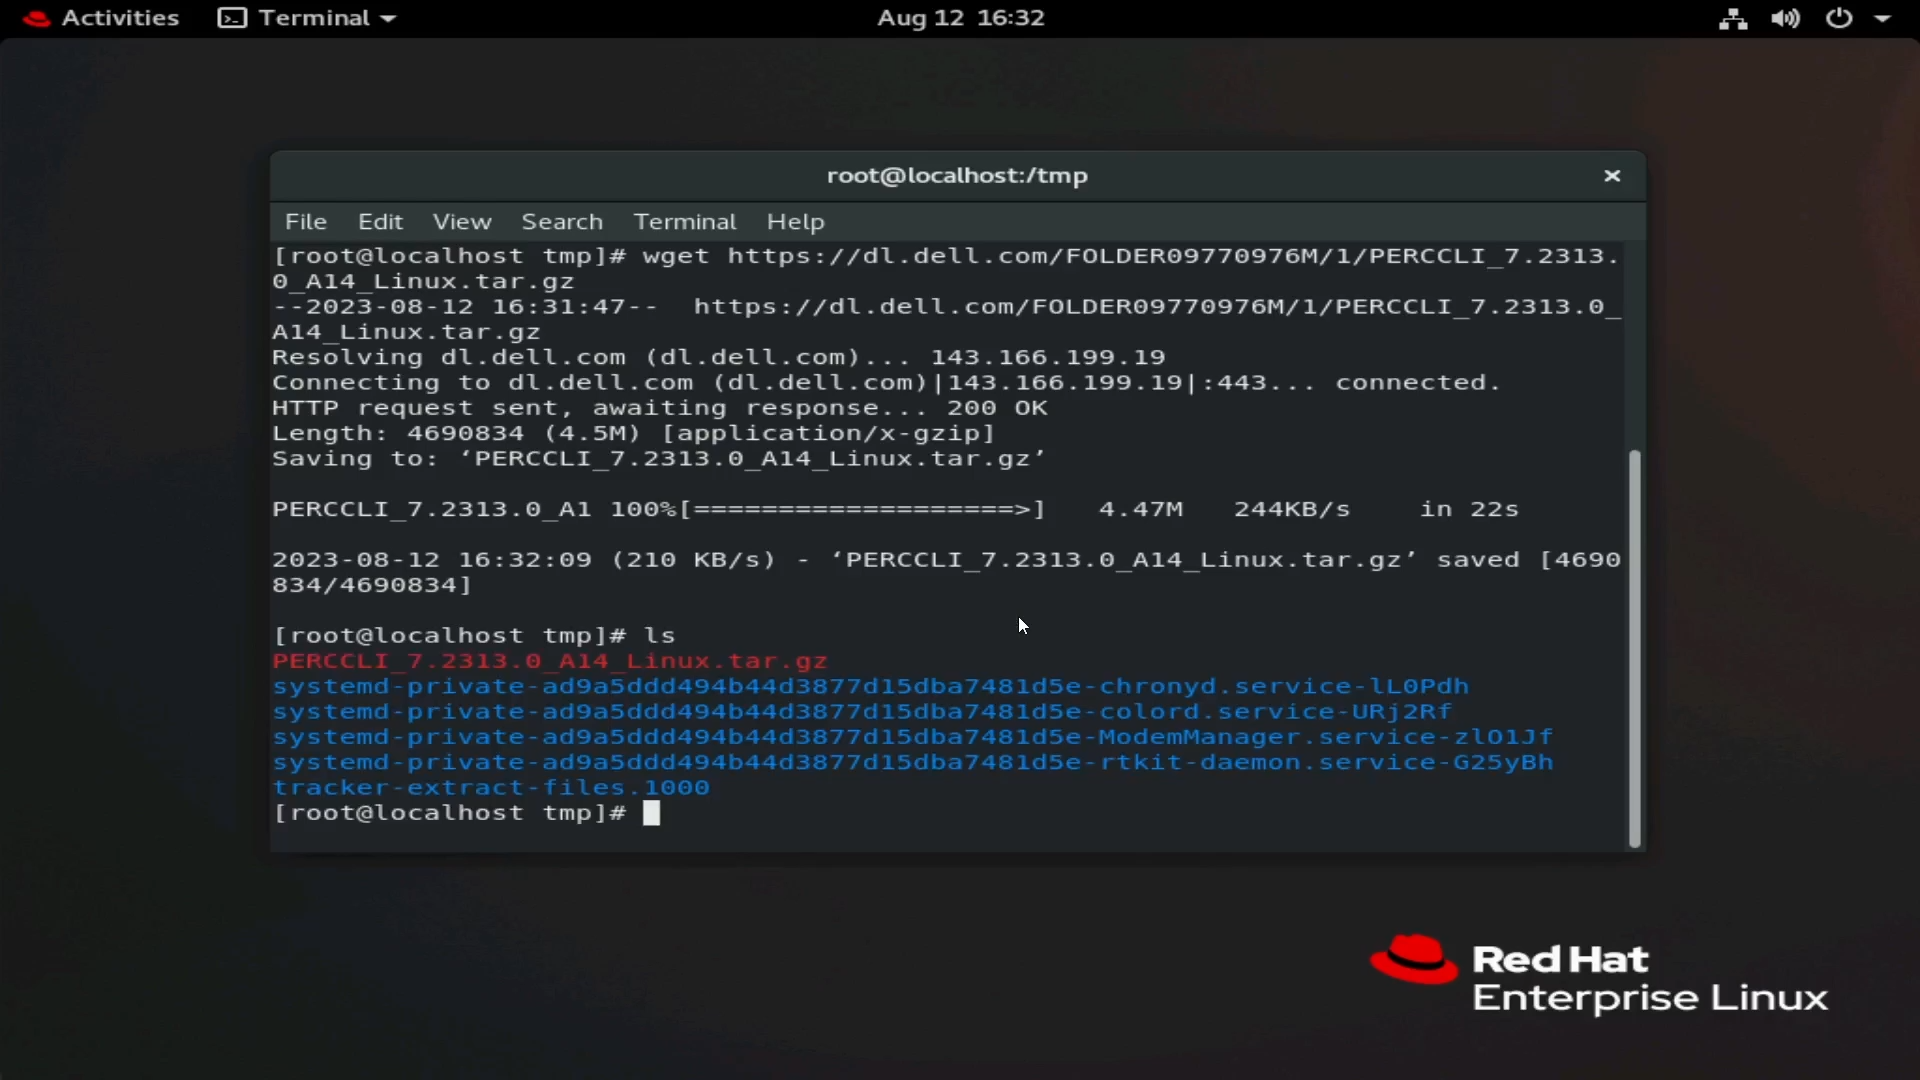
Figure 11: File downloaded with the wget command
Extract the File:
- Extract and Untar the file.
Note When typing the command, you can type the first letters of the PERC utility and press <Tab>, and it finishes the line for you. It is case-sensitive, so make sure to match the case to the filename.
- Run the command:
tar xzvf PERCCLI_7.2313.0_A14.Linux.tar.gz
- Once complete, you can use the
lscommand and see a PERCCLI directory

Figure 12: PERCCLI directory after extraction of file
- Navigate to the extracted directory. Like when untarring a file, you can type the
cdcommand, and then the first letters of the directory name and press <Tab> to auto-complete. - When in the directory, you see files. For this Red Hat environment, we used the
RPMfile.
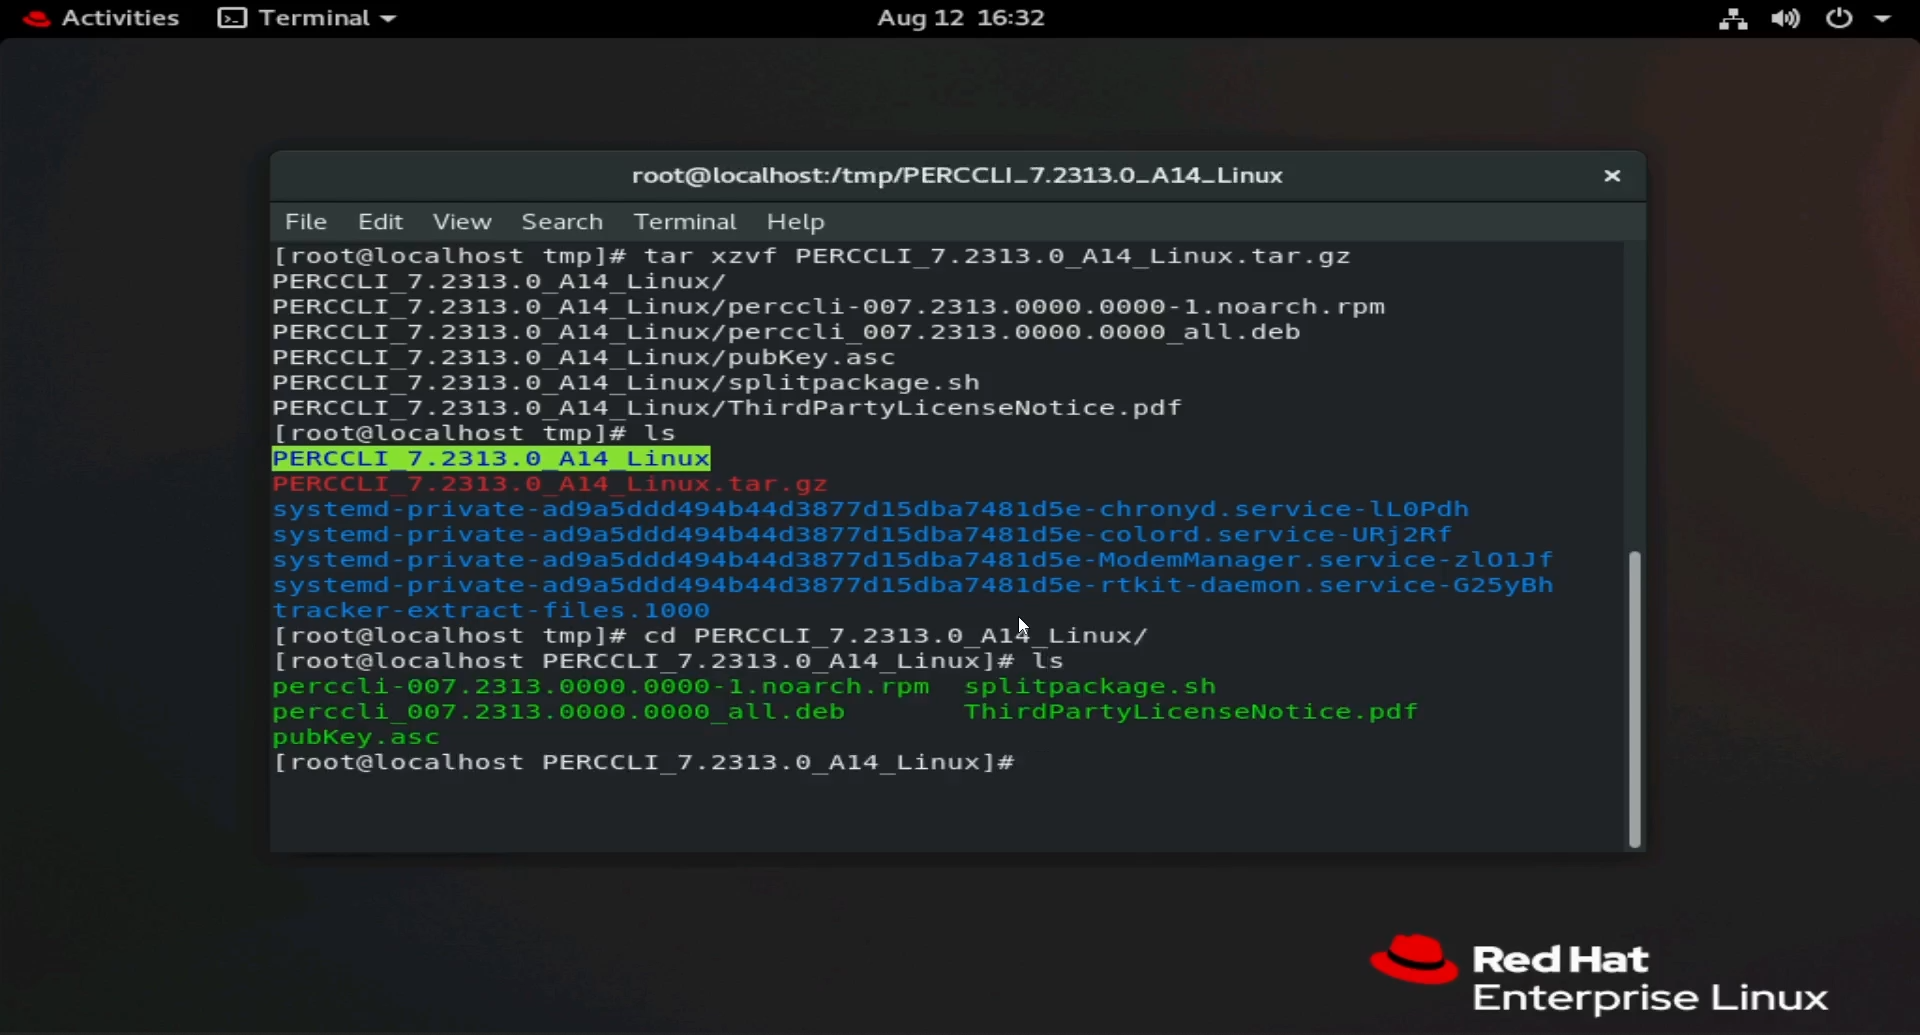
Figure 13: List of files in the extracted directory. In RHEL, the RPM file is used.
Figure 14: Highlighting RPM file in terminal.
Install PERCCLI:
- In this Red Hat Installation, we use the
RPMcommand to install. Press <Tab> to auto-complete the file name.
# rpm -ivh perccli-007.2313.0000.0000-1.noarch.rpm

Figure 15: RPM command to install the utility.
- Once Installed, navigate to the install location. You see the PERCCLI utility.
# cd /opt/MegaRAID/perccli

Figure 16: Navigation to the PERCCLI install directory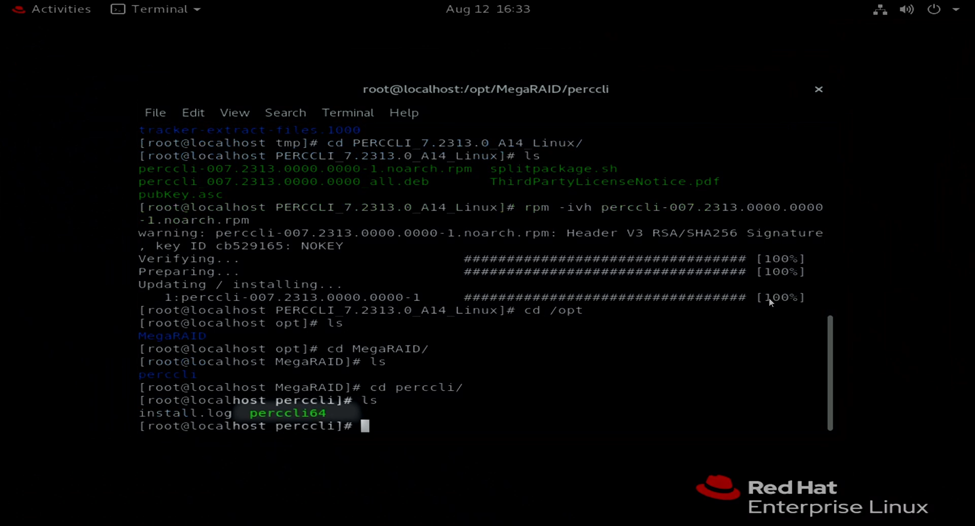
Figure 17: PERCCLI utility perccli64 shown in terminal.
Run Some Commands:
- You can now run your PERCCLI commands. When in the PERCCLI directory, start the command with
./perccli64. If you are not in that directory, you can type out the full directory to invoke it,/opt/MegaRAID/perccli/perccli64. - Here as an example, we issue commands to show controllers, and then show details about that controller.
# ./perccli64 show
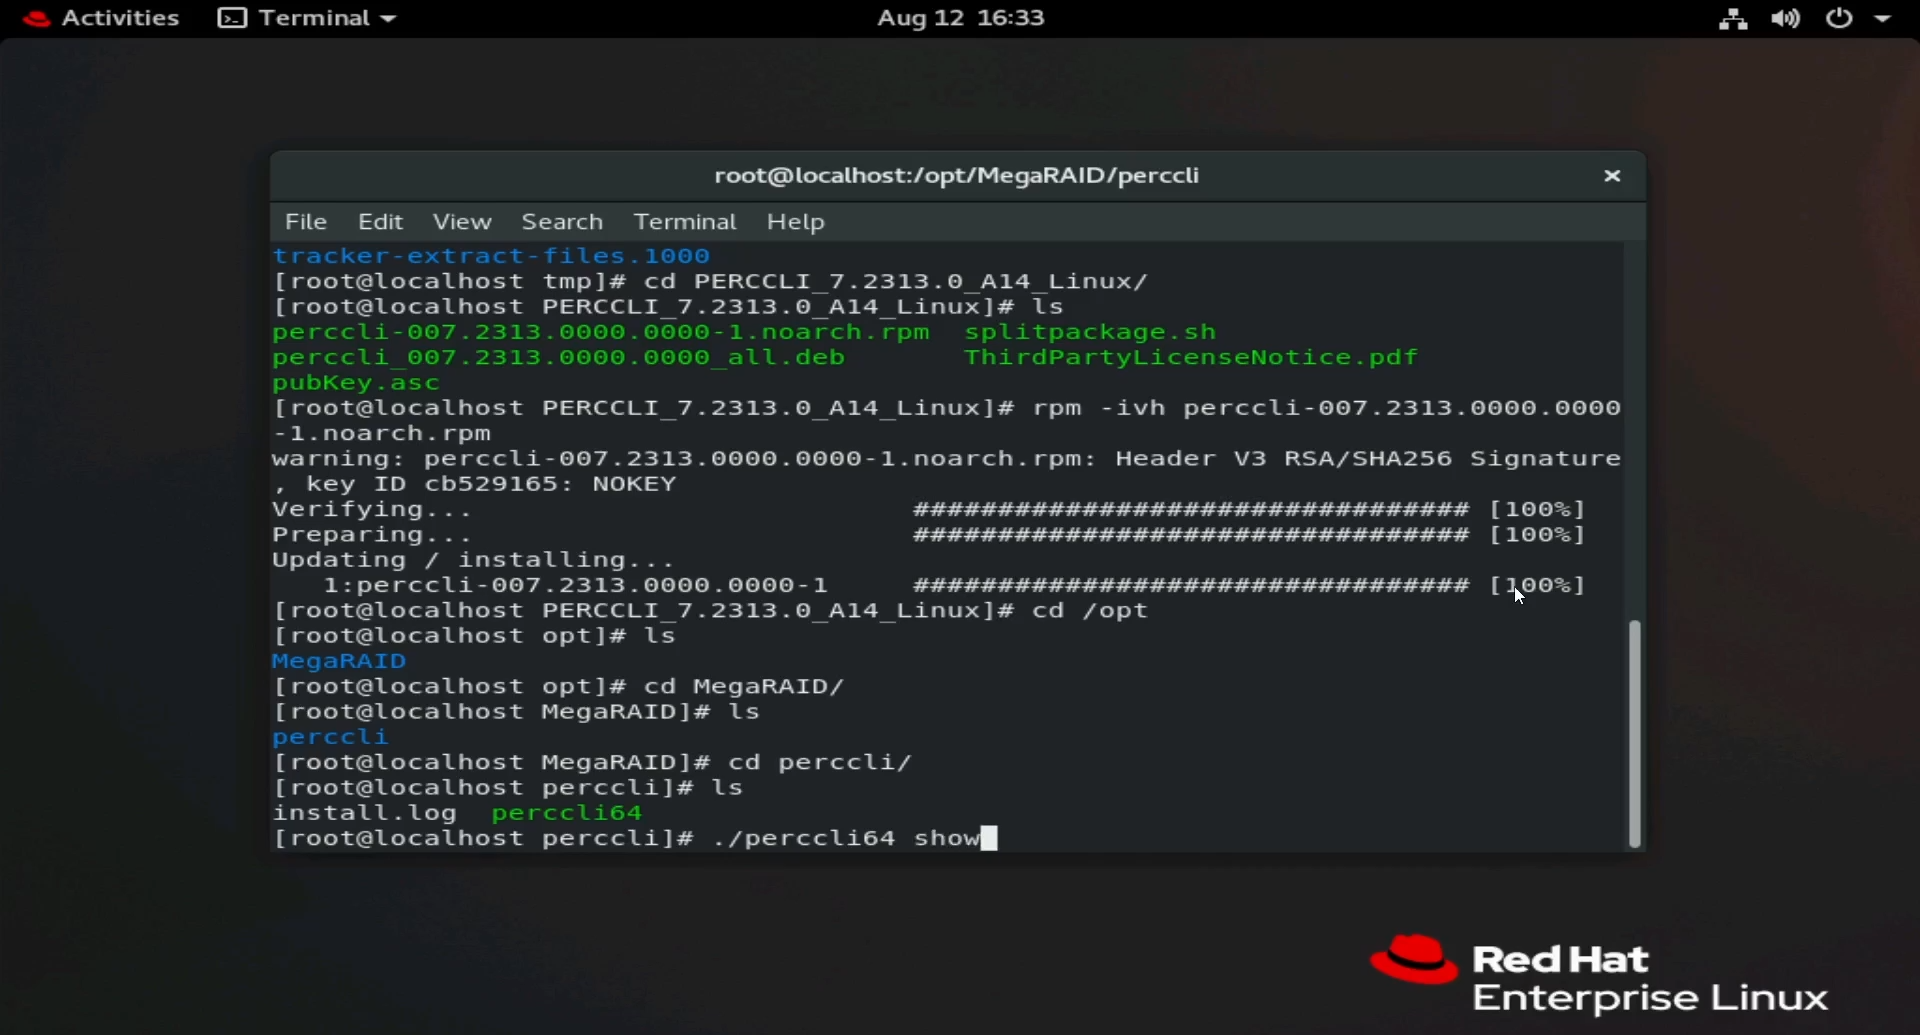
Figure 18: Running command ./perccli64 /show.
- Details show we have one controller, an HBA330. The Controller has been enumerated as controller 0.
Note: In most installations there will be a single PERC controller, listed as controller 0. Be aware of configurations that may have more than one controller. Be sure you are targeting Controller 0, Controller 1, and so forth.
- Now we can call out controller 0 in other commands. Commands in the format of
./perccli64 /cx, where "x" is the number of the controller we want to use.
# ./perccli64 /c0 show
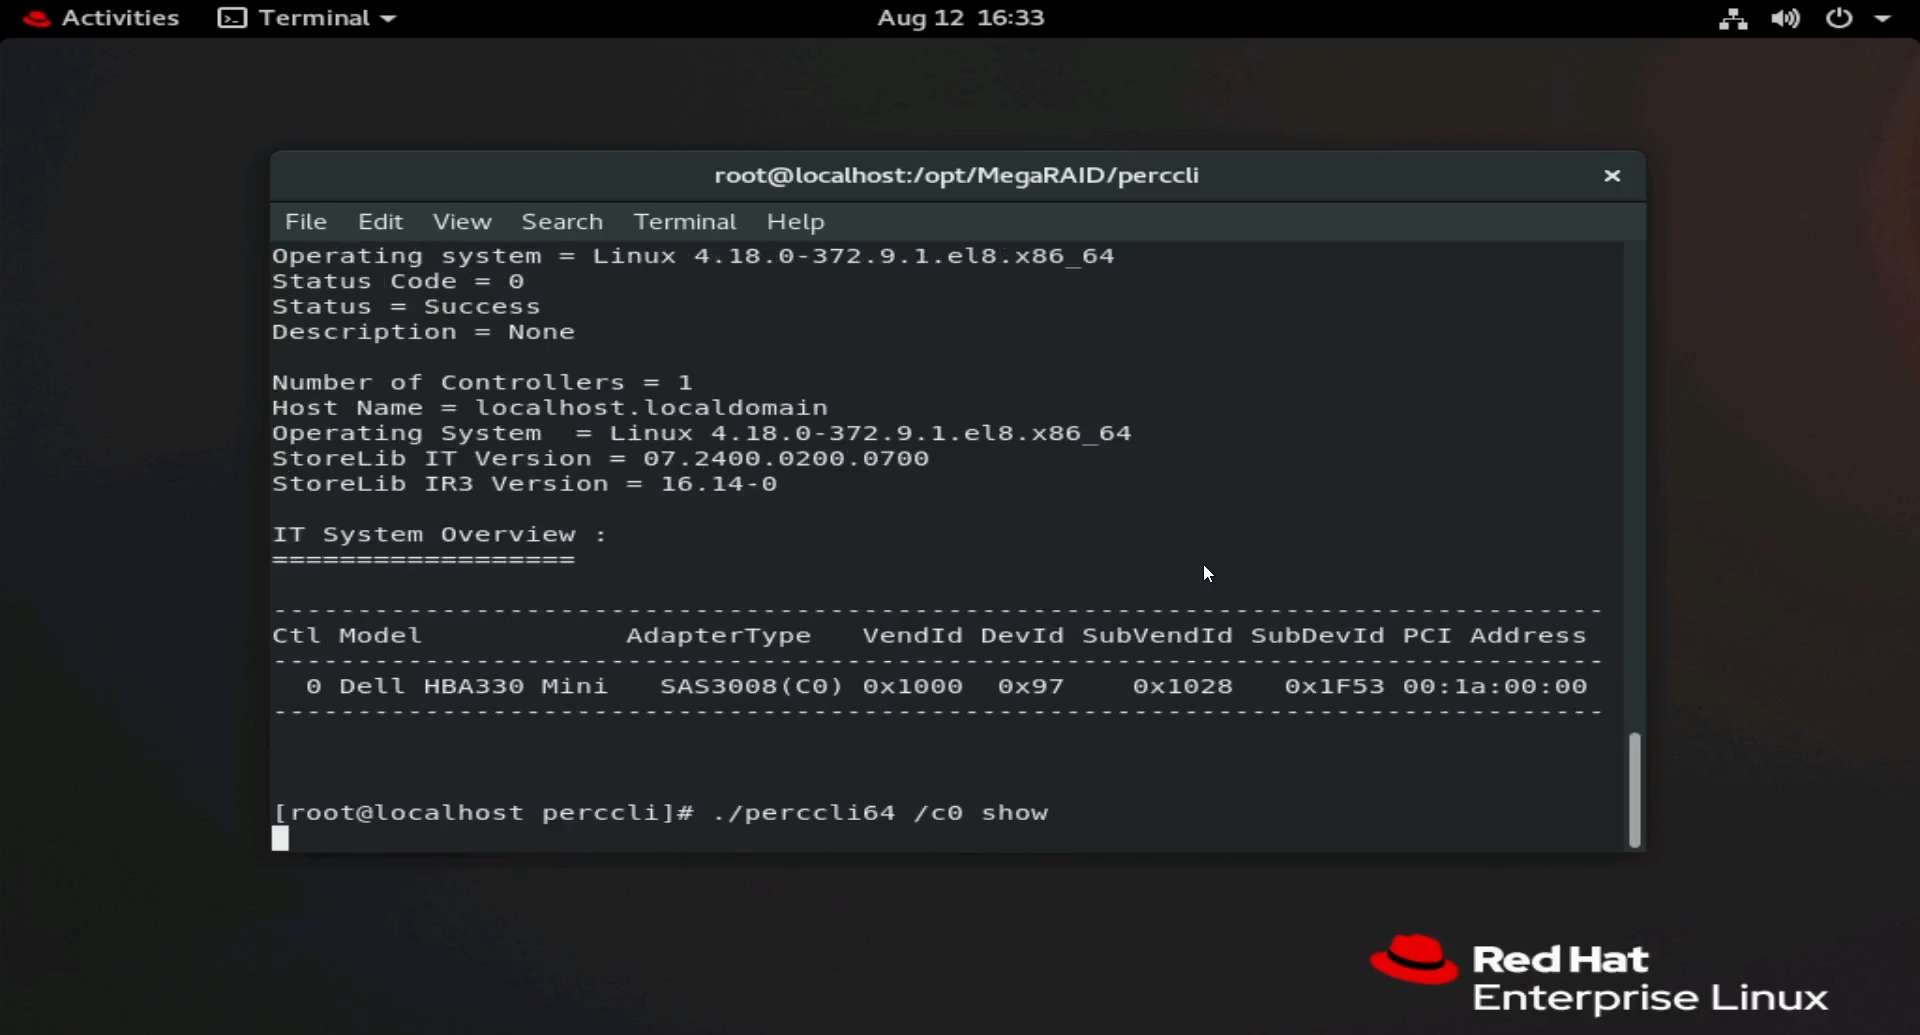
Figure 19: Running command ./perccli64 /c0 show.
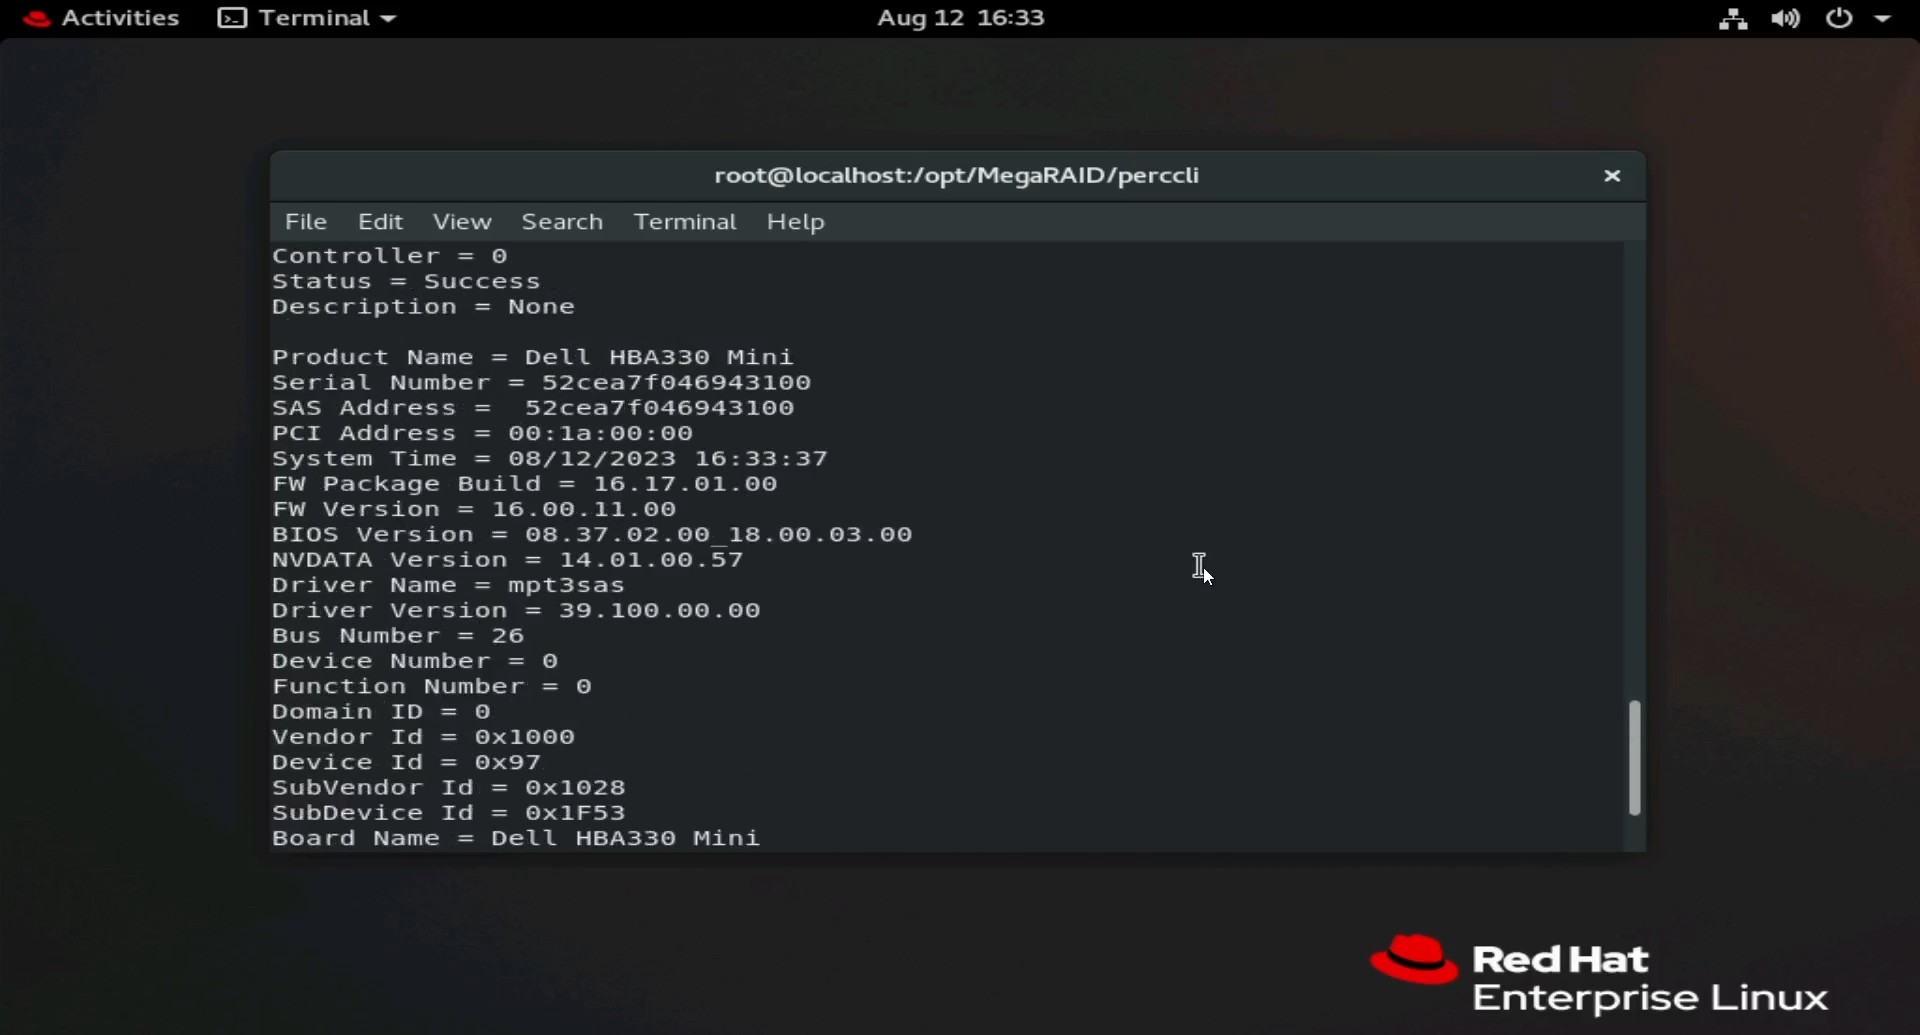
Figure 20: Output of PERCCLI show commands.
- You see it displays different aspects of the controller, such as Firmware version and SAS Address.
2: Installing PERCCLI on Ubuntu Linux
- In this example, we do not have a user interface like in the Red Hat example. This does not change anything however, we did everything from the terminal anyway. Use an FTP client to transfer over SSH, or the wget command to download the utility.
- The only real difference in Ubuntu is the file that we use to install. Instead of the
RPMfile, we install using the .deb file.
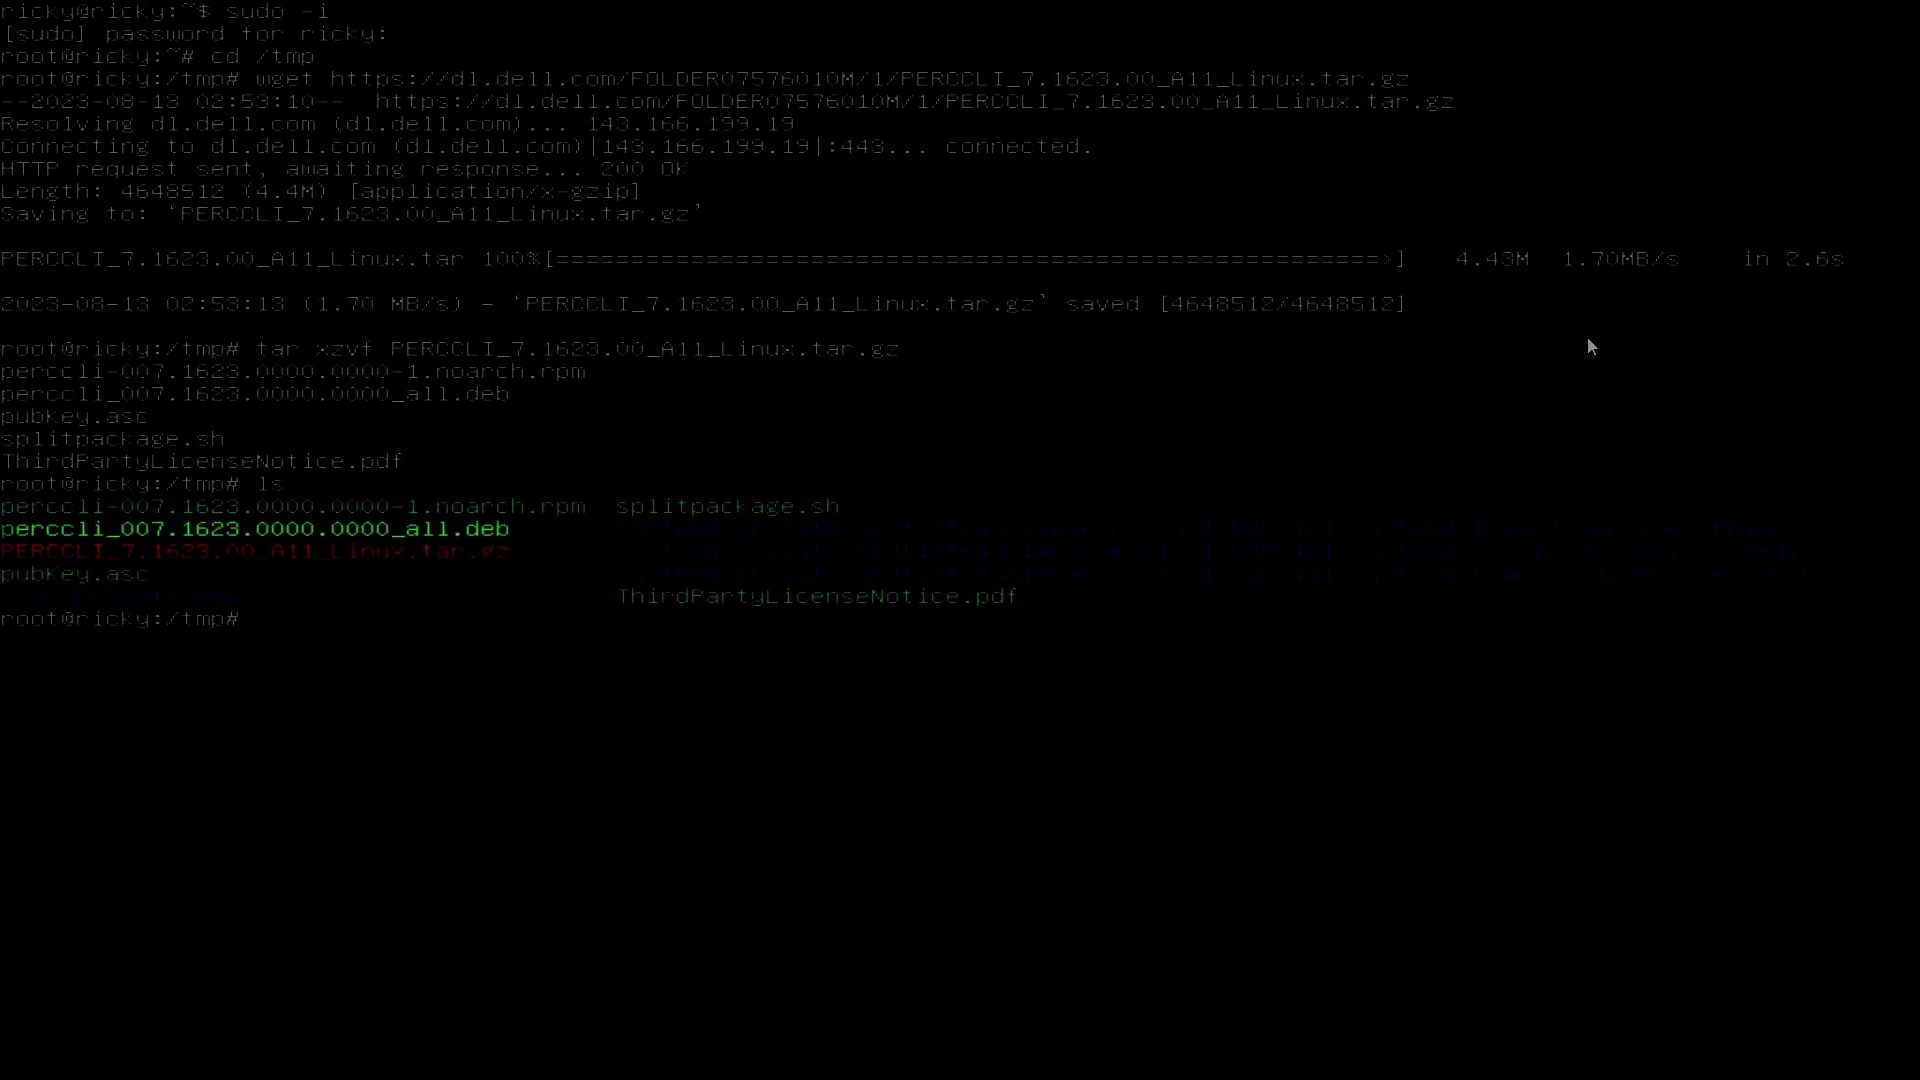
Figure 21: Debian file .deb shown in the Ubuntu command shell
- Like in Red Hat, you can press the <Tab> key after typing the first characters of the file to auto-complete. Install using the command:
# dpkg -i perccli_007.1623.0000.0000_all.deb
- Once installed you can navigate to
/opt/MegaRAID/perccliand begin running commands, the same as in the Red Hat example.
3: Installing PERCLI on VMware ESXi
Copy PERCCLI Utility to Server:
- In this example, we have a fresh install of ESXi 7.0.
- To use an FTP client as we did in the Linux examples, we first must enable SSH. We must also enable the Command Shell to run
percclicommands once it gets installed. - On the opening Screen press the <F2> key, and it brings up a login menu. Once you enter credentials, the System Menu pulls up. Navigate to "Troubleshooting Options."
- Enable "ESXi Shell," also enable "SSH."

Figure 22: New ESXi install
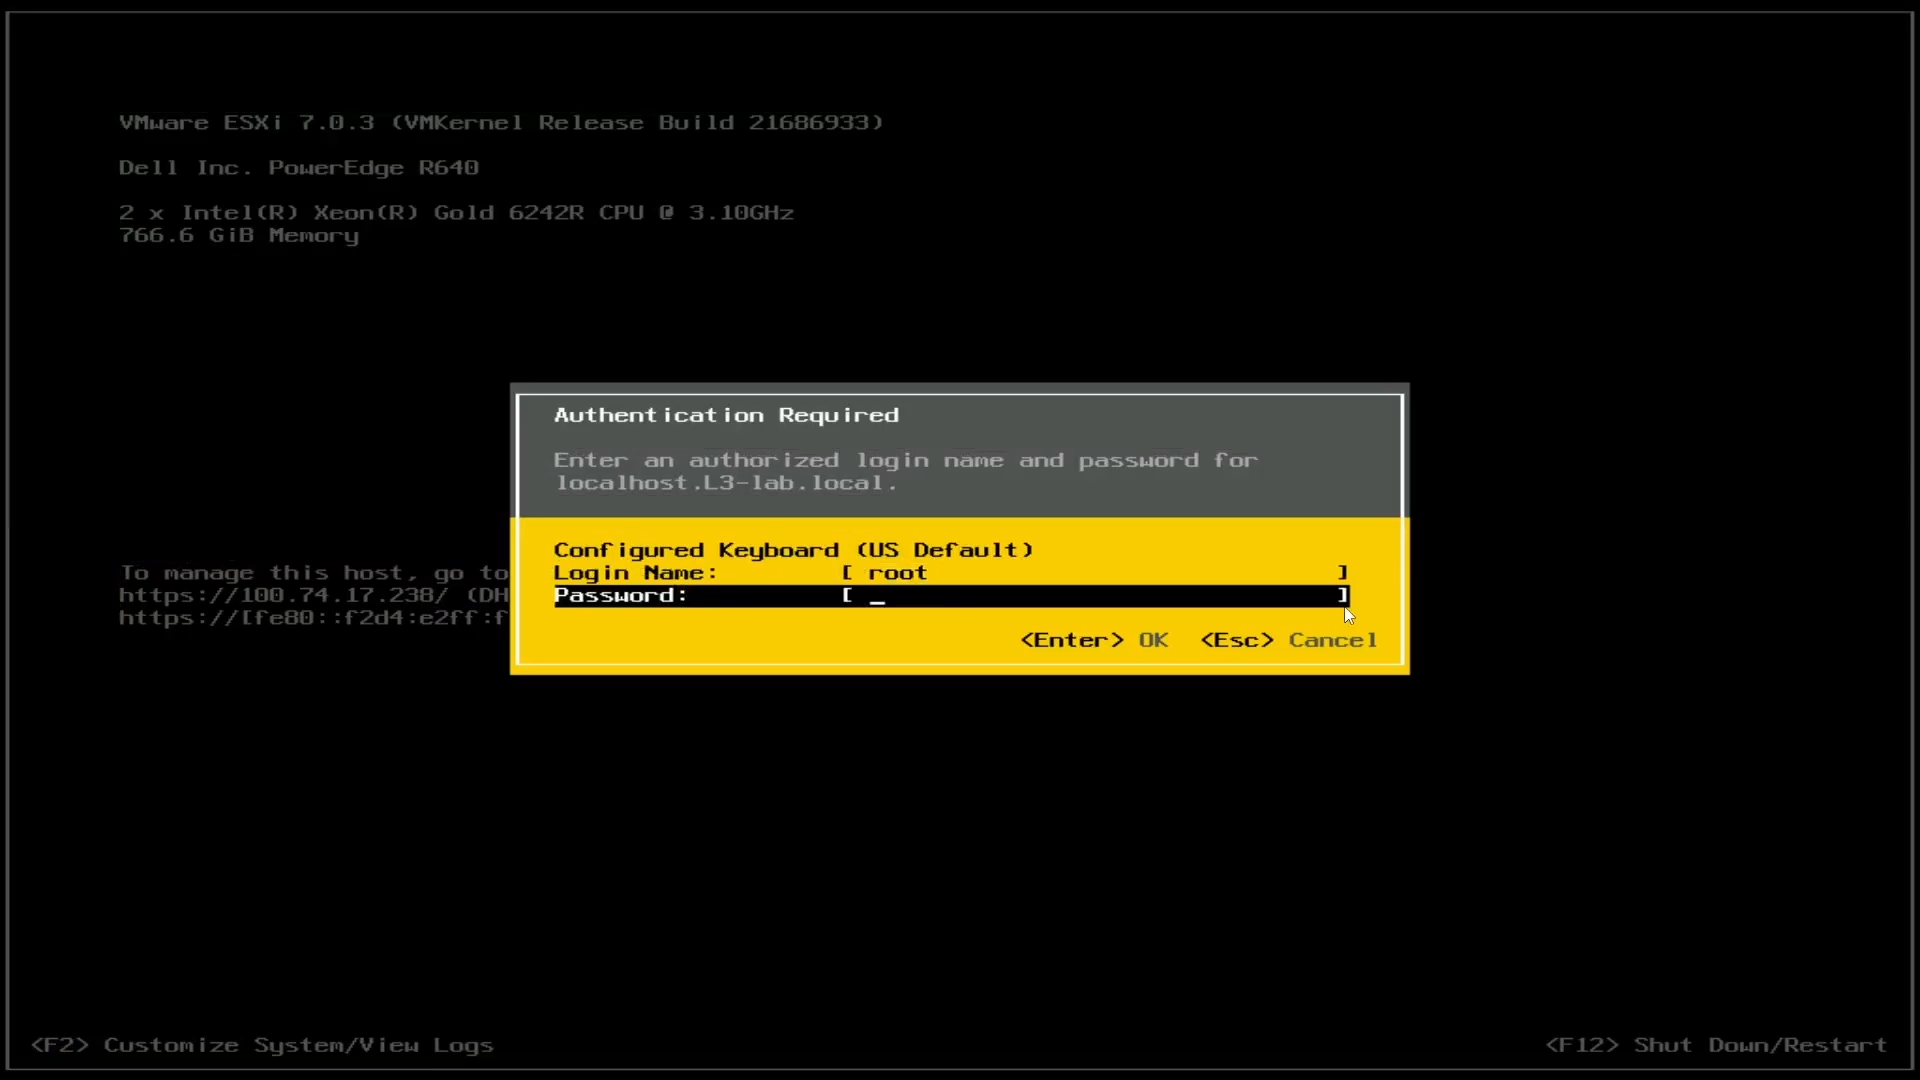
Figure 23: ESXi login
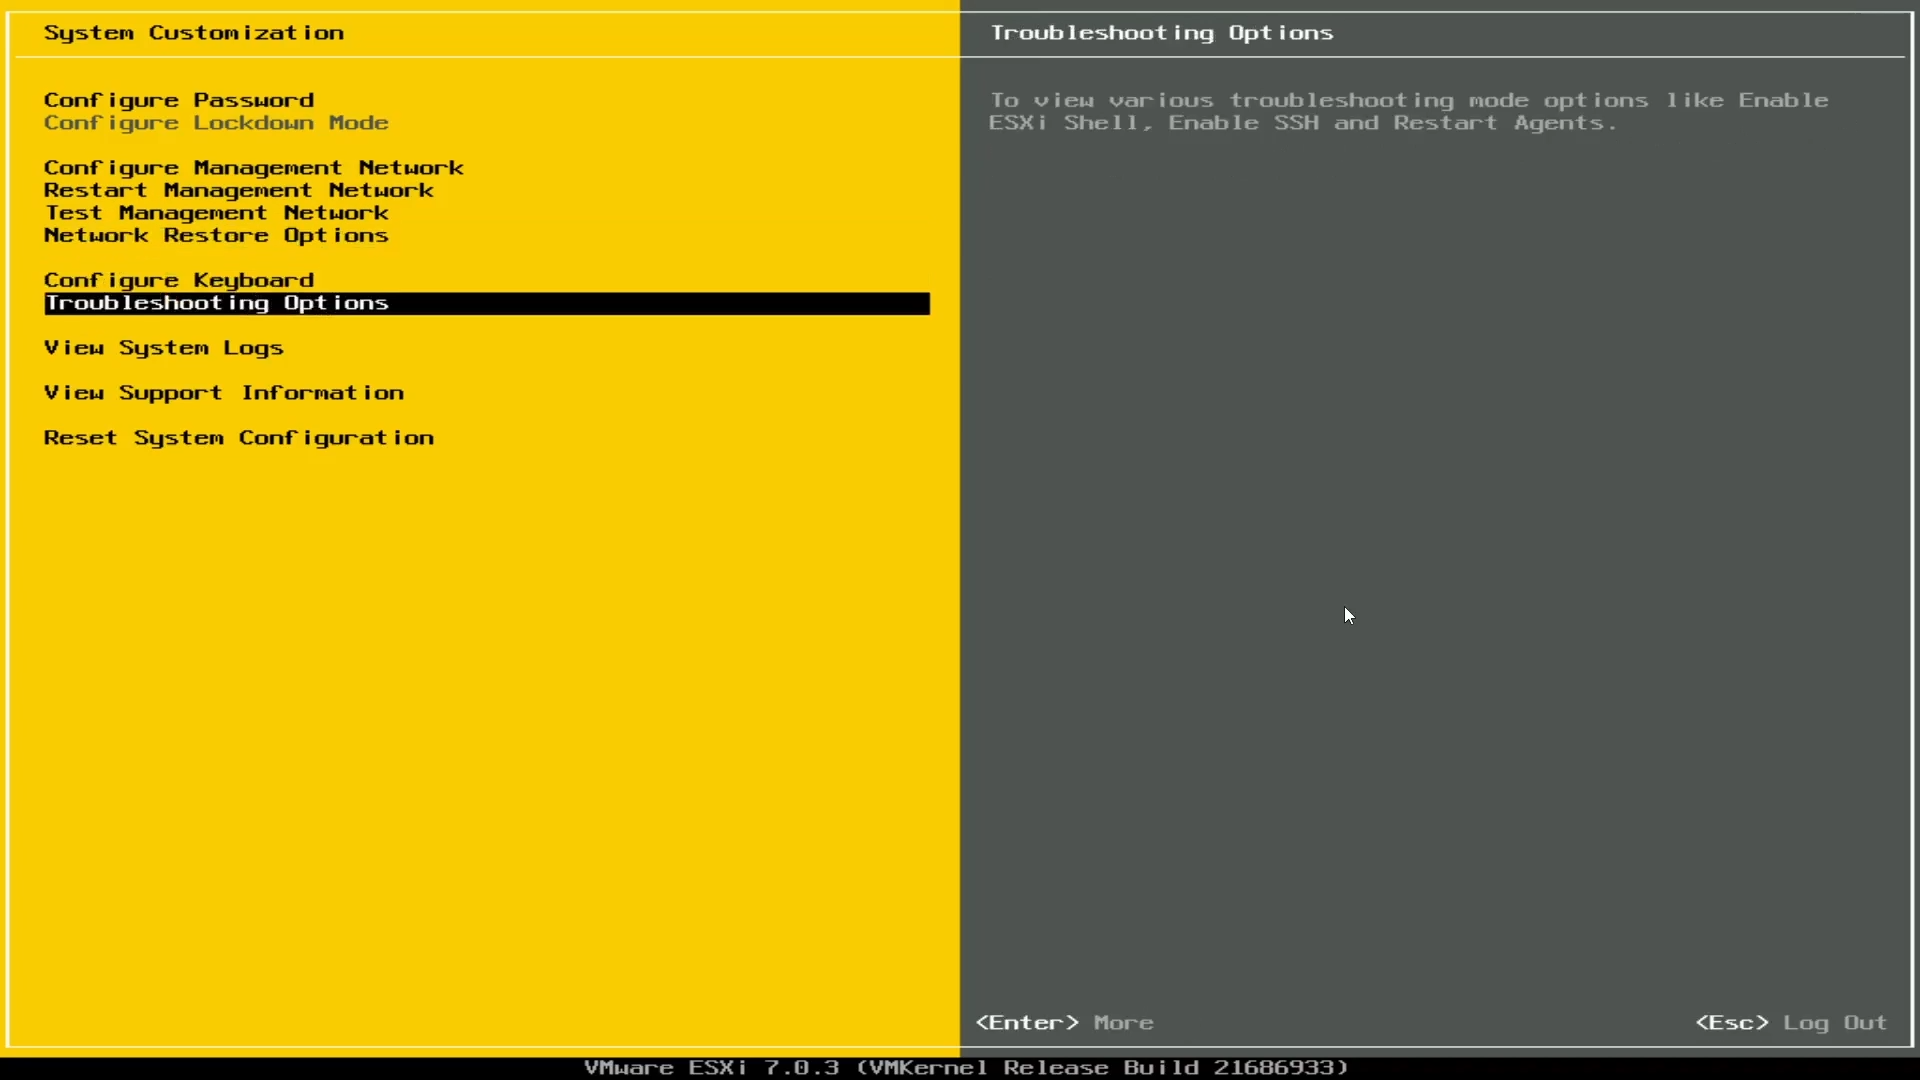
Figure 24: ESXi Troubleshooting Options
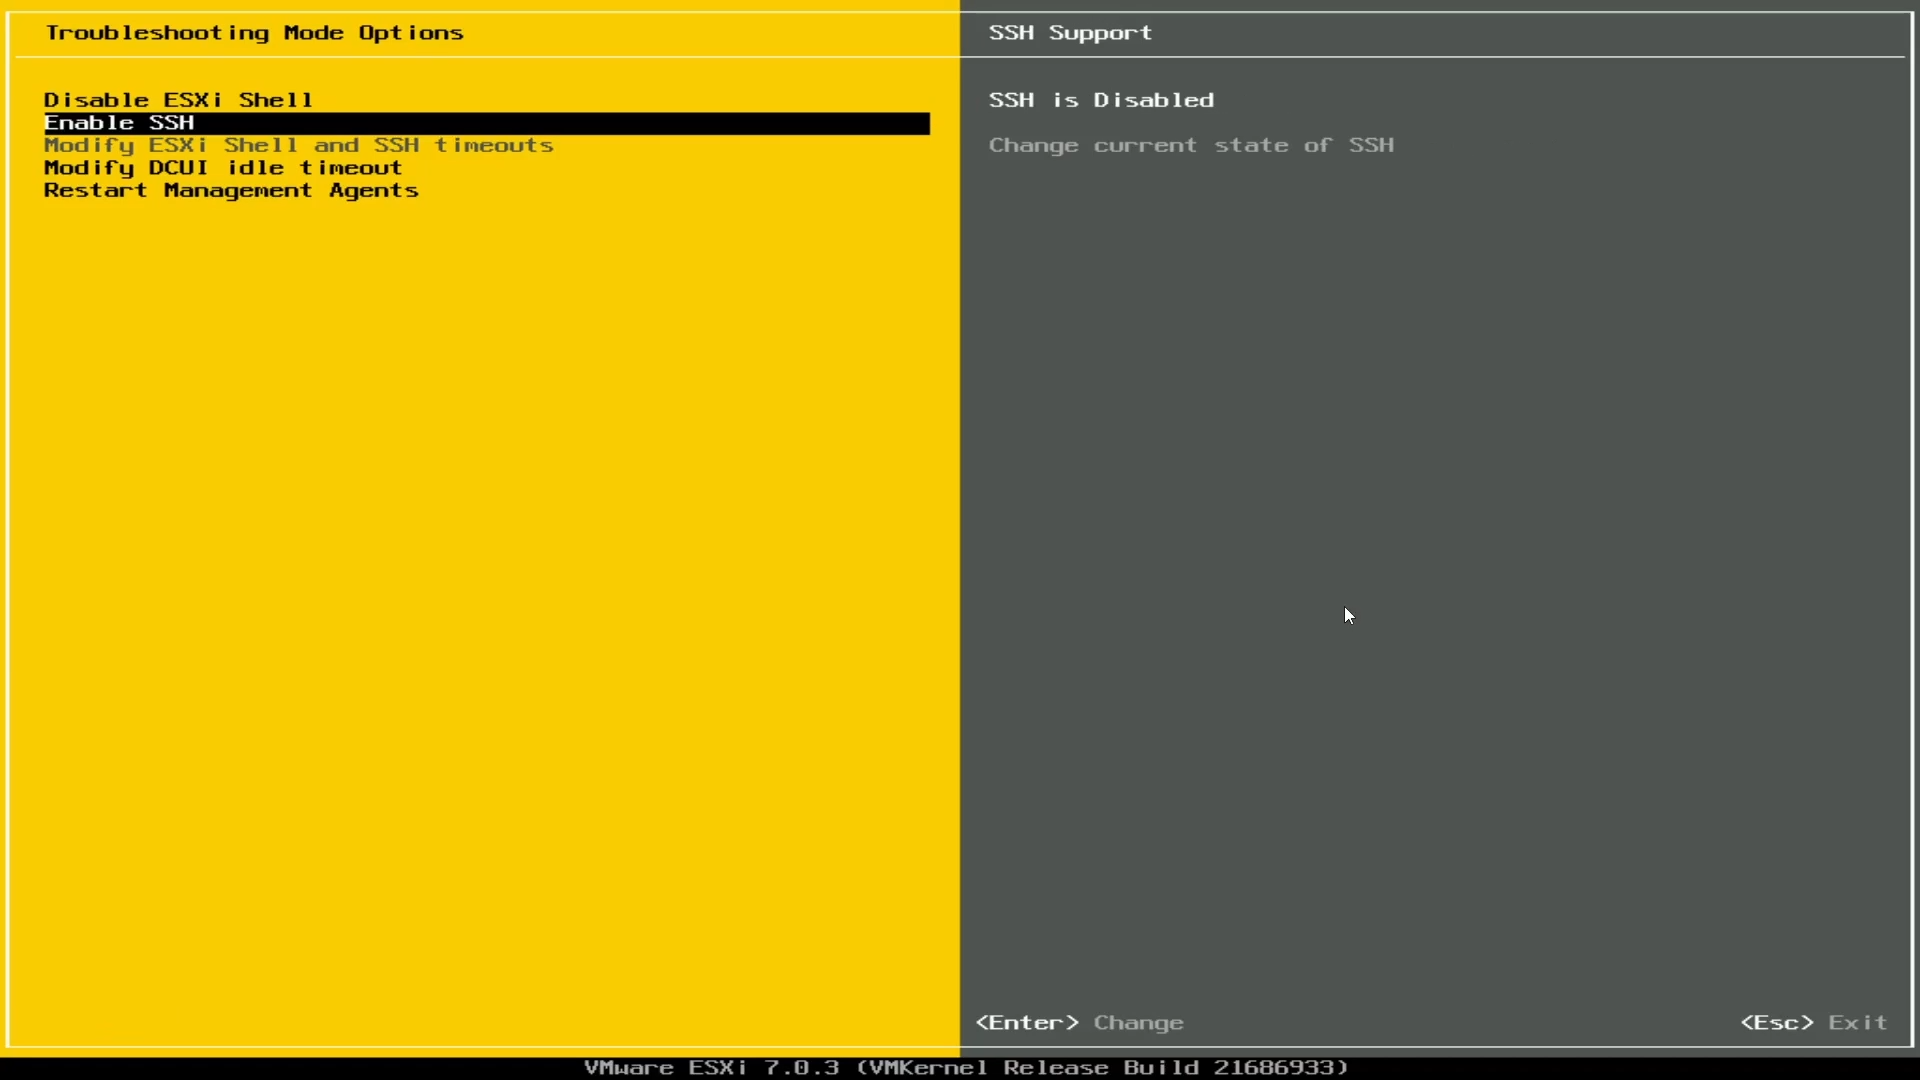
Figure 25: Enable ESXi Shell, Enable SSH
- With SSH Enabled, we cannot transfer using an FTP client, same as in the Linux examples.
- For this example, I use the vSphere user interface to transfer to the datastore.
- Use the IP Address for the host found on the main screen.
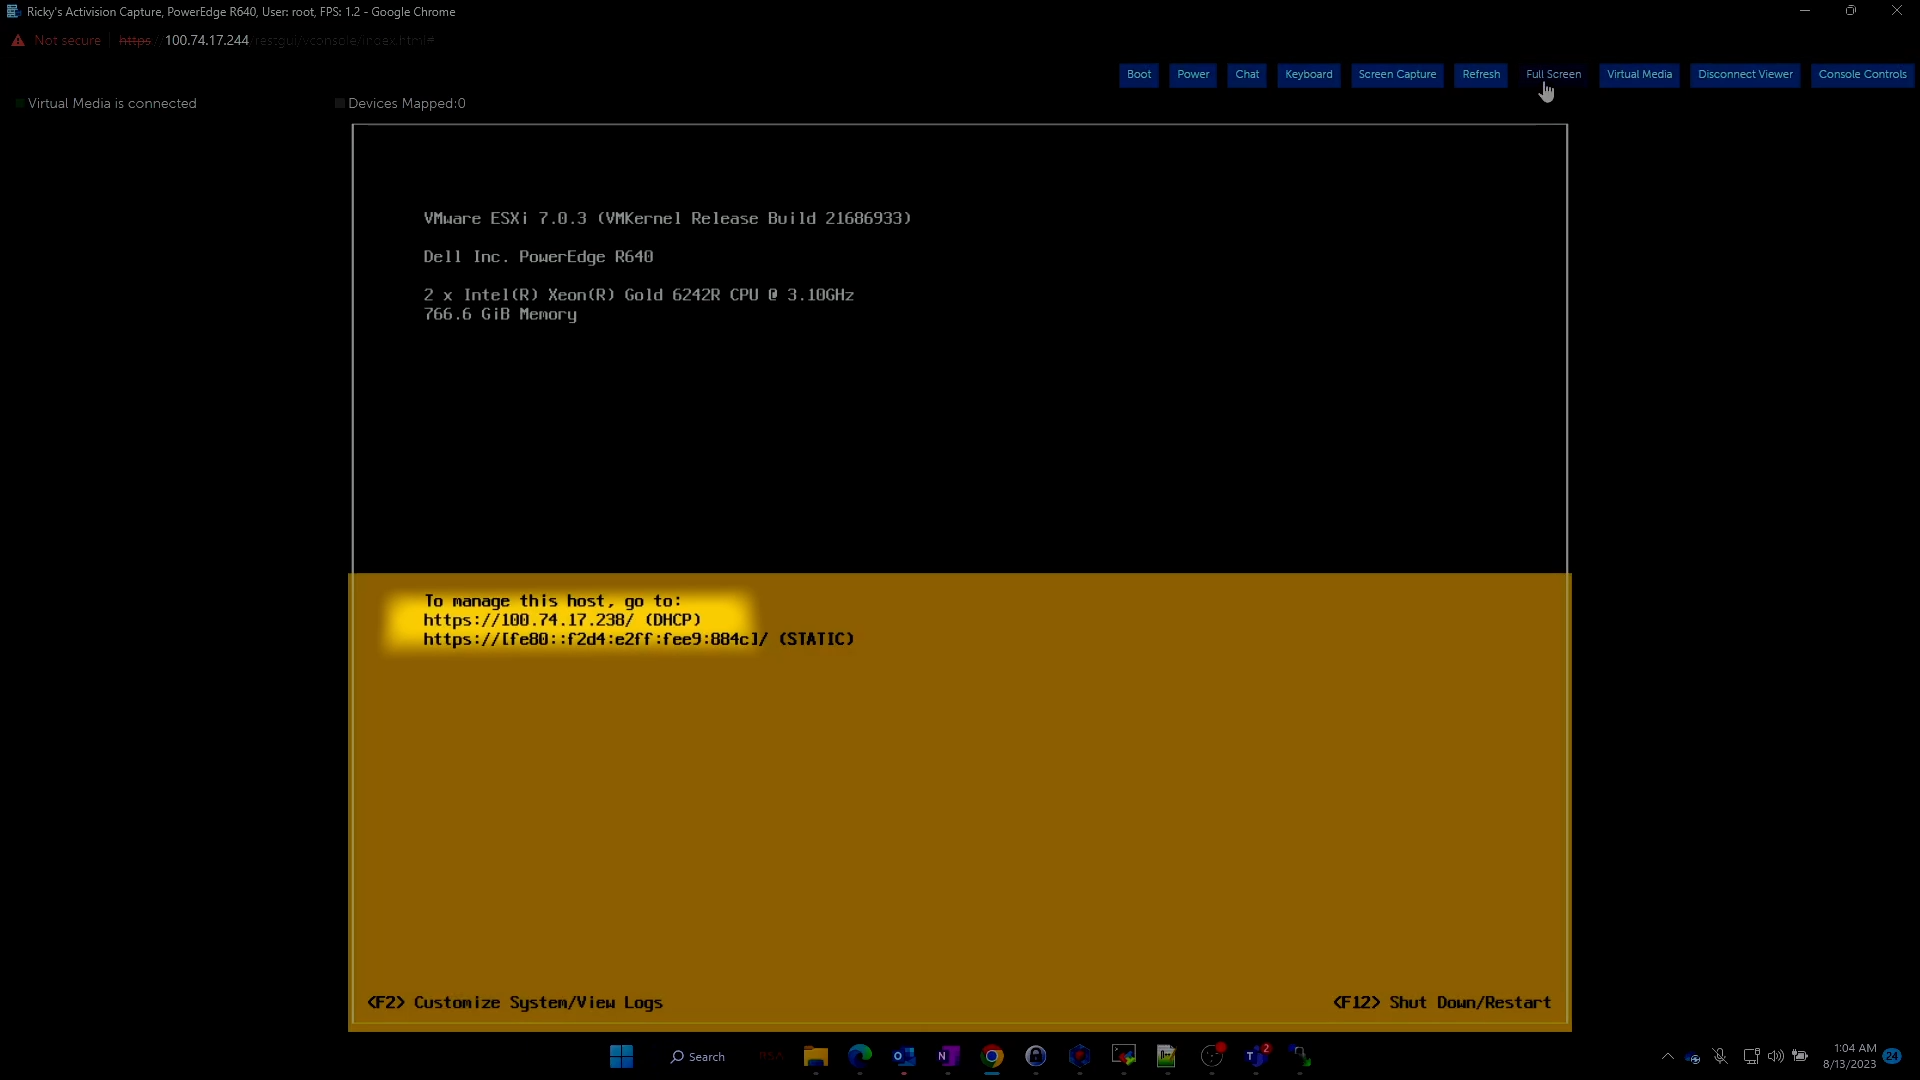
Figure 26: IP Address shown on the ESXi main screen
- Use that IP address and type it in to a browser on any machine on the network. It brings up the login portal, and you can enter the credentials to log in.

Figure 27: ESXi web client login through browser
- Once in, go to Storage, and then click the datastore. Then click the datastore browser
- A submenu appears, and you can then click Upload.
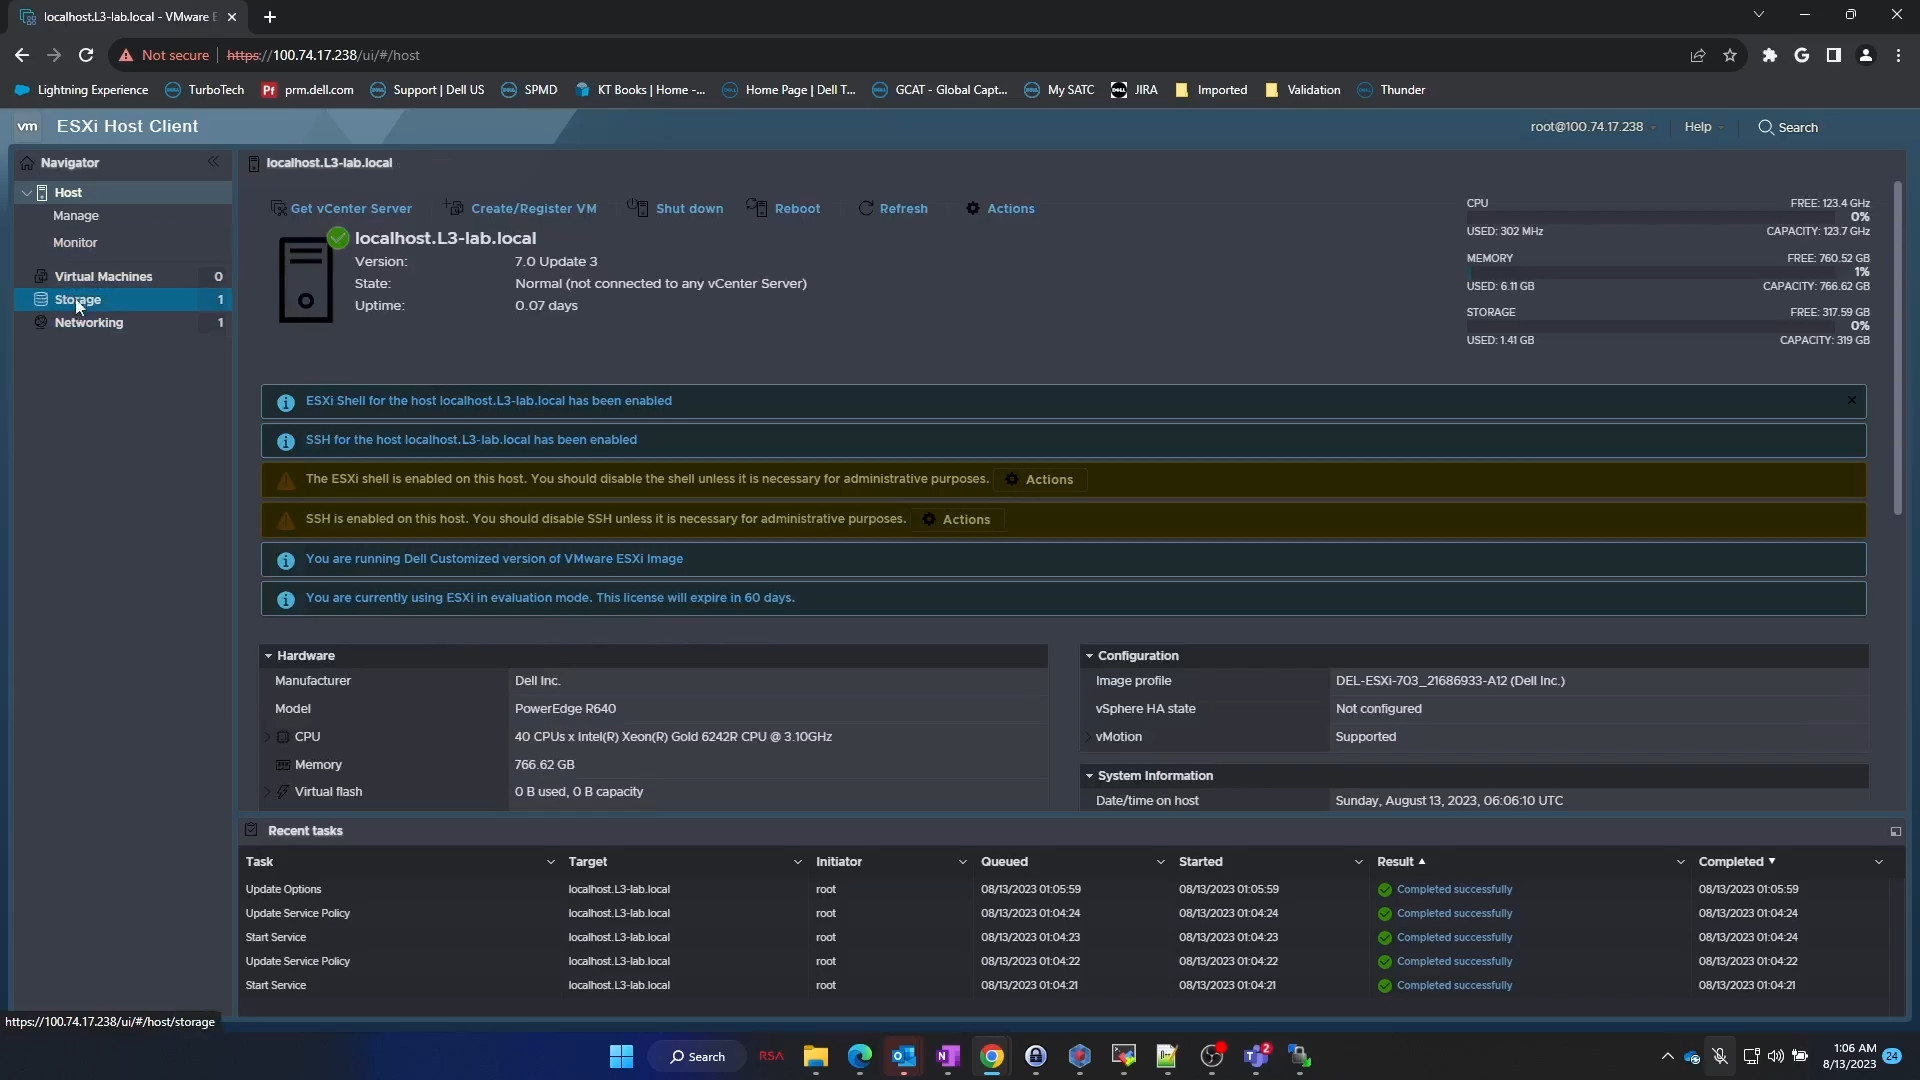
Figure 28: Web Client main screen navigation to Storage.
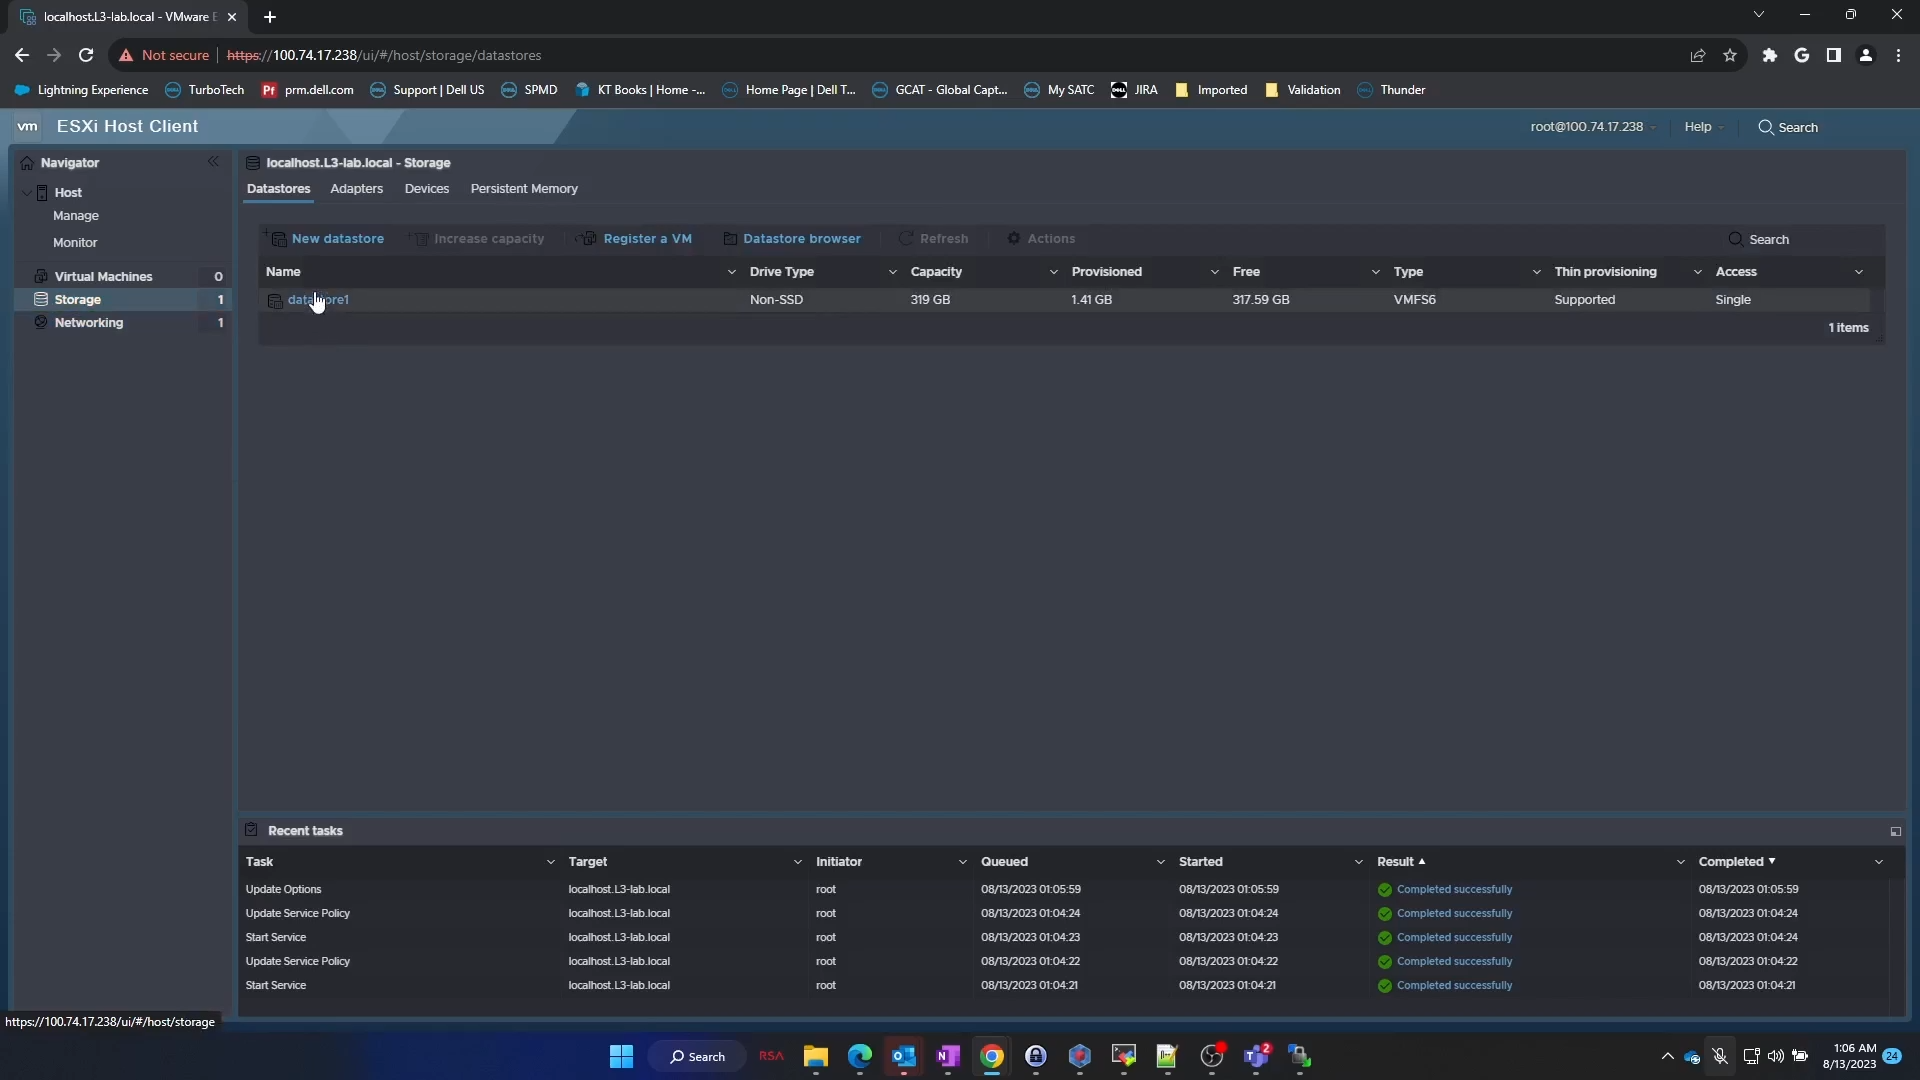
Figure 29: Datastore selection in web client

Figure 30: Datastore Browser
- The VMware install file comes as a .zip file. It is advised to extract this .zip file.
- Once extracted, drill down into the directories to find the
.vibfile.
<Extracted .zip folder> / <ESXi version folder> / vib20 / vmware_perccl64 / .vib file
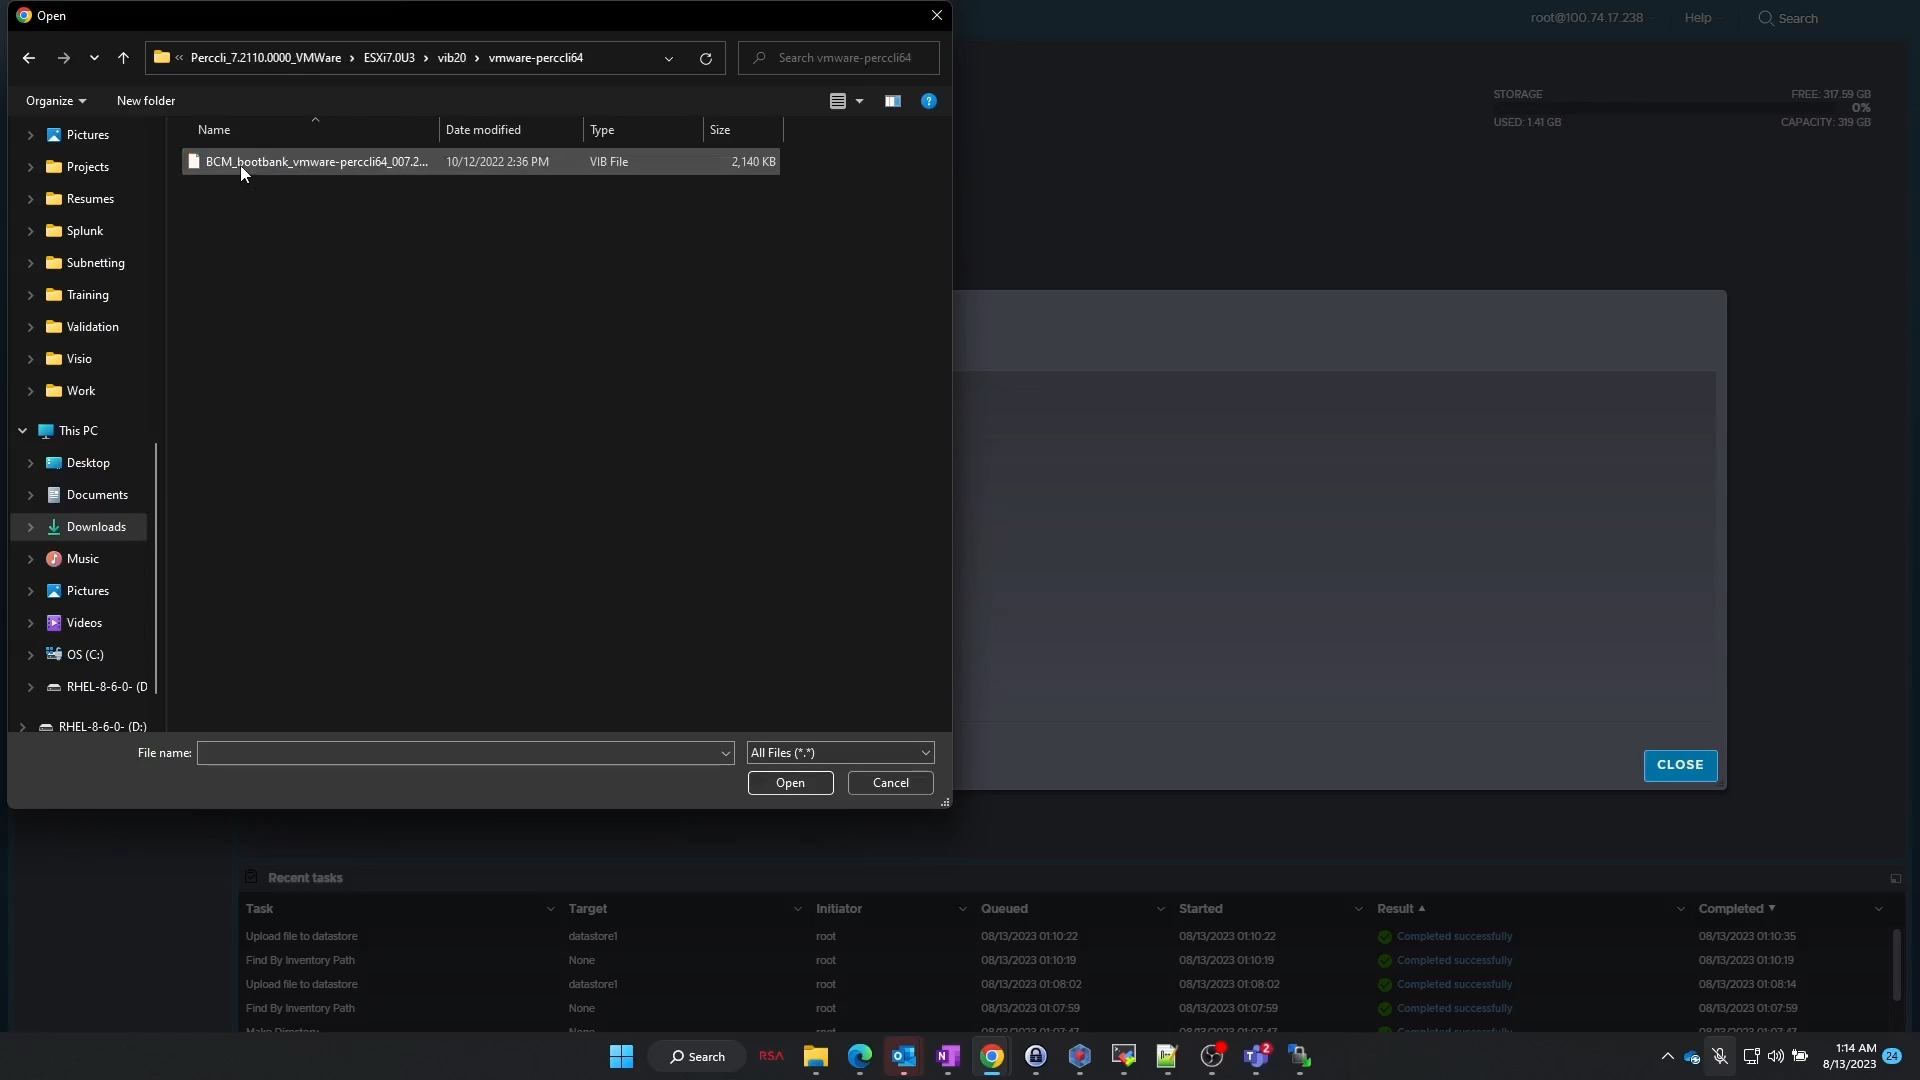
Figure 31: Extraction of ESXi PERCCLI .zip file on Windows workstation
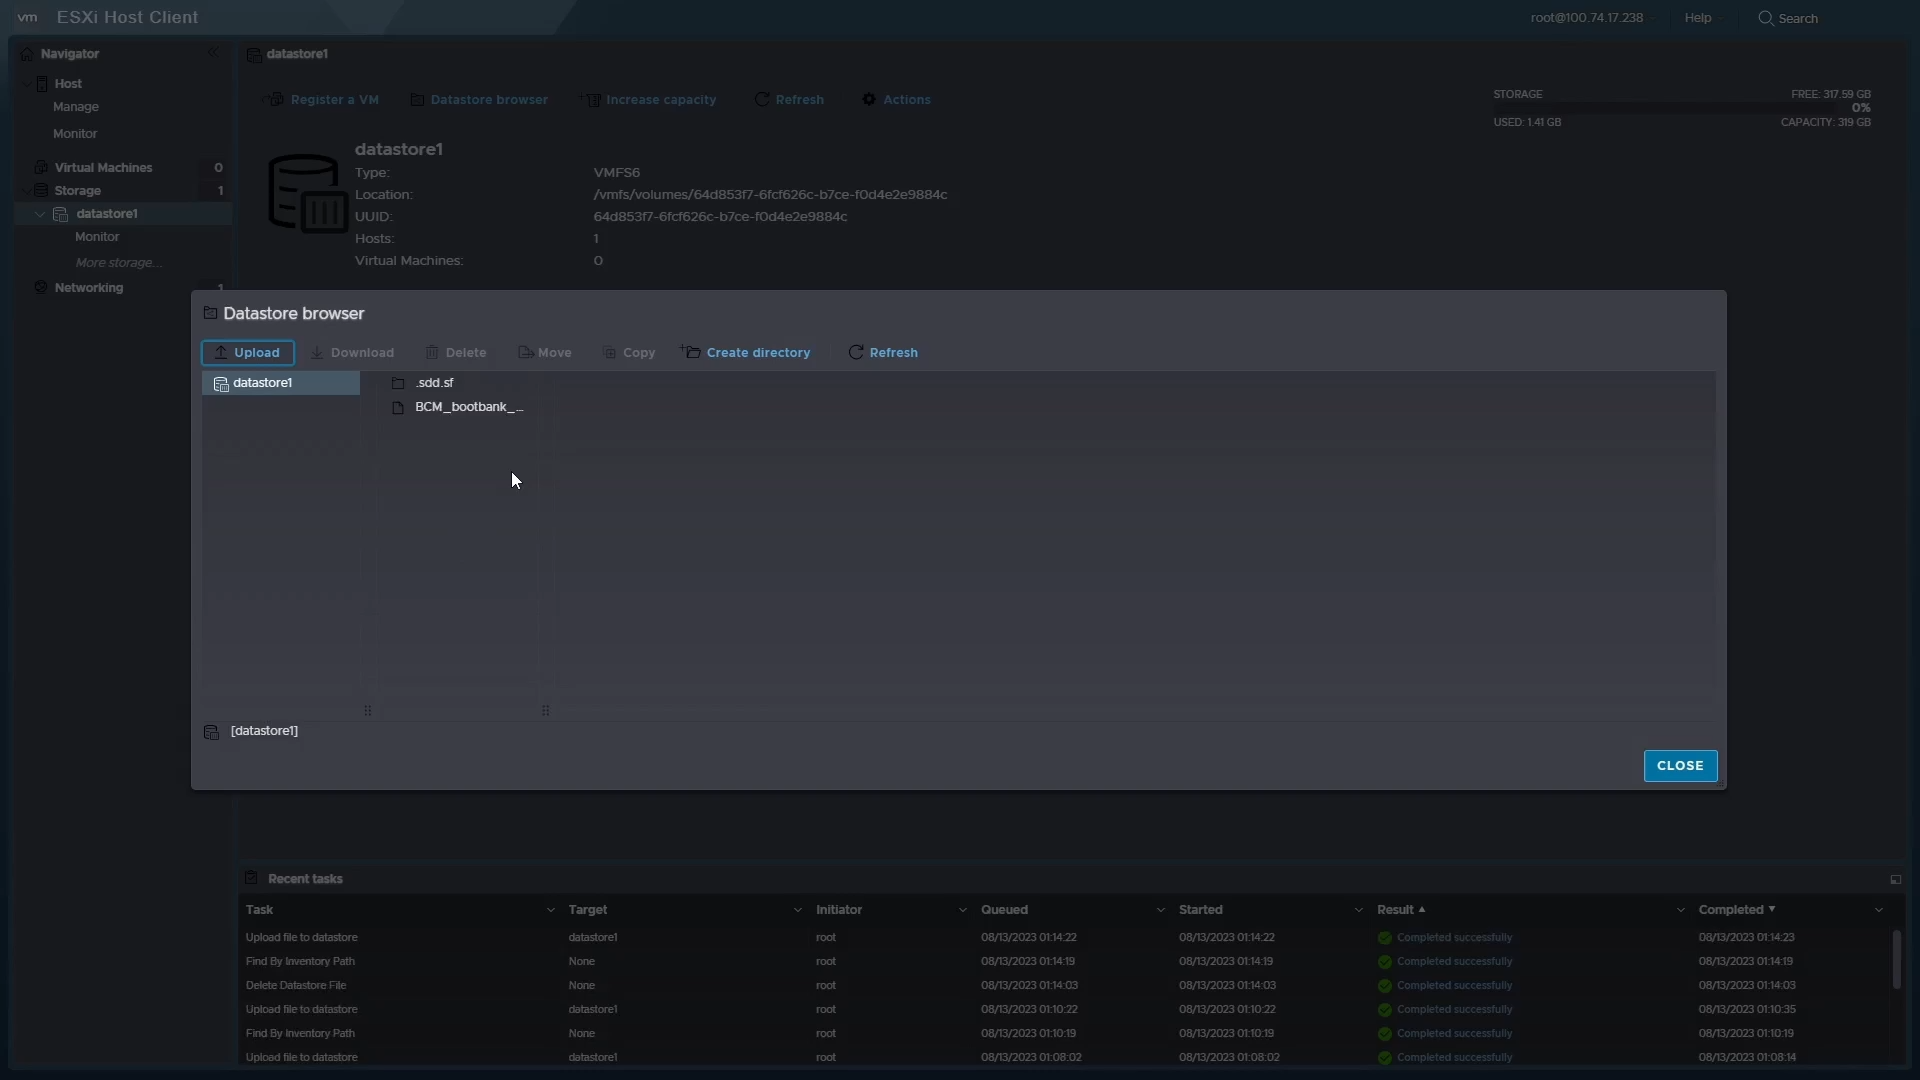
Figure 32: Upload of the VIB file to datastore.
- Now that the file is uploaded, let us go back to the server console.
- We want to access the command-line shell. Press
<Alt> + <F1>to get to the command line, and login.
Install PERCCLI:
- Once logged in, navigate to the datastore directory.
- On this clean install of ESXi with no additional modification, you can navigate to:
/vmfs/volumes/datastore1/
Note:
datastore1 is the default name of this datastore. Customers may have modified this.
- Once there you can use the
lscommand to verify theVIBfile is there.
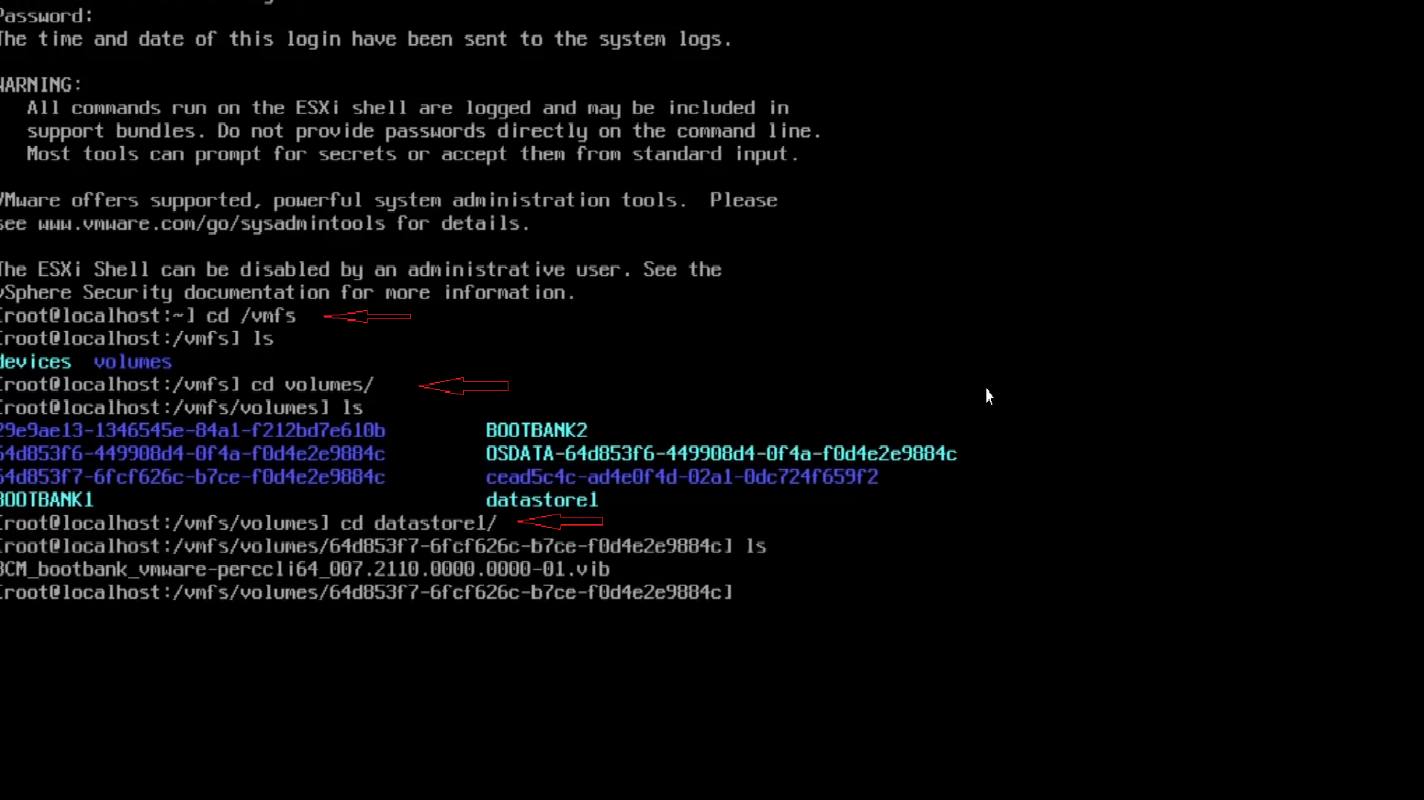
Figure 33: List the content of the datastore to verify a file is uploaded.
- To install, use the command:
# esxcli software vib install -v /vmfs/volumes/datastore1/<filename of .vib file>
- Remember to use <TAB> key to autofill the rest of the filename
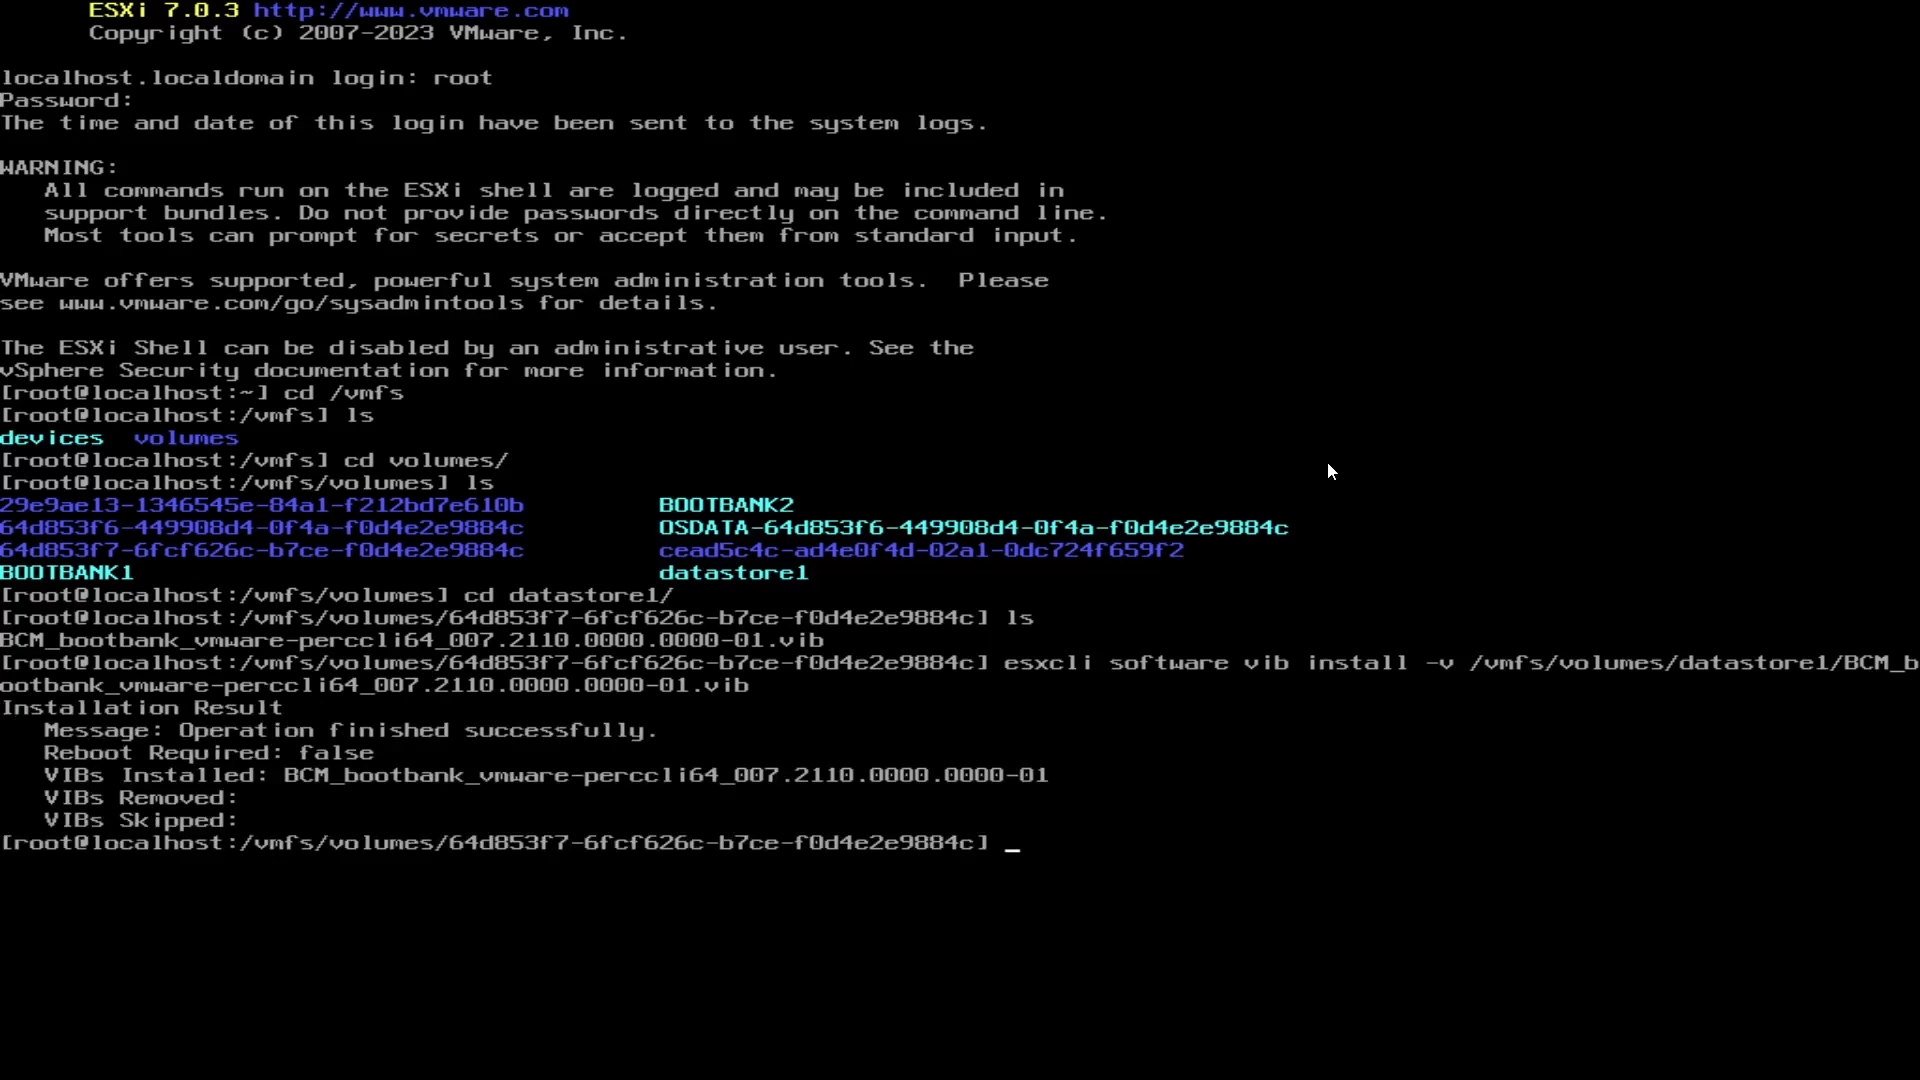
Figure 34: Command to install PERCCLI using the VIB file.
- Now we must navigate to the directory. The directory in ESXi is different than that of Linux installs
- Navigate to:
/opt/lsi/perccli64 - Commands can now be run same as in the Linux examples

Figure 35: Navigation to the PERCCLI directory
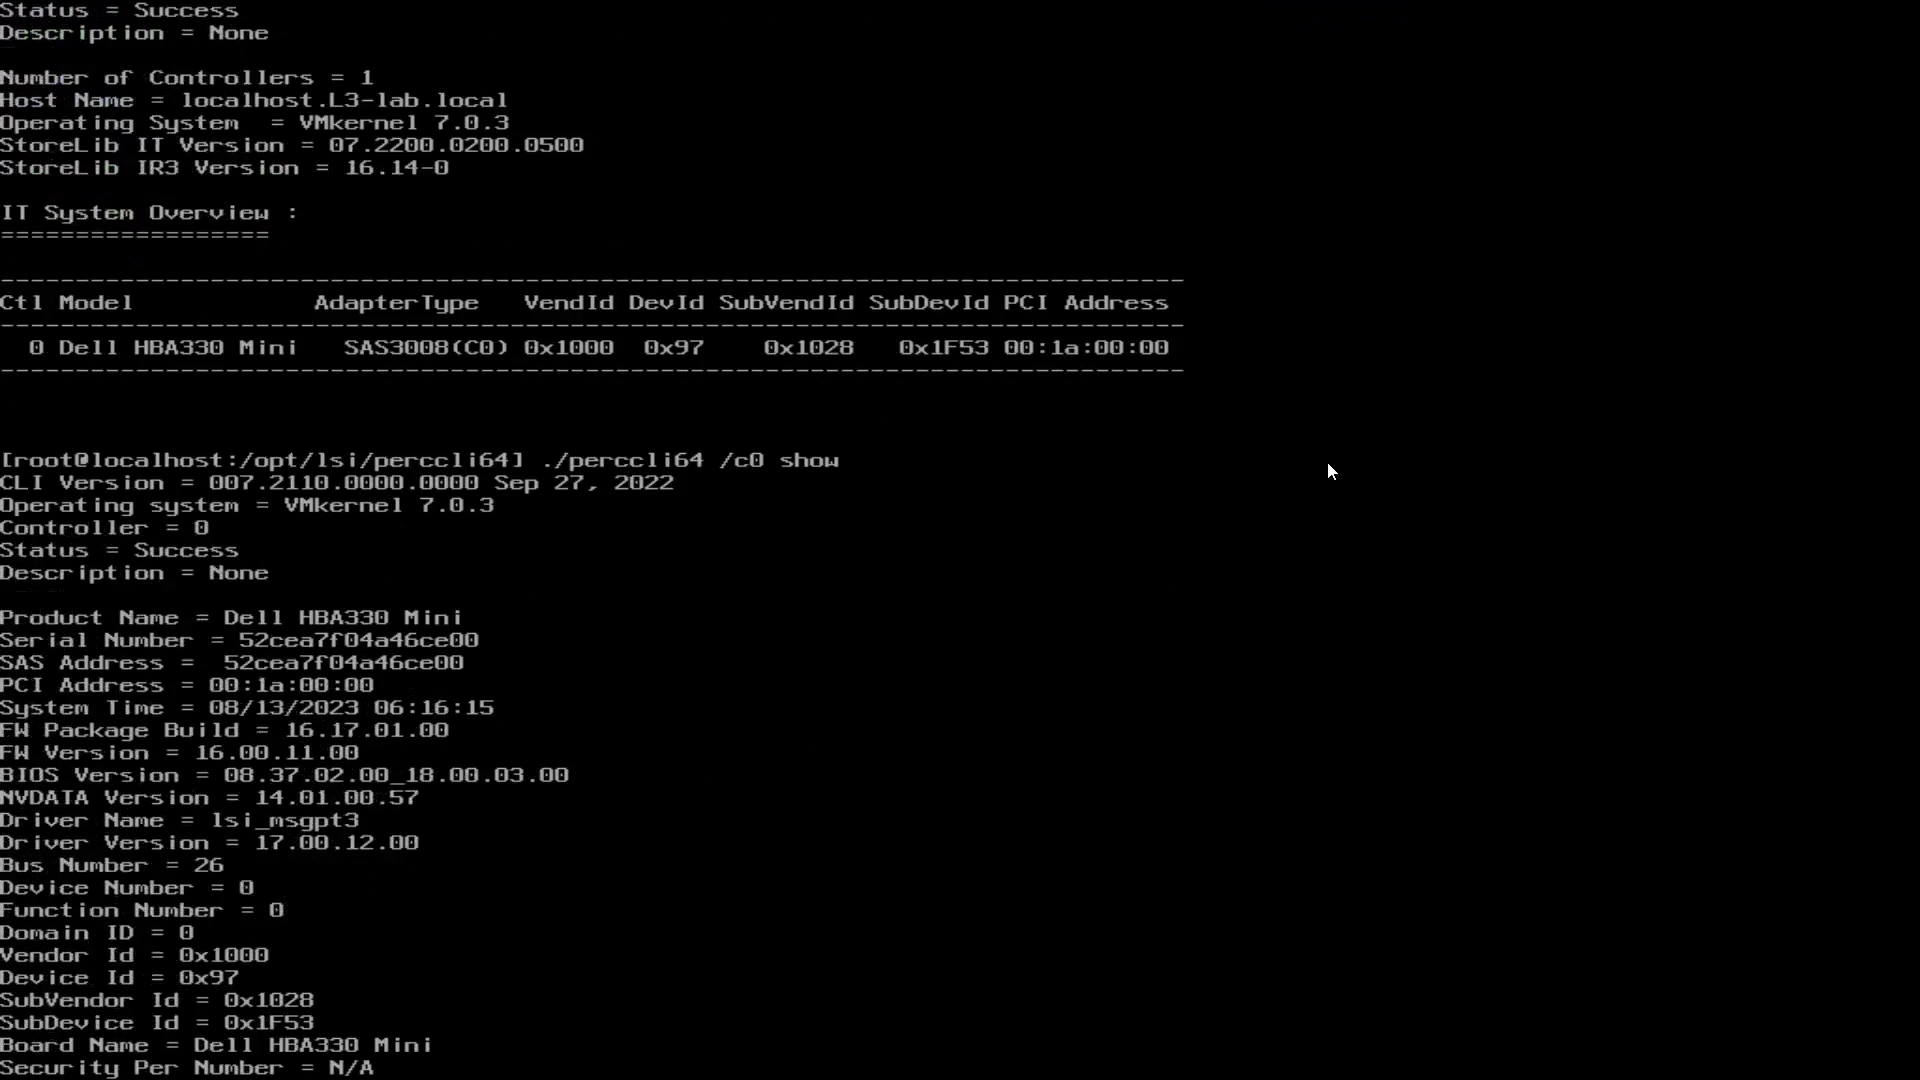
Figure 36: Running PERCCLI commands in the ESXi command shell
4: Installing PERCLI on Windows Server
- Starting by downloading the package from the Dell support website. Once downloaded, run the package and it extracts PERCCLI contents to a folder
- In this example, I changed the default folder to
C:\PERCCLI

Figure 37: Windows PERCCLI utility on Dell support site download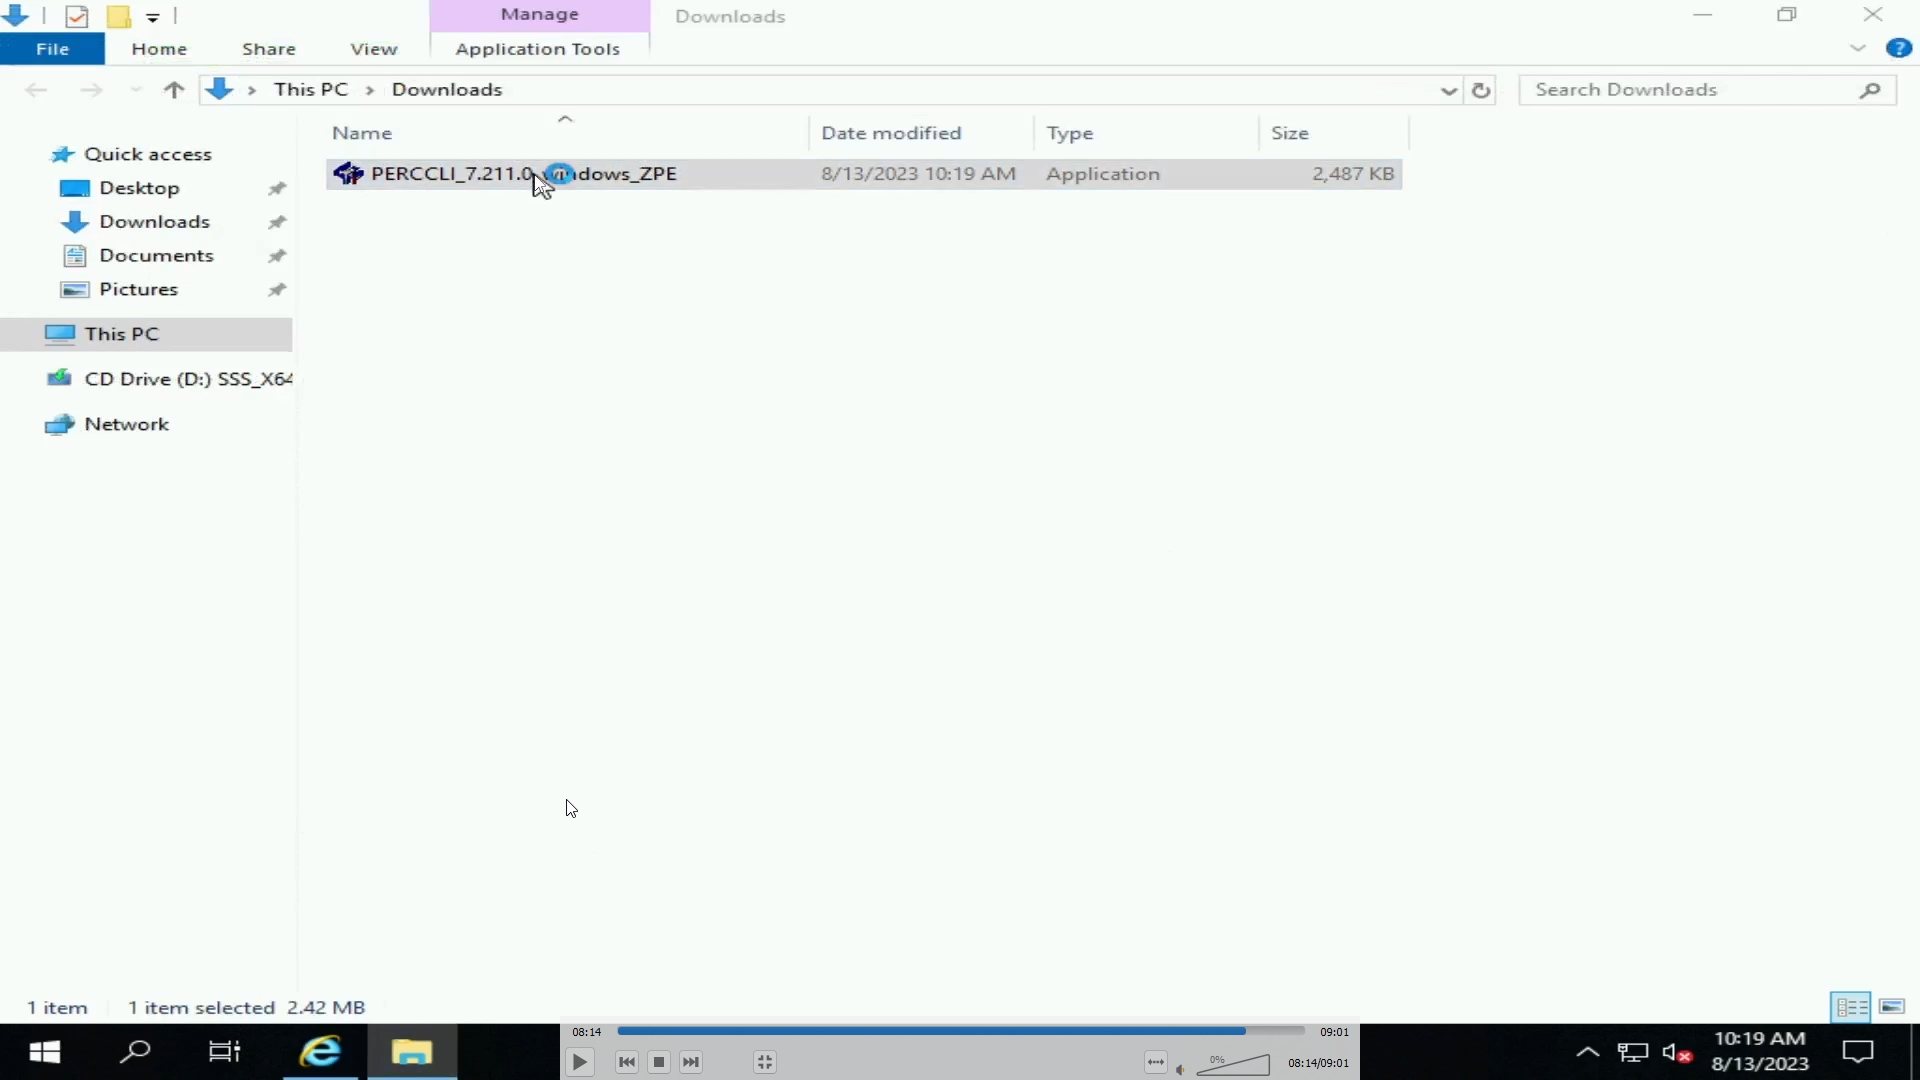
Figure 38: PERCCLI EXE file downloaded on Windows server

Figure 39: Extraction of PERCCLI file
- Navigate to the folder in the command line. One way to do this in to navigate there in the Windows Explorer user interface. Then type "
cmd" on the address bar, and it opens a command line already in that folder - We can then invoke the PERCCLI utility as in other examples
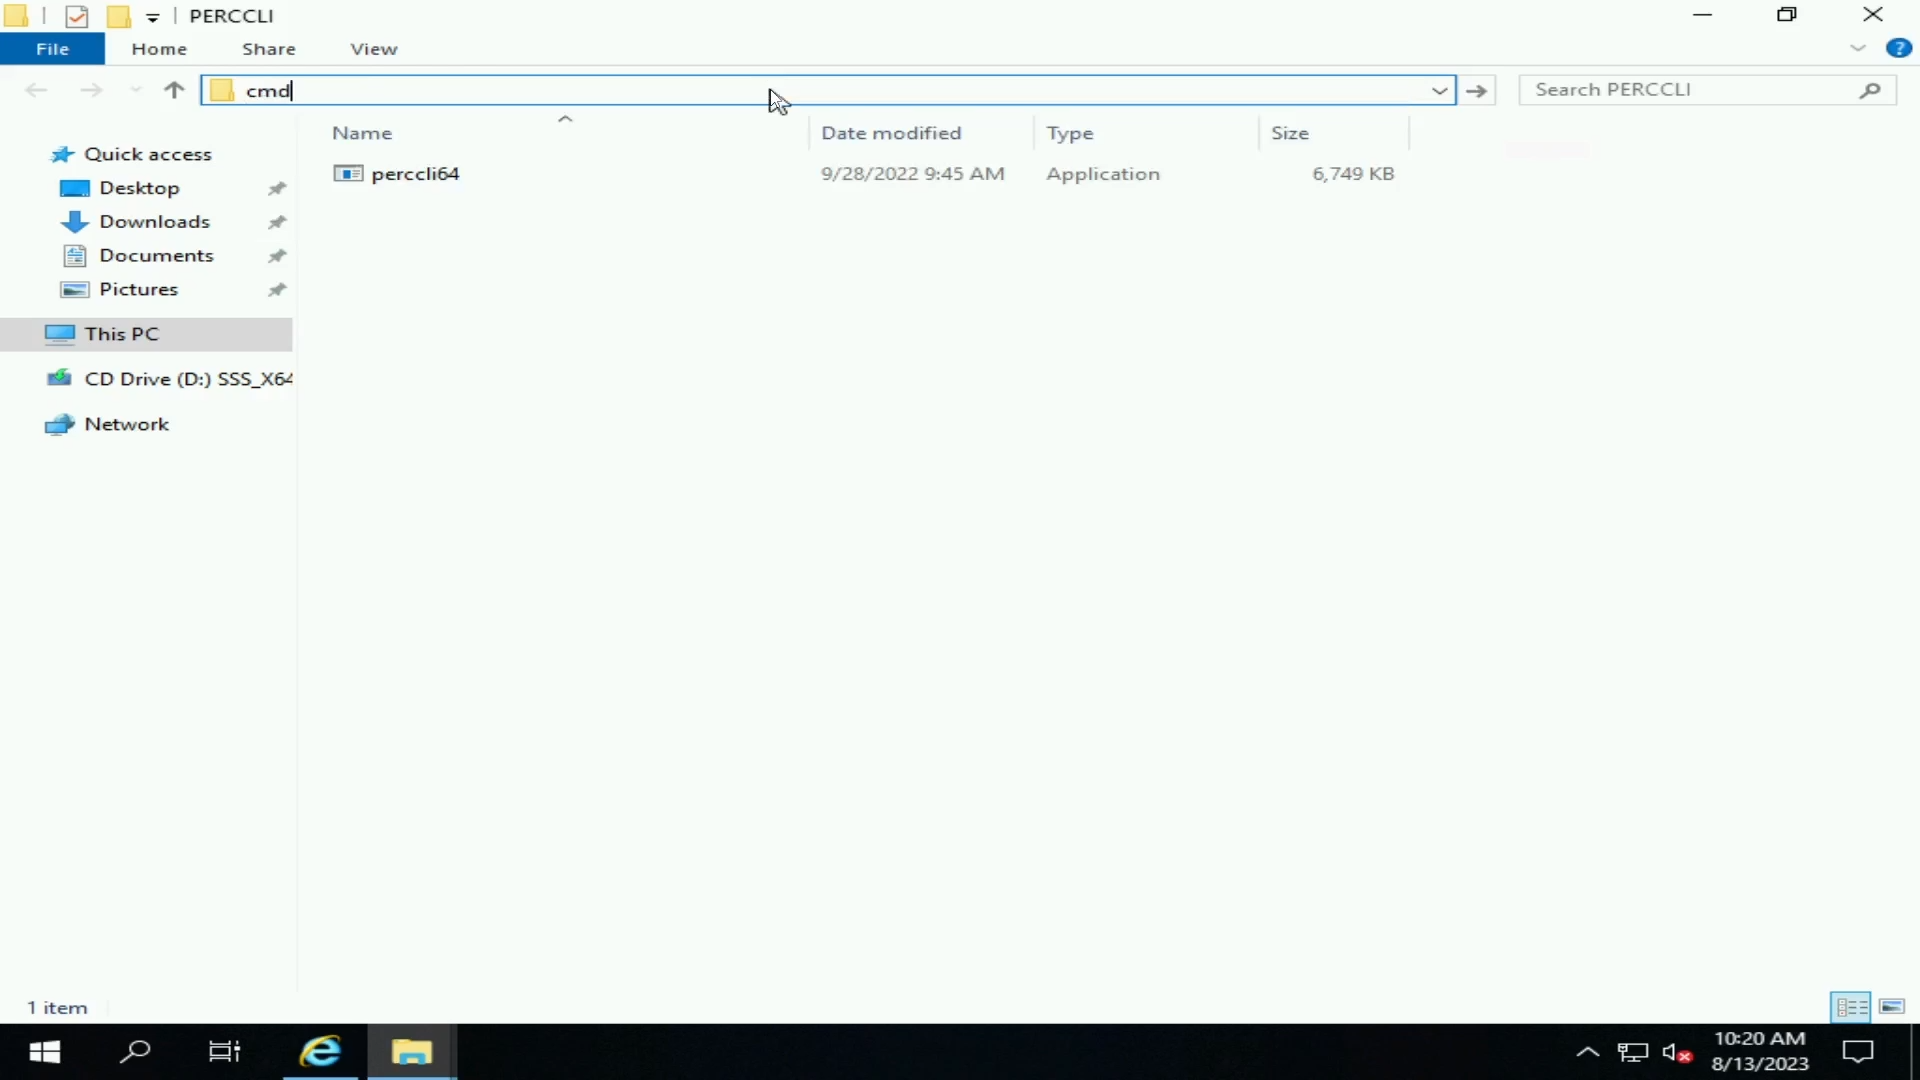
Figure 40: Extracted PERCCLI file
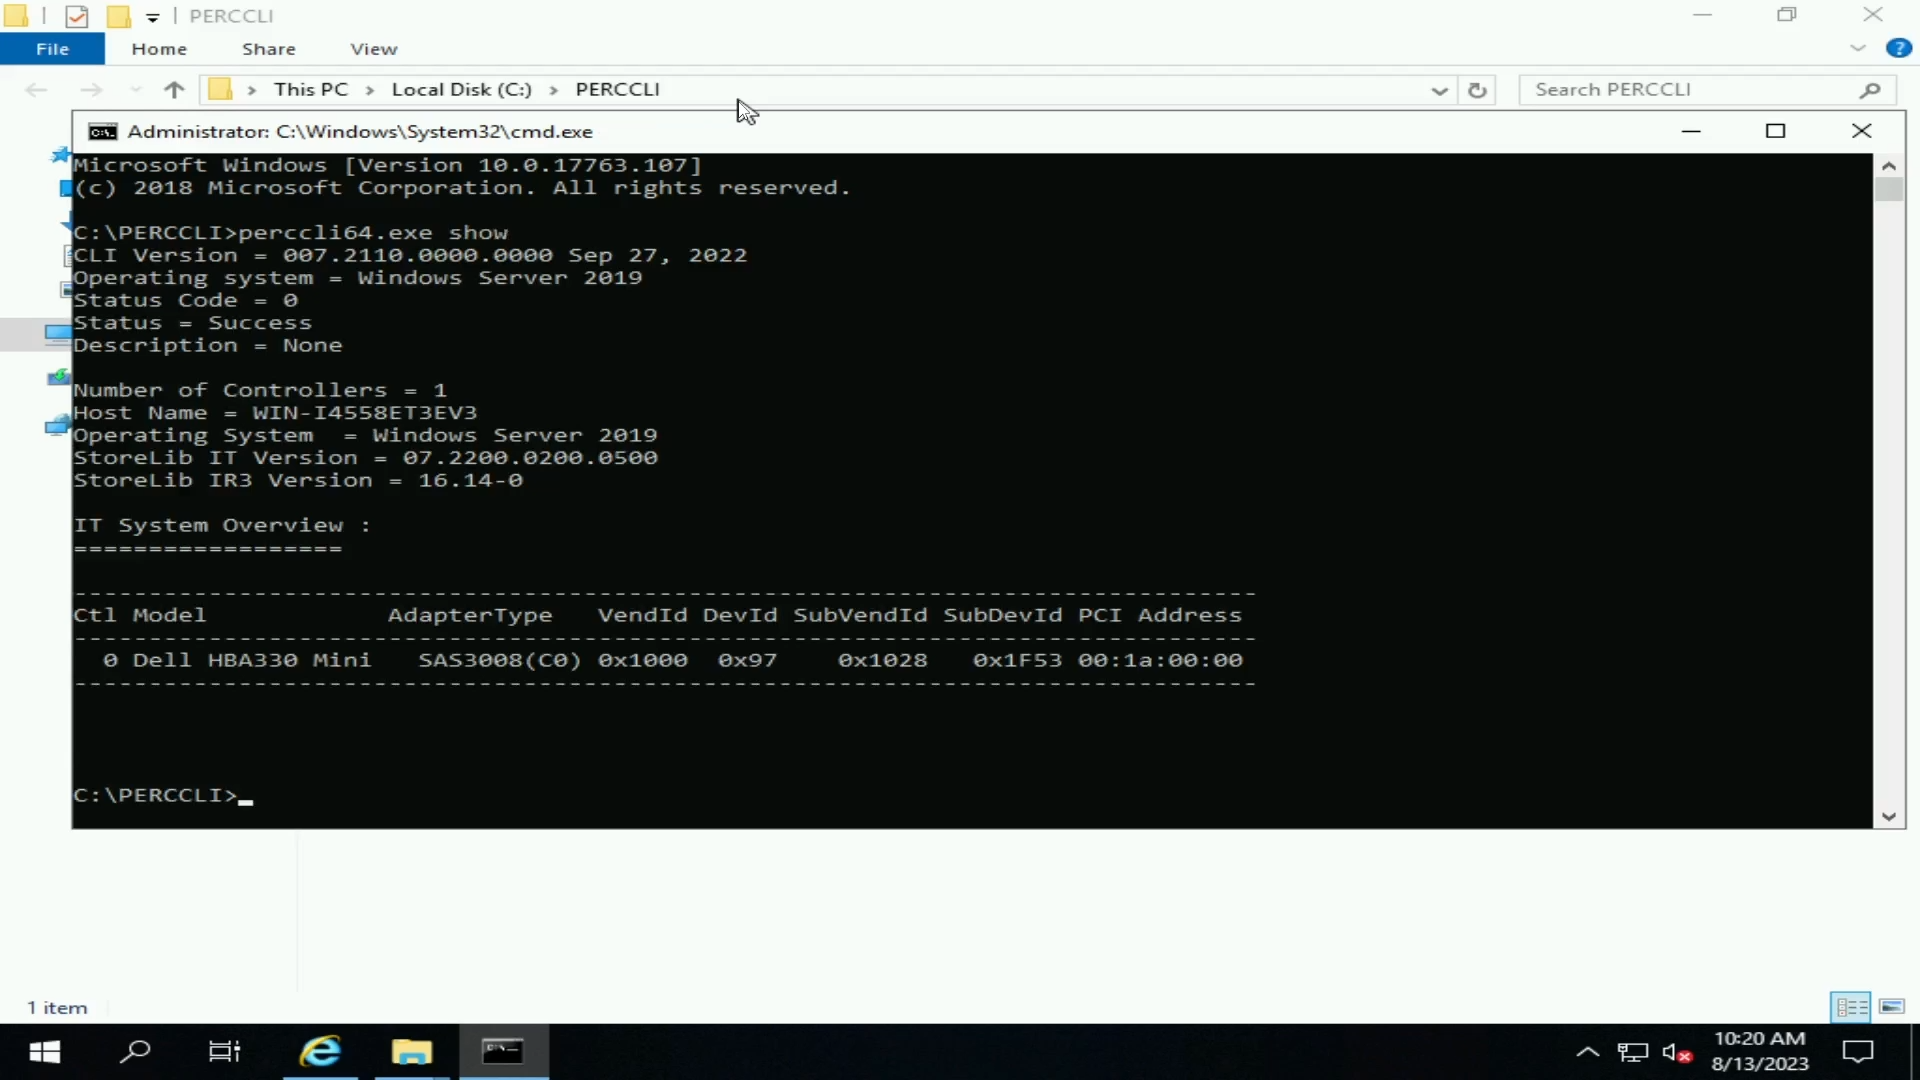
Figure 41: PERCCLI show command
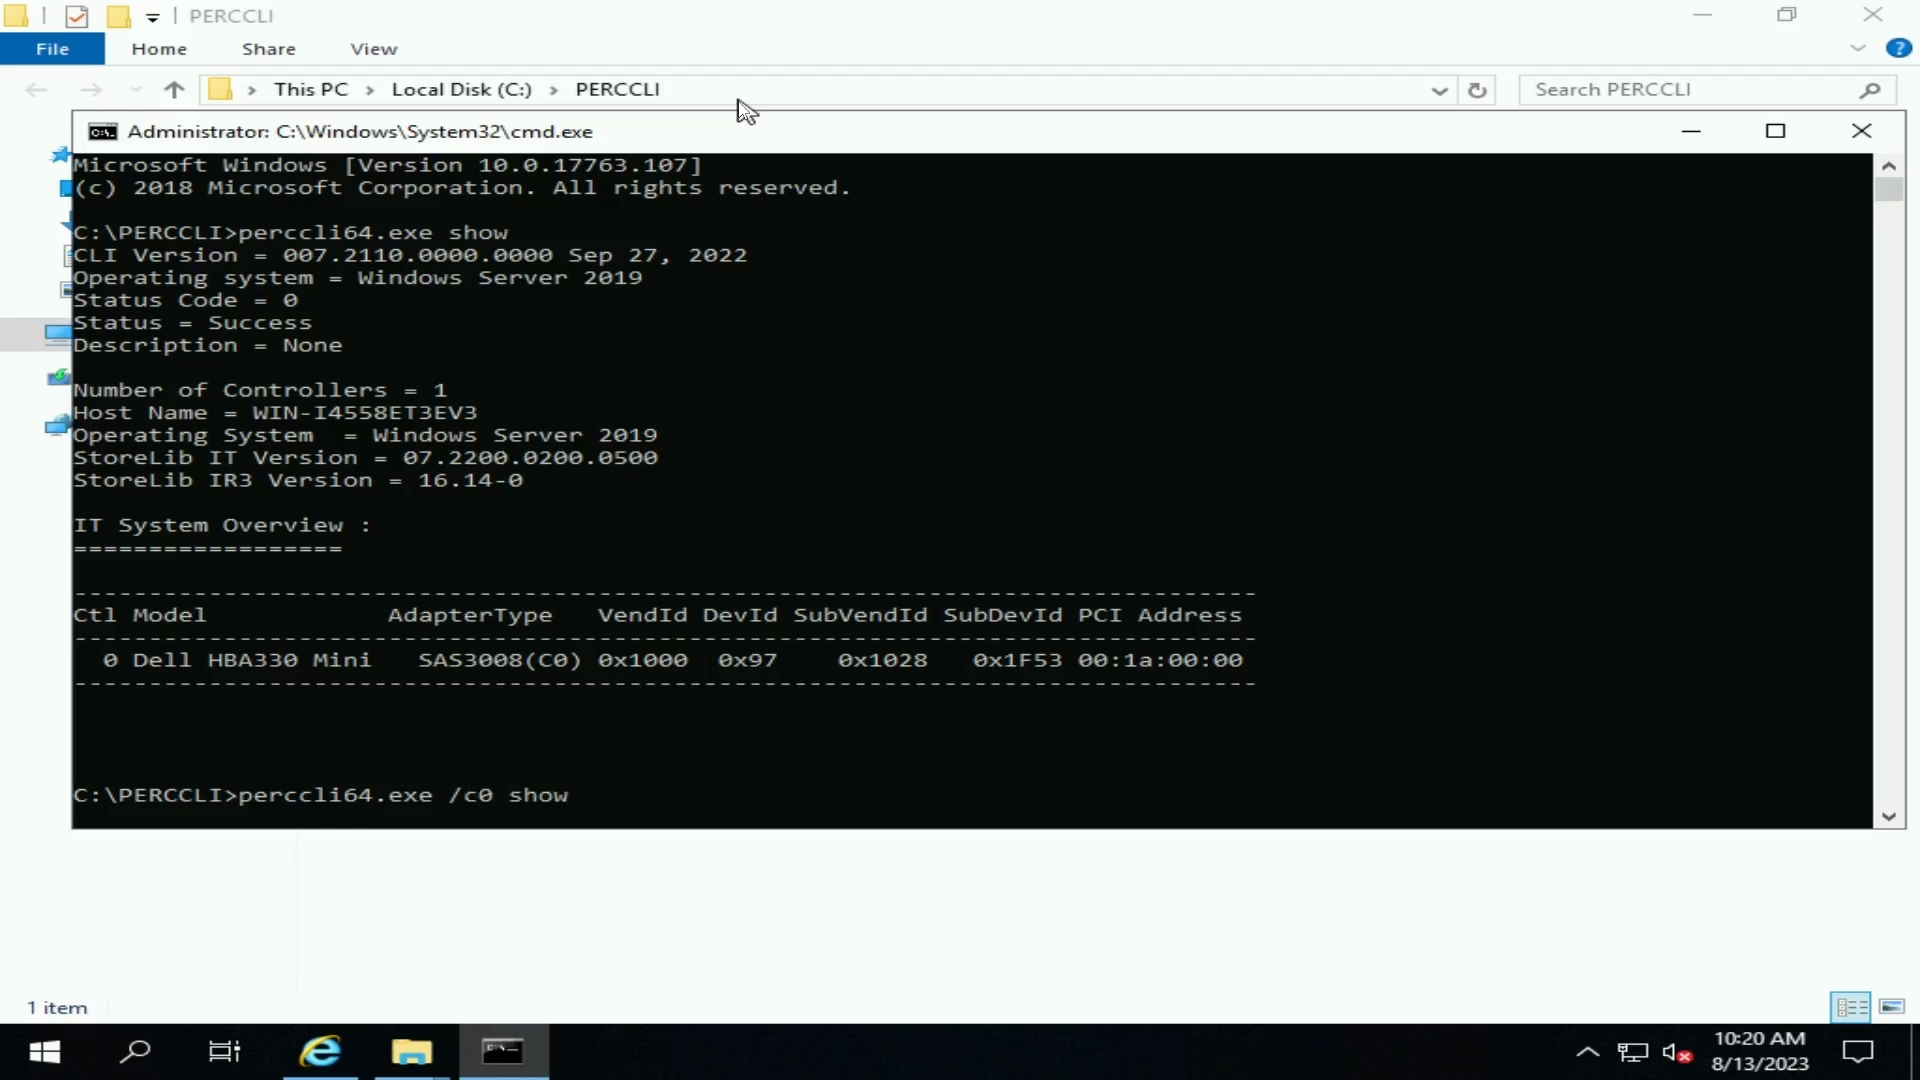
Figure 42: PERCCLI controller show command
受影響的產品
Microsoft Windows Server 2016, Microsoft Windows Server 2019, Microsoft Windows Server 2022, Red Hat Enterprise Linux Version 7, Red Hat Enterprise Linux Version 9, Red Hat Enterprise Linux Version 8, Ubuntu Server LTS, VMware ESXi 6.7.X
, VMware ESXi 7.x, VMware ESXi 8.x
...
產品
PowerEdge RAID Controller H345, PowerEdge RAID Controller H350 Adapter SAS, PowerEdge RAID Controller H355 Front SAS, PowerEdge RAID Controller H355 Adapter SAS, PowerEdge RAID Controller H745, PowerEdge RAID Controller H745P MX
, PowerEdge RAID Controller H750 Adapter SAS, PowerEdge RAID Controller H755 Adapter, PowerEdge RAID Controller H755 MX Adapter, PowerEdge RAID Controller H755N Front NVMe, PowerEdge RAID Controller H755 Front SAS, PowerEdge RAID Controller H965i Adapter, PowerEdge RAID Controller H965i Front, PowerEdge RAID Controller H965i MX, Poweredge C4140, PowerEdge C6420, PowerEdge C6520, PowerEdge C6525, PowerEdge C6615, PowerEdge C6620, PowerEdge FC640, PowerEdge M640, PowerEdge M640 (for PE VRTX), PowerEdge MX5016s, PowerEdge MX740C, PowerEdge MX750c, PowerEdge MX760c, PowerEdge MX840C, PowerEdge R240, PowerEdge R250, PowerEdge R260, PowerEdge R340, PowerEdge R350, PowerEdge R360, PowerEdge R440, PowerEdge R450, PowerEdge R540, PowerEdge R550, PowerEdge R640, PowerEdge R6415, PowerEdge R650, PowerEdge R650xs, PowerEdge R6515, PowerEdge R6525, PowerEdge R660, PowerEdge R660xs, PowerEdge R6615, PowerEdge R6625, PowerEdge R740, PowerEdge R740XD, PowerEdge R740XD2, PowerEdge R7415, PowerEdge R7425, PowerEdge R750, PowerEdge R750XA, PowerEdge R750xs, PowerEdge R7515, PowerEdge R7525, PowerEdge R760, PowerEdge R760XA, PowerEdge R760xd2, PowerEdge R760xs, PowerEdge R7615, PowerEdge R7625, PowerEdge R840, PowerEdge R860, PowerEdge R940, PowerEdge R940xa, PowerEdge R960, PowerEdge RAID Controller H740P, PowerEdge RAID Controller H965e Adapter, PowerEdge T150, PowerEdge T160, PowerEdge T340, PowerEdge T350, PowerEdge T360, PowerEdge T440, PowerEdge T550, PowerEdge T560, PowerEdge T640, PowerEdge XE2420, PowerEdge XE7420, PowerEdge XE7440, PowerEdge XE8545, PowerEdge XE8640, PowerEdge XE9640, PowerEdge XE9680
...
文章屬性
文章編號: 000217748
文章類型: How To
上次修改時間: 10 3月 2025
版本: 7
向其他 Dell 使用者尋求您問題的答案
支援服務
檢查您的裝置是否在支援服務的涵蓋範圍內。