How to Identify the VMware Carbon Black Cloud Endpoint Sensor Version
Summary: Learn step-by-step instructions to identify the version of VMware Carbon Black Cloud Endpoint for Windows, Mac, or Linux.
This article applies to
This article does not apply to
This article is not tied to any specific product.
Not all product versions are identified in this article.
Instructions
Knowing the version of the VMware Carbon Black Cloud Endpoint allows a user to:
- Identify known issues
- Understand workflow changes
- Verify system requirements
Affected Products:
- VMware Carbon Black Cloud Endpoint
Affected Operating Systems:
- Windows
- Mac
- Linux
The version of VMware Carbon Black Cloud Endpoint may be identified from the:
Click the appropriate option for more information.
Windows
Versioning can be determined either through the product user interface (UI) or through RepCLI. Click the appropriate method for more information.
UI
- Log in to the Windows protected device.
- In the Windows System Tray, right-click the Cb Defense icon and then select About.
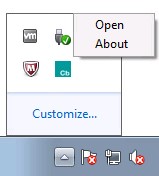
- Record the Version. In the example, 3.4.0.1091 is the Version.
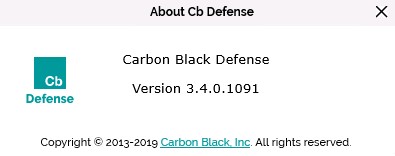 Note: The Version of your sensor may differ from the example screenshot.
RepCLI
The VMware Carbon Black Cloud sensor for Windows includes a command-line tool that is known as RepCLI. RepCLI allows authenticated users to gather information and perform various administrative tasks.
Note:
- RepCLI is in sensor installs for Windows beginning with version 3.3.0.953. The RepCLI executable (
RepCLI.exe) can be found inC:\Program Files\Confer. - For more information about RepCLI, reference What is VMware Carbon Black Cloud RepCLI.
- Log in to the Windows protected device.
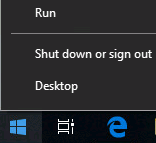
- Right-click the Windows Start menu and then click Run.
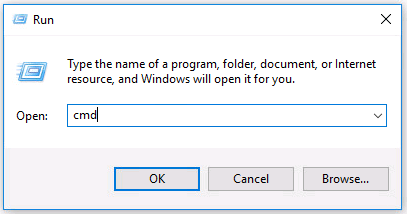
- In the Run UI, type
cmdand then press Enter.
- In Command Prompt, go to the installation directory using the change directory command (
cd <DIRECTORY>) and then press Enter.
 Note: If VMware Carbon Black is installed in the default directory, type
cd "C:\Program Files\Confer"and then press Enter. - Once in the installation directory, type
RepCLI.exe versionand then press Enter.

- Record the version of RepMgr. In the example, 3.5.0.1680 is the product version.
 Note: The version of your sensor may differ from the example screenshot.
Mac
Versioning can be determined either through the product user interface (UI) or through RepCLI. Click the appropriate method for more information.
UI
- Log in to the macOS protected device.
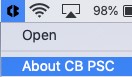
- In the menu bar, right-click the Carbon Black Cloud icon and then select About CB PSC.
- Record the Version. In the example screenshot, 3.3.3.35 is the Version.
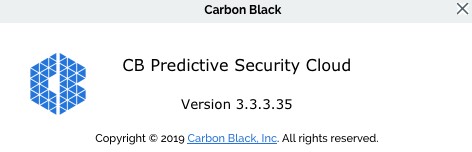 Note: The version of your sensor may differ from the example screenshot.
RepCLI
RepCLI is a command-line tool that allows superusers to locally manage certain sensor functions, such as forcing cloud check-ins and printing diagnostic info.
Note:
- RepCLI is in sensor installs for macOS versions beginning with 3.5.
- For more information about RepCLI, reference What is VMware Carbon Black Cloud RepCLI.
- Log in to the macOS protected device.
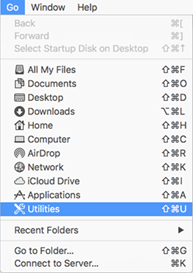
- From the Apple menu, click Go and then select Utilities.
- In the Utilities menu, double-click Terminal.
- In Terminal, go to the installation directory using the change directory command (
CD <DIRECTORY>) and then press Enter.
 Note: If VMware Carbon Black is installed in the default directory, type
cd /Applications/VMware\ Carbon\ Black\ Cloud/repcli.bundle/Contents/MacOSand then press Enter. - Type
sudo ./repcli statusand then press Enter.

- Record the Version. In the example, 3.5.1.23 is the product version.
 Note: The version of your sensor may differ from the example screenshot.
Linux
Versioning can be determined through Terminal.
- Log in to the Linux protected device.
- Open Terminal.

- In Terminal, type
/opt/carbonblack/psc/bin/cbagentd --versionand then press Enter.Note: Version requires two dashes (-). See the example below for clarification. - Record the version. In the example, the version is 2.4.0.3.
 Note: The version of your sensor may differ from the example screenshot.
Cloud
Versioning can be determined through the VMware Carbon Black Cloud UI.
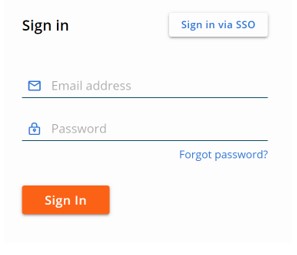
- In a web browser, go to [REGION].conferdeploy.net.
Note: [REGION] = Region of tenant
- Americas = https://defense-prod05.conferdeploy.net/
- Europe = https://defense-eu.conferdeploy.net/
- Asia Pacific = https://defense-prodnrt.conferdeploy.net/
- Australia and New Zealand = https://defense-prodsyd.conferdeploy.net
- Americas = https://defense-prod05.conferdeploy.net/
- Sign In to the VMware Carbon Black Cloud.
- In the left menu pane, click Inventory and then click Endpoints.
 Note: The layout in the example may differ slightly from your environment.
 - Locate the targeted DEVICE NAME.
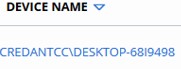 Note: The example DEVICE NAME will differ in your environment.
 - Record the listed SENSOR version. In the example, 3.4.0.1091 is the version.
 Note: The version of your sensor may differ from the example screenshot.
To contact support, reference Dell Data Security International Support Phone Numbers.
Go to TechDirect to generate a technical support request online.
For additional insights and resources, join the Dell Security Community Forum.
Affected Products
VMware Carbon BlackArticle Properties
Article Number: 000126764
Article Type: How To
Last Modified: 19 Apr 2026
Version: 13
Find answers to your questions from other Dell users
Support Services
Check if your device is covered by Support Services.