How to Configure Proxy Settings in Dell Security Management Server Virtual
Summary: Learn how to configure proxy settings in Dell Security Management Server Virtual (formerly Dell Data Protection Virtual Edition) with these instructions.
Instructions
This article covers how to configure proxy settings in Dell Security Management Server Virtual (formerly Dell Data Protection | Virtual Edition).
Affected Products:
- Dell Security Management Server Virtual
- Dell Data Protection Virtual Edition
Dell Security Management Server Virtual proxy settings may require configuration to:
- Download virtual appliance updates.
- Validate on-the-box product licenses.
- Communicate with the Advanced Threat Prevention (ATP) tenant.
- Volume product licenses do not require external validation.
- ATP Tenant is only used with Dell Endpoint Security Suite Enterprise.
- Proxy settings may require configuration for more than one function.
Click Virtual Appliance Updates or Product Licenses and Advanced Threat Protection (ATP) Tenant for more information about setting the proxy.
Virtual Appliance Updates
The proxy settings of Dell Security Management Server Virtual vary between v9.11.0 to Later, v9.7.0 to 9.10.1, v9.5.0 to 9.6.0, v9.0.0 to 9.4.1, and v8.2.0 to 8.5.0. Click the appropriate version for specific steps. For versioning information, reference How to Identify the Dell Data Security Server Version.
v9.11.0 and Later
- Log in to the Dell Security Management Server Virtual administration console.
 Note:
Note:- The default credentials for Dell Security Management Server Virtual are:
- Username:
delluser - Password:
delluser
- Username:
- An administrator can change the default password within the product’s virtual appliance menu.
- The default credentials for Dell Security Management Server Virtual are:
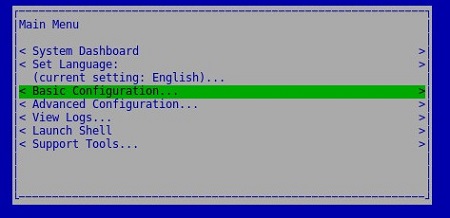
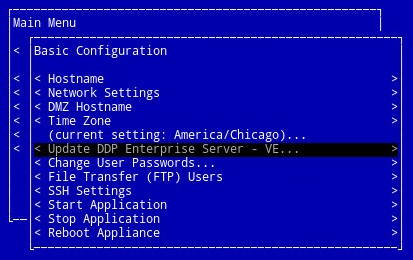
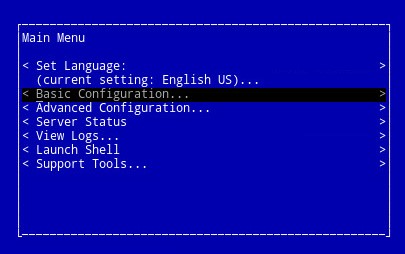
- From the Main Menu, select Basic Configuration and then press Enter.
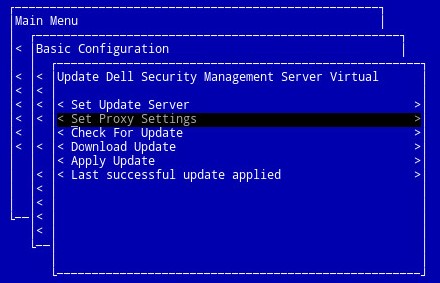
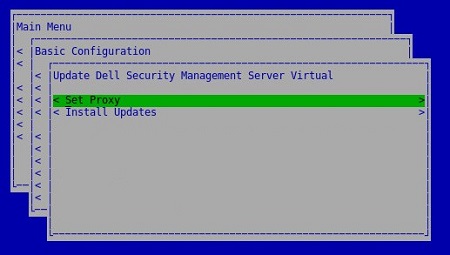
- Select Update Dell Security Management Server Virtual and then press Enter.

- Select Set Proxy and then press Enter.

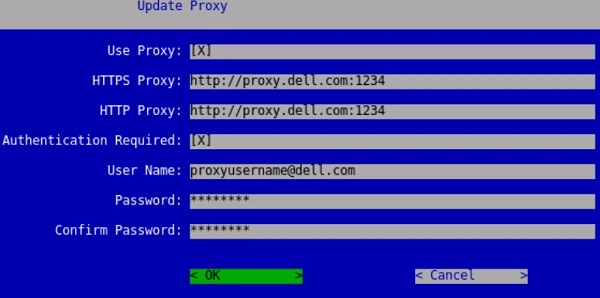
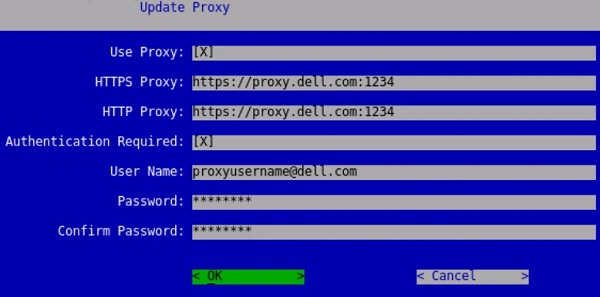
- In the Update Proxy menu:
- Press the spacebar to the right of Use Proxy to enable this feature.
- Populate HTTPS Proxy and HTTP Proxy.
- If proxy authentication is required, press the spacebar to the right of Authentication Required to enable this security feature, and then go to Step 5D. If proxy authentication is not required, go to Step 5E.
- Populate the Username, Password, and Confirm Password.
- Select OK and then press Enter.
 Note: For more information about the upgrade process, reference How to Upgrade Dell Security Management Server Virtual.
v9.7.0 to 9.10.1
- Log in to the Dell Security Management Server Virtual administration console.
 Note:
Note:- The default credentials for Dell Security Management Server Virtual are:
- Username:
ddpuser - Password:
ddpuser
- Username:
- An administrator can change the default password within the product’s virtual appliance menu.
- The default credentials for Dell Security Management Server Virtual are:
- From the Main Menu, select Basic Configuration and then press Enter.

- Select Update Dell Security Management Server Virtual and then press Enter.

- Select Set Proxy Settings and then press Enter.
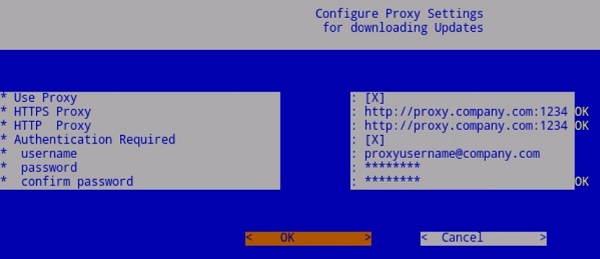
- In the Proxy Settings menu:
- Press the spacebar to the right of Use Proxy to enable this feature.
- Populate HTTPS Proxy, HTTP Proxy, and FTP Proxy.
- If proxy authentication is required, press the spacebar to the right of Authentication Required to enable this security feature, and then go to Step 5D. If proxy authentication is not required, go to Step 5E.
- Populate the Username, Password, and Confirm Password.
- Select OK and then press Enter.
 Note: For more information about the upgrade process, reference How to Upgrade Dell Security Management Server Virtual.
v9.5.0 to 9.6.0
- Log in to the Dell Enterprise Server Virtual administration console.
 Note:
Note:- The default credentials for Dell Data Protection Enterprise Server Virtual Edition are:
- Username:
ddpuser - Password:
ddpuser
- Username:
- An administrator can change the default password within the product’s virtual appliance menu.
- The default credentials for Dell Data Protection Enterprise Server Virtual Edition are:
- From the Main Menu, select Basic Configuration and then press Enter.

- Select Update DDP Enterprise Server - VE and then press Enter.

- Select Set Proxy Settings and then press Enter.
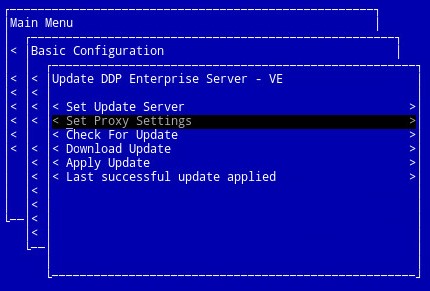
- In the Proxy Settings menu:
- Press the spacebar to the right of Use Proxy to enable this feature.
- Populate HTTPS Proxy, HTTP Proxy, and FTP Proxy.
- If proxy authentication is required, press the spacebar to the right of Authentication Required to enable this security feature, and then go to Step 5D. If proxy authentication is not required, go to Step 5E.
- Populate the Username, Password, and Confirm Password.
- Select OK and then press Enter.
 Note: For more information about the upgrade process, reference How to Upgrade Dell Security Management Server Virtual.
v9.0.0 to 9.4.1
- Log in to the Dell Enterprise Server Virtual administration console.
 Note:
Note:- The default credentials for Dell Data Protection Enterprise Server Virtual Edition are:
- Username:
ddpuser - Password:
ddpuser
- Username:
- An administrator can change the default password within the product’s virtual appliance menu.
- The default credentials for Dell Data Protection Enterprise Server Virtual Edition are:
- From the Main Menu, select Basic Configuration and then press Enter.
- Select Update DDP Enterprise Server - VE and then press Enter.
- Select Set Proxy Settings and then press Enter.

- In the Proxy Settings menu:
- Press the spacebar to the right of Use Proxy to enable this feature.
- Populate HTTPS Proxy, HTTP Proxy, and FTP Proxy.
- If proxy authentication is required, press the spacebar to the right of Authentication Required to enable this security feature, and then go to Step 5D. If proxy authentication is not required, go to Step 5E.
- Populate the Username, Password, and Confirm Password.
- Select OK and then press Enter.
 Note: For more information about the upgrade process, reference How to Upgrade Dell Security Management Server Virtual.
v8.2.0 to 8.5.0
- Log in to the Dell Enterprise Server Virtual administration console.
 Note:
Note:- The default credentials for Dell Data Protection Enterprise Server Virtual Edition are:
- Username:
ddpuser - Password:
ddpuser
- Username:
- An administrator can change the default password within the product’s virtual appliance menu.
- The default credentials for Dell Data Protection Enterprise Server Virtual Edition are:
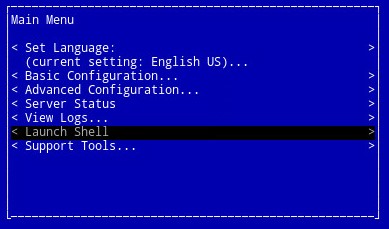
- From the Main Menu, select Launch Shell and then press Enter.

- Type
su ddpsupportand then press Enter.
- Type the Password for
ddpsupportand then press Enter. Note:
Note:- The default credentials for Dell Data Protection Enterprise Server Virtual Edition are:
- Username:
ddpsupport - Password:
ddpsupport
- Username:
- An administrator can change the default password within the product’s virtual appliance menu.
- The default credentials for Dell Data Protection Enterprise Server Virtual Edition are:
- Type
sudo nano /etc/environmentand then press Enter.
- Press down to go to a new blank line.

- Type the following text, populating the proxy server and port where
proxy.company.comand1234are shown:http_proxy=https://proxy.company.com:1234/ https_proxy=https://proxy.company.com:1234/ ftp_proxy=https://proxy.company.com:1234/ no_proxy="localhost,127.0.0.1" HTTP_PROXY=https://proxy.company.com:1234/ HTTPS_PROXY=https://proxy.company.com:1234/ FTP_PROXY=https://proxy.company.com:1234/ NO_PROXY="localhost,127.0.0.1"
Note:Proxy.company.comand port1234are examples only. The proxy server FQDN and port configuration will differ in your environment.
- Press CTRL+X to exit. Upon being prompted to save, press Y to continue.

- Press Enter for it to save without any changes to the filename.

- Type
exitand then press Enter to log out ofddpsupport.
- Type
exitand then press Enter to log out of the shell to the UI.
- Select Basic Configuration from the Main Menu and then press Enter.

- Select Reboot Appliance and press Enter.
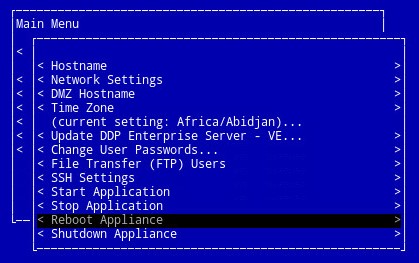
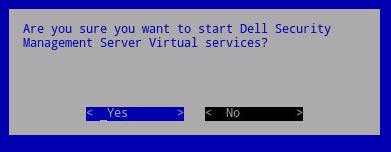
- Select Yes and press Enter.
 Note: For more information about the upgrade process, reference How to Upgrade Dell Security Management Server Virtual.
Product Licenses and Advanced Threat Protection (ATP) Tenant
The proxy settings of Dell Security Management Server Virtual vary between v9.11.0 and Later, v9.7.0 to 9.10.1, and v8.2.0 to 9.6.0. Click the appropriate version for specific steps. For versioning information, reference How to Identify the Dell Data Security Server Version.
v9.11.0 and Later
- Log in to the Dell Security Management Server Virtual administration console.
 Note:
Note:- The default credentials for Dell Security Management Server Virtual are:
- Username:
delluser - Password:
delluser
- Username:
- An administrator can change the default password within the product’s virtual appliance menu.
- The default credentials for Dell Security Management Server Virtual are:
- From the Main Menu, select Basic Configuration and then press Enter.

- Select Update Dell Security Management Server Virtual and then press Enter.

- Select Set Proxy and then press Enter.
- In the Update Proxy menu:
- Press the spacebar to the right of Use Proxy to enable this feature.
- Populate HTTPS Proxy, and HTTP Proxy.
- If proxy authentication is required, press the spacebar to the right of Authentication Required to enable this security feature, and then go to Step 5D. If proxy authentication is not required, go to Step 5E.
- Populate the Username, Password, and Confirm Password.
- Select OK and then press Enter.
 Note: For more information about the upgrade process, reference How to Upgrade Dell Security Management Server Virtual.
v9.7.0 to 9.10.1
- Log in to the Dell Security Management Server Virtual administration console.
 Note:
Note:- The default credentials for Dell Security Management Server Virtual are:
- Username:
ddpuser - Password:
ddpuser
- Username:
- An administrator can change the default password within the product’s virtual appliance menu.
- The default credentials for Dell Security Management Server Virtual are:
- From the Main Menu, select Launch Shell and then press Enter.
- Type
su ddpsupportand then press Enter.
- Type the Password for
ddpsupportand then press Enter. Note:
Note:- The default credentials for Dell Data Protection Enterprise Server Virtual Edition are:
- Username:
ddpsupport - Password:
ddpsupport
- Username:
- An administrator can change the default password within the product’s virtual appliance menu.
- The default credentials for Dell Data Protection Enterprise Server Virtual Edition are:
- Type
sudo nano /opt/dell/server/security-server/conf/application.propertiesand then press Enter.
- Scroll down to
proxy server settingsusing the arrow keys.
- At
proxy.server.enabled=false, deletefalseand typetrue.
- At
proxy.server.host=, type the fully qualified domain name (FQDN) of the proxy server. Note: The example in the image, proxy.company.com, may differ from the FQDN in your environment.
 - At
proxy.server.port.ssl=, type the proxy server’s SSL port. Note: The example in the image, 443, may differ from the port in your environment.
 - At
proxy.server.port.http=, type the proxy server’s HTTP port. Note: The example in the image, 80, may differ from the port in your environment.
 - If the proxy server requires authentication, go to Step 11a. If the proxy server does not require authentication, go to Step 12.
- At
proxy.server.username=, type the proxy server’s username. Note: The example in the image,
proxyusername@company.com, may differ from the username in your environment. - At
proxy.server.password=, replaceENC, withCLR.
- At
proxy.server.password=, replace the alphanumeric information betweenCLR()with the password ofproxyusername@company.com. Note: The example in the image,
proxypassword, may differ from the password in your environment.
- At
- Press CTRL+X to exit. On prompt to save, type
Yto continue.
- Press Enter for it to save without any changes to the filename.

- Type
exitand then press Enter to log out ofddpsupport.
- Type
exitand then press Enter to log out of the shell to the Main Menu.
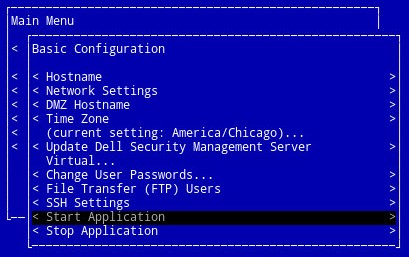
- From the Main Menu, select Basic Configuration and then press Enter.

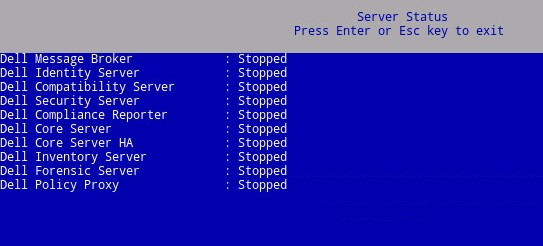
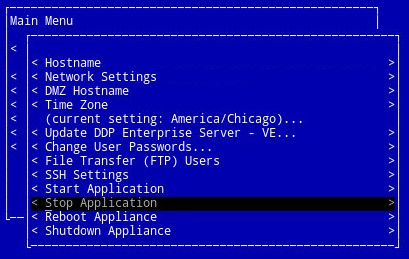
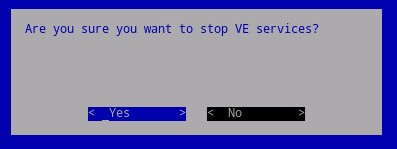
- Select Stop Application and press Enter.

- Select Yes and then press Enter.

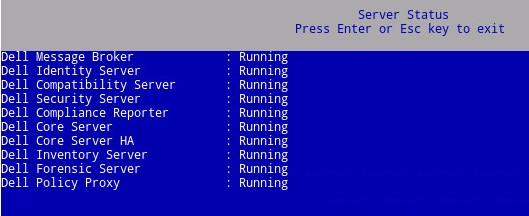
- Once all services have stopped, press ESC to return to the Basic Configuration menu.
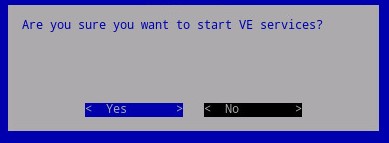
- Select Start Application and then press Enter.
- Select Yes and then press Enter.
- Once all services have started, press ESC to return to the Basic Configuration menu.
v8.2.0 to 9.6.0
- Log in to the Dell Enterprise Server Virtual administration console.
 Note:
Note:- The default credentials for Dell Data Protection Enterprise Server Virtual Edition are:
- Username:
ddpuser - Password:
ddpuser
- Username:
- An administrator can change the default password within the product’s virtual appliance menu.
- The default credentials for Dell Data Protection Enterprise Server Virtual Edition are:
- From the Main Menu, select Launch Shell and then press Enter.

- Type
su ddpsupportand then press Enter.
- Type the password for
ddpsupportand then press Enter. Note:
Note:- The default credentials for Dell Data Protection Enterprise Server Virtual Edition are:
- Username:
ddpsupport - Password:
ddpsupport
- Username:
- An administrator can change the default password within the product’s virtual appliance menu.
- The default credentials for Dell Data Protection Enterprise Server Virtual Edition are:
- Type
sudo nano /opt/dell/server/security-server/conf/application.propertiesand then press Enter.
- Scroll down to
Proxy server settingsusing the arrow keys.
- At
proxy.server.enabled=false, deletefalseand typetrue.
- At
proxy.server.host=, type the fully qualified domain name (FQDN) of the proxy server. Note: The example in the image, proxy.company.com, may differ from the FQDN in your environment.
 - At
proxy.server.port.ssl=, type the proxy server’s SSL port. Note: The example in the image, 443, may differ from the port in your environment.
 - At
proxy.server.port.http=, type the proxy server’s HTTP port. Note: The example in the image, 80, may differ from the port in your environment.
 - If the proxy server requires authentication, go to Step 11a. If the proxy server does not require authentication, go to Step 12.
- At
proxy.server.username=, type the proxy server’s username. Note: The example in the image,
proxyusername@company.com, may differ from the username in your environment. - At
proxy.server.password=, replaceENC, withCLR.
- At
proxy.server.password=, replace the alphanumeric information betweenCLR()with the password ofproxyusername@company.com. Note: The example in the image,
proxypassword, may differ from the password in your environment.
- At
- Press CTRL+X to exit. On prompt to save, press
Yto continue.
- Press Enter for it to save without any changes to the filename.

- Type
exitand then press Enter to log out ofddpsupport.
- Type
exitand then press Enter to log out of the shell to the Main Menu.
- From the Main Menu, select Basic Configuration and then press Enter.
- Select Stop Application and press Enter.
- Select Yes and then press Enter.
- Once all services have stopped, press ESC to return to the Basic Configuration menu.

- Select Start Application and then press Enter.

- Select Yes and then press Enter.
- Once all services have started, press ESC to return to the Basic Configuration menu.

To contact support, reference Dell Data Security International Support Phone Numbers.
Go to TechDirect to generate a technical support request online.
For additional insights and resources, join the Dell Security Community Forum.