System Does Not Meet BitLocker Automatic Device Encryption Requirements
Summary: Steps for manually getting BitLocker to encrypt the hard drive in OptiPlex 3060, 5060, 7060 and XE3 systems running Windows 10.
This article applies to
This article does not apply to
This article is not tied to any specific product.
Not all product versions are identified in this article.
Symptoms
BitLocker Automatic Device Encryption Requirements
OptiPlex 3060, 5060, 7060 and XE3 systems running Windows 10 64bit Professional and Enterprise editions do not automatically enable the BitLocker function.
You can use the following steps to verify the BitLocker function.
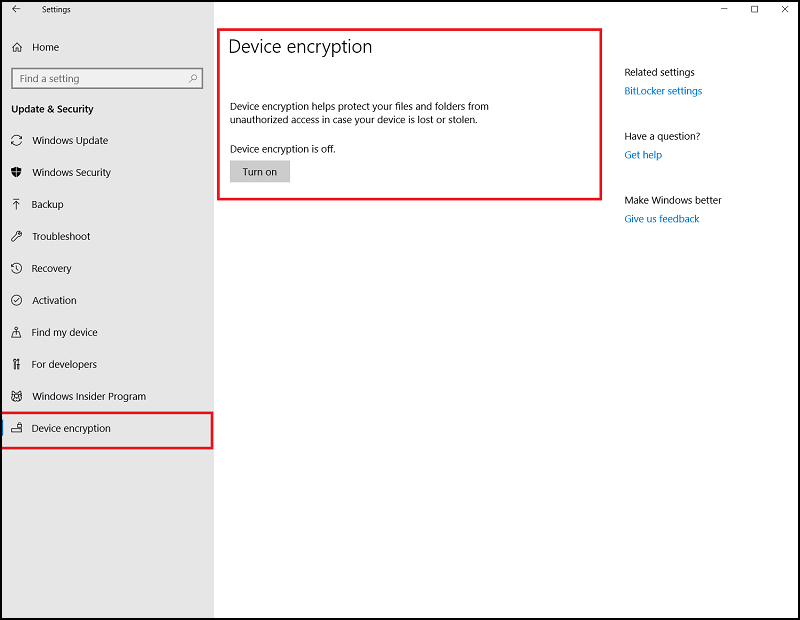
- Press the Windows Key and type Settings.
- Select Update & Security.
- The following screen shows if the system meets the BitLocker automatic Encryption Requirement.

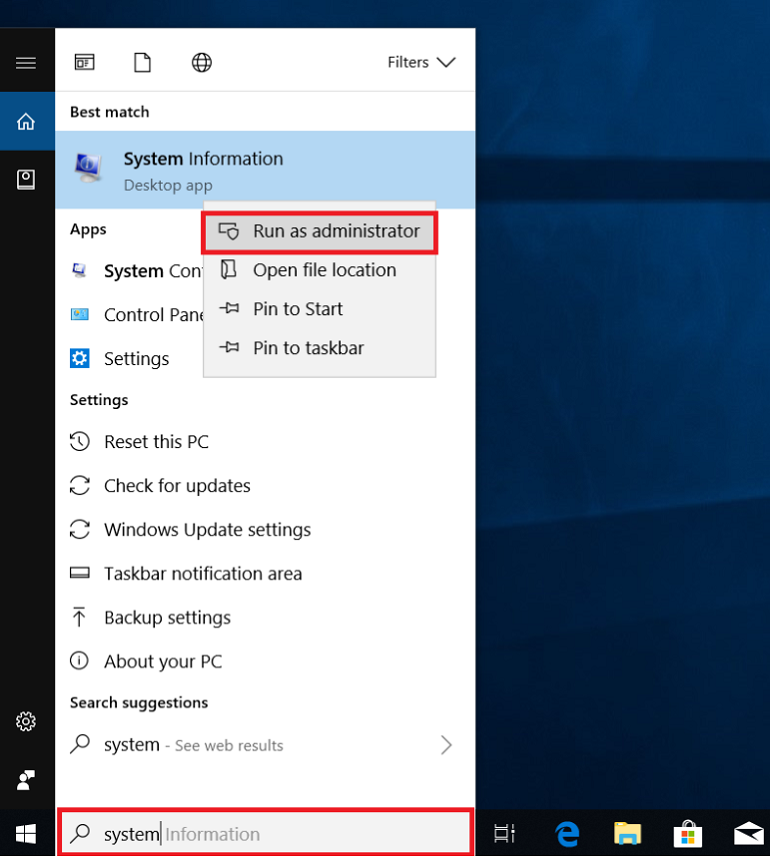
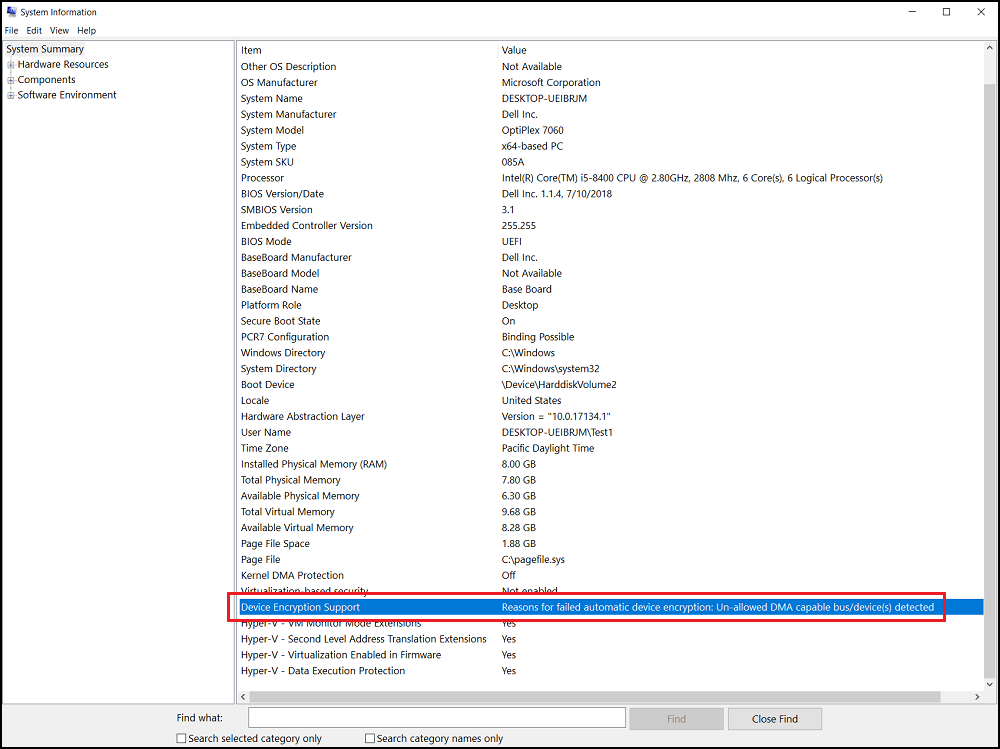
Run System Information as an Administrator (Right Click), and check the "Device Encryption Support" field. Check for "Reasons for failed automatic device encryption: Unallowed DMA capable bus/device(s) detected."
Cause
No cause information is available.
Resolution
You must manually set the BitLocker drive encryption with the following steps.
Warning: The following steps are for Advanced users. Users should manually back up their system Registry (How to back up and restore the registry in Windows  or set a System Restore point.
Users should also back up data as a precaution.
Users should also back up data as a precaution.
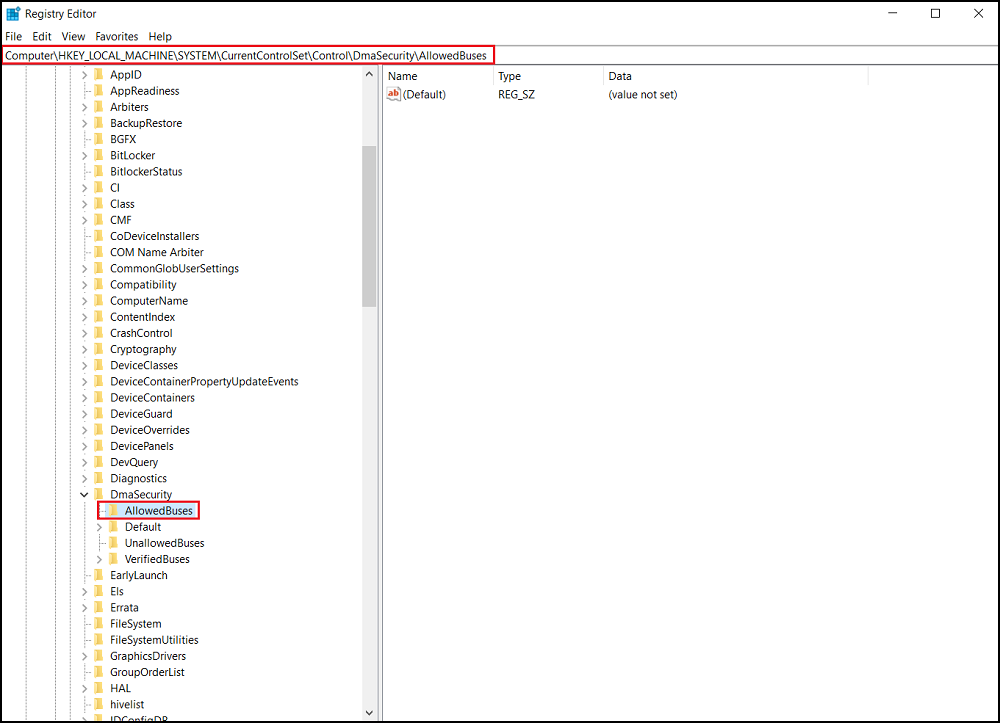
You must add a bus or device to the allowed list. Go to the registry key:
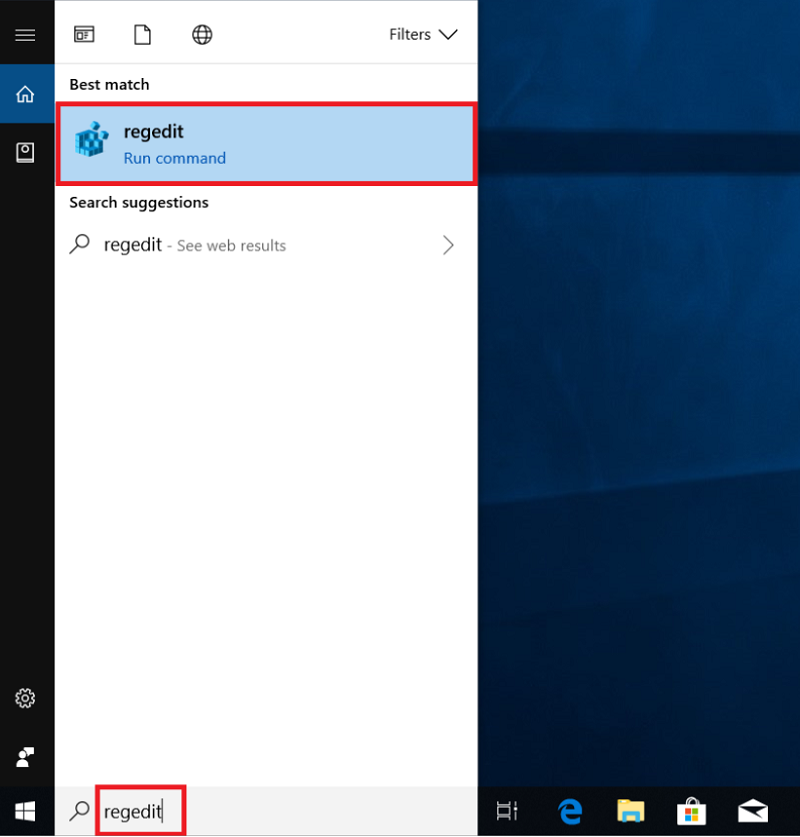
- Run "regedit" to open the Registry Editor.
- Find the following registry key path:
[HKEY_LOCAL_MACHINE\SYSTEM\CurrentControlSet\Control\DmaSecurity\AllowedBuses]
- Right-click "AllowedBuses" and select "Permissions."
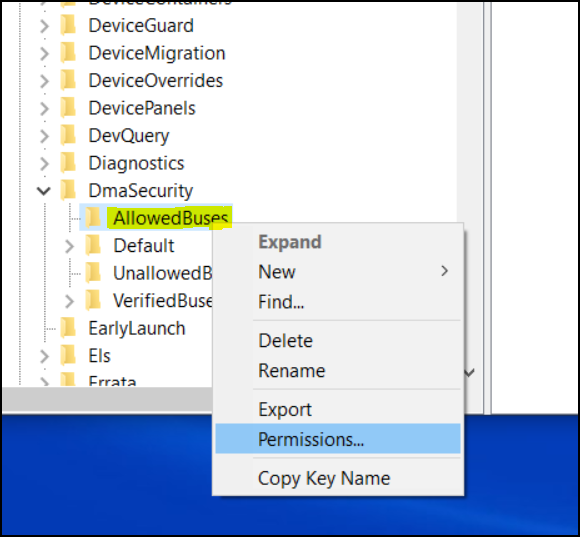
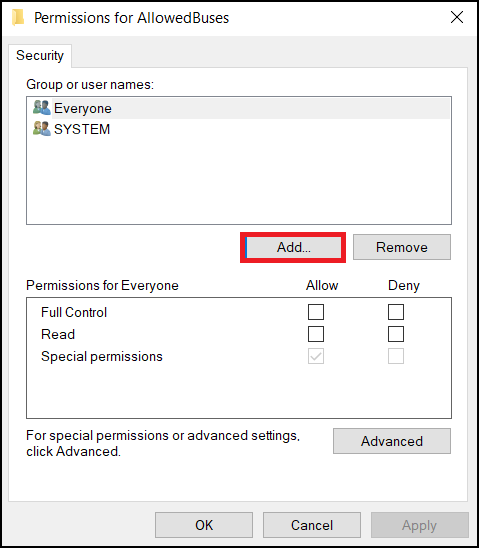
- Select "Add…" to add your user names in the Permissions for AllowedBuses Window
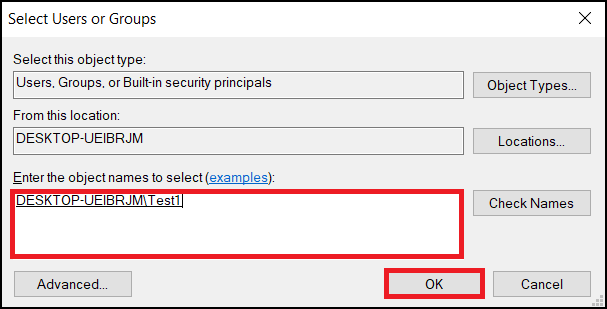
Enter your Windows User account name and click OK to finish.
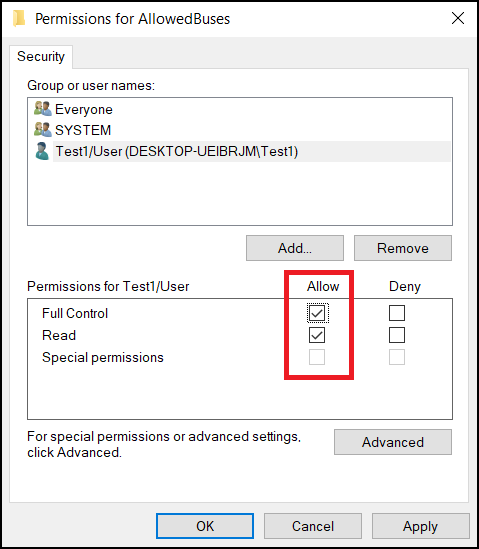
- Check "Allow" on "Full Control" and "Read" Permissions for your user account and select "Apply" to save the settings.
- Right-click the Windows Desktop and select New -> Text Document.
- Copy the following text and save as Add_AllowedBuses.reg
Windows Registry Editor Version 5.00
[HKEY_LOCAL_MACHINE\SYSTEM\CurrentControlSet\Control\DmaSecurity\AllowedBuses]

 "Intel 300 Series Chipset Family LPC Controller(Q370)"="PCI\\VEN_8086&DEV_A306"

 "Intel 300 Series Chipset Family LPC Controller(H370)"="PCI\\VEN_8086&DEV_A304"

 "PCI-to-PCI Bridge#1"="PCI\\VEN_8086&DEV_1901"

 "PCI-to-PCI Bridge#2"="PCI\\VEN_104C&DEV_8240"

 "PCI Express Root Port #1"="PCI\\VEN_8086&DEV_A338"

 "PCI Express Root Port #2"="PCI\\VEN_8086&DEV_A339"

 "PCI Express Root Port #3"="PCI\\VEN_8086&DEV_A33A"

 "PCI Express Root Port #4"="PCI\\VEN_8086&DEV_A33B"

 "PCI Express Root Port #5"="PCI\\VEN_8086&DEV_A33C"

 "PCI Express Root Port #6"="PCI\\VEN_8086&DEV_A33D"

 "PCI Express Root Port #7"="PCI\\VEN_8086&DEV_A33E"

 "PCI Express Root Port #8"="PCI\\VEN_8086&DEV_A33F"

 "PCI Express Root Port #9"="PCI\\VEN_8086&DEV_A330"

 "PCI Express Root Port #10"="PCI\\VEN_8086&DEV_A331"

 "PCI Express Root Port #11"="PCI\\VEN_8086&DEV_A332"

 "PCI Express Root Port #12"="PCI\\VEN_8086&DEV_A333"

 "PCI Express Root Port #13"="PCI\\VEN_8086&DEV_A334"

 "PCI Express Root Port #14"="PCI\\VEN_8086&DEV_A335"

 "PCI Express Root Port #15"="PCI\\VEN_8086&DEV_A336"

 "PCI Express Root Port #16"="PCI\\VEN_8086&DEV_A337"

 "PCI Express Root Port #17"="PCI\\VEN_8086&DEV_A340"

 "PCI Express Root Port #18"="PCI\\VEN_8086&DEV_A341"

 "PCI Express Root Port #19"="PCI\\VEN_8086&DEV_A342"

 "PCI Express Root Port #20"="PCI\\VEN_8086&DEV_A343"

 "PCI Express Root Port #21"="PCI\\VEN_8086&DEV_A32C"

 "PCI Express Root Port #22"="PCI\\VEN_8086&DEV_A32D"

 "PCI Express Root Port #23"="PCI\\VEN_8086&DEV_A32E"

 "PCI Express Root Port #24"="PCI\\VEN_8086&DEV_A32F"
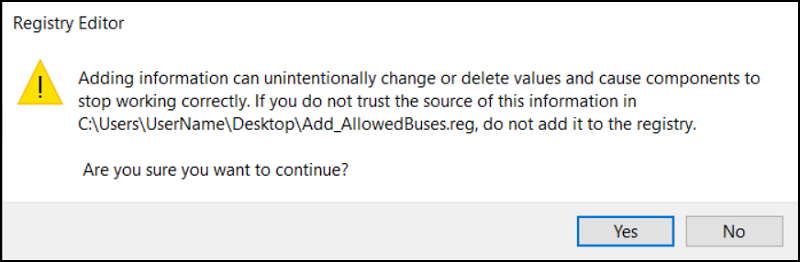
- Double-Click the Add_AllowedBuses.reg file to add the registry keys.
- Press "Yes" to continue to add the registry keys
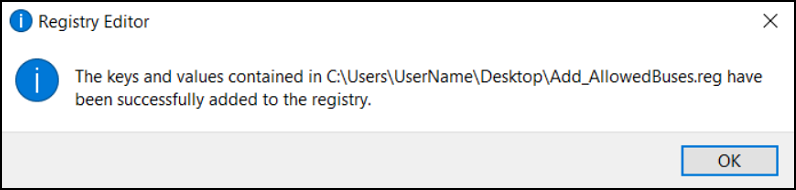
- All 8th Generation PCI Express Root Port device ids have been added into the system registry key successfully.
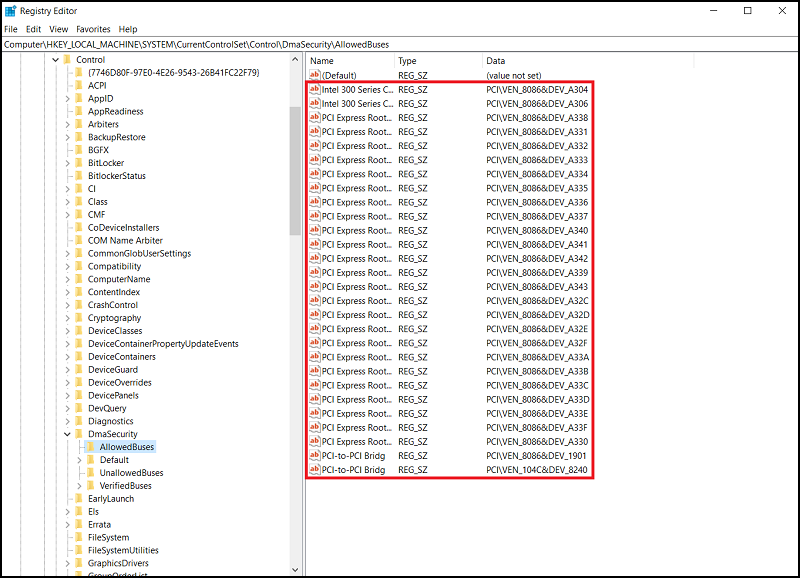
- Check the system registry key-in following path, all PCI Express Root Port device ids have been added successfully.
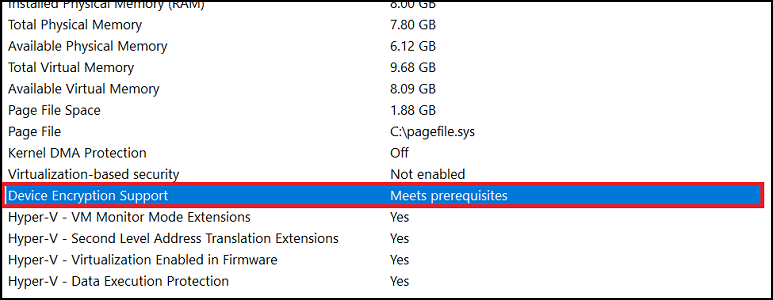
- Run System Information as an Administrator (Right Click)
[Device Encryption Support] -> [Meets perquisites]
- You can now Click the "Turn On" button to enable Device encryption from [Settings] -> [Device encryption]
Affected Products
Security, Software, OptiPlex 3060 Tower, OptiPlex 3060 Micro, OptiPlex 3060 Small Form Factor, OptiPlex 5060 Tower, OptiPlex 5060 Micro, OptiPlex 5060 Small Form Factor, OptiPlex 7060 Tower, OptiPlex 7060 Micro, OptiPlex 7060 Small Form Factor
, Optiplex XE3
...
Article Properties
Article Number: 000124709
Article Type: Solution
Last Modified: 19 Apr 2026
Version: 7
Find answers to your questions from other Dell users
Support Services
Check if your device is covered by Support Services.