T40 VROC RAID Install Windows Server 2016
Summary: This article provides a brief introduction to the Intel® VROC and describes how to configure it on Dell PowerEdge servers.
This article applies to
This article does not apply to
This article is not tied to any specific product.
Not all product versions are identified in this article.
Symptoms
Contents
- Introduction to VROC
- Configuring VROC
- Creating a Windows Server 2016 boot image that supports UEFI using Rufus
- Installing the Windows Server 2016 system using a USB drive
1. Introduction to VROC
Intel® Virtual RAID on CPU (Intel® VROC) is an enterprise-grade hybrid RAID solution. It is a simpler RAID solution enabled by Intel® VMD.
Windows Software User Guide: https://www.intel.com/content/dam/support/us/en/documents/memory-and-storage/ssd-software/Windows_VROC_User_Guide.pdf
Linux Software User Guide: https://www.intel.com/content/dam/support/us/en/documents/memory-and-storage/ssd-software/Linux_VROC_6-0_User_Guide.pdf
2. Configuring VROC on PowerEdge T40
Power on the device and press F12 to enter the boot menu, as shown in the image below: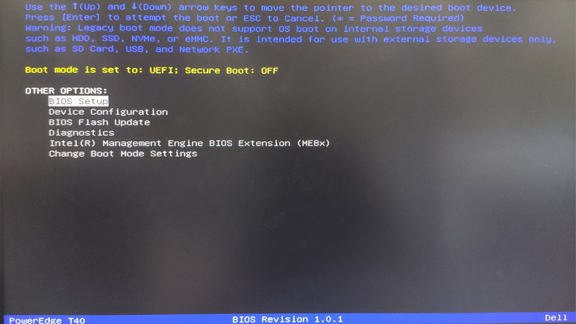
Use the Up/Down arrow keys to select the "Device Configuration" option and press Enter to enter the VROC screen and configure the array.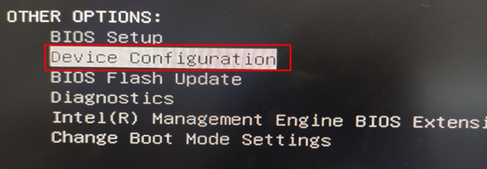
 Note: If the device has only one hard drive, the hard drive will be in non-raid mode by default. It cannot be switched to raid mode or configured as a single drive raid0. In this case, you can directly use the AHCI mode. You will only be able to configure VROC RAID if the device has two or more hard drives.
In this example, we will use two SATA 1 TB hard drives to create two RAID1 volumes and install Windows Server 2016.
1. Use the Up/Down arrow keys to highlight and select the "Create Virtual Drive" option, then press Enter to enter the array configuration screen. 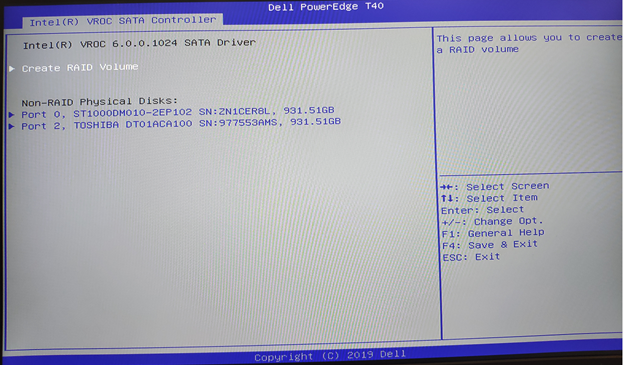
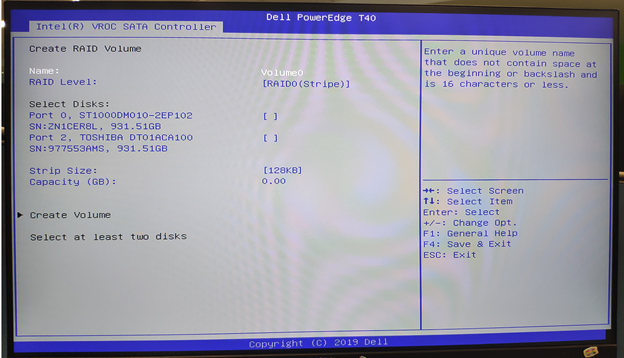
2. Use the Up/Down arrow keys to highlight "Name" and press Enter to edit the name of the volume. Press Enter again to finish editing. 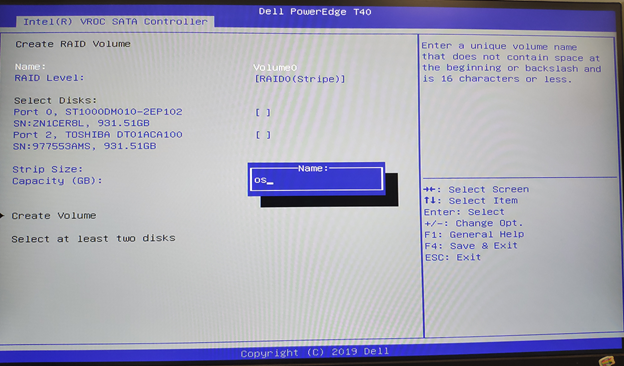
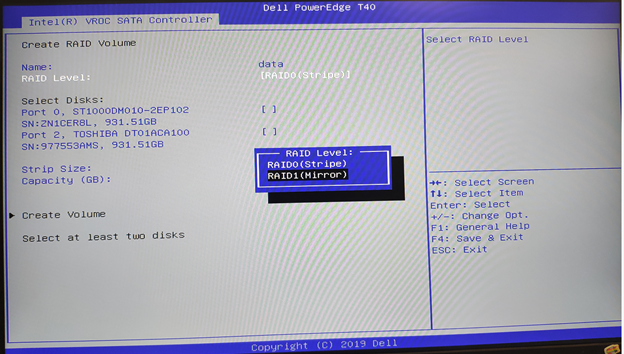
3. Use the Up/Down arrow keys to highlight and select the "RAID Level" option. Press Enter to select the desired array level based on your needs. Here, we will select "RAID1". Press Enter to confirm. (The array levels available here are determined by the number of physical hard drives currently installed on the server. Only the array levels supported by the current configuration will be shown)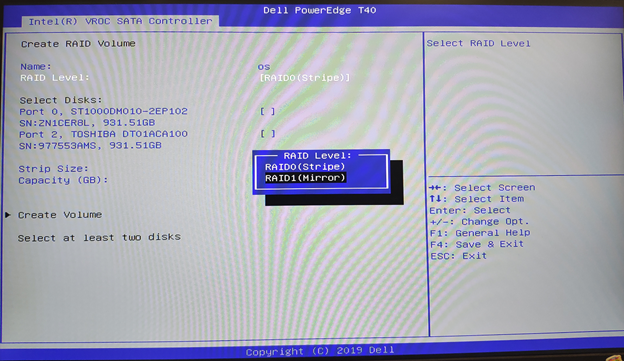
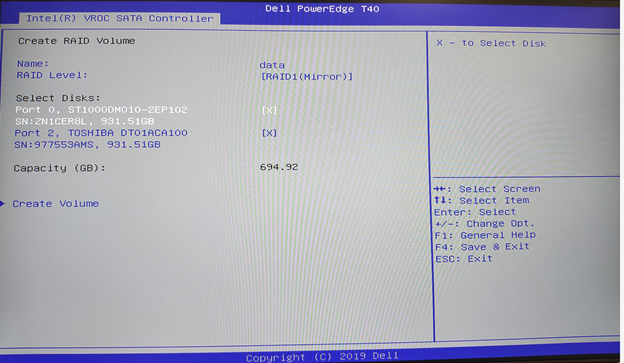
4. Add physical hard drives to the RAID array. Use the Up/Down arrow keys to highlight a hard drive, then press Space or Enter to select it. Selected hard drives will have an "x" mark after the name. 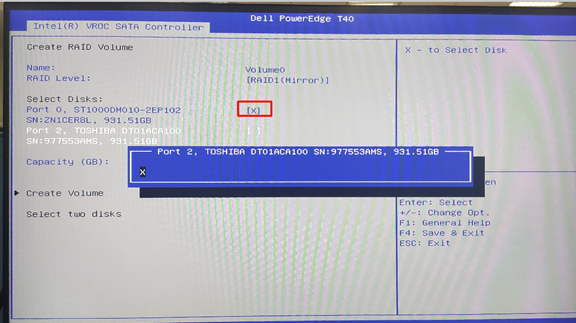
5. After selecting a physical hard drive, use the Up/Down arrow keys to highlight the "Capacity" option and Press Enter. By default, the capacity of the current virtual disk is displayed. If you want to create two volumes, you can modify the capacity (in GB) here. For example, you can change it to "200" and press Enter. 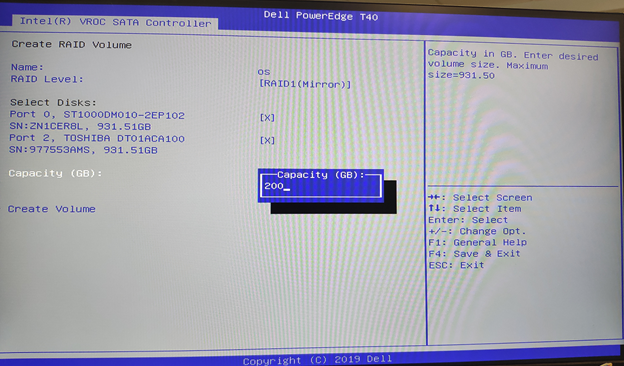
6. After confirming the configuration, use the Up/Down arrow keys to highlight the "Create Volume" option and press Enter. 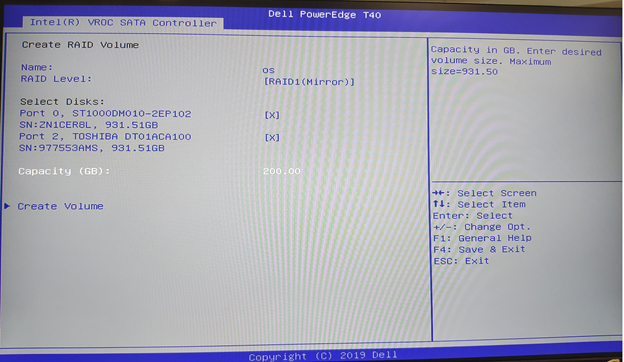
7. After creating the first volume, use the Up/Down arrow keys to highlight the "Create RAID Volume" option. The following screen will appear. Follow the steps above to give it a name and select the RAID level. By default, the hard drive is selected and the capacity is set to the remaining amount of space. After confirming the configuration, use the Up/Down arrow keys to highlight the "Create Volume" option and press Enter. 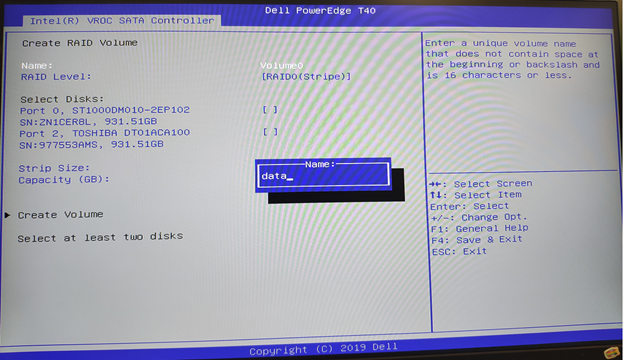
8. When finished, you will see two volumes, as shown in the picture below. 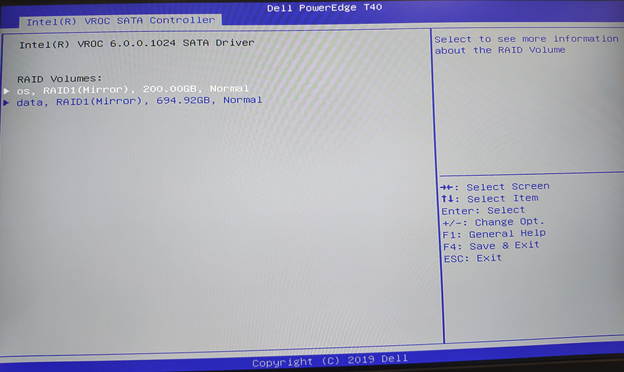
9. Press F4 and select "Yes" to save and exit.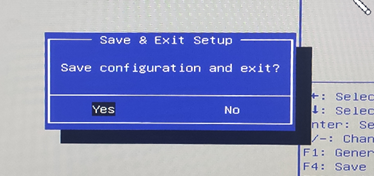
3. Creating a Windows Server 2016 boot image that supports UEFI using Rufus
Rufus is a free and open-source utility that helps create ISO boot drives larger than 4 GB that support UEFI.
Download address: https://github.com/pbatard/rufus/releases/download/v3.11/rufus-3.11p.exe
 The T40 does not support booting from internal disks with the Legacy BIOS. Make sure that the boot drive supports UEFI boot.
When running Rufus for the first time, you will be prompted to check for updates. Click 'No' to proceed to the main screen.
1. Select the USB drive that needs to be formatted as the boot drive.
Select the Windows Server ISO file.
All content in the green box will be auto generated. Verify that the information is consistent.
Click "Start" to start creation. Make sure that there is no data on the USB drive before you start.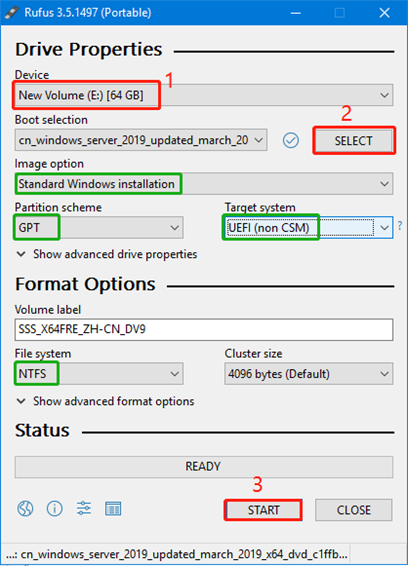
2. You will see a prompt that all data on the USB drive will be erased. Please back up the data on the USB drive in advance. 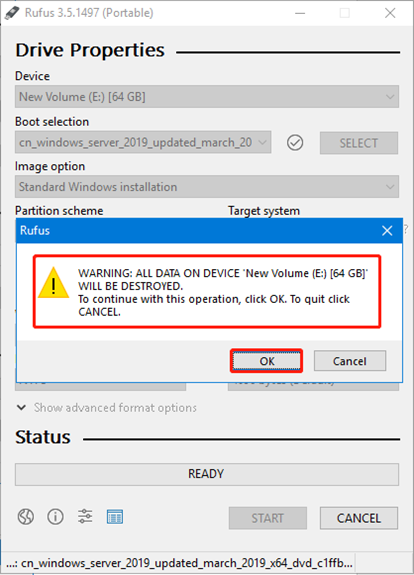
3. Wait for the ISO writing process to complete.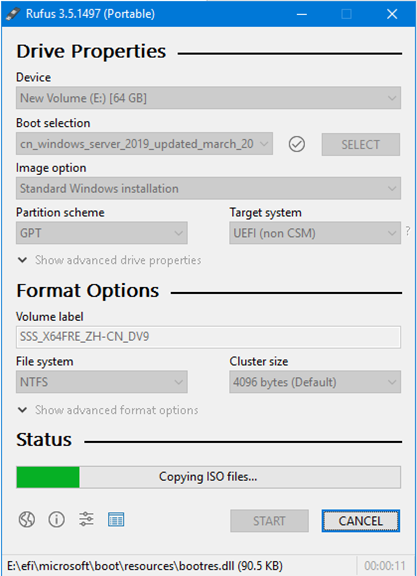
4. After the boot drive is created, you will see a prompt that you must disable "Secure Boot" in the BIOS in order to boot this boot drive in UEFI mode.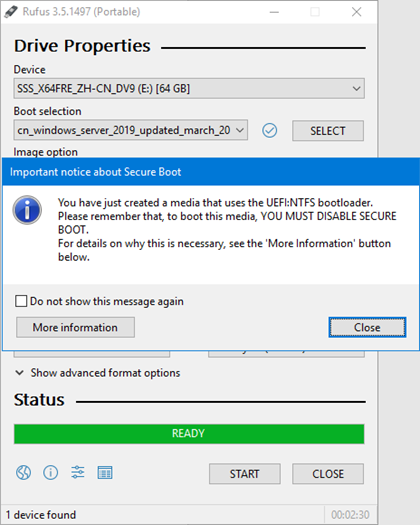
4. Installing the Windows Server 2016 system using a USB drive
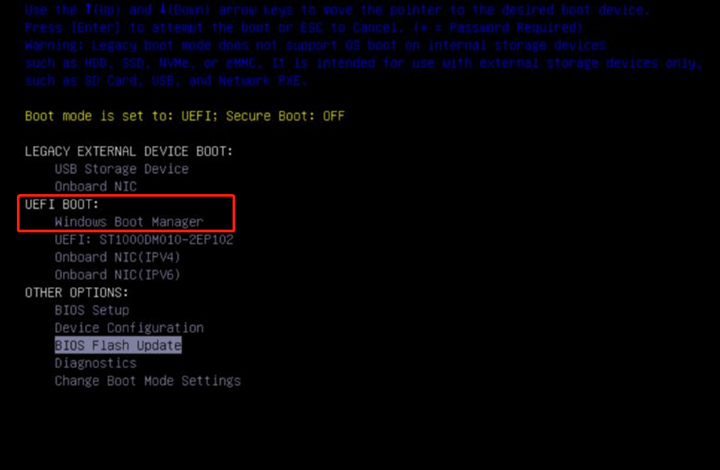
1. Insert the created USB drive into the USB port of the T40 server. Power the server on and press F12 to enter the boot menu.
Check that the boot mode is "UEFI" and that Secure Boot is "OFF". In the UEFI Boot list, select the UEFI USB boot drive for Windows Server installation that you just created using Rufus.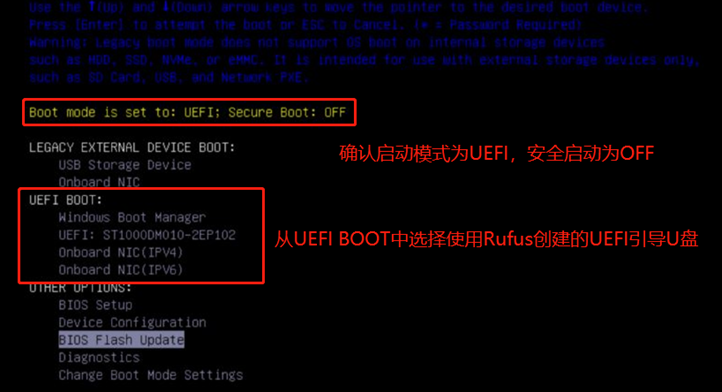
2. After booting from the USB drive, the system files will be loaded automatically.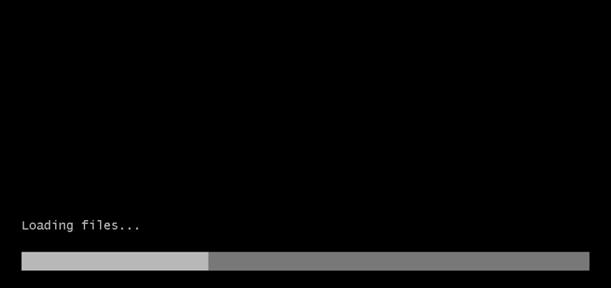
3. Select the desired "Language" and click "Next" to continue. 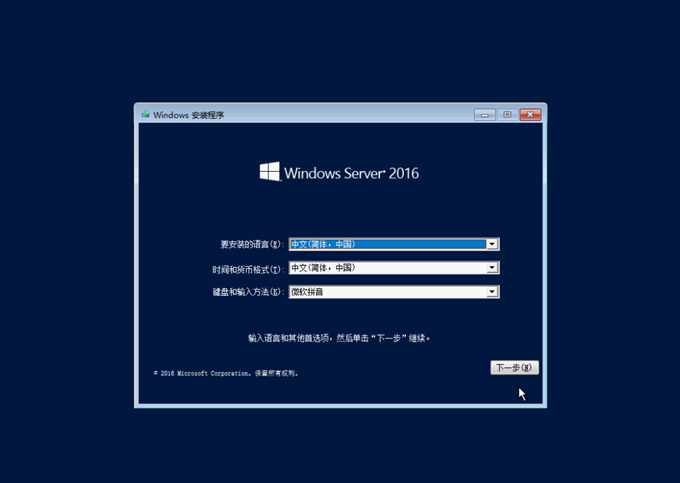
4. Select "Install Now" to begin installing the Windows operating system. 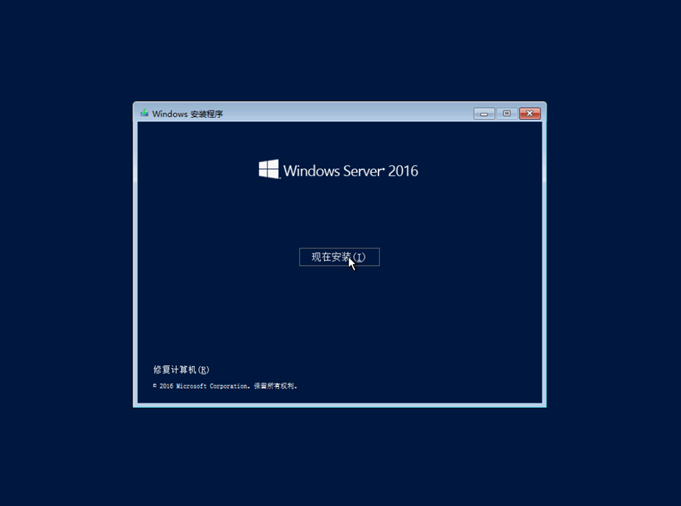
5. Depending on the image version, you may see a Windows activation screen where you need to enter the "Product Key" and click "Next" to continue. If you prefer to activate it later, you can click "I do not have a product key" to skip this step and activate it after the system is installed. 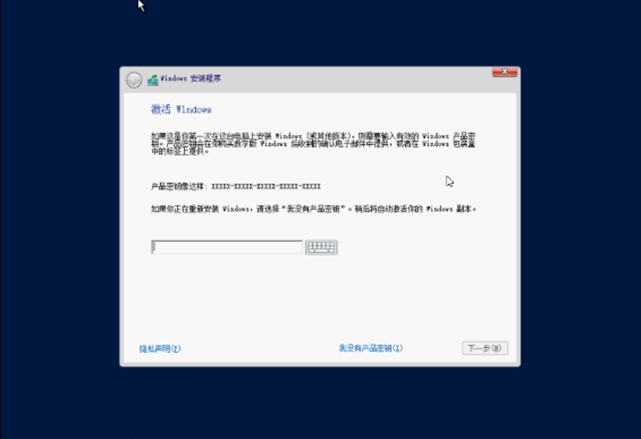
6. Select the specific version of the operating system you want to install. For a common Windows operating system, select the version with "Desktop Experience". Click "Next" to continue. 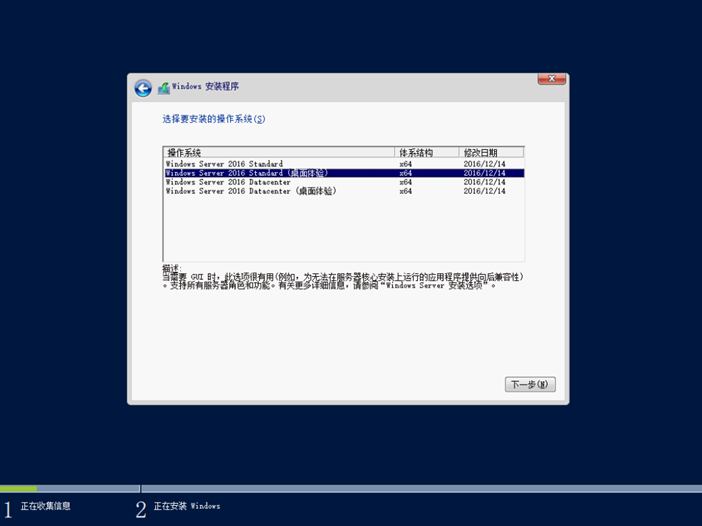
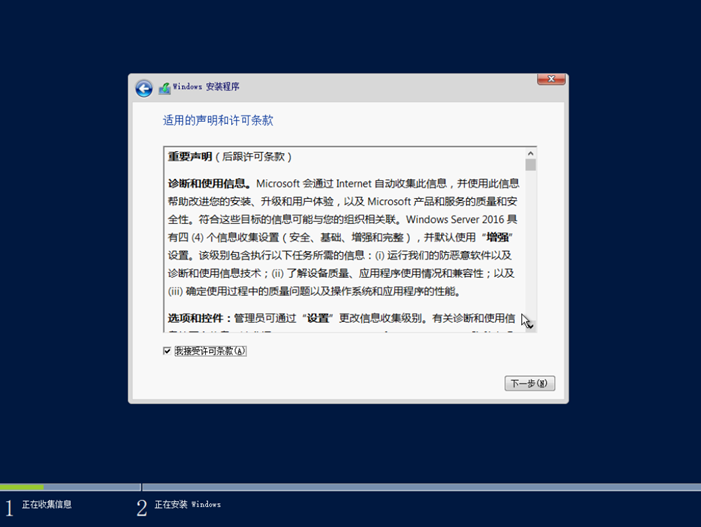
7. Read the Microsoft Notices and Licensing Terms. Check "I accept the Licensing Terms" and click "Next" to continue.
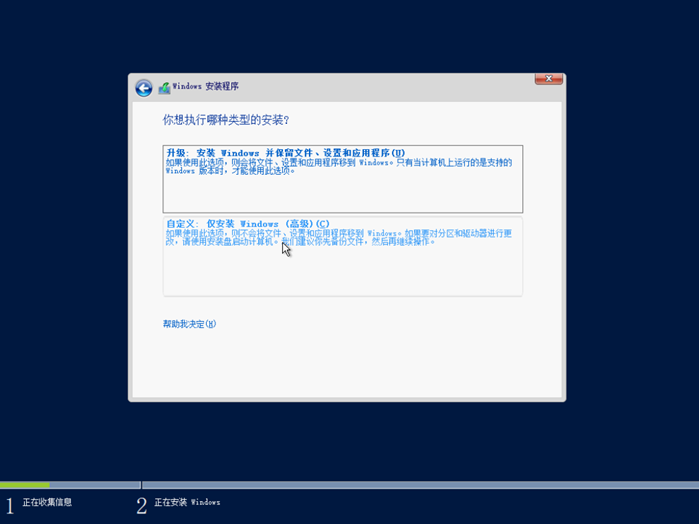
8. Click "Custom: Install Windows only (Advanced)".
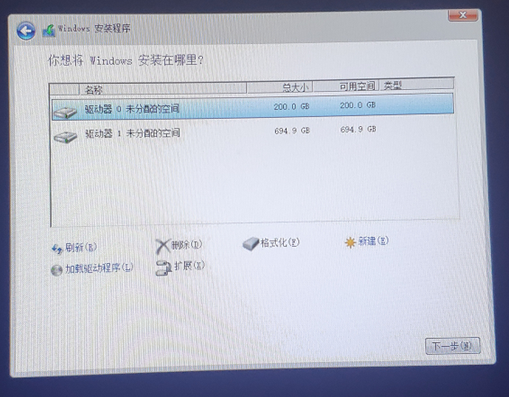
9. By default, the Windows Server 2016 system can directly recognize the hard drive. Select the OS volume that you just created to install the system. Here, we will select "Drive 0 200G". Click "Next". Windows Installer will create the required UEFI boot partition and start installation automatically.
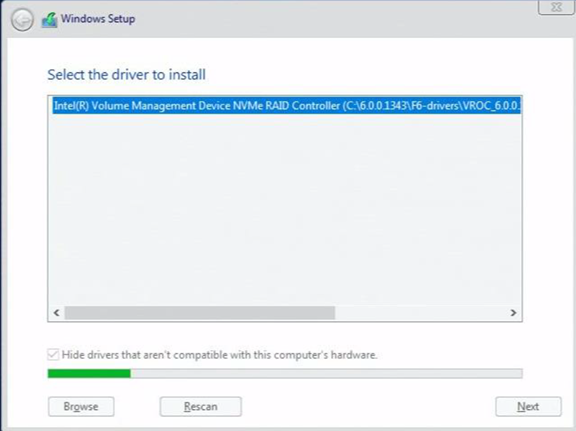
If the hard drive cannot be recognized in this step, you will need to load the array card driver manually:
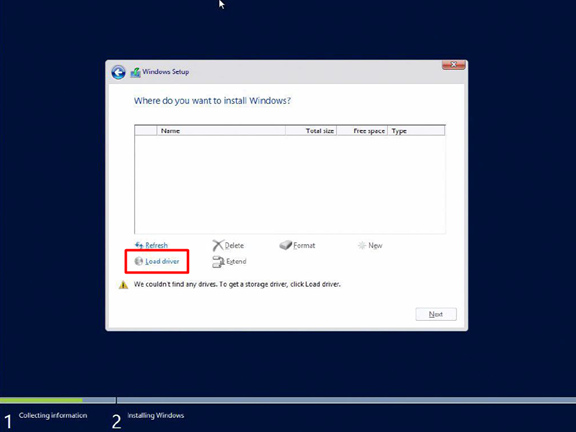
How to load the array card driver
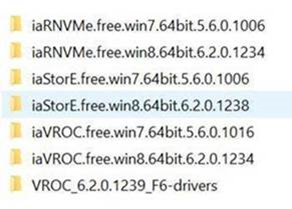
Download the array card driver from the official Intel website:
Download and unzip the Intel RAID driver. Unzip the file "VROC_6.2.0.1239_F6-drivers.zip" in the directory "Intel_VROC_win_6.2.0.1239_pv\SW_Packages\F6-drivers" and copy all the contents to the USB drive.
"Click 'Browse' to locate and load the VROC driver extracted onto the USB drive. Once loaded successfully, the VROC RAID can be recognized.
Driver description:
The iaStorE driver supports SATA and sSATA drives.
The iaVROC driver supports NVMe drives connected to the Intel VMD controller.
The iaRNVME driver is intended for Intel platforms without VMD support.
10. After the system installation is complete, remove the USB boot drive and restart the server. UEFI will start the Windows Server automatically.
11. The Windows Boot Manager will appear in the F12 UEFI boot menu and can be used to start the Windows Server.
Cause
-
Resolution
-
Additional Information
-
Affected Products
PowerEdge, PowerEdge T40Article Properties
Article Number: 000125271
Article Type: Solution
Last Modified: 04 Mar 2026
Version: 8
Find answers to your questions from other Dell users
Support Services
Check if your device is covered by Support Services.