How to Install Dell Threat Defense
Summary: Learn step-by-step instructions about how to install Dell Threat Defense on either Windows or Mac.
This article applies to
This article does not apply to
This article is not tied to any specific product.
Not all product versions are identified in this article.
Instructions
Note:
- As of May 2022, Dell Threat Defense has reached End of Maintenance. This product and its articles are no longer updated by Dell. For more information, reference Product Life Cycle (End of Support and End of Life) Policy for Dell Data Security. If you have any questions on alternative articles, either reach out to your sales team or contact endpointsecurity@dell.com.
- Reference Endpoint Security for additional information about current products.
This article covers the installation process for Dell Threat Defense in a Windows and Mac environment.
Affected Products:
- Dell Threat Defense
Affected Versions:
- v1372 and Later
Affected Operating Systems:
- Windows
- Mac
The installation process differs between Windows and Mac. Click the appropriate operating system platform for the installation process.
Windows
Dell Threat Defense can be installed on Windows through the:
Click the preferred method for more information.
Note: Before installation, ensure that the computer meets the product requirements by referencing Dell Threat Defense System Requirements.
UI
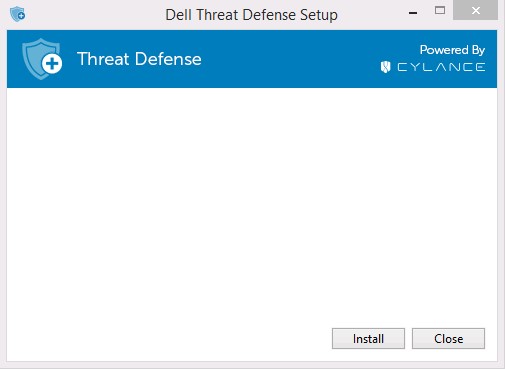
- Double-click DellThreatDefenseSetup.exe to begin the installation.
 Note: For information about obtaining DellThreatDefenseSetup.exe, reference How to Download Dell Threat Defense.
 - In the Dell Threat Defense Setup UI, click Install.
- Enter the Installation Token for the Dell Threat Defense tenant and then click Next.
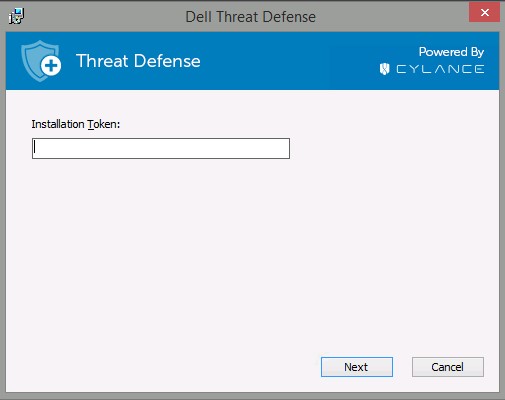 Note: If you do not have access to your Installation Token, contact your Dell Threat Defense administrator or reference the How to Obtain an Installation Token for Dell Threat Defense.
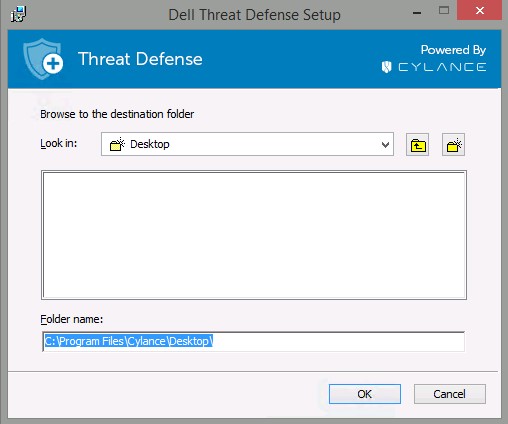
 - Optionally, change the folder name and then click OK.
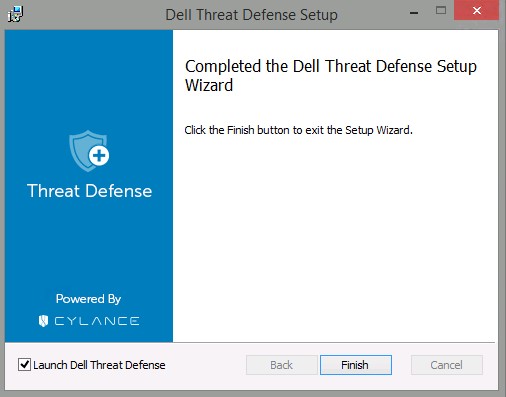
- Click Finish to complete the installation.
 Note: If the installation fails, reference How to Collect Logs for Dell Threat Defense.
CLI
Dell Threat Defense allows flexibility in command-line installation options by using switches, options, and parameters.
Note: Command-line switches and parameters are case-sensitive.
| Switch | Meaning |
|---|---|
/V |
Pass variables to the .msi inside the executable. The content must always be enclosed in plain-text quotes. |
/I |
Configures package for installation |
/S |
Silent Mode |
/X |
Uninstall Mode |
/L*V |
Modifies the installation logging name and output location with verbosity enabled. |
/QB |
User interface with Cancel button. Prompts for device reboot on installation completion. |
/QB- |
Installation UI with Cancel button. Reboots device automatically on installation completion. |
/QB! |
User interface without Cancel button. Prompts for device reboot on installation completion. |
/QB!- |
Installation UI without Cancel button. Reboots device automatically on installation completion. |
/QN |
No user interface. |
Supported parameters differ depending on if you are using v1522 and Later or v1512 and Earlier. Click the Dell Threat Defense version for supported parameters. For more information, reference How to Identify the Dell Threat Defense Version.
v1522 and Later
Note: Parameter switches and parameters are case-sensitive.
| Parameters | Values | Required | Purpose |
|---|---|---|---|
PIDKEY= |
See Examples Below | Yes | Connects endpoint to Dell Threat Defense using an Installation Token1. |
LAUNCHAPP= |
0 |
No | The system tray icon and Start Menu folder are hidden at run-time. |
LAUNCHAPP= |
1 (Default) |
No | The system tray icon and Start Menu folder are not hidden at run-time. |
SELFPROTECTIONLEVEL= |
1 |
No | Only local administrators can make changes to the registry and services. |
SELFPROTECTIONLEVEL= |
2 (Default) |
No | Only system administrators can make changes to the registry and services. |
APPFOLDER= |
See Examples Below | No | Modifies the default installation directory (C:\Program Files\Cylance\Desktop). |
VENUEZONE= |
See Examples Below | No | Requires v1382 or later. Adds a device to a specific zone. If a zone does not exist, a zone is created using the name that is provided. If not specified, defaults to UNZONED. |
VDI |
X |
No | Installs Dell Threat Defense in a non-persistent VDI (virtual desktop infrastructure) environment. X = Counter for the total number of deployments before a unique fingerprint is created for the workstation. |
AD |
0 (Default) |
No | Hostname is used for workstation fingerprint. |
AD |
1 |
No | Used in deployment of Dell Threat Defense on a primary image. Ties the workstation fingerprint to the Computer SID instead of hostname. Value takes precedence over the VDI parameter flag. |
1 For more information, reference How to Obtain an Installation Token for Dell Threat Defense.
CLI Installation Examples:
Example #1:
msiexec /I DellThreatDefenseSetup_x64.msi /QN SELFPROTECTIONLEVEL=1 PIDKEY= 50UiRIN8ON5tznNaw213dM3 /S
Example #1 contains:
- Installer =
DellThreatDefenseSetup_x64.msi - Silent install = Yes
- User Interface During Installation = No
- Dell Threat Defense Tenant =
50UiRIN8ON5tznNaw213dM3 - Protection Level = Local administrator
- Visible Application Folder & Icon = Yes
- Default value since undefined.
- Zone Name =
UNZONED- Default since undefined.
- VDI Fingerprint= No
- Default since undefined.
- AD Fingerprint= No
- Default since undefined
- Installation Directory =
C:\Program Files\Cylance\Desktop- Default since undefined.
- Installation Log =
C:\Program Files\Cylance\Desktop\log- Default since undefined.
Example #2:
msiexec /I DellThreatDefenseSetup_x64.msi APPFOLDER="D:\Program Files\ATP" VENUEZONE=HelpDesk PIDKEY= Dh6312AwdhaJ29Y /L*V C:\Temp\TD_Install.log
Example #2 contains:
- Installer =
DellThreatDefenseSetup_x64.msi - Silent install = Yes
- User Interface During Installation = No
- Dell Threat Defense Tenant =
50UiRIN8ON5tznNaw213dM3 - Protection Level = Local administrator
- Visible Application Folder & Icon = Yes
- Default value since undefined.
- Zone Name =
HelpDesk - VDI Fingerprint= Yes
- Workstations deployed after the primary image create a unique fingerprint since VDI counter = 2 or greater (>1 results in a unique fingerprint).
- AD Fingerprint= No
- Default since undefined.
- Installation Directory =
D:\Program Files\ATP - Installation Log =
C:\Program Files\Cylance\Desktop\log- Default since undefined.
Example #3:
msiexec /I DellThreatDefenseSetup_x64.msi LAUNCHAPP=1 VENUEZONE=Accounting PIDKEY= Dh6312AwdhaJ29Y AD=1 /L*V C:\Temp\TD_Install.log
Example #3 contains:
- Installer =
DellThreatDefenseSetup_x64.msi - Silent install = No
- User Interface During Installation = Yes
- Dell Threat Defense Tenant =
Dh6312AwdhaJ29Y - Protection Level = System administrator
- Visible Application Folder & Icon = No
- Zone Name = Accounting
- VDI Fingerprint= No
- Default since undefined
- AD Fingerprint= Yes
- Installation Directory =
D:\Program Files\Cylance\Desktop- Default since undefined
- Installation Log =
C:\Program Files\Cylance\Desktop\log- Default since undefined.
v1512 and Earlier
Note: Parameter switches and parameters are case-sensitive.
| Parameters | Values | Required | Purpose |
|---|---|---|---|
PIDKEY= |
See Examples Below | Yes | Connects endpoint to Dell Threat Defense using an Installation Token1. |
LAUNCHAPP= |
0 |
No | The system tray icon and Start Menu folder are hidden at run-time. |
LAUNCHAPP= |
1 (Default) |
No | The system tray icon and Start Menu folder are not hidden at run-time. |
SELFPROTECTIONLEVEL= |
1 |
No | Only local administrators can make changes to the registry and services. |
SELFPROTECTIONLEVEL= |
2 (Default) |
No | Only system administrators can make changes to the registry and services. |
APPFOLDER= |
See Examples Below | No | Modifies the default installation directory (C:\Program Files\Cylance\Desktop). |
VENUEZONE= |
See Examples Below | No | Requires v1382 or later. Adds a device to a specific zone. If a zone does not exist, a zone is created using the name that is provided. If not specified, defaults to UNZONED. |
VDI |
X |
No | Installs Dell Threat Defense in a non-persistent VDI (virtual desktop infrastructure) environment. X = Counter for the total number of deployments before a unique fingerprint is created for the workstation. |
CLI Installation Examples:
Example #1:
msiexec /I DellThreatDefenseSetup_x64.msi /QN SELFPROTECTIONLEVEL=1 PIDKEY= 50UiRIN8ON5tznNaw213dM3 /S
Example #1 contains:
- Installer =
DellThreatDefenseSetup_x64.msi - Silent install = Yes
- User Interface During Installation = No
- Dell Threat Defense Tenant =
50UiRIN8ON5tznNaw213dM3 - Protection Level = Local administrator
- Visible Application Folder & Icon = Yes
- Default value since undefined.
- Zone Name =
UNZONED- Default since undefined.
- VDI Deployment = No
- Default since undefined.
- Installation Directory =
C:\Program Files\Cylance\Desktop- Default since undefined.
- Installation Log =
C:\Program Files\Cylance\Desktop\log- Default since undefined.
Example #2:
msiexec /I DellThreatDefenseSetup_x64.msi APPFOLDER="D:\Program Files\ATP" VENUEZONE=HelpDesk PIDKEY= Dh6312AwdhaJ29Y VDI=1 /L*V C:\Temp\TD_Install.log
Example #2 contains:
- Installer =
DellThreatDefenseSetup_x64.msi - Silent install = Yes
- User Interface During Installation = No
- Dell Threat Defense Tenant =
50UiRIN8ON5tznNaw213dM3 - Protection Level = Local administrator
- Visible Application Folder & Icon = Yes
- Default value since undefined.
- Zone Name =
HelpDesk - VDI Deployment = Yes
- Workstations deployed after the primary image create a unique fingerprint since VDI counter = 2 or greater (>1 results in a unique fingerprint).
- Installation Directory =
D:\Program Files\ATP - Installation Log =
C:\Program Files\Cylance\Desktop\log- Default since undefined.
Mac
The process to install on Mac differs between v1382 and Later and v3172. Click the Dell Threat Defense version for the proper installation steps. For more information, reference How to Identify the Dell Threat Defense Version.
v1382 and Later
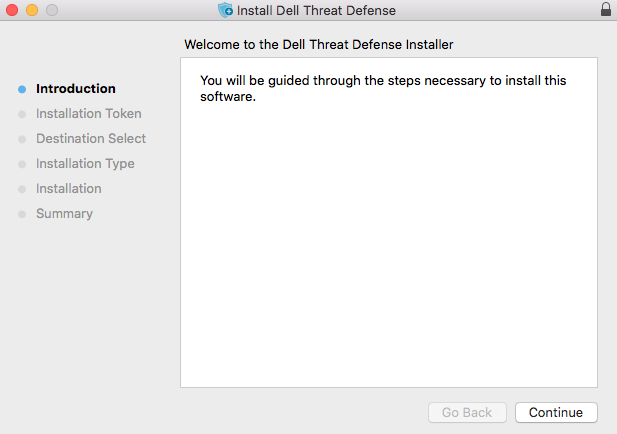
- Double-click DellThreatDefense.dmg to mount the installer.
Note: To download DellThreatDefense.dmg, reference How to Download Dell Threat Defense.
- Double-click the Threat Defense icon to initiate the installation.

- Click Continue to verify that the operating system and hardware meet the product requirements.
 Note: For more information about product requirements, reference Dell Threat Defense System Requirements.
 - Click Continue to begin installation configuration.
- Input the Dell Threat Defense tenant Installation Token and then click Continue.
 Note: For more information about obtaining an installation token, reference How to Obtain an Installation Token for Dell Threat Defense.
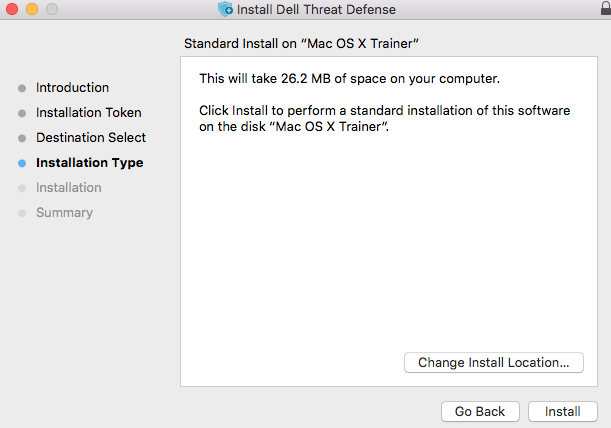
 - Optionally, Change Install Location and then click Install.
- Populate an administrator's Username and Password. Once populated, click Install Software.

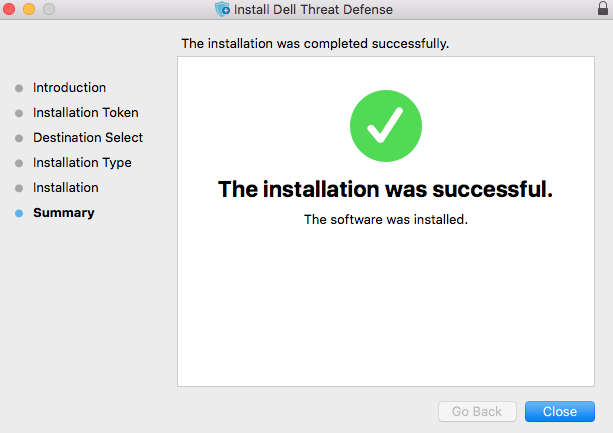
- Click Close upon successful installation.
 Note: If the installation fails, reference How to Collect Logs for Dell Threat Defense.
v3172
- Double-click the CylanceProtect.dmg to mount the installer.
Note: To download CylanceProtect.dmg, reference How to Download Dell Threat Defense.
- Double-click the Protect icon to initiate the installation.

- Click Continue to verify that the operating system and hardware meet the system requirements.
 Note: For more information about product requirements, reference Dell Threat Defense System Requirements.
 - Click Continue to continue installation.

- Enter the Dell Threat Defense tenant Installation Token and then click Continue.
 Note: For more information about obtaining installation tokens, reference How to Obtain an Installation Token for Dell Threat Defense.
 - Optionally, Change Install Location and then click Install.

- Populate an administrator’s Username and Password. Once populated, click Install Software.

- Click Close upon successful installation.
 Note: If the installation fails, reference How to Collect Logs for Dell Threat Defense.
To contact support, reference Dell Data Security International Support Phone Numbers.
Go to TechDirect to generate a technical support request online.
For additional insights and resources, join the Dell Security Community Forum.
Affected Products
Dell Threat DefenseArticle Properties
Article Number: 000126838
Article Type: How To
Last Modified: 03 Mar 2025
Version: 17
Find answers to your questions from other Dell users
Support Services
Check if your device is covered by Support Services.