Dell Device Management Agentをホスト コンピューターにインストールする方法
Summary: この記事では、Dell Device Management Agent (DDMA)をホスト コンピューターにインストールする方法について説明します。
This article applies to
This article does not apply to
This article is not tied to any specific product.
Not all product versions are identified in this article.
Instructions
対象製品:
- Dellデバイス管理コンソール
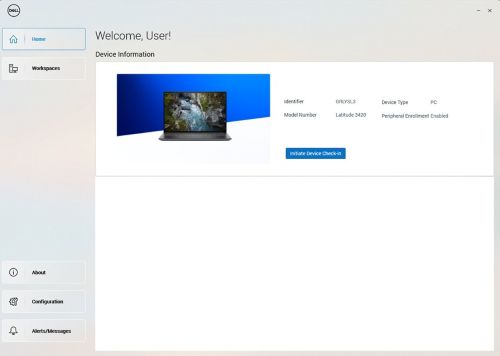
注:DDMAのインストールが正常に完了した後、システム トレイのエージェント アイコンを起動すると、ホスト コンピューター情報へのすべてのアクセス権を持つ必要があります。
正常にインストールされたDell Device ManagerエージェントUIの例。
DDMAをインストールする手順:
- ホスト コンピューターから、Dell Device Managerコンソール(DDMC)にログインします。
https://device.manage.dell.com/ - DDMCから Deployment タブに移動し、 Manage Available Softwareを選択します。
![[Manage Available Software]を選択します](https://supportkb.dell.com/img/ka0Do000000ZyDwIAK/ka0Do000000ZyDwIAK_ja_2.jpeg)
- DDMAをダウンロードし ます。
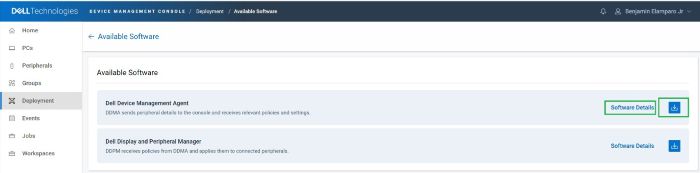
- ソフトウェアの詳細をクリックし、グループトークンをコピーします。

- グループ トークンとサーバーURLのインストール引数を使用してDDMAを導入します。
- インストール手順:
- ダウンロードしたDDMAエージェントをホストの
C:\tempの詳細を確認してください。 - 管理者権限でコマンド プロンプトを開きます。
- コマンド プロンプトで、ディレクトリーを次のように変更します。
C:\tempの詳細を確認してください。 - GROUPTOKENを含む次のコマンド構文を実行します。
DellDeviceManagementAgent.SubAgent_25.06.0.8.exe /s /v"/qn GROUPTOKEN=xxxxxxxx URL=https://device.manage.dell.com:443 /lv* c:\dma_installer.log"
注:BIOS TPMが有効になっていることを確認します。
- ダウンロードしたDDMAエージェントをホストの
- インストール手順:
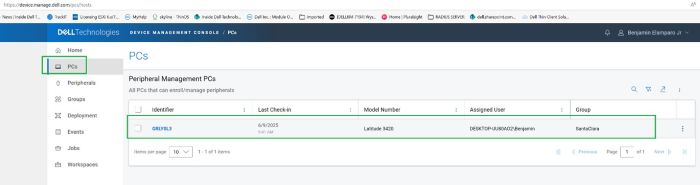
- ホスト コンピューターを再起動し、システム トレイのDMAエージェントを確認します。期待どおりに表示されるはずです。
これで、ホスト コンピューターがDellデバイス管理コンソールに登録されます。
Affected Products
Dell Device Management ConsoleArticle Properties
Article Number: 000348644
Article Type: How To
Last Modified: 23 Jul 2025
Version: 2
Find answers to your questions from other Dell users
Support Services
Check if your device is covered by Support Services.