Avamar: How to Configure LDAP when there are Multiple AD Servers
Summary: This article provides the steps to configure the Lightweight Directory Access Protocol (LDAP) settings in an Avamar environment with multiple Active Directory servers, some of which may be firewall restricted. ...
This article applies to
This article does not apply to
This article is not tied to any specific product.
Not all product versions are identified in this article.
Instructions
These are the steps required to configure LDAP in an Avamar environment with multiple active directory (AD) servers, some of which may be firewall restricted.
This condition may arise when the ldap.properties or krb5.conf files are populated with AD servers with standard LDAP and Kerberos (KRB) ports 88, 389, and 464 which the firewall in the environment blocks.
This requires a selective search for AD servers that do not have these ports blocked within the environment.
The following steps explain how to search the AD servers and identify servers, within the customer environment, that have the required ports open. The ldap.properties and krb5.conf files must be manually updated with the appropriate AD server information.
1. Log in to the Avamar Utility Node as admin.
2. Run the nslookup command (using the customer domain):
nslookup <customerdomain.com> |grep Address
Example output
Address: 10.10.10.240#53
Address: 10.10.10.240
Address: 10.10.10.242
Address: 10.10.10.244
Address: 10.10.10.246
Address: 10.10.10.248
Address: 1234:5:678:aaaa:fff:cccc:dddd:eeee
3. Rerun the command, and send the output of the IPv4 addresses to a file:
nslookup |grep Address | cut -d " " -f2 |grep -v ":" > /tmp/ldaplookup
4. Verify that the contents of /tmp/ldaplookup contains only the IP addresses:
cat /tmp/ldaplookup
Example output
10.10.10.240
10.10.10.242
10.10.10.244
10.10.10.246
10.10.10.248
5. Run a "for i" loop using the /tmp/ldaplookup file (created above) until a connection is made to LDAP port 389:
(Use telnet or curl depending on what is available)
for i in $(cat /tmp/ldaplookup) ; do timeout 30 telnet $i 389;done
-- Or --
for i in $(cat /tmp/ldaplookup); do curl -kv --max-time 30 $i:389;done
Generally, if port 389 can be reached, other KRB ports are also accessible.
6. Once a connection has been established, CTRL-C multiple times to exit the loop. Alternately continue through the list to determine which is the best domain controller use for LDAP.
(Write down the AD servers that can be connected to)
Example output - telnet:
Trying 10.10.10.240...
Trying 10.10.10.242...
Trying 10.10.10.244...
Connected to 10.10.10.244
Escape character is '^]'
Trying 10.10.10.246...
Trying 10.10.10.248...
-- Or --
Trying 10.10.10.240...
telnet: connect to address 10.10.10.240: Connection refused
Trying 10.10.10.242...
telnet: connect to address 10.10.10.242: Connection refused
Trying 10.10.10.244...
Connected to 10.10.10.244
Escape character is '^]'
Trying 10.10.10.246...
telnet: connect to address 10.10.10.246: Connection refused
Trying 10.10.10.248...
telnet: connect to address 10.10.10.248: Connection refused
Example output - curl:
* Rebuilt URL to: 10.10.10.240:389/
*   Trying 10.10.10.240...
* TCP_NODELAY set
* Connection timed out after 30001 milliseconds
* stopped the pause stream!
* Closing connection 0
curl: (28) Connection timed out after 30001 milliseconds
* Rebuilt URL to: 10.10.10.242:389/
*   Trying 10.10.10.242...
* TCP_NODELAY set
* connect to 10.10.10.242 port 389 failed: Connection refused
* Failed to connect to 10.10.10.242 port 389: Connection refused
* Closing connection 0
curl: (7) Failed to connect to 10.10.10.242 port 389: Connection refused
* Rebuilt URL to: 10.10.10.244:389/
*   Trying 10.10.10.244...
* TCP_NODELAY set
Connected to 10.10.10.244 (10.10.10.244) port 389 (#0)
> GET / HTTP/1.1
> Host: 10.10.10.244:389
> User-Agent: curl/7.60.0
> Accept: */*
* Rebuilt URL to: 10.10.10.246:389/
*   Trying 10.10.10.246...
* TCP_NODELAY set
* connect to 10.10.10.246 port 389 failed: Connection refused
* Failed to connect to 10.10.10.246 port 389: Connection refused
* Closing connection 0
curl: (7) Failed to connect to 10.10.10.246 port 389: Connection refused
7. Use the nslookup command to determine the Fully Qualified Domain Name (FQDN) of the AD server:
nslookup
Example command and output
nslookup 10.10.10.244
Server:    1.2.3.4
Address: 1.2.3.4:53

Non-authorative answer:
244.10.10.10.in-addr.apra    name=my-ad-server.customername.com
8. Using the Management Console Server (MCS) UI, follow steps 9-17:
9. Log in to the Avamar MCS UI.
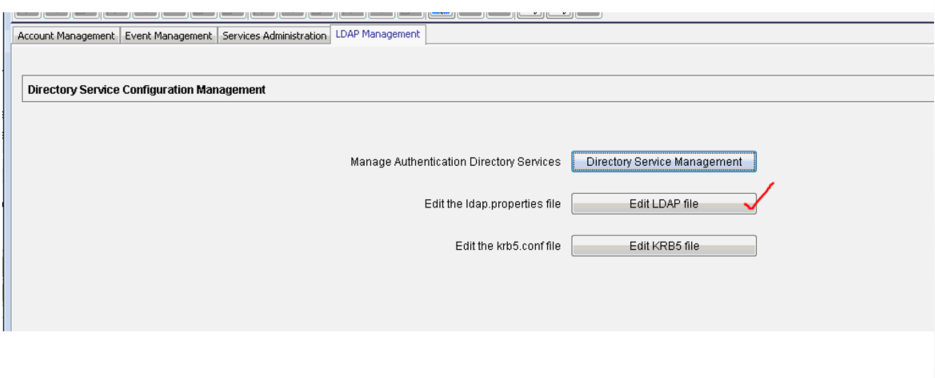
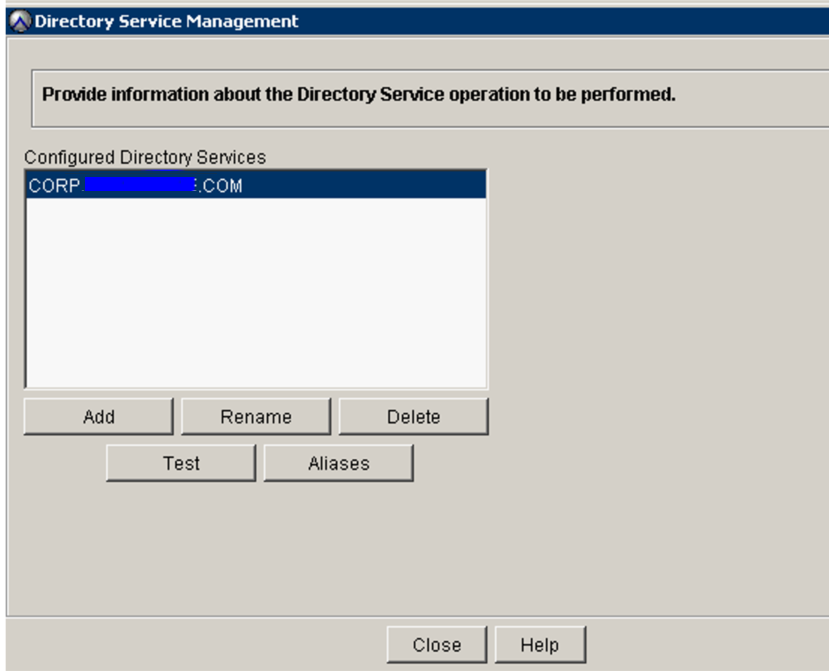
10. Go to LDAP Management (Administration, LDAP Management)
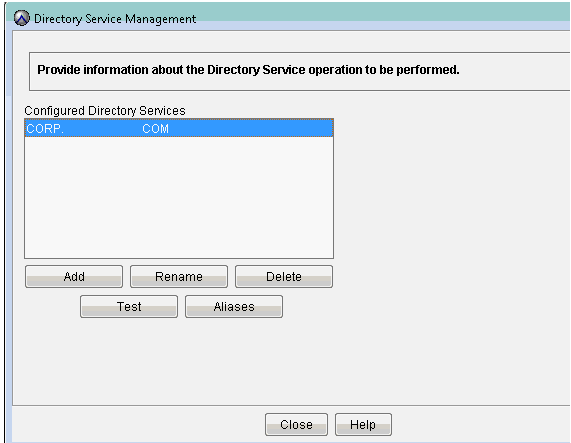
11. Verify that the Directory Service management Screen has the customer domain information already entered:
12. Click Edit LDAP file:
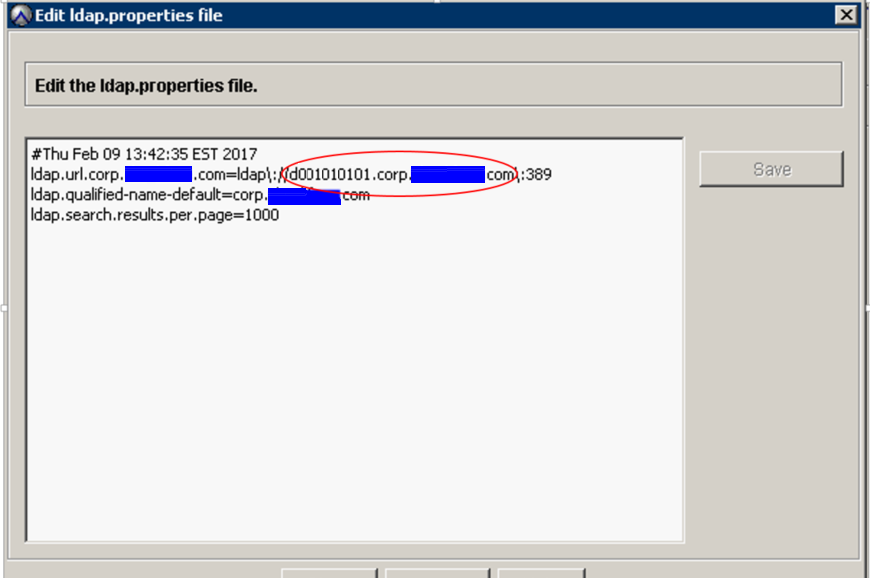
13. Replace the ldap.url.corp.userdomain.com with the new hostname from the above search step.
Example: ldap.url.corp.xxxxx.com=ldap\://d001010101.corp.xxx.com\:389
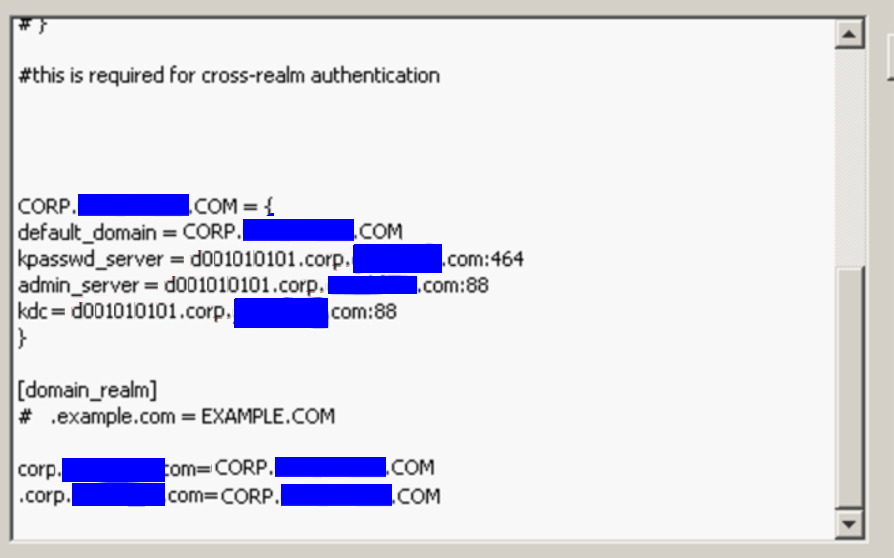
14. Do the same in the krb5.conf file. (The information to change is near the bottom.):
15. Go to the Directory Service Management screen and perform a test using valid customer credentials.
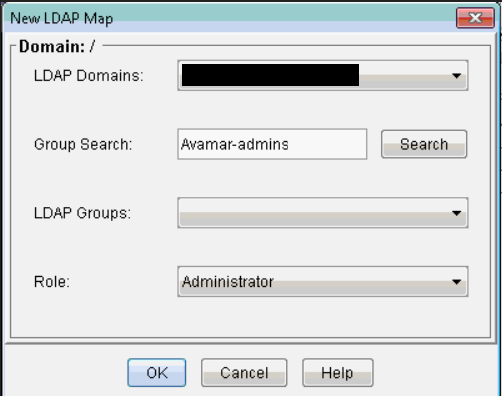
16. Add a new LDAP map (Administration, Account Management, New LDAP Map) and add the necessary LDAP Group. The below example is Avamar-admins group.
17. Once the LDAP (AD) group is successfully added, test it by logging in to the Avamar UI using an AD account that is a member of that LDAP group.
Affected Products
Avamar, Avamar ServerArticle Properties
Article Number: 000014466
Article Type: How To
Last Modified: 21 Oct 2025
Version: 13
Find answers to your questions from other Dell users
Support Services
Check if your device is covered by Support Services.