How to Use Dell Command Update to Update All Drivers, BIOS, and Firmware For Your Computer
Summary: Learn how to use the Dell Command Update utility to perform driver, BIOS, and firmware updates on your computer.
This article applies to
This article does not apply to
This article is not tied to any specific product.
Not all product versions are identified in this article.
Instructions
Dell Command Update (DCU) is a Dell utility that allows you to automate driver, BIOS, and firmware updates on your computer. The Dell Command Update tool allows you to keep your computer up to date without you having to know every driver or update needed. It checks your computer and compares it to the available updates on Dell Support for your specific computer.
Note: Dell Command Update is compatible with Latitude E-Series, OptiPlex Desktops 745 and newer, Precision Workstations 390 and newer, Precision Mobile M2400 and newer, and the newest Dell All-in-One desktops, Dell Plus laptops, Dell Pro laptops, Dell Pro desktops, Dell Slim desktops, and Dell Tower desktops.
Table of Contents
- How to Install Dell Command Update
- How to Use Dell Command Update
- Advanced Driver Restore for Windows Reinstallation
- Device Driver Version Reporting or Exporting
- Troubleshooting Dell Command Update
How to Install Dell Command Update
- Download the latest version of the software from Support for Dell Command Update - Drivers & Downloads.
Note: Use the most current version of Dell Command Update. The images below may indicate previous versions, but the installation process should remain the same.
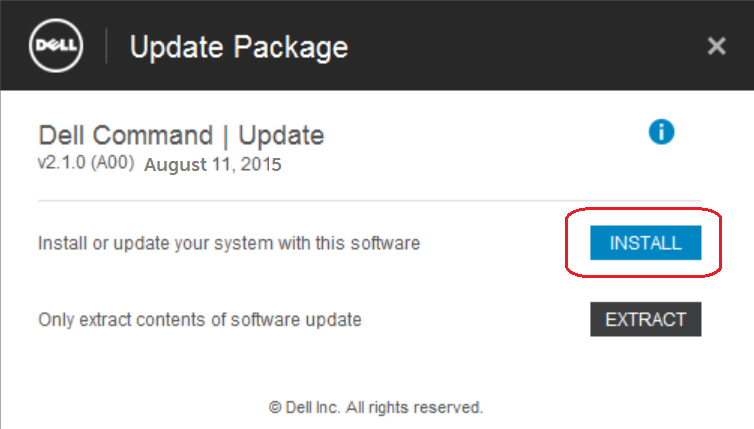
- Double-click the file and then click the INSTALL button.
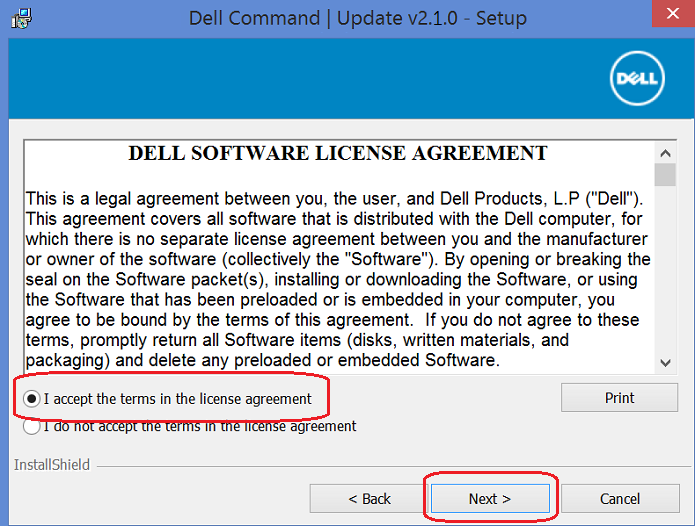
- Click YES to the User Account Control (UAC) prompt and then click Next on the Dell Command Update setup screen.
- Accept the License Agreement and then click Next.
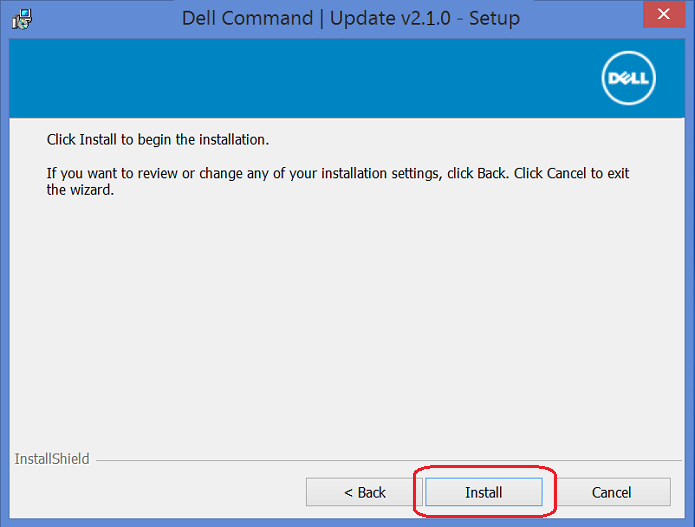
- Click the Install button to continue.
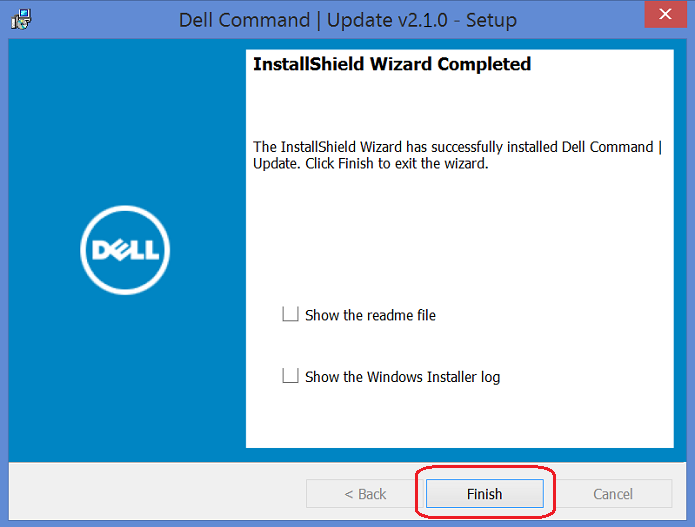
- When the installation wizard is complete, click the Finish button.
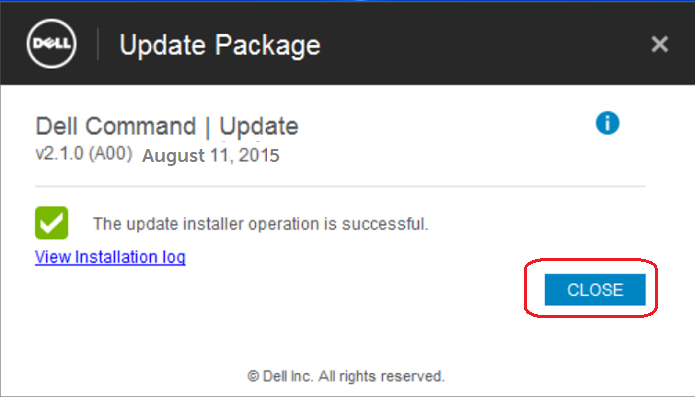
- Click Close in the Update Package window.
How to Use Dell Command Update
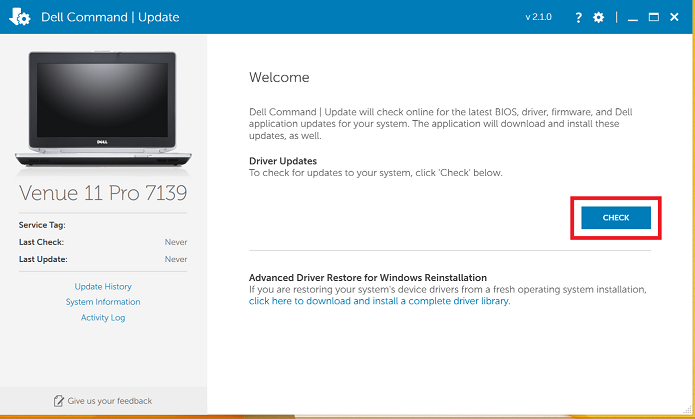
- Open the Dell Command Update application from the Start menu.
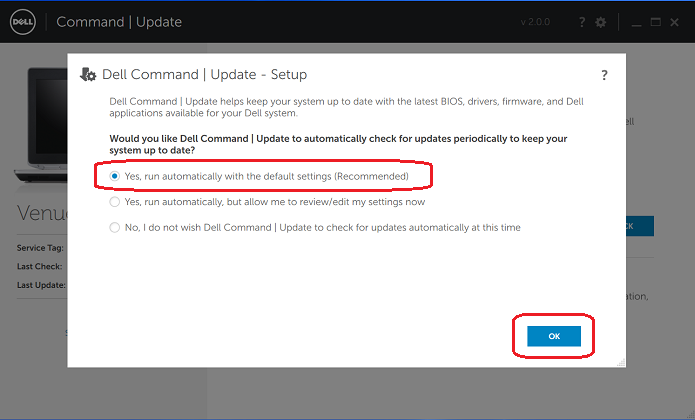
- Dell Technologies recomends selecting Yes, run automatically with the default settings, then clicking the OK button.
- Click the Check button to allow DCU to check your computer and identify any required updates.
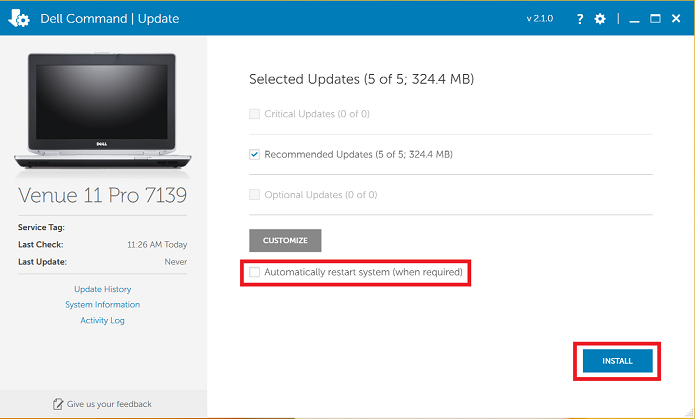
- Your computer may have several updates. Select the Recommended Updates, select Automatically restart system (when required), then click the Install button.
- Once all the updates are installed, click the Close.
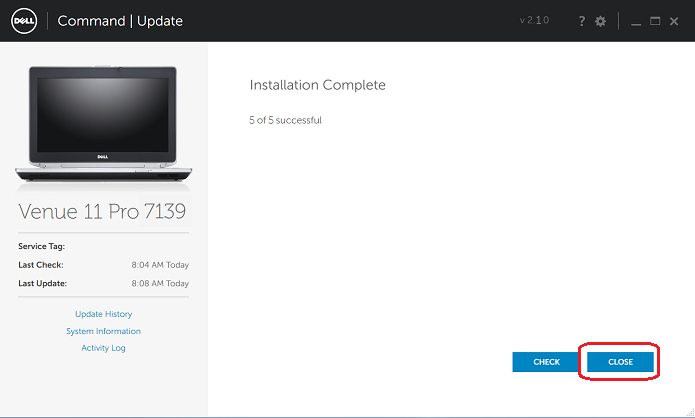 Note: Multiple reboots may occur while the updates are installed.
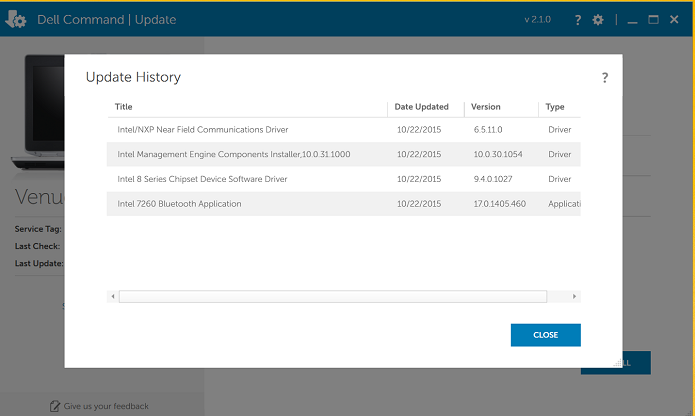
 - Your computer should now be up to date. Optionally, on the left side of the main screen, Update History can be checked to verify which updates have been installed to date.
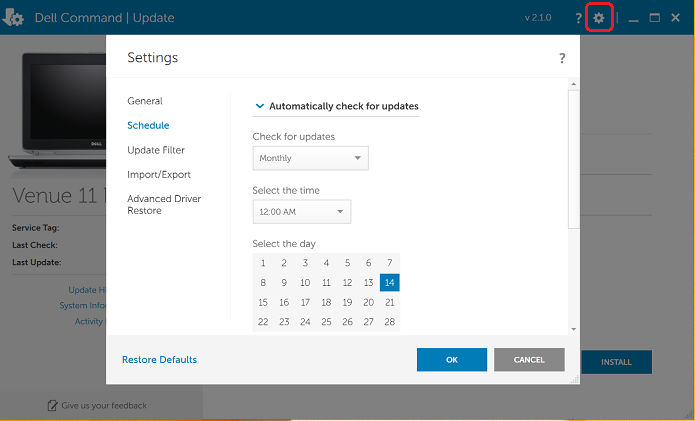
- You can use the settings icon (the small gear icon in the upper-right corner) to set up a schedule to keep the computer updated on a continuous basis.
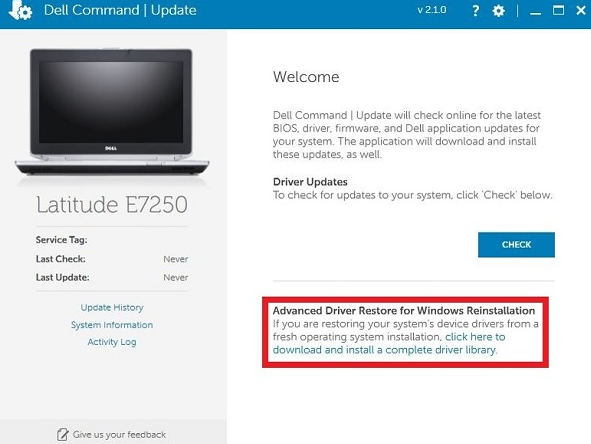
Advanced Driver Restore for Windows Reinstallation
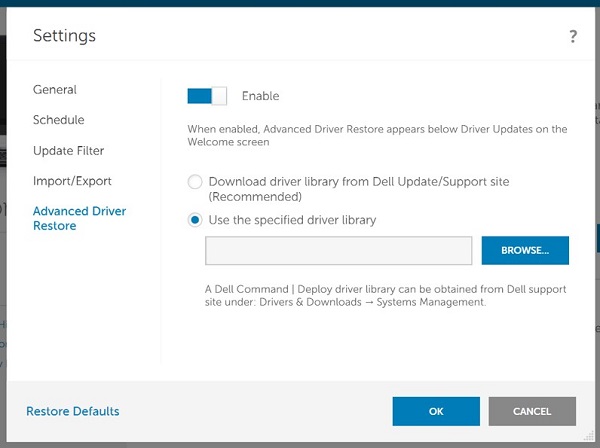
Advanced Driver Restore provides a one-click installation of the base driver CAB file to provide device IDs for all internal devices. Once complete, you can reboot, open DCU, and run a check. With All Device IDs in place, it pulls all the latest drivers. Dell hosts all CAB files at Dell Command | Deploy Driver Packs for Enterprise Client Operating System Deployment
- Open the Dell Command Update application from the Start menu and then select click here to download and install a complete driver library.
- Dell Command Update prepares for a driver restore. This may take several moments.
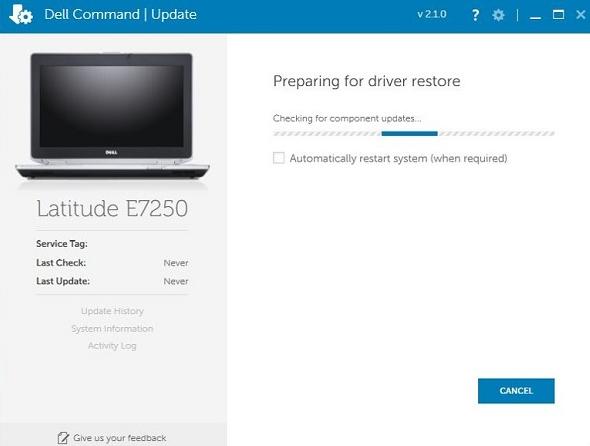
- You must extract the driver cab for the specific computer onto a USB drive or other location. The CAB file can be loaded to baseline the Device Manger and prepare the computer for a full update check by specifying the location.
Device Driver Version Reporting or Exporting
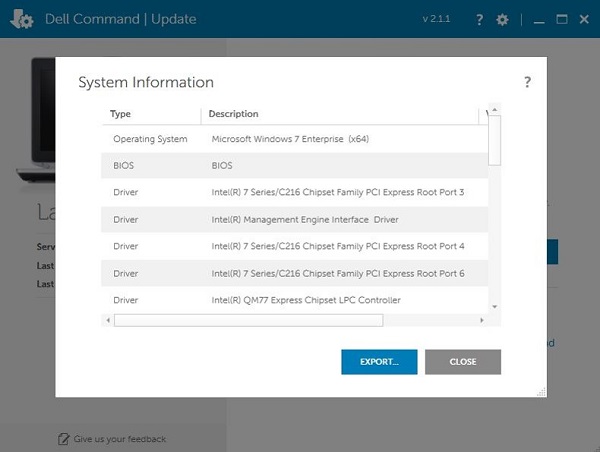
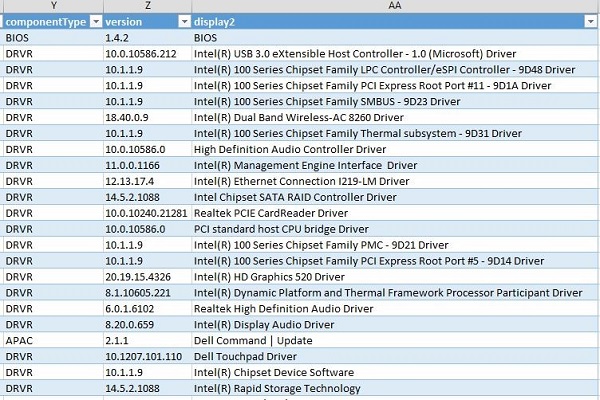
- You can export a complete report of all current drivers, firmware, and BIOS versions by selecting System Information on the left side of the main screen, then selecting Export.
- Optionally, you can convert the report to an Excel file. Once the file has been exported to a location, open Excel and go to that file. Choose As an XML Table from the prompt that opens.
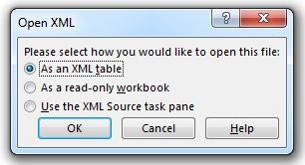
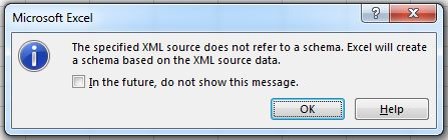
- When Excel says, "The specified XML source does not refer to a schema", click OK.
- The example image below shows what the Excel report looks like. This can be helpful in verifying that a driver has updated to the latest version.
Troubleshooting Dell Command Update
If you are experiencing issues downloading or installing drivers to your computer using Dell Command Update, use one of the following options:
- Use Dell SupportAssist to automatically check for and install updated drivers. Dell SupportAssist is now preinstalled on most new Dell devices running Windows. It can be found in the Start menu under All Programs in the Dell or Alienware folder. Information about using Dell SupportAssist and a download link to download the utility is available at Dell SupportAssist.
- You can manually search for and install driver updates for your computer at Dell Drivers & Downloads. Once at the Drivers & Downloads site, ensure that your computer model and operating system are correct, then use the Category drop-down menu to find the latest available drivers for your computer.
- For additional information about downloading and installing drivers and firmware, go to How to Download and Install Dell Drivers and Firmware.
- For additional information about downloading and installing BIOS updates, go to the Dell BIOS and UEFI Update Download and Installation Guide.
Affected Products
Dell Command | UpdateArticle Properties
Article Number: 000108963
Article Type: How To
Last Modified: 15 Oct 2025
Version: 12
Find answers to your questions from other Dell users
Support Services
Check if your device is covered by Support Services.