Connectrix Cisco MDS: How to generate an authorization code for an MDS switch in offline mode without generating a RUM report
Summary: To generate authorization code in offline mode, perform these steps:
This article applies to
This article does not apply to
This article is not tied to any specific product.
Not all product versions are identified in this article.
Instructions
Step 1: Log in to the CSSM Web UI
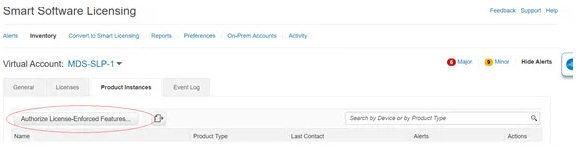
Step 2: Click Inventory > Product Instances > Authorize License-Enforced Features.
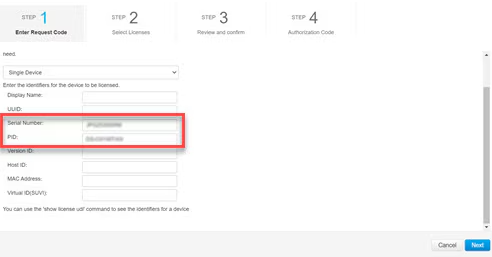
Step 3: In the Enter Request Code section, select the Single Device option from the drop-down option if it is not already selected.
Step 4: Enter the Serial Number and PID information of your switch and click Next. You will only need to provide the serial number and PID information and need not provide other information on this pane.
The Serial Number and PID information can be viewed using the # show license udi command on your switch or PI.
Step 5: In the Selected Licenses section, enter the number of licenses (multiples of block size) under Reserve for the appropriate switch and click Next.

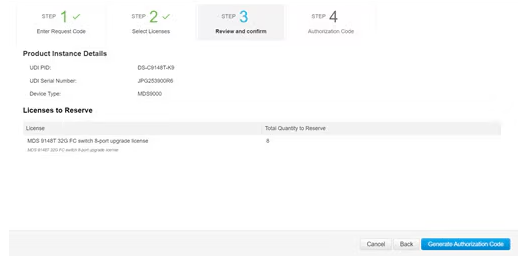
Step 6: Select a Device Type (MDS9000) and click Continue.
Step 7: Click Generate Authorization Code.
Step 8: Click Download as File to save the code.
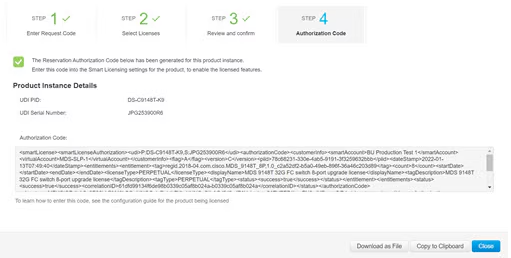
Step 9: Copy the authorization code to the bootflash of your switch.
Step 10: Use the license smart import command to import the authorization code on your switch.
switch# configure t
switch(config)# license smart import bootflash:authcode.txt
Done smart import

switch(config)# show license authorizations

Overall status:
  Active: PID:DS-C9148T-K9,SN:XXX253900X6
      Status: SMART AUTHORIZATION INSTALLED on Apr 18 2017 22:29:18 UTC
      Last Confirmation code: xxxxxxxx
      Status:PAK

Authorizations:
  MDS 9148T 32G FC 8-port activation (MDS_9148T_8P):
    Description: MDS 9148T 32G FC 8-port activation
    Total available count: 8
    Enforcement type: ENFORCED
    Term information:
      Active: PID:DS-C9148T-K9,SN:XXX253900X6
        Authorization type: SMART AUTHORIZATION INSTALLED
Step 11: Get the confirmation code from previous step and update the CSSM portal under Inventory > Product Instances (click on the respective product instance) and then click Action > Enter Confirmation Code at the bottom.
Note: This step is necessary only if the portal indicates an incomplete registration.
Affected Products
Connectrix MDS-Series Firmware 9.XProducts
VxBlock and Vblock SystemsArticle Properties
Article Number: 000318601
Article Type: How To
Last Modified: 20 May 2025
Version: 1
Find answers to your questions from other Dell users
Support Services
Check if your device is covered by Support Services.