How to Package OpenAI CLIP for Intel x64 CPUs for Microsoft Configuration Manager
Summary: The following article provides information about how to package OpenAI CLIP for Intel x64 Processors for Microsoft Configuration Manager.
This article applies to
This article does not apply to
This article is not tied to any specific product.
Not all product versions are identified in this article.
Instructions
Affected Products:
- Dell Pro AI Studio
Table of Contents:
Prerequisites
- Download OpenAI CLIP for Intel x64 Processors from: Dell Pro AI Studio > Drivers & Downloads
- Place the extracted contents of
Dell.Model.CLIP-vit-base-patch32.NPU.ORT-OV.x64.zipon a file share in your environment.
Note: Dell AI Framework and models are platform-specific downloads. From the Dell Support link, set the Operating system dropdown to Windows 11 for Intel or Windows 11 ARM64 for Qualcomm compatible downloads.
Adding OpenAI CLIP for Intel x64 Processors
Note: The model .zip file and MSI installer must be in the same folder due to file size limitations.
-
Open the Configuration Manager Console.

-
Navigate to Software Library > Application Management > Applications.

-
Click the Create Application button in the top ribbon.

-
Click the radio button for Manually specify the application information and click Next.

-
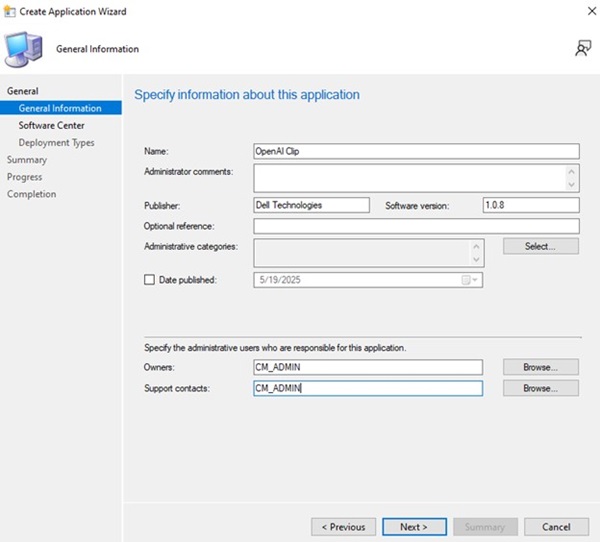
Enter a name and provide any needed information such as publisher and software version. Update the application owner, and support contact if needed, then click Next.
-
On the software center page, update the language if needed and click Next.

-
On the deployment types screen, click Add.

-
Click the radio button to manually specify the deployment type information and click Next.

-
Provide a name and select a language if needed then click Next.

-
Click browse next to the content location and select the folder where the installer is located, then click Next.

-
In the installation program field, type:
msiexec /i "Dell.Model.CLIP-vit-base-patch32.NPU.ORT-OV.x64.msi" /norestart /qn -
For uninstall program, type:
msiexec /x "Dell.Model.CLIP-vit-base-patch32.NPU.ORT-OV.x64.msi" /norestart /qn -
Then click Next.
-
On the detection method page, click the Add Clause button.

-
Click the Setting Type drop down menu and select the Windows Installer, then click Browse.

-
Select the OpenAI CLIP Installer and click open then click OK.

-
Click Next.
-
On the user experience page, set the following options and click Next.
-
Installation behavior: Install for system
-
Logon requirement: Whether or not a user is logged on
-
Installation program visibility: Hidden

-
-
On the requirements page, click add and select the requirements based on your needs. Click ok and add any additional requirements.

-
Once finished click Next.
-
On the Dependencies page, click Add.

-
Provide a dependency group name then click Add.

-
Select Dell AI Framework then click OK.

-
Click OK on the Add Dependency screen then click Next.

-
On the Summary page, click Next.

-
On the completion page, click Close.
 Note: After closing the completion page, you see another open window with the wizard open at the Deployment Type page.
 -
Click Next on the deployment type page.

-
On the summary page, click Next.

-
On the completion screen, click Close.

Affected Products
Dell Pro AI StudioArticle Properties
Article Number: 000330490
Article Type: How To
Last Modified: 24 Oct 2025
Version: 2
Find answers to your questions from other Dell users
Support Services
Check if your device is covered by Support Services.